Reply 320 of 844, by gdjacobs

Rank
l33t++
- Rank
- l33t++
That's quite a lot. I wonder if the mods can help.
All hail the Great Capacitor Brand Finder
That's quite a lot. I wonder if the mods can help.
All hail the Great Capacitor Brand Finder
That, I have no idea. Imgur can also work as well, but this site detests images that are bigger than the screen resolutions the monitors can handle. I believe when postimg.org comes back, the postimg.cc goes away (insert question mark).
Discord: https://discord.gg/U5dJw7x
Systems from the Compaq Portable 1 to Ryzen 9 5950X
Twitch: https://twitch.tv/retropcuser
I started to use imgur a while back but it doesnt even have a sort function for images anymore. I have to arrange them manually.
I'll adopt a waiting strategy until I know for certain that postimage.cc is here to stay and it wont revert to postimage.org
postimage has been in the hosting scene since 2004 that's why I used it. It was fast but it had those nasty ads. After a while I didnt see the ads at all 😁
I dont know how the mods could help...that would require some work...
So I'll wait for now.
Haze-M - Lucky Love (Original Club Mix)
https://www.youtube.com/watch?v=xsByp7j6Ry8
I managed to update all the picture links in this thread. Qbix was kind and let me do my work. Thanks a lot! 😀 I still have to check all the posts tonight and after that it will be business as usual 😁
Also I must thank swaaye for pointing me into the right direction 😀
Thank You!
The last weekend I got my A$$ in OVERDRIVE 😁 with Intel 80486 Overdrive / SZ959 / DX4ODPR100 😁
I found the CPU without a heatsink and in bad shape, bent pins and the MOSFET was twisted and desoldered by a massive hit. On its forehead it was written: GOLD SCRAP! Good thing I found it before it got melted 😁
I also found a sweet 80386DX 40MHz 😁


See you laters dudes. 😁
New victims for Robert's dungeon... lots of "torture cleaning" ahead. 😁
😁 That put a BIG smile on my face 😁 You're not far from the truth to say the least 😁
Sweet - The Ballroom Blitz (Official Video)
https://www.youtube.com/watch?v=ewFBuYHldeY
More victims undergoing "surgery". Fresh from the flea market! 😁 (without the fleas of course)

More later.
Robert Burian - Free
https://www.youtube.com/watch?v=kodHpYmswcY
Gloves needed. The socket 4 motherboard now has a mirror finish 😁 I still could clean some areas but I wont torture the part anymore. My socket 4 setup is as I want it for the time being.
Full story at the appropriate time. P66 in the house 😁

The mainboard with the soldered 80386DX-40MHz was also cleaned.
Three motherboards remaining. i850.SA6.K7M. Let the isopropyl alcohol overflow! 😁
More later.
Gorgon City - Sky High
https://www.youtube.com/watch?v=LZiaw2FfVmo
i850 DONE! 😁
Two more to go 😁


gallery: https://postimg.cc/gallery/qw8qun0w/
More later.
Shimmer - To Be As One
https://www.youtube.com/watch?v=nEbFy902v9Q
ATI special...kind of...my ordeals with ATI cards continue...8500/9500/9800
The title of this episode is self explanatory.
Yep. Plain and simple, me and ATI have started on the wrong foot. Back in '99 I bought a mighty Celeron A 366MHz and a 440BX motherboard model MSI-6154. The system came with an ATI Rage II C 4MB graphic card. Soon after I received my PC I saw how weak the RAGE II C was. I had a small budget and I didnt want to buy a K6-2 no matter what. Pentium II/III or a K7 were out of discussion. A year later, on my birthday I bought an ACorp nVIDIA VANTA 8MB and THAT was everything I wanted. Carmagheddon ran like a dream!
The differences between ATI RAGE II C and VANTA were like night and day. That was the first moment I really tasted what meant to have a 3D accelerator. It was AS GOOD AS IT GETS!. I will never forget that VANTA. A few years back I recovered my card from my cousin and now it sits in her box together with her sisters 😀
As you probably have already noticed, you wont see too many ATI cards in my collection. Also they do not pop up at the flea market very often. This is why when I find them I buy them without having second thoughts.
After the ATI Rage II C moment I never bought an ATI card until this day. In the future I might be tempted to try an ATI, who knows. My bias toward nVIDIA cards and the cycle at which I purchased graphic cards, made that I only bought nVIDIA.
Cirrus Logic-ATI-nVIDIA-nVIDIA-nVIDIA-nVIDIA-nVIDIA-nVIDIA-nVIDIA.
The three cards I'm about to present are the result of three separate visits I took at the flea market this year.
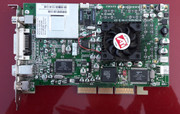
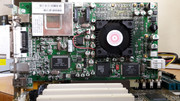
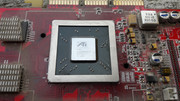
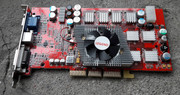
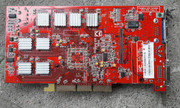
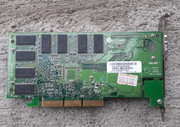
1. Ati Radeon All-In-Wonder 8500DV 64MB
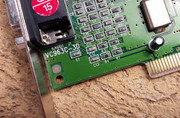
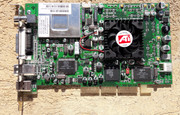
2. Ati Radeon 9500 64 MB - PN 109-94200-30
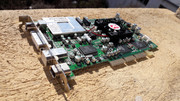
3. Ati Radeon 9800 PRO 256MB - PN 109-A09400-00
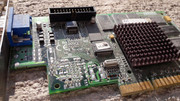
Ati Radeon All-In-Wonder 8500DV 64MB
This beauty caught my eye as soon as I noticed it. I lifted her from the rag it was sitting on and I inspected her thoroughly. It was impecable and for a very low price it was mine! . "Lucky" flea market find....yeah my A$$...pfffffttt...
At that moment I was 99.9999999% sure that it was working. What could possibly go wrong? such a nice and clean graphic card. A dumpster find usually isnt that clean.
I decided to clean only the heatsink and the fan and tidy up the PCB with a soft dry brush and a few cotton sticks dipped in isopropyl alcohol 99%. I wanted to preserve the markings on the top of the capacitors for the sake of authenticity.
The heatsink was held in place with thermal glue. BIG DISAPPOINTMENT!
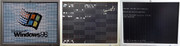
After I cleaned the card I powered it up and I waited anxiously for the happy boot beep and a clear image.
...
The unthinkable became reality in just a few seconds. Check out those cool artefacts on the mighty 20" LCD. A+++
To make matters worse a burnt smell came from the area of the graphic chip ... 🙁 the card still worked though...
Nothing more to add. Another one for the section of deceased cards.
gallery: https://postimg.cc/gallery/1ktsn7ows/
gallery 2: https://imgur.com/a/jaakFsG
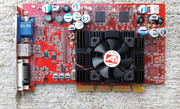
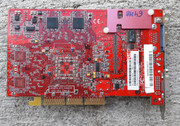
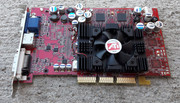
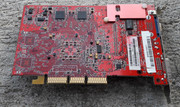
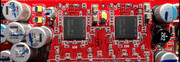
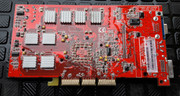
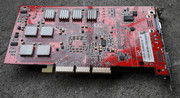
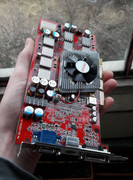
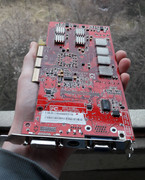
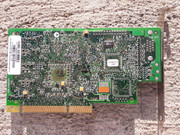
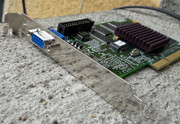
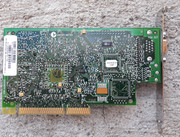
Ati Radeon 9500 64 MB - PN 109-94200-30
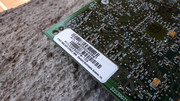
I found this red card tossed in a dirty suitcase. Intially my pulse spiked as I thought it was a faster card but the label on the back soon brought me down to EARTH. 9500 NON PRO 64MB.
I placed it back in the suitcase and went away. Not long after that, I was back and bought it for a very low price. After I paid for the card, I had a feeling like the one you have when you buy something that in fact you dont want 😁 Obviously, higher forces were playing with me and were telling me to buy it 😁 . In the end it seems they were right after all...
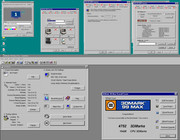
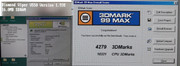
The card was cleaned well. The testing session went smoothly. On the PIII-800 the card couldnt stretch its legs but the most important thing is that it is alive and kicking.
gallery: https://postimg.cc/gallery/3bisokan0/


gallery 2: https://imgur.com/a/PZuMivP
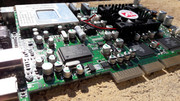
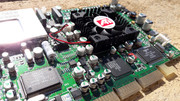
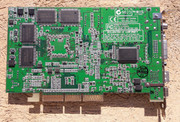
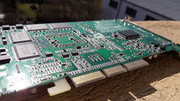
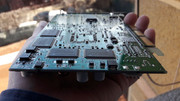
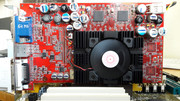
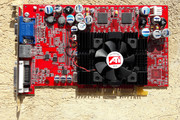
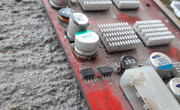
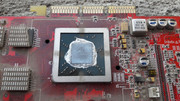
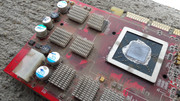
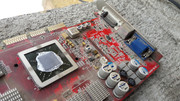
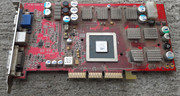
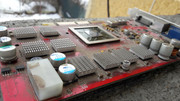
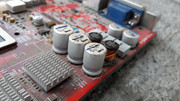
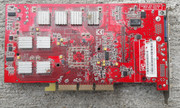
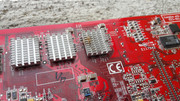
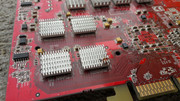
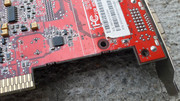
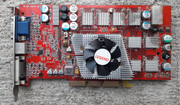
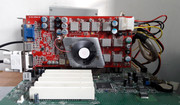
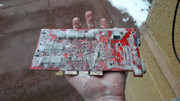
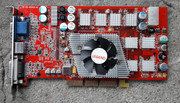
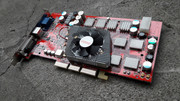
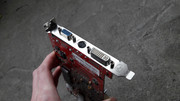
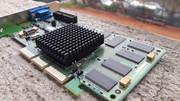
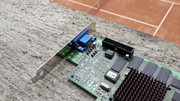
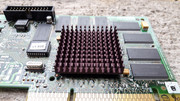
Ati Radeon 9800 PRO 256MB - PN 109-A09400-00
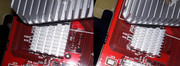
I honestly dont know what I was thinking when I bought this card 😁. I was attracted by the size, the silver heatsinks and the RED PCB of the damn thing.
I checked her for a while and I placed it back on the stand.
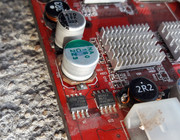
It was in a horrible state. Dirty, scratched, a capacitor was hanging for dear life, the heatsinks had bent fins, the fan was missing, ... in short: DO NOT BUY!
The only clean part was the area where the missing fan stood. I still wonder why people take the fans off electronics especially the ones with a proprietary design. MAN is a strange beast. This fact reminded me of the case of the motherboards I bought which were stripped of jumpers. What could you possibly do with a bag of jumpers???!!!
While I browsed the wares at the flea market I still thought of the BIG RED CARD. In the end I haggled a bit and bought it for a very low price.
So it was mine. Like glue BO$$!
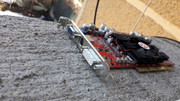
Look at it! terrible, terrible, terrible 😁

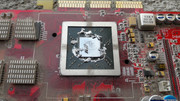

I used a dry soft brush to remove much of the dirt from the surface. I was very gentle with the card.
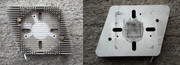
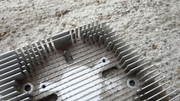
Next I tackled the cooling of the card. The BIG problem was the missing fan. The asymmetric holes where the original fan stood, already signaled the difficulties ahead. I scratched my head and I wondered how am I going to solve this ...
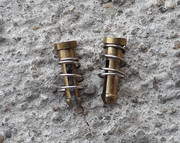
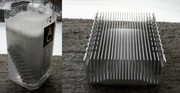
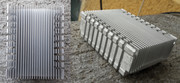
The heatsink was loose and after I removed it I saw the bent push-pins.
I washed the heatsink well and I straightened all the fins.
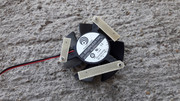
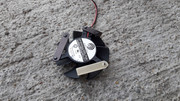
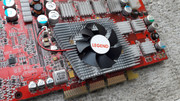
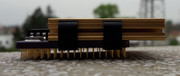
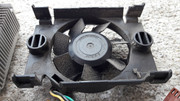
I didnt have a replacement for the missing fan so I started searching in my cooling BOX-O-PARTS. I stopped at a DeepCool V50 but I soon realised I couldnt use it as the original heatsink had a rised area that made contact with the die of the graphic chip. The flat V50 was of no use to me. I tried other coolers but to no avail. I didnt want to remove the silver frame from the graphic chip.
Hmmmm...it looks like I'm stuck with you...
I looked for a fan...and nothing fit.
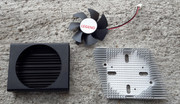
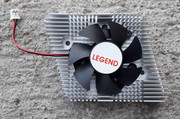
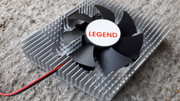
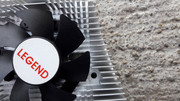
In the end I decided to use THE LEGEND 😁
At a first look it fit the bill. Silent and stronger than the original fan. It fitted with almost no room to spare.
I wanted to attach it with just a screw and this was a fail. Like i didnt know that...
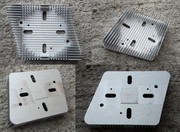
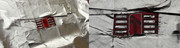
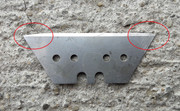
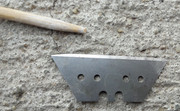
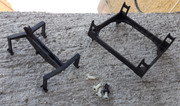
Still searching for solutions I came up with the idea of "a frame" on which I can attach the fan and I wanted to make it from a sheet of aluminium. This would've involved too much work so I looked for alternatives.
I remembered I had a few sheets of thin textolite. BINGO!
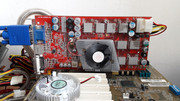
To save time I wanted to make the frame in a triangle shape but that would've reduced the cooling capacity of the heatsink as the airflow woulnd't've reach the area under the fan. In the end I took the difficult path and I made three textolite extensions.
My first try was about 90% of what I wanted.
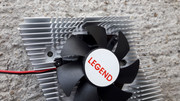
My second attempt was a WIN.
I searched for black screws and I used a black marker to conceal the "scaffolding".
The tolerances were small but in the end I prevailed. A JOB WELL DONE!!!
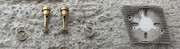
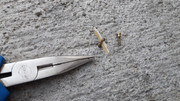
I returned the push-pins to their original shape. I used a pair of pliers and a couple of small pieces of textolite. I inserted the textolite at the base of the push-pins and with the pliers I clamped the tip. The brass was cooperative and I saved the push-pins 😁

I soldered the capacitor, I used some Arctic MX-4 thermal paste and the card was ready for its test. (The capacitor had bent feet so I decided to attach it as well as I could for the testing session and after a successful run I was going to remove it and do a proper job.)
On the first power-up the fan wasnt running. WTH?!?!? The fan header was flipped. I put it in the correct position and the fan sprung to life.
Unfortunately the 9800 gave no signal on the ABIT SA6 and on the the i850 I received the beep code for VGA NOT DETECTED...
I tried to use a PCI video card and rewrite the BIOS-ul of the 9800. The PC refused to ouput a video signal on the PCI card when the ATI was used.
Not good...
Hmmmmmm..............
VGA NOT DETECTED? What if this is a case of a corrupt BIOS like the V4-L?
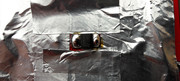
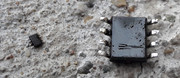
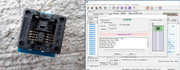
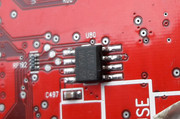
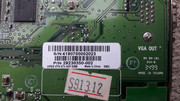
I searched for the BIOS chip and I soon found it: SOIC 8 - STMicroelectronics ST25P05 / ST25P05V6.
I tried to use a SOIC clamp from the TL866A package while the BIOS chip was still soldered on the board. Overcurrent protection kicked in. I knew this might happen. I could've tried to rewrite the BIOS with the card powerd-up but I feared I might damage the programmer. My instinct was telling me to try something else.
I found a site where it was suggested to cut a pin from the soldered SOIC 8 BIOS chip, rewrite it and make a small solder bridge to rebuild the contact between the cut pin and the PCB pad afterwards . Because of the small area I needed to make the cut, the lack of suitable cutting tools and horror images with ripped pads that came into my mind, I said F@CK IT! and I decided to remove the BIOS chip and do a proper job.
Like it was the case with the V4-L, I first tried to remove a SOIC 8 chip from a dead motherboard. The removal of the SOIC 8 chip was a breeze.

I did the procedure on the 9800 PRO. The removal, programming and soldering of the BIOS chip went smoothly.
Regarding the programming of the BIOS chip I have a few thing to report. At a first VERIFY the chip looked blank and I gave the ERASE command and it completed successfully. I searched the internet for a BIOS file using the P/N number and I couldnt believe how difficult it was. Luckily TPU/TechPowerUp has a BIOS database for graphic cards. I can find BIOS files for cards older than 20 years and I cant find suitable ones for newer cards...
https://www.techpowerup.com/vgabios/
Even with the help of TPU it was difficult to find a BIOS file for my model. In the end I reduced the search area to R350 / SAMSUNG memory and the stock frequencies for Ati 9800 PRO 256MB.
https://www.techpowerup.com/vgabios/?architec … Size=256&since=
As the card was most probably built by ATI I decided to use a stock image and I only found one.
https://www.techpowerup.com/vgabios/23/ati-98 … amsung22-030404
NOTE. During the programming of the BIOS chip I sometimes received the error that the chip isnt oriented correctly in the socket even if it was positioned correclty. This fact gave me food for thought that maybe the BIOS chip wasnt blank and the leftover solder on the tiny feet might've made that the chip didnt fit well in the socket of the adapter. But how did the VERFIFY and ERASE commands complete successfully?...
Lets return to the matter at hand.
I had the card ready and willing. The chances that it might work were pretty high.
Power-up....and.....NOTHING...no change... drat and double drat and even a triple drat...😁
Several days have passed.
I read many articles and internet pages. I searched high and low for other BIOS files but I couldnt find anything.
I found the P/N on a old russian site...
For a fact, the card didnt work from the start and maybe the BIOS chip wasnt to blame. I'm a little pissed that when I gave the ERASE command I didnt check to see if the BIOS chip sat perfectly in the socket. Maybe I could've recovered something from it..maybe the card had a bad flash and the chip was empty...assumptions... assumptions...
After a few more days of busting my brains I said STOP but I still tried one more thing. I read a few more reviews I decided to try another BIOS file, this time from GIGABYTE.
https://www.techpowerup.com/vgabios/70/gigaby … -samsung-030523
I removed the BIOS chip, etc etc etc...
Unfortunately no change.
At this moment I SAID THAT'S ENOUGH! and I prepared the card for the final cleaning.
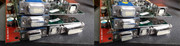
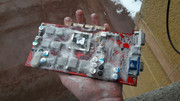
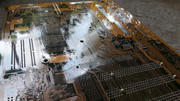
I used isopropyl alcohol 99% but the dirt was stubborn and gave me the middle finger so I used FAIRY and HOT water. And by HOT I MEAN REALLY HOT! 😁
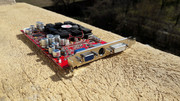
Finally I could see the RED FACTORY colour. F@CK YEAH! I LIKE IT! 😁
After I used Fairy and water I also washed the card with isopropyl alcohol 99%.
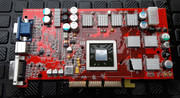
FINAL RESULTS.
Yep my ATI ordeals are kind of real 😁
From the 8500, 9500 NP and 9800 PRO, only the humble 9500 NP is alive and kicking. I wasnt expecting this. Even so the entire affair was a bitter pill to swallow...
The upside is that after this endeavour I still learned a lot of things. LIVE AND LEARN!
It is kind of scary how fast the information can disappear from the internet. In my attempts to recover the 9800 PRO the reviews were a valuable resource. Unfortunately on many occasions I was greeted by incomplete or blank pages, pictures that wouldnt't load, bad kinks, etc. We are speaking about a graphic card launched in 2003 and not in the 1990.
This is what it is and I cant change it 😁
More to come.
gallery: https://postimg.cc/gallery/190eaq02k/
gallery 2: https://imgur.com/a/J75UxUo
I knocked it out of the park...again 😁

ASUS K7M REV:1.04 DONE!
MORE LATER! 😀
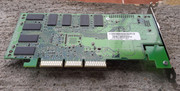
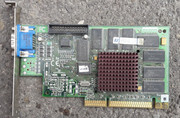
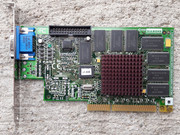
My FIRST fully fledged TNT 2
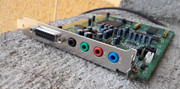
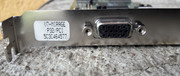
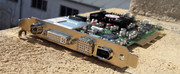
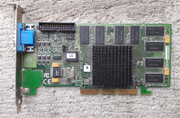
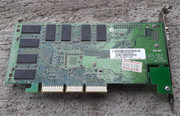
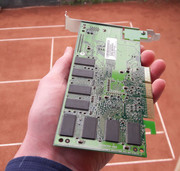
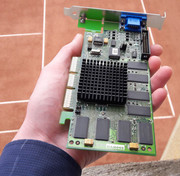
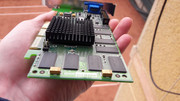
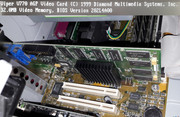
DIAMOND Viper V770 ATX AGP 32MB REV. B
This card is my first fully fledged TNT 2 complete in every way and in good working condition. I have another ELSA TNT 2 Pro graphic card, but it has a damaged memory chip and a missing bracket.
I was looking for some time for a TNT 2 but all I could find was the TNT 2 M64.
The TNT 2, TNT 2 PRO or TNT 2 Ultra, arent found so often at the flea market so my best chance of finding one was one of my vintage HW suppliers. Time passed and I found a TNT 2 at one of my contacts but at that moment I had other ongoing projects and I didnt want to buy it so that opportunity quickly evaporated. Several months passed and I went again at the flea market. Here I found two cards placed directly on the pavement. One made by Diamond and the other some forgetable brand. I took the Diamond in my hand, looked at it and I said to myself: what's this dreary old thing? I even didnt bother to look for the model number and I placed it back on the pavement. It was twisted, a little dirty and it had a black passive heatsink.
So I went ahead and browsed the market. As I didnt find anything else that caught my attention I went back to see the Diamond card. I took it again in my hand, took out my phone and I did a search..I couldnt believe my eyes. TNT ... 2 WTH?! That was a close one. 😁 I paid a low sum of money for it and it was MINE ALL MINE!
If it had a fan it would've been a V770 ULTRA. IF...
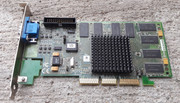
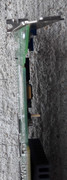
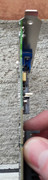
I polished the bracket. I used gentle persuasion to straighten the PCB and the bracket. Isopropyl alcohol 99%. 30 minutes later I got the desired results.


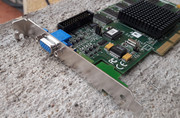
The test session was smooth. No stress. The card works like a champ. PIII-800MHz, Slot 1, 384MB RAM.
Short and sweet. Dont worry though, there are plenty of TL;DR episodes left all Robert B TM.
More later.
gallery: https://postimg.cc/gallery/1hdxxmbm0/
gallery 2: https://imgur.com/a/KK6P8pZ
NEXT WEEK! O V E R D R I V E 486 style 😁
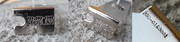
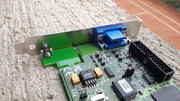
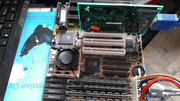
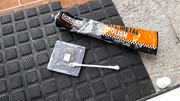
Intel 486 O V E R D R I V E
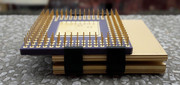
The STAR of todays episode is none other than the Intel 486 OverDrive 100MHz CPU . The model number is SZ959 v1.1 for PGA168 socket 3. Not to be mistaken for the SZ957 which has 169 pins.
This CPU was offered as an upgrade option to slower 486 CPUs. The upgrade matrix can be found in the link bellow. Drop in replacement, a few jumper settings and you were good to go. In any case you can use this CPU with many socket 3 motherboards and not just as an upgrade option as stated in the upgrade matrix. It was destined for 5V motherboads lacking 3.3V CPU support. "The IntelDX4 OverDrive processor offers several new features not found in the IntelDX2 OverDrive processors. It has 16 KByte on-chip cache and the internal core operates at 3x (speed tripled) the external clock frequency. The underlying technology behind the IntelDX4 OverDrive processor is the IntelDX4 microprocessor core with on-package voltage regulation. This allows the OverDrive processor to plug directly into existing 5V systems."
http://www.cpu-world.com/info/80486/80486upgrade.html
http://www.cpushack.com/UpgradeProcessors.html
For some time I dreamed of a Pentium OverDrive. Along the three years since all this "retro" madness has started, I saw a handful of these CPUs but they were either too expensive or I didnt pay enough attention to them, so the opportune moment vanished into the great void beyond.
I was dreaming with my eyes wide open. Buying boxed OD CPUs at ebay prices was out of the question. For the price I would have to pay I could buy a lot more good stuff from the flea market or one of my local contacts and besides, where's the challenge in that? Bragging rights with boxed stuff 😁 (Do not be mistaken, I DO like boxed stuff but I'm not ready to pay THE PRICE.)
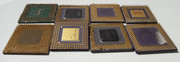
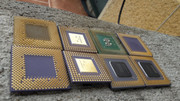
Lets get back to the story. Some time ago, I bought from the flea market nine CPUs and a 80386 motherboard with a soldered AMD 80386-DX40 CPU. The whole package was arround 24 EUR / 38 USD. Not bad at all.
I bought them from a group of gypsies and it required some negociation. How much are you willing to pay for them, give me X sum of money, buy them all, etc. In the end I took out a big banknote and bought a few CPUs, they gave me change for the banknote, 30 minutes later I was back and bought some more, negociation as they like it. I made sure they saw the contents of my wallet so they knew I meant business.
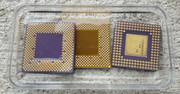
They tried to bump up the price in any way possible with stuff like they work, they are good for gold scarp, etc but I told them in a calm way: "Sir, if you would know as much as I do, about these CPUs that you are trying to sell, you wouldn't say anything more. You want to get as much as you can and I want to pay as little as I can." With this said I softened them up and I managed to pay a much lower price. 😁 The initial price was about 22 EUR / 34 USD for three ceramic CPUs.
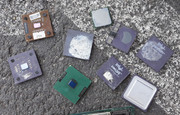
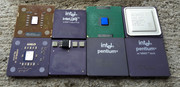
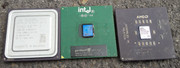
THE LOOT:
AMD Athlon XP 1800+ / AXDA1800DUT3C / 1533MHz / Thoroughbred - S462
AMD Duron 1.1 GHz / DHD1100AMT1B / Morgan -S462
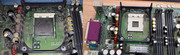
Intel 486 DX4 100MHz / SK051 / A80486DX-100 - socket 3
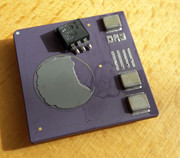
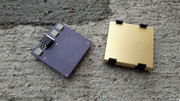
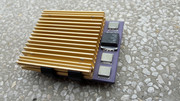
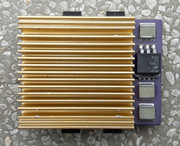
Intel 80486 Overdrive / SZ959 / DX4ODPR100 / Ab252b03CC A4 33 - socket 3
Intel Celeron 1.1GHz/100/128 - SL5XU - Coppermine
Intel Pentium 133MHz / SY022 / A80502133 / Fb51b8bbAE
AMD K6-2/300AFR / 300MHz
Intel Pentium 166MMX / SL27K / A80503166 / E7249948BG
Intel Mobile Pentium 4 532 / SL7NA - 3.06GHz/1MB/533 - Prescott
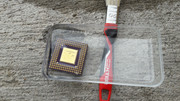
Out of the "CPU pile" one stood out. The CPU with the banged MOSFET and the missing heatsink. It looked like a socket 3 CPU but I didnt see anything like that before. I examined the CPU and I searched on the internet the only clue I found: the string "Ab252b03CC" but to no avail. I was already cursing the gorilla that took off the tiny heatsink the easy way to determine the model of the strange CPU.
I knew that it might be an OverDrive CPU or something exotic but I had no clues at that moment.
When I got home I fired up my main PC and I searched for Intel OverDrive. Shortly, I reduced the search area to Intel 486 OverDrive. Then, I had to determine the frequency of the CPU. After a few hours of searching, reading and checking I found out that the only 486 OD CPU which didnt have markings on the three big ceramic capacitors near the banged MOSFET, is the 100MHz model. Next, I tried to determine the exact model of the 486 OD CPU I had. I had to choose between DX4ODPR100 and DX4ODP100. A simple pin count 168 vs 169 was needed to find out what I held in my hand. There are two kinds of 486 OD 100MHz CPUs which dont have markings on the ceramic capacitors: SZ959 si SU004. In the case of the SZ959 the string on the back starts with the letter "A" and in the case of the SU004 it starts with the letter "E". In conclusion there is a 99.99% chance that my CPU is DX4ODPR100 / SZ959 V1.1
http://brainstones.narod.ru/collection/intel_overdrive.htm
http://datasheets.chipdb.org/Intel/x86/486/ap … ts/29043606.PDF
Once I found out what CPU I bought 😁 I started to straighten the bent pins for all them. The only CPU that lost the fight is the 1.1GHz Celeron. It looked like it was stepped on and it was missing a few pins. The CPU lost two more pins after the straightening process. His story will be told in the ABIT SA6 episode.
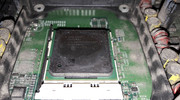
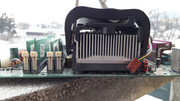
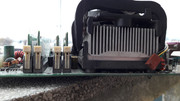
DX4ODPR100
Not looking good. That thermal glue was giving me the finger across the room 😁
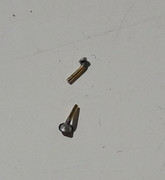
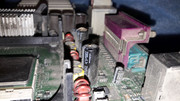
First I removed the banged MOSFET. It was an easy job as it was held only by the three pins. The other part was separated.
After I removed the LT912 CM 9528 MALAY MOSFET I tackled the matter of the bent pins. The chances of breaking the pins while I tried to straighten them were pretty high and I took a moment to evaluate my options. First, I took a pair of fine pliers and I tried to move the pins. NO DICE! Next, I took a wide screwdriver with a regular head and I put it between the pins. With great attention and moderate controlled force, I twisted the screwdriver and I straightened the pins as best as I could. I had to refrain from a perfect result because the danger of breaking them was real. The results were above my expectaions.
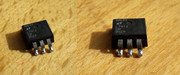
Soon after this I had to solder back the MOSFET. I cleaned the old solder from the pads and I was ready to go. I quickly soldered the three pins but when came the moment to solder the other part of the MOSFET, I hit a snag. My 40W soldering iron was weak and the only other option was a 100W one. As the 100W soldering iron seemed to powerfull I search for other options.
I remembered I had a bottle of TOPNIK RF800 liquid flux. The lack of experience in soldering MOSFETs meant that my first try was a miss. I looked at a few more YOUTUBE clips and I was ready to try again. I placed the tip of the soldering iron on the metalic pad of the MOSFET and I waited until the flux started to bubble up then I added solder. After I saw that the solder was sucked up I removed the soldering iron and I waited for the area to cool. Afterwards I checked the strength of my solder job and I was quite pleased with the results.
My first MOSFET solder job COMPLETED! 😁
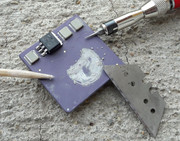
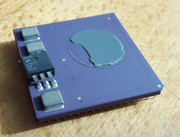
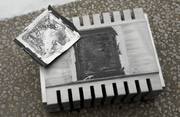
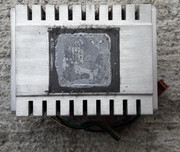
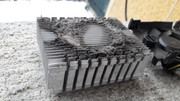
THERMAL GLUE! A NIGHTMARE TO REMOVE!
I had to remove thermal glue a few times before but nothing like this.
I tried isopropyl alcohol 99% but it didnt work. I tried acetone but it didnt work.I tried paint thinner but it didnt work. I tried a fine screwdriver but the thermal glue was HARD and I could damage the surface of the CPU .
What to do?
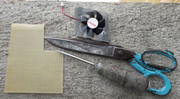
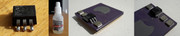
I searched for alternatives. I stopped at a cutter blade and a bamboo stick. My trusty allies in hard times 😀
When I used isopropyl alcohol 99% I saw that the surface of the thermal glue is a little easier to scrape off. So I placed the CPU in isopropyl alcohol 99% anywhere between 5-15 minutes then I took the blade and I scrapped off as much thermal glue as I could. Then I placed the CPU in alcohol again, took it out and I used the bamboo stick and I scrapped off as much thermal glue as I could. I did this many times.
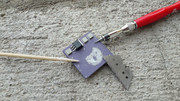
At one moment I saw that the blade didnt remove as much thermal glue as before and to my amazement I saw that it lost its edge after a few uses. HARD STUFF this thermal glue! The bamboo stick didnt fare better either but it was the perfect tool to remove the last bits of thermal glue.
OBSERVATION. I used the blade to scrape off most of the thermal glue. To remove the last traces of thermal glue and for other fine operations I used ONLY the bamboo stick!
After almost three hours I managed to remove all of the thermal glue. I dont want to repeat this anytime soon you can be sure of that.
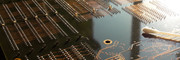
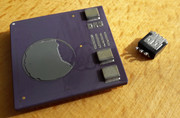
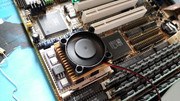
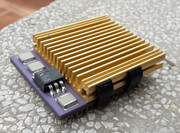
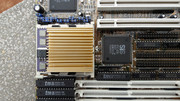
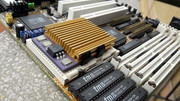
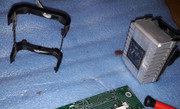
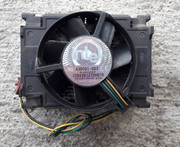
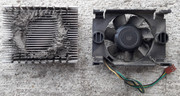
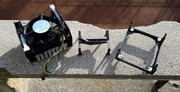
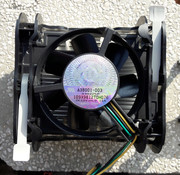
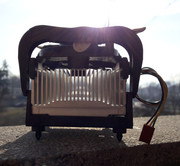
After I cleaned the CPU I had to find a heatsink. I wanted to use a stock socket 3 cooler (plastic frame+heatsink) but the three ceramic capacitors and the MOSFET stood in the way.
In the end I used another socket 3 cooler that had another retaining system. Where did I find this one? At the flea market of course 😁 A few months ago I saved it from a pile of junk. Everything is connected with an invisible thread. Bits and pieces of a bigger puzzle 😁
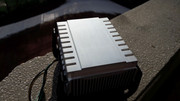
PERFECT FIT I LIKE IT!
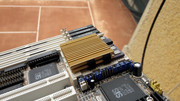
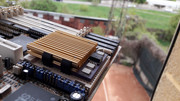
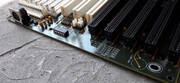
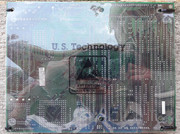
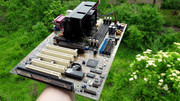
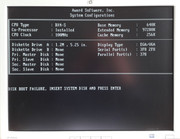
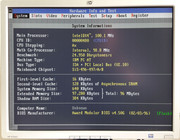
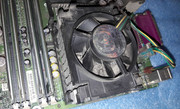
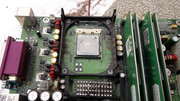
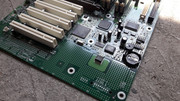
The CPU testing was done on a Jetway J446A v2.0 - SiS 496/497 motherboard.
I searched the manual for jumper settings but because it didnt specify a setting for a 100MHz 486 OD CPU, I used the settings for AMD 586-133MHz and P24D-66MHz CPUs to determine the exact combination required. Jumper settings, hmmm, serious business! 😁
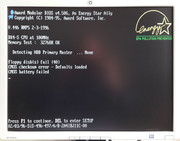
Running like a CHAMP! CPUID is 0480.
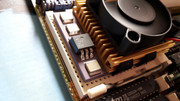
I used ARCTIC MX-4 FTW to cool the OD CPU!!! Way better than thermal glue that's for sure!
GLAMOUR SHOTS 😁

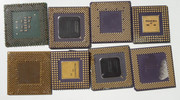
All is well that ends well but didnt I forget something? Aaaaa...the pictures with the CPUs after I straightened all the pins 😁 The 486 OD stole my attention and I almost forgot about them 😁
The OverDrive adventure was a bumpy ride but the result was PRICELESS. I wouldnt change a thing.
See you soon with the next episode(s) . 😁 There's plenty more to come. You can be sure of THAT!
More later.
gallery: https://postimg.cc/gallery/2z1tfzpl4/
gallery2: https://imgur.com/a/srXP0IJ
Awesome loot/cleanup.
SiS496/497 boards are always a winner. Does yours work with EDO ram?
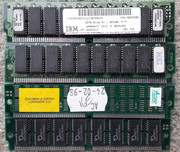
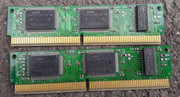
I bought these puppies as SIMM FPM. Based on the numbers on the chips they might be ?!?! I dont know. The size may indicate EDO but I have no ideea. 2x32MB IBM and 2x16MB ACorp. They work well on the J446.
I remember that I tried EDO sticks on the Jetway J446A v2.0 but they didnt work. I had to use only FPM and I had 2x16MB FPM sticks which are now on the ZIDA 4DPS.
Brand spanking new! 😁
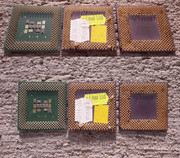
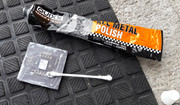
Ceramic CPU overhaul 😁 The Duron was so nasty that I said F..K IT!!! QUIXX All Metal Polish FTW!!! 😁 The results were above my expectations. Cinderella story 😁
WIN! WIN! WIN! 😁
More later.
Lately I'm feeling like '90s Eurodance ... I dont know why?!? 😁 Could it be all this retro madness? I WONDER! 😁
Real McCoy Runaway
https://www.youtube.com/watch?v=kH1fsKK85Qo
SOON: Rumble in the jungle with RaaaAAAaaAAmmmMMMMMMMMBbbBBBBUUuUuuuSSSS
More later.
Nora En Pure - Deep House & Tech House ' Best Dance Summer Mix 2018
https://www.youtube.com/watch?v=c7QJqv5zOmE
Rumble in the jungle with RaaaAAAaaAAmmmMMMMMMMMBbbBBBBUUuUuuuSSSS
RAMBUS. This name stuck in my mind, when back in the day, I read in the local CHIP computer magazine, about the mighty Pentium 4 with RAMBUS memory, the next best thing after sliced bread.
As we know, RAMBUS didnt get to dominate the market and DDR got to be THE KING. This is already ancient history. I couldnt afford a P4 RAMBUS and when I could buy one, it was already obsolete.
What it is certain is that I still had a few sectors allocated in my memory for the RAMBUS thing so when the opportunity arrived I pulled the trigger.
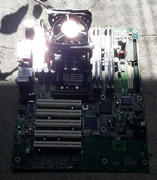
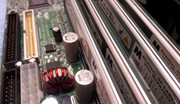
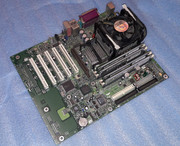
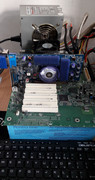
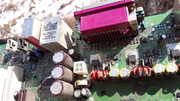
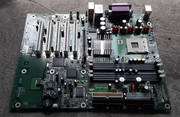
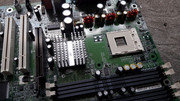
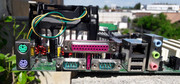
This year, around the beginning of February, I found on the local OLX site a RAMBUS kit: Intel D850EMV2 + 4x128MB RIMM PC800 + Pentium 4 SL683 2.26GHz.
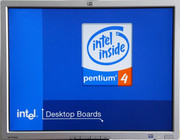
If we take into consideration the fact that only in 2018 I woke from my slumber, all due to the retro bug 😁, I wasnt fussy and I wasnt put off by an Intel Desktop Board and only 512MB RIMM. I would've wanted a motherboard with OC capabilities and some PC1066 RIMM. Even so, I was pleased with my purchase. 28EUR / 33USD well spent.
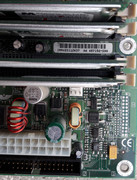
The add said that the kit was in good working condition and that it only had two bulged capacitors. Nothing out of the ordinary.
I called as soon as I saw the add and I spoke with the owner. We agreed upon the price, shipping and other details. I also received additional pictures on email. ALL GOOD!!!
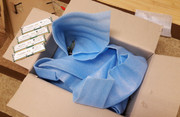
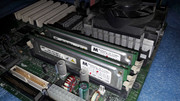
The RAMBUS kit came with the local Post transport and it was packed in a sturdy cardboard box.
The first thing I did after I took the box from the Post Office was to shake it a little. Immediately I heard a suspicious rattle.
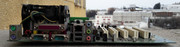
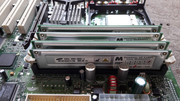
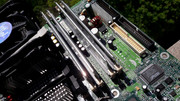
When I got home, I opened up the box and BEHOLD: the four RIMM sticks were moving freely inside. Blue Danube GOD DAMN IT!. What the...I fished the RIMM sticks and I inspected them. NO DAMAGE. I also found the bag in which the sticks were put and I wondered why wasnt the bag sealed with tape or even better why werent the RIMM sticks in their socket?!? The kit was packed in some thick spongy stuff the kind that it is put under parquet. Bonus points for the seller as he also included the motherboard shield. A nice bonus indeed!
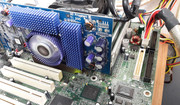
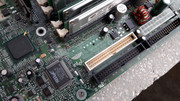
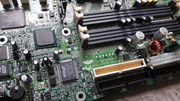
.........I went on to inspect the motherboard. Immediately I found a broken little black plastic piece from the CPU cooler and the northbridge cooler retention system was held in three points instead of four..........I looked further and I saw that a 1500uf/6.3V capacitor had a small dent in its casing.......... by this time I was already apprehensive and I wasnt in the mood for additional checks. In the end I took a big breath and I went over the parts with a fine-comb.
After a thorough check, I arrived to the conclusion, that besides the facts mentioned above, all was OK. I wasnt bothered by the dirt on the motherboard . This stuff comes with the territory.
For sure, the package was handled with velvet gloves and stood on soft pillows and for that matter I was happy that it didnt arrive sliced and diced.
I called the seller and I informed him that the package arrived and all was OK. To my question why were the RIMM sticks taken out of their slots and the bag wasnt sealed with tape I received the answer that they are SAMSUNG RIMM sticks and they work for sure...
I thanked him for the kit and I didnt say anything more.


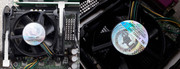
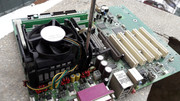
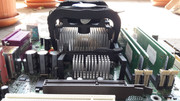
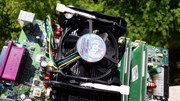
A few weeks after I received the package I got to test it. I powered it up and all was as it should. In an uncharacteristic fashion I didnt clean the parts before. I removed the old metalic thermal pad and I applied fresh Arctic MX-4 on the dried up stuff. I only cleaned the dirt from the CPU cooler. DONT DO LIKE I DID! 😁
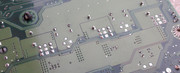
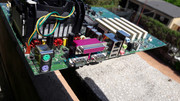
I removed the offending corpses of the two dead Nichicon 3300Uf/6.3V caps.

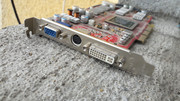
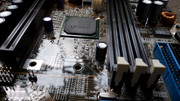
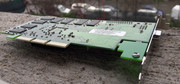
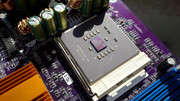
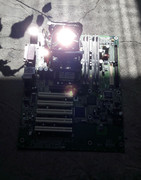
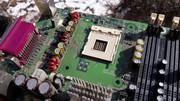
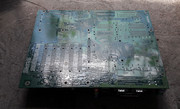
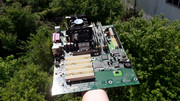
There she is in plain daylight. The motherboard has a deformation due to the fact that it is missing a backplate to relieve the stress put up by the CPU cooler.
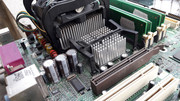
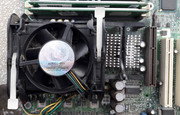
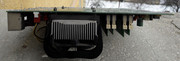
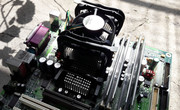
How to remove the Intel P4 Boxed Cooler. Screwdriver time!
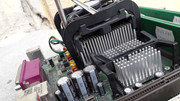
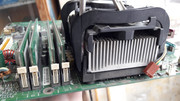
First, I cleand the CPU heatsink and all the plastic bits. I wasnt able to remove the northbridge heatsink no matter what I tried and for fear that I might do more bad than good I left it in place.

I soldered two new Nichicon 3300uf/6.3V caps.
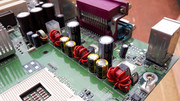
I restored the shine to all the chromed parts. I paid great attention to detail.

Isopropyl alcohol 99%.
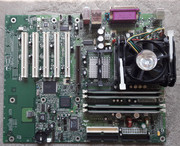
FINAL RESULTS.
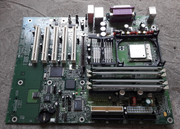

Shine my precious 😁


gallery: https://postimg.cc/gallery/yocg6ktq/
This was the RAMBUS story. I didnt have a particular hard time restoring the kit and in the end all was fine.
I also found at the flea market another plastic retention harness to replace the damaged one even if the damage was just cosmetic and I glued back the broken piece.
While I did the final assembly of the bits I took off from the motherboard, I also saw that the retention lever for the northbridge heatsink wasnt in the correct position. I put it as it has to be.
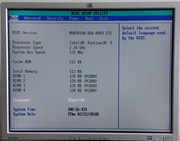
The motherboard has the final BIOS version. The check of the motherboard revision - AA number, revealed, that it doesnt support the faster Northwood 3.06GHz/512/533 CPU and at max only a Northwood 2.80/512/533 CPU can be used. I dont intend to further upgrade the system in the near future and it will be used as is. I did find a mobile P4 SL7NA 3.06GHz/1MB/533 but it has a Prescott core.
C ya later with the next episode 😁
Herd & Fitz ft. Abigail Bailey - I Just Can't Get Enough [HQ]
https://www.youtube.com/watch?v=yvvuEdzahxY
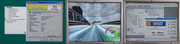
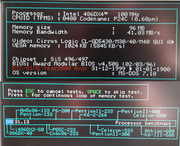
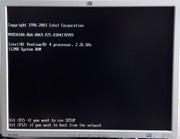
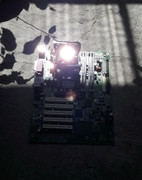
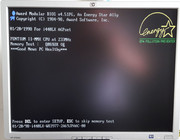
The BOOT message made me smile 😁
***Good News PC Healthy*** - Good news indeed! 😁 I was like what's going on? Are you talking to me? 😁
Flea market surprise!
Because in my recent visits at the flea market I found a few smaller pieces I decided to include them in shorter episodes. These episodes will be called: Flea market surprise.
In these episodes I'll keep the details at a minimum and I'll let the pictures do the talking.
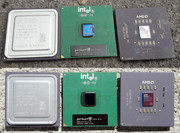
The stars of today's episodes are:
1. Diamond Viper V550 SDR ATXNLX 16MB AGP Rev. B - RIVA TNT
2. AMD K6-2/450AFX - 450MHz
3. Intel Pentium III 1GHz - 1000/256/133/1.7V SL4C8
4. AMD Duron 1.2GHz - DHD1200AMT1B
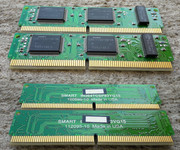
5. Two C.O.A.S.T. sticks (at least I think they are?) - SMART 1995
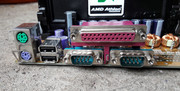
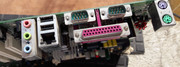
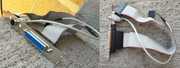
6. PS/2 cable
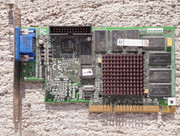
Diamond Viper V550 SDR ATXNLX 16MB AGP Rev. B - RIVA TNT
A little bit of elbow grease...

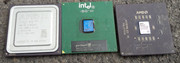
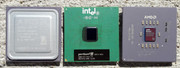
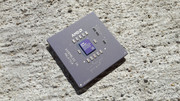
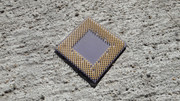
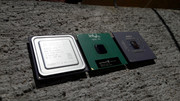
AMD K6-2/450AFX - 450MHz *** Intel Pentium III 1GHz - 1000/256/133/1.7V SL4C8 *** AMD Duron 1.2GHz - DHD1200AMT1B
I straightened a few bent pins and I cleaned the K6-2 and Intel CPUs.
The only CPU that still looked like hell after it was cleaned it was the DURON. So, I decided to use metal polish paste and a cotton stick. I gently cleaned the ceramic surface of the CPU and then I washed it with lots of isopropyl alcohol 99%. In the end I was amazed by the results 😁


The PS/2 cable and the C.O.A.S.T. sticks were cleaned well.
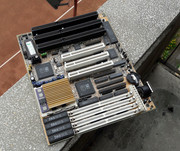
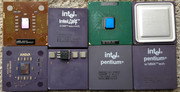
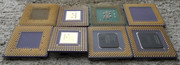
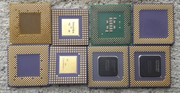
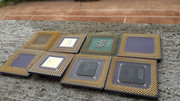
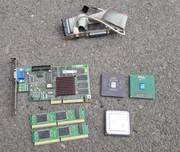
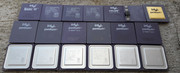
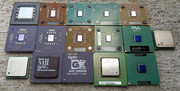
When I prepared to put the cleaned CPUs in their box, I decided to take out a few of the CPUs I own and let them take some air 😁. When I did a headcount I came to the number 35. I raised my eyebrow as I didnt think that I have so many. The pictures dont show the other socket 3, socket 4, socket 7, socket 370, Slot 1, Slot A and Socket A CPUs that are on the stored motherboards or in completed builds.
The wide majority were bought from the flea market along the three years since I started "going back in time".
gallery: https://postimg.cc/gallery/385p0lu7s/
More later.


