VOGONS


Reply 760 of 844, by Robert B

User metadata
Rank Oldbie
Rank
Oldbie

Retr08right? What's the hubbub with the bleaching of ancient electronic artefacts?

Retrobright. Ever since I heard about this "thing" called retrobright, I wanted to try it. The main obstacle that prevented me from doing this was and still is, the fact that I mainly "specialize" in gathering components. I have just five complete PCs and of these, two need a retrobright treatment. The rest are looking fine and there is no need to fix something that's not "broken".

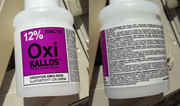
I watched a lot of videos on YT and read quite a few articles on the good ol' internet about what makes the retrobright tick. From all the information I gathered, I decided to use the 40 vol (12%) Hydrogen peroxide solution.

I won't go into detail in regard to types of retrobright solutions and methods as I think that there are way better tutorials on the internet than what I can present at this early stage. This will be a presentation of my first retrobright experience.

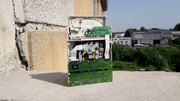
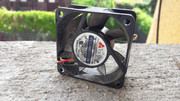
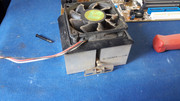
As this was my first ever foray into this new area, I needed the proverbial guinea pig which arrived in the form of two ODDs that initially were destined for recycling.

RTRBRT-001.jpg

I took a long hard look at them and I said: Why don't I try a rejuvenating treatment on you two? What do you say? Yes please! was the unanimous answer.

Before I tackled these two, cough, ahem, beauties, I briefly tested them and they proved to be in good shape. They read DVDs like a dream. NOICE!
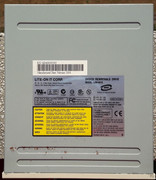
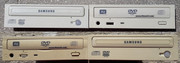
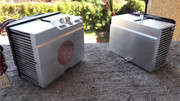
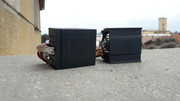
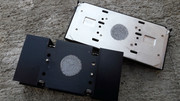
Let's meet the duo.

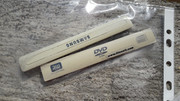
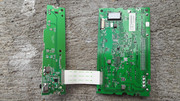
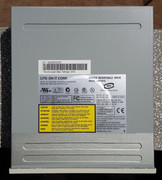
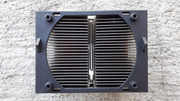
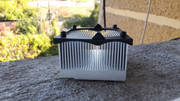
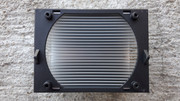
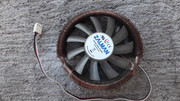
Lite-On DVD-RW LDW-851S

RTRBRT-002.jpg RTRBRT-003.jpg RTRBRT-004.jpg RTRBRT-005.jpg RTRBRT-006.jpg

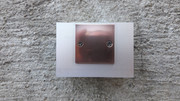
Samsung DVD-ROM TS-H352

RTRBRT-007.jpg RTRBRT-008.jpg RTRBRT-009.jpg RTRBRT-010.jpg RTRBRT-011.jpg

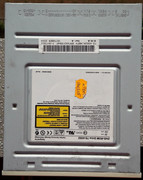
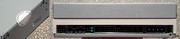
These drives are common as dirt where I live and if I didn't get them as a combo deal with other parts I might've never bought them. Also, I must confess, that once I get something, it is quite hard for me to knowingly send them to the crusher. So I was stuck with these two ODDs and I wanted to at least give them a new lease of life. I mean, who in their right mind would stick something looking like that into a retro PC? For sure I would not do such thing.

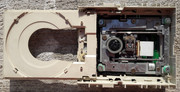
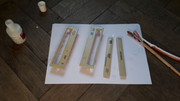
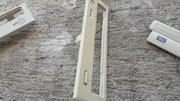
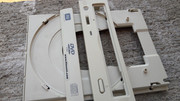
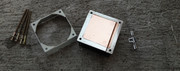
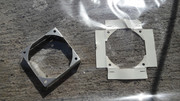
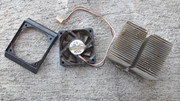
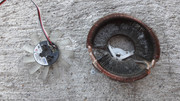
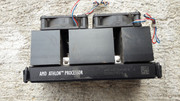
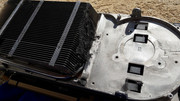
I disassembled the trays and front bezels and I assessed the state of the plastics.

RTRBRT-012.jpg

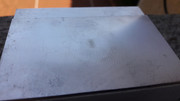
Inside the units, the trays looked quite well and they gave an indication of the original shade of white.

RTRBRT-013.jpg RTRBRT-014.jpg RTRBRT-015.jpg

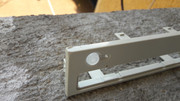
Being confronted by 50 shades of yellow I was even more determined to make these ODDs look as good as possible.

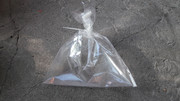
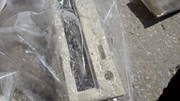
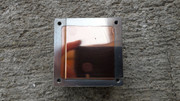
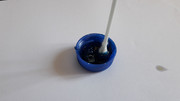
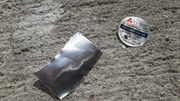
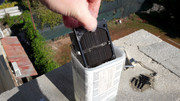
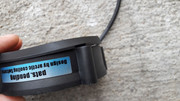
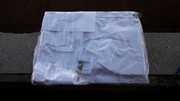
As I don't have zip bags or cling film and I didn't want to buy them just for this experiment, I took a regular plastic sheet cover, tied it with a zip tie to see if it held air and I was good to go. 😀 Not ideal but wth, the main purpose of this is to prevent the evaporation of the hydrogen peroxide solution/emulsion.

RTRBRT-016.jpg

Finding the hydrogen peroxide solution/emulsion that I needed proved a little tricky but in the end I prevailed. At first I wanted to go to a hair saloon and buy a bottle of 40 vol (12%) hydrogen peroxide but in the end I bought what I needed from a local supermarket. Buying from the internet would've been even easier but I left that for the next time when I'll retrobright bigger plastic elements.

Initially I wanted to use a hydrogen peroxide in liquid form like I saw on the internet but when I found a small bottle of hydrogen peroxide in gel form I knew that it was perfect. As a backup I also bought some hydrogen peroxide in powder form which once water was added would also turn to a gel consistency.

RTRBRT-017.jpg RTRBRT-018.jpg RTRBRT-019.jpg

RTRBRT-020.jpg

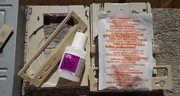
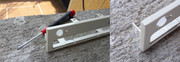
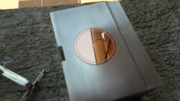
I used a couple of brushes and I coated the plastic bits with a generous layer of hydrogen peroxide gel. When I did this, I also did my first "mistake". I didn't wear gloves while I handled the plastics and even if I took great care I still got some of hydrogen peroxide gel on my fingers. When I saw my skin turn white I rushed to the sink and with lots of water I washed away all of the hydrogen peroxide. This wasn't dangerous but it made my heart race a little. What can I say. Beginner mistake. During the time I worked with the hydrogen peroxide I had the inspiration to at least wear some safety glasses. You really really don't want this stuff in or near your eyes. 😁

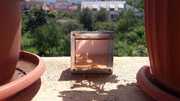
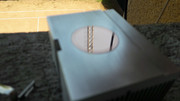
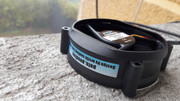
The bigger plastic bits were put in plastic sheet covers that were tied with zip ties, and the tray covers were put in a plastic sheet cover that was just rolled at the end. Nothing fancy.

RTRBRT-021.jpg RTRBRT-022.jpg RTRBRT-023.jpg RTRBRT-024.jpg RTRBRT-025.jpg

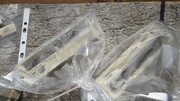
After 30 minutes in the summer sun, I could see the transformation taking place just in front of my eyes. It was like magic, even if this sounds cheesy. 😁 After just a few minutes in the sun you could tell that the stuff was doing its job.

I left the bits in the sun for an hour, then I washed them with water and dish soap. I used some regular rubber gloves just as a precaution. My skin is very sensitive.

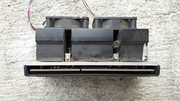
Let's see what I got in the end.

RTRBRT-026.jpg

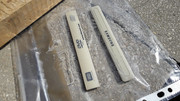
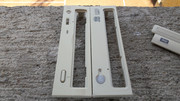
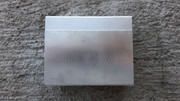
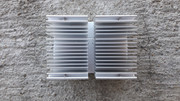
Fantastic results. An exigent eye can spot some hints of yellow still present but that didn't bother me at all. I didn't want to do another pass of retrobright as the scope of this entire thing was not to make perfect these humble ODDs, as to gather the all important data for future projects.

Before and now. Night and day difference.

RTRBRT-027.jpg

Another reason why I didn't want to do another pass of retrobright was the fact that it is quite easy to overdo a retrobright treatment and get a shade of white that will not match an older case. Also it is worth mentioning that retrobrighting a part doesn't mean that it will stay like that forever. The yellow shade will return some time down the road. When? Nobody knows, as this is variable. In some cases it may take years or much less. Also it may return with a vengeance yellower than any yellow before it. 😁 It depends. The fire retardants used in the composition of the plastics that are responsible of the yellowing will still do their thing no matter what. Sure you could just paint the plastics but that it is an entirely different matter that needs a whole more experience to get it perfect, so retrobrighting is a lets say, safe and easy method to improve the appearance of all sorts of computer plastic bits.

The 50 shades of yellow are almost gone.

RTRBRT-028.jpg RTRBRT-029.jpg RTRBRT-030.jpg

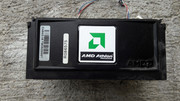
After the success of the the retrobright treatment I was ready to do what I know best. Restoring everything that's PC related and sometimes even more.

RTRBRT-031.jpg

I still couldn't believe my eyes while I performed the final stages of cleaning.

RTRBRT-032.jpg RTRBRT-033.jpg RTRBRT-034.jpg RTRBRT-035.jpg

The front bezels of the ODDs have taken some beating but as the plastic is soft I used a small screwdriver and with the round metal part I pressed the plastic back into shape. This was as good as it was ever going to get.

RTRBRT-036.jpg RTRBRT-037.jpg

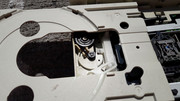
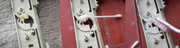
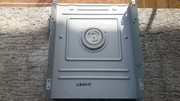
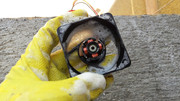
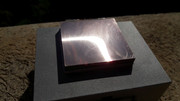
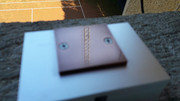
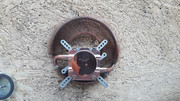
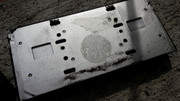
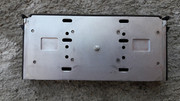
The metal cover of the Samsung drive had some small scuffs and spots of rust that were removed. I used a cotton stick and some paint to blend in the areas that were damaged. The results were quite good as the drive looked like it was never touched up.

RTRBRT-038.jpg

The Lite-On drive had a lot more rust and the paint had a different shade of gray that didn't match anything that I had in stock. I treated the rust and I painted the area that was damaged. Nothing fancy.

RTRBRT-039.jpg

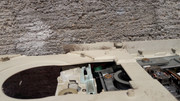
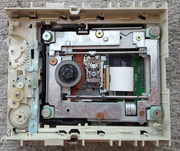
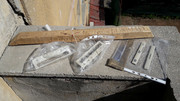
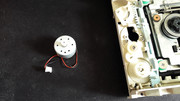
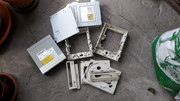
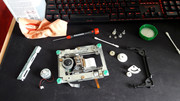
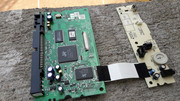
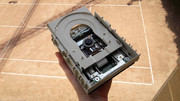
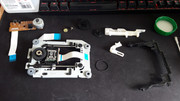
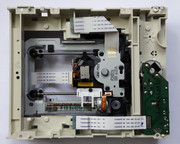
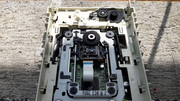
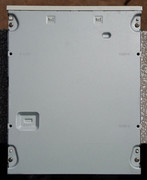
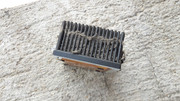
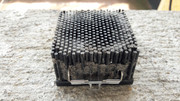
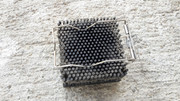
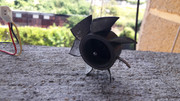
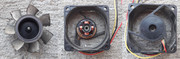
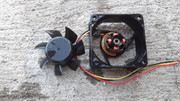
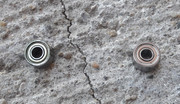
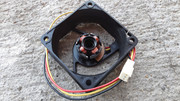
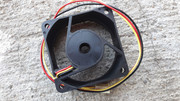
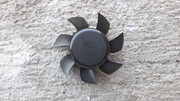
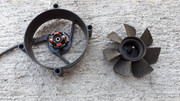
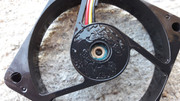
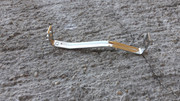
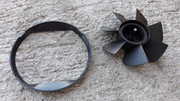
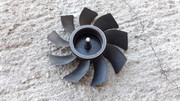
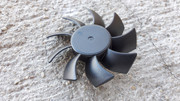
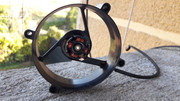
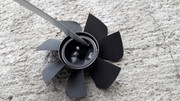
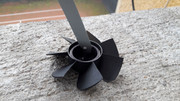
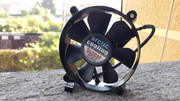
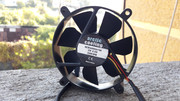
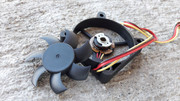
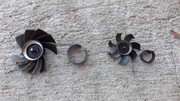
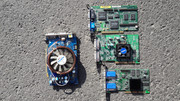
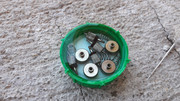
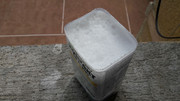
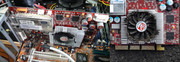
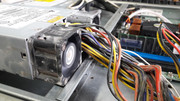
Both of the drives have been taken completely apart and thoroughly cleaned. I took detailed pictures of all the important bits. To my joy the Lite-On drive didn't have a rubber belt. That's a plus in my book no matter the ODD. During the cleaning process I had to use some polishing paste to remove some brown stains on the inside.

RTRBRT-040.jpg RTRBRT-041.jpg RTRBRT-042.jpg RTRBRT-043.jpg RTRBRT-044.jpg RTRBRT-045.jpg RTRBRT-046.jpg RTRBRT-047.jpg RTRBRT-048.jpg RTRBRT-049.jpg RTRBRT-050.jpg

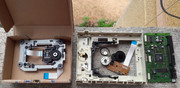
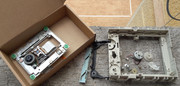
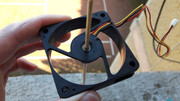
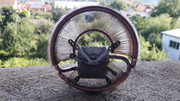
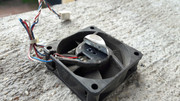
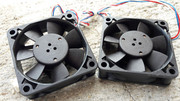
Some assemblies required.

RTRBRT-051.jpg

The first to be assembled was the Lite-On drive. All of the rails and all contact parts have been lubed with silicone grease. The laser lens has been cleaned gently with a microfiber cloth and some IPA 99%.

RTRBRT-052.jpg RTRBRT-053.jpg RTRBRT-054.jpg RTRBRT-055.jpg RTRBRT-056.jpg RTRBRT-057.jpg RTRBRT-058.jpg RTRBRT-059.jpg RTRBRT-60.jpg RTRBRT-061.jpg RTRBRT-062.jpg RTRBRT-063.jpg RTRBRT-064.jpg RTRBRT-065.jpg

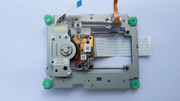
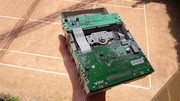
Next came the turn of the Samsung drive.

RTRBRT-066.jpg RTRBRT-067.jpg RTRBRT-068.jpg RTRBRT-069.jpg RTRBRT-070.jpg RTRBRT-071.jpg RTRBRT-072.jpg RTRBRT-073.jpg RTRBRT-074.jpg RTRBRT-075.jpg RTRBRT-076.jpg RTRBRT-077.jpg RTRBRT-078.jpg RTRBRT-079.jpg RTRBRT-080.jpg RTRBRT-081.jpg RTRBRT-082.jpg

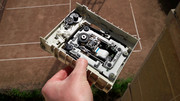
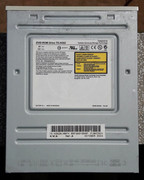
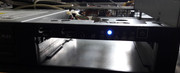
After a lot of work I had in my hands a couple of usable ODDs and I was filled with a sense of accomplishment.

RTRBRT-083.jpg RTRBRT-084.jpg

My joy was short lived though.

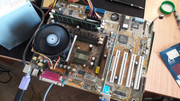
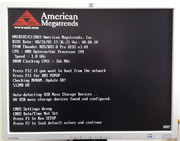
After I finished the drives I installed them into my Slot 1 PC and I was ready to check them thoroughly. These two, cough, ahem, beauties, would not read CDs no matter what I tried. They read DVDs perfectly.

I tried to clean the laser head lenses a few more times but got the same results. It seems that the CD lens inside the laser head assembly it is toast on both of the units. What where to odds of this happening?! I even used cotton sticks dipped in IPA 99% that I left to rest on the lenses for a few minutes. Nothing worked. DVDs were read great CDs not so much. &*#&*($#%^#$!@#&!!!!!! 😁 The ASUS CD-ROM inside the Slot 1 PC worked as usual. I even changed the cable. Nothing changed.

RTRBRT-085.jpg

I was a little bummed but I looked at the bright side of this affair. The retrobright section of this adventure was a complete success. 😁

Retrobrighting is not complicated and if you decide to do it, it is better to start on small bits and pieces. In some cases retrobrighting might not get you the results you expect but this doesn't have to stop you from trying. You must decide if a piece of tech needs this treatment. There are cons and pros like everything in life. "If you don't eat yer meat, you can't have any pudding. How can you have any pudding if you don't eat yer meat?" 😁

As always Google is your friend. There is a lot of information on this subject waiting at your fingertips. 😁

gallery: https://postimg.cc/gallery/QTBxyFY

More later.

Reply 761 of 844, by Warlord

User metadata
Rank l33t
Rank
l33t

you probably didn't cause it but I wouldn't reccomend using anything but just water on a q-tip and damp not dripping then gently wipe the lense and then dry it off with the other side of the qtip. I've never used alchol or micro fible cloths and never needed it. I have rescued many drives this way. I don't know what the laser lenses are made of but if they are not glass, it's no telling what alchol will do to the plastic lense depending on their chemical makeup. I'm guilty of using alchol to cleans all kinds of things and I have destroyed things with it too.

Reply 762 of 844, by Robert B

User metadata
Rank Oldbie
Rank
Oldbie

Thanks for the info. The first time I cleaned the lenses I used such a gentle touch like you would not believe it. 😀 The cloth is super smooth and it was just marginally moist.

I am aware of some coatings of certain lenses that can be damaged by IPA 99%. I'll try not to use IPA 99% in the future or just dilute it a bit with distilled water.

In this instance I'm pretty sure that I didn't damage anything. If the units read DVDs which have tracks way thinner than CDs then there must be a fault of the CD reading part.

I bought these units with a banged up case. The interesting thing that caught my eye was that there were these two units installed. They were very dirty and the case of the PC was bent and rusty. Maybe something happened during "transit" or maybe they were faulty and used a lot. Who knows?

I've restored 20+ units to this date and this is the first time I saw this behavior.

My best guess is that something is wrong with the lens for reading CDs that's inside the laser head, not the lens I've cleaned or check this image where it shows the different lasers for DVD and CD reading. Maybe this is why these units read DVDs but not CDs. https://www.repairfaq.org/sam/dvdop1.jpg *** https://www.repairfaq.org/sam/cdfil.htm

In any case I won't lose any more time with these two units. I got what I wanted from them. 😀

Reply 763 of 844, by Robert B

User metadata
Rank Oldbie
Rank
Oldbie

Show Me What You Believe Baby 1989 Party up in here!

Friday I had some cake and I also got to see some topless action! 😁

PRW-2021-311.jpg
Filename
PRW-2021-311.jpg
File size
1.49 MiB
Views
1739 views
File license
Fair use/fair dealing exception
PRW-2021-312.jpg
Filename
PRW-2021-312.jpg
File size
178.56 KiB
Views
1739 views
File license
Fair use/fair dealing exception

I hoped for a 1000MHz core like my defunct K7 750MHz but I was out of luck. Next time will be my lucky day! 😀 Still, a fresh 8(O)(O) MHZ slot A CPU that enters my collection is nothing to sneeze at.

NEXT EPISODE: A bunch of coolers! You need them! You love them! Some may hate them but there is no way around them!

PRW-2021-313.jpg
Filename
PRW-2021-313.jpg
File size
955.75 KiB
Views
1739 views
File license
Fair use/fair dealing exception

More later.

Reply 764 of 844, by Robert B

User metadata
Rank Oldbie
Rank
Oldbie

KMBN - Der Panther (Tänzer)

A bunch of coolers! You need them! You love them! Some may hate them but there is no way around them!

The humble or not so humble cooler. A cooler has a vital role inside any PC be it older or the latest tech. Often, the importance of a cooler is overlooked and only when something doesn't work as it is supposed to, people realize that from time to time, you have to clean that spinning fan and heatsink inside your computer.

As I mainly deal with stuff from the flea market, I found coolers that were in a state that ranges from perfect to one that is quite ridiculous. Fans and heatsinks caked with animal hairs, paint and all sorts of deposits of an unknown nature. Smelly and looking nasty. I'm not fazed by this fact as I know that it comes with the territory.

In regard to restoring old coolers I apply the same principles I always do. Nothing is unimportant. Surviving parts that once were destined to the crusher but had the opportunity to come into my possession deserve my absolute attention.

Over the time, when I restored old parts you also got to read how I gave a new lease of life to old lumps of aluminum and/or copper. There is a certain charm to building a system with era period correct components. This is why I try when possible, to save old fans, old stickers and everything in between.

The stars of today's episode aren't something out of this world. No exotic stuff. No water coolers. Just regular coolers that for sure will be put to good use. Some of them are more desirable than others but all of them are more than capable to fulfill their role. Keep things cool under pressure. These coolers have been acquired in the last 4-6 months with motherboards or on their own. I decided to have a small stash of coolers as the number of motherboards that I bought is growing way faster that I anticipated. In a word: I need to "reserve" more cooling capacity for the future! 😁

So, without further ado, let's get on with the show! 😀

Alpha PAL6035
Spire Falcon Rock II
AVC AV-112C86FBL01 AMD Sk. A Stock Cooler - Copper insert x2
No Name Socket. A CPU Cooler x2
Arctic Cooling Cooper Silent
Arctic Cooling Super Silent PRO
Zalman VF900-Cu
Akasa, Neolec
Mighty AMD K7 700MHz with dual cooling fans

Back in the day I read about the ALPHA coolers. I never owned such a cooler and to be honest I was on the lookout for one. Sure, I would've wanted an Alpha P3125 or something along the lines of it, but heck, beggars can't be choosers so I'm happy with my purchase.

I found this puppy inside a big plastic 200L barrel. It flew outside when the barrel released its contents on the ground. At first I looked at it in an absent manner. A few seconds later, though, it was in my hands. To my surprise I saw that it was an ALPHA PAL6035 CPU cooler. NICE! I liked the way it looked so I bought it asap. On the same day I also bought a Spire Falcon Rock II. The Spire cooler, albeit being nothing spectacular, is well built and silent. I have three or four of them and they are decent performers.

Coolers-001.jpg

The Alpha PAL6035 had a rough life in the dust mines and it begged to be saved. Which I did in spades.

Coolers-002.jpg Coolers-003.jpg Coolers-004.jpg Coolers-005.jpg

Dismantling.

Coolers-006.jpg

The cooling fan certainly had seen better days.

Coolers-007.jpg Coolers-008.jpg

I can't imagine how hard the cooling fan had to work to ensure a proper temperature of the CPU. Truth be told, the "hedgehog" design of the heatsink doesn't help either. Also, the cooling fan was mounted in a reversed position than regular, drawing air inside the heatsink instead of blowing it out. Why? I have no idea. Later on I'll put things in order from my point of view.

Coolers-009.jpg Coolers-010.jpg Coolers-011.jpg

I removed the four round bits of foam that were present on the bottom of the heatsink as I want to use this cooler on other CPUs that aren't Sk.A. Also, the heatsink underwent an initial cleaning and detailing stage. I used water under pressure to remove all of the stuff that was inside the heatsink. It felt so good to watch it shine.

Coolers-012.jpg Coolers-013.jpg Coolers-014.jpg Coolers-015.jpg

All bits have been washed with dish soap and hot tap water. Some rust that was on the long screws has been eradicated.

Coolers-016.jpg

This was the easy part. Next came the cooling fan. Saving cooling fans isn't an exact science or a particularly sure shot procedure. Despite your efforts you might not get the expected results. Even if I am fully aware of this fact I always try to save them. There are two reasons for this: authenticity and money.

Coolers-017.jpg Coolers-018.jpg

I have cleaned quite a few fans over the course of the time and I have a few tricks up my sleeve. In this instance I decided that I need to wash the whole thing with dish soap and hot tap water before I even start to assess its state.

Coolers-019.jpg Coolers-020.jpg

Out with the old bearings! In with the still old bearings! 😁 Despite the washing with water, the bearings still worked nicely so I decided not to open and service them and just give them a grease treatment. I tried to get some grease inside by spinning them or just by using a very fine needle. If you are patient, using a fine needle you can get inside the bearings that minute quantity of grease that is required. Servicing bearings doesn't always get you the expected results. Sometimes they are so far gone that no grease will help. Also, using a thinner or a thicker oil instead of grease usually it is not recommended as it will push the grease out and make the bearing run way louder. In any case, the original grease can became contaminated or even dry out so all in all this is not an exact science. YMMV.

Coolers-021.jpg Coolers-022.jpg Coolers-023.jpg

Looking good!

Coolers-024.jpg

The scratches that were present on the heatsink have been covered with black paint that is resistant to temperature. This wasn't exactly needed but I had a can laying around so I said: why not?

Coolers-025.jpg Coolers-026.jpg Coolers-027.jpg

The cooling fan received its final stage of cleaning.

Coolers-028.jpg Coolers-029.jpg Coolers-030.jpg

After a day inside the grease bath, I removed the bearings and massaged them until they ran like butter. I think that I got lucky this time or maybe the bearing were of a better quality.

Coolers-031.jpg Coolers-032.jpg

The hedgehog heatsink in all its glory.

Coolers-033.jpg Coolers-034.jpg

The sticker from the cooling fan received a backing of aluminum tape to make it a little stiffer, then it was mounted with o.2mm double sided tape. Also, the frame of the cooling fan was damaged and it was glued back with super glue. Before the final assembly I removed the protective film that was on the aluminum shroud of the cooler. It felt so good! 😁

Coolers-035.jpg Coolers-036.jpg Coolers-037.jpg Coolers-038.jpg Coolers-039.jpg Coolers-040.jpg

Saved to fight another day. I put some high strength clear tape to prevent the scratching of the heatsink and I also mounted the fan in the position that I wanted.

This cooler is @100! The cooling fan is running great. I have yet to test it in a a system but it sure looks the part, ready to give an old runner that original look!

Coolers-041.jpg Coolers-042.jpg Coolers-043.jpg

The Spire Falcon Rock II was in bad shape. I bought it for 1 EURO as I really didn't want to spend anything more. 😁

Coolers-044.jpg Coolers-045.jpg

Always take pictures of the way the metal clamp is positioned.

Coolers-046.jpg

I rolled up my sleeves and got to work.

Coolers-047.jpg Coolers-048.jpg

The cooling fan has an aluminum frame and by the looks of it, had contact with moisture so it lost some of its original appearance. Regardless, I took it apart and gave it what it so desperately needed.

Coolers-049.jpg Coolers-050.jpg Coolers-051.jpg

During the time I was occupied with the Spire cooler I also had an AVC AV-112C86FBL01 AMD Sk. A Stock Cooler that underwent the same procedure.

Coolers-052.jpg Coolers-053.jpg Coolers-054.jpg Coolers-055.jpg Coolers-056.jpg

The heatsink from the AVC cooler had some very hard specs of some gray stuff on the cooper insert so I lightly sanded it down and polished it by hand. I wasn't looking for perfection just for functionality.

Coolers-057.jpg Coolers-058.jpg Coolers-059.jpg Coolers-060.jpg Coolers-061.jpg

The cooling fan on the AVC cooler was running well. Also the fan from the Spire cooler made a full recovery.

Coolers-062.jpg Coolers-063.jpg Coolers-064.jpg Coolers-065.jpg Coolers-066.jpg

As good as it gets.

Coolers-067.jpg Coolers-068.jpg Coolers-069.jpg

The AVC cooler isn't the best or one of the most silent coolers but it gets the job done. Tossing it out to be recycled wasn't an option so I was stuck with it. It can be upgraded with a better fan and be put to good use. The Spire on the other hand is everything that the AVC cooler isn't. A better option overall.

Three coolers got to fight another day. Three restored coolers that wait patiently to be jump back into action.

Coolers-070.jpg Coolers-071.jpg Coolers-072.jpg Coolers-073.jpg Coolers-074.jpg

These two coolers, another AVC AV-112C86FBL01 and a No name Sk. A cooler, were fished from two Sk. A ASUS motherboards. They were also cleaned and made a full recovery.

Coolers-075.jpg Coolers-076.jpg Coolers-077.jpg Coolers-078.jpg Coolers-079.jpg Coolers-080.jpg

The next three coolers were found on a few more Sk.A motherboards that I acquired recently. The most interesting ones are the Arctic coolers. They are well built. Silent and in my book, they look the part.

No Name Socket. A CPU Cooler *** Arctic Cooling Cooper Silent *** Arctic Cooling Super Silent PRO

Coolers-081.jpg Coolers-082.jpg Coolers-083.jpg

Initial state.

Coolers-084.jpg Coolers-085.jpg Coolers-086.jpg Coolers-087.jpg Coolers-088.jpg Coolers-089.jpg Coolers-090.jpg Coolers-091.jpg Coolers-092.jpg Coolers-093.jpg Coolers-094.jpg

The Arctic Super Silent PRO, that's a mouthful, is well built. I never saw or had one back in the day. When I took it apart I found out what it made it tick. I appreciated the nice addition of that plastic ring that ensures a concentrated stream of air inside the heatsink. An out of the ordinary detail that many coolers didn't have. Both of the Arctic coolers have this method of construction.

The Arctic Cooling Cooper Silent was full of everything you do not want inside a CPU cooler.

Coolers-095.jpg Coolers-096.jpg Coolers-097.jpg Coolers-098.jpg Coolers-099.jpg

The No Name cooler was pretty clean. Go figure.

Coolers-100.jpg

I washed the heatsinks with hot tap water and dish soap. The heatsink from the Arctic Cooling Cooper Silent was put inside a container to remove some of the more adherent stuff that was inside. I used an old long brush to stir the water inside. The heatsink have been dried with an air compressor after they were washed.

Coolers-101.jpg Coolers-102.jpg Coolers-103.jpg Coolers-104.jpg

In regard to the Arctic coolers one thing was quite clear. I needed to restore both of the fans and any other replacement would throw a spanner into the way they looked and worked. I had no intention to modify new fans to fit inside the nicely made funnel rings. Also, given the track record of Arctic I knew that these fans should be quiet straight out of the door. They had a sleeve bearing type of construction that was still very, very quiet. Go figure.

Coolers-105.jpg Coolers-106.jpg Coolers-107.jpg Coolers-108.jpg Coolers-109.jpg Coolers-110.jpg

The No Name cooler had a ball bearing and sleeve bearing combo. I opened up the tiny ball bearing. I used a fine needle to remove the dust cap only to find out that it had a security ring that would've made things way easier. I put it back with minimal tampering evidence. Fresh grease and stuff.

Coolers-111.jpg Coolers-112.jpg Coolers-113.jpg Coolers-114.jpg

The cooling fan had signs of water damage. The copper sleeve bearing had some corrosion that was removed with vinegar. This damned cooling fan required so much work that once I was deep in, there was no turning back. I had to carry on and hope for the best. 😁 I plugged the hole with a bamboo stick and made a small pool of vinegar and it was left like that for a few hours.

Coolers-115.jpg Coolers-116.jpg

After washing, detailing and polishing I could see that in the end, all my efforts will pay off.

Coolers-117.jpg Coolers-118.jpg Coolers-119.jpg Coolers-120.jpg Coolers-121.jpg Coolers-122.jpg Coolers-123.jpg Coolers-124.jpg Coolers-125.jpg Coolers-126.jpg Coolers-127.jpg Coolers-128.jpg Coolers-129.jpg Coolers-130.jpg Coolers-131.jpg Coolers-132.jpg Coolers-133.jpg Coolers-134.jpg Coolers-135.jpg Coolers-136.jpg Coolers-137.jpg Coolers-138.jpg Coolers-139.jpg Coolers-140.jpg

Clean screws.

Coolers-141.jpg

The fight with the verdigris was intense.

Coolers-142.jpg Coolers-143.jpg Coolers-144.jpg Coolers-145.jpg

Some rust is still present but it doesn't interfere with the functioning of the fan.

Coolers-146.jpg

I used some aluminum tape to restore the old sticker. 0.2mm double sided tape was used to fix it well.

Coolers-147.jpg Coolers-148.jpg Coolers-149.jpg Coolers-150.jpg

This cooling fan was an affair that I want to forget. Despite my efforts it didn't respond well to treatment. Valuable information was gathered and experience has been gained, though. A Noctua fan is a perfect replacement both in the color department and also from a performance point of view.

Coolers-151.jpg Coolers-152.jpg Coolers-153.jpg

After I put back the cooling fan on the Arctic Cooling Cooper Silent, I saw that once the cooler was flat on a surface, it would make a grindy noise that was gone once the cooler was flipped over. After a few minutes of investigation I found a solution.

I call it fan tuning! 😁 I made a small lever from a piece of metal and I tuned the round magnet that sits inside the propeller. How I found this solution? At first I experimented with small rubber o rings but that was a tedious affair and it didn't get me the expected outcome. Then, while I fiddled with the fan the solution hit me! From what I found, the whole grinding sound problem was due to the distance between the propeller and the sleeve bearing and/or motor so the solution was resting in that area.

A minute change in the position of the round magnet inside the propeller made all the change! The fan ran like a dream. YEAH!!!

Coolers-154.jpg Coolers-155.jpg Coolers-156.jpg Coolers-157.jpg

Perfect VICTORY!

Arctic Cooling Copper Silent.

Coolers-158.jpg Coolers-159.jpg Coolers-160.jpg Coolers-161.jpg Coolers-162.jpg Coolers-163.jpg Coolers-164.jpg

The Arctic Cooling Super Silent PRO also made a full recovery. The fan was running well from the get go. I had to use some tape to ensure a proper grip of the screws that hold the fan.

Coolers-165.jpg Coolers-166.jpg Coolers-167.jpg Coolers-168.jpg Coolers-169.jpg Coolers-170.jpg Coolers-171.jpg Coolers-172.jpg Coolers-173.jpg

Three coolers got another lease of life. NICE!

Coolers-174.jpg Coolers-175.jpg Coolers-176.jpg Coolers-177.jpg

A close up with the funnel ring.

Coolers-178.jpg Coolers-179.jpg Coolers-180.jpg Coolers-181.jpg

During the time I was restoring these coolers I also made some progress with smaller fans that have 0.5cm bearing inside. While trying to service these bearing is in most cases problematic, as they usually do not respond too well to this treatment, I still do it. 😁 I even started experimenting with other magnets to try and restore other fans in the future. I do this from the perspective that if I get another ATI Rage Fury MAXX or another V5 5500 or even a V5 6k I want the original fans on, no matter what. Instead of replacing something it is sometimes better to try at least to save those parts. IMO. There is too much garbage and waste as it is.

Coolers-182.jpg Coolers-183.jpg Coolers-184.jpg Coolers-185.jpg Coolers-186.jpg Coolers-187.jpg Coolers-188.jpg Coolers-189.jpg Coolers-190.jpg

HUH! This is a long episode! We are not done yet though! No rest for the wicked!

Next is the Zalman VF900-Cu VGA cooler.

I found the Zalman cooler on a regular trip to the flea market. It was mounted on a beat up 7600GT PCI-E. It looked worse for wear but nothing too serious. Some elbow grease and it will be golden ahem, copper(y) like. I said to myself. 😁

VF900-Cu-01.jpg

It had some rust on some parts. Nothing that the rust remover solution can't handle.

VF900-Cu-02.jpg VF900-Cu-03.jpg VF900-Cu-04.jpg VF900-Cu-05.jpg VF900-Cu-06.jpg VF900-Cu-07.jpg

The copper heatsink took a nice 15 minutes bath inside vinegar mixed with some table salt.

VF900-Cu-08.jpg

The copper base will forever be engraved with the nVIDIA logo. I wonder what will an ATI card say if I manage to mount this cooler on one. I'm pretty sure that it will puke it out! Fixing nuts and all. 😁

VF900-Cu-09.jpg VF900-Cu-10.jpg VF900-Cu-11.jpg VF900-Cu-12.jpg VF900-Cu-13.jpg

The rust was stubborn and it needed to be flushed out.

VF900-Cu-14.jpg

Clean as a whistle.

VF900-Cu-15.jpg VF900-Cu-16.jpg VF900-Cu-17.jpg VF900-Cu-18.jpg

The seal of approval.

VF900-Cu-19.jpg

LED action. NICE!

VF900-Cu-20.jpg

Tiny coolers that also got what they so desperately needed. The AKASA fan was still good the Neolec not so much. Crappy balls inside the ball bearing. For sure they used square balls inside!

Coolers-191.jpg Coolers-192.jpg Coolers-193.jpg Coolers-194.jpg Coolers-195.jpg Coolers-196.jpg Coolers-197.jpg Coolers-198.jpg

After quite a few stand alone coolers we have arrived to one that was still firmly attached to a CPU.

Meet a very dusty double headed monster. A two PAPST beast that I really like! It was mounted on a Slot A AMD 700MHz CPU that in turn was mounted on a very dead Gigabyte GA-7IXE motherboard. When I mean dead I mean riddled with holes. Precious metal hunting + small brains = lot's of dead components. Not all that glitters is GOLD!

K7-700-01.jpg K7-700-02.jpg K7-700-03.jpg K7-700-04.jpg

Holy dust bunnies Batman!

K7-700-05.jpg K7-700-06.jpg

Dirty bits. In case you are wondering, I powered up the CPU to see if it works. It worked well but I also got a dust storm effect. Like when old plane engine fire up for the first time. 😁 I used a breathing mask of course. The CPU said NOT DEAD YET! AWESOME STUFF! The fans coughed up and got back to life.

K7-700-07.jpg K7-700-08.jpg K7-700-09.jpg

Exemplary TIM placement that marginally touches the area of the CPU. NICE! GREAT! AWESOME!

K7-700-10.jpg K7-700-11.jpg K7-700-12.jpg

Bubble bath.

K7-700-13.jpg

I wanted to service the cooling fans but I found out that they have an enclosed design. I could've tried to try and pull on the propellers and try to remove them as for sure this is the way they were built, with a tiny plastic washer that holds the shaft, but I decided to try something that it is let's say a little more lazy. 😀

Also they were so dirty that there was no way to clean them without extreme measures.

K7-700-14.jpg K7-700-15.jpg

I washed them inside and outside!

K7-700-16.jpg

Even after a good scrub they were still nasty. In what conditions has been poor thing used? In a mine or something?

K7-700-17.jpg

After I was done with the cleaning of the fans I used a thick oil to lube the bearings inside. Not ideal but they were in bad shape to begin with. Three tiny holes inside the propeller made things nice and easy. In the end the tiny fans got from a very bad working state to a more than decent one. Still not perfect but perfectly usable if you know what I mean. A small grumble is still present but otherwise they spin freely.

K7-700-18.jpg K7-700-19.jpg K7-700-20.jpg

Nice and clean.

K7-700-21.jpg

I decided not to open the CPU cartridge as I do not plan to use this CPU in a build any time soon. I gave it a good clean and some air compressor treatment.

K7-700-22.jpg

Some assembly required. 😁

K7-700-23.jpg K7-700-24.jpg K7-700-25.jpg K7-700-26.jpg K7-700-27.jpg K7-700-28.jpg K7-700-29.jpg K7-700-30.jpg

I did some tests with Arctic MX-4 to determine the best quantity of TIM needed. Also I put the blob of TIM on the center of the die of the CPU.

K7-700-31.jpg K7-700-32.jpg K7-700-33.jpg K7-700-34.jpg K7-700-35.jpg

Done and Done!

K7-700-36.jpg K7-700-37.jpg K7-700-38.jpg K7-700-39.jpg K7-700-40.jpg K7-700-41.jpg K7-700-42.jpg

RIP GA-7IXE ...

K7-700-43.jpg K7-700-44.jpg K7-700-45.jpg

There you have it! A huge episode dedicated to the silent (or sometimes not so silent) heroes inside our machines. They toil in scorching heat, keeping things in check so that we can enjoy our purpose driven PCs. Do not overlook them and give them the attention they seldom need. A little bit goes a long way.

More later.

gallery: https://postimg.cc/gallery/dyNHsHx *** https://postimg.cc/gallery/gwDvvNF *** https://postimg.cc/gallery/D4CV88T *** https://postimg.cc/gallery/0vC4cRp *** https://postimg.cc/gallery/Gyqjrzm *** https://postimg.cc/gallery/wvT4XBw *** https://postimg.cc/gallery/np27L0K

Last edited by Robert B on 2021-11-27, 18:18. Edited 1 time in total.

Reply 767 of 844, by Doornkaat

User metadata
Rank l33t
Rank
l33t

All better now! 😄
I had always been wondering wether I could submerge those Zalman coolers into vinegar or citric acid to restore the copper without damaging the other metal parts too badly. Looks very much like it. 😃👍
And the shine on some of that copper; better than new! 😁

Reply 768 of 844, by Robert B

User metadata
Rank Oldbie
Rank
Oldbie

First try to experiment with shorter immersion times. 😀 You might get more with less.

In other turn of events I've been a vewy vewy bad puddy tat. 😁 Lately I've got so many new entries that is kind of ridiculous. 😁 So many great episodes are into the making. How long it will take? I don't know. One thing is certain though. I'm in for the long haul!

A mishmash of pics bellow! 😁 The Lawyer - I Wanna MMM [Official Video]

PRW-2021-314.jpg PRW-2021-315.jpg PRW-2021-316.jpg PRW-2021-317.jpg PRW-2021-318.jpg PRW-2021-319.jpg PRW-2021-320.jpg PRW-2021-321.jpg PRW-2021-322.jpg PRW-2021-323.jpg PRW-2021-324.jpg PRW-2021-325.jpg PRW-2021-326.jpg PRW-2021-327.jpg PRW-2021-328.jpg PRW-2021-329.jpg PRW-2021-330.jpg PRW-2021-331.jpg PRW-2021-332.jpg PRW-2021-333.jpg PRW-2021-334.jpg PRW-2021-335.jpg PRW-2021-336.jpg PRW-2021-337.jpg PRW-2021-340.jpg PRW-2021-341.jpg PRW-2021-343.jpg PRW-2021-345.jpg PRW-2021-346.jpg PRW-2021-347.jpg PRW-2021-348.jpg PRW-2021-349.jpg PRW-2021-350.jpg PRW-2021-351.jpg PRW-2021-352.jpg PRW-2021-353.jpg PRW-2021-354.jpg PRW-2021-355.jpg PRW-2021-356.jpg PRW-2021-357.jpg PRW-2021-358.jpg PRW-2021-359.jpg PRW-2021-360.jpg PRW-2021-361.jpg PRW-2021-362.jpg PRW-2021-363.jpg PRW-2021-364.jpg PRW-2021-365.jpg PRW-2021-366.jpg PRW-2021-367.jpg PRW-2021-368.jpg PRW-2021-369.jpg PRW-2021-370.jpg PRW-2021-371.jpg PRW-2021-372.jpg PRW-2021-373.jpg PRW-2021-374.jpg PRW-2021-375.jpg PRW-2021-376.jpg PRW-2021-377.jpg PRW-2021-378.jpg PRW-2021-379.jpg PRW-2021-380.jpg PRW-2021-381.jpg PRW-2021-382.jpg PRW-2021-383.jpg PRW-2021-385.jpg PRW-2021-386.jpg PRW-2021-387.jpg PRW-2021-388.jpg PRW-2021-389.jpg PRW-2021-390.jpg PRW-2021-391.jpg PRW-2021-392.jpg PRW-2021-393.jpg PRW-2021-394.jpg PRW-2021-395.jpg PRW-2021-396.jpg PRW-2021-397.jpg PRW-2021-398.jpg PRW-2021-399.jpg PRW-2021-400.jpg PRW-2021-401.jpg PRW-2021-402.jpg PRW-2021-403.jpg PRW-2021-404.jpg PRW-2021-405.jpg PRW-2021-406.jpg PRW-2021-407.jpg PRW-2021-408.jpg PRW-2021-409.jpg PRW-2021-410.jpg

More later.

Reply 770 of 844, by Robert B

User metadata
Rank Oldbie
Rank
Oldbie

Camels? Lot's of 'em! 😁 Ali Baba ain't got nothin' on me! 😁 Just kidding. 😀

The Lucky Star LS486E C2 needed new cache chips and a new TIP127 transistor and now it works like a dream. The 386 board has massive battery leak damage im 80% sure that it is toast but I'll find out eventually if she's dead or alive. The SOYO 025K2 also has some battery leak damage. Traces look okish. The Aquarius MB-4D33/50D Sk.3 motherboard is minty fresh. The battery holes are without solder and the PCB is like glass. The Cyrix 486 is bonkers and also a little heater at 5V. 😁 The AV-8540 - Sk.3 motherboard UMC chipset is also minty fresh. A MOSFET needed rework but other than that it is A ok.

The LS might be put through some OC with a 5x86-133MHz. Your work with OC-ing the AMD 586 @180 Mhz and 200MHz has peaked my interest! Also I saw the same stuff on CPU Galaxy and that was also awesome! 😁 While I do not intend to use peltiers I do plan to use beefy tower coolers from the 775 era. 😁

The rest of the loot is "newer" but it also needed rescuing. Some of that stuff is 12-15+ years old. I really dig the Super H8DAE motherboard but it is so beat up that it will be a miracle if it works. I still need CPU's, coolers and RAM.

I really like the three SS7 ATX boards I got in the last weeks. Gigabyte, MSI and an ASUS P5A.

Many of new entries are in different stages of restoration. They will require a TON of work but I am not complaining. No SIR!

And one more thing. I have acquired a lot more stuff than what can be seen in the pics above. This year has been nuts!

Reply 771 of 844, by devius

User metadata
Rank Oldbie
Rank
Oldbie

Funny how on that CT6950 towards the bottom the heatsink on the voltage regulator is bigger than the one on the actual graphics chip 😁

Those Compaq memory expansion modules are a good find! It's not always easy to find those types of proprietary modules.

Reply 772 of 844, by Robert B

User metadata
Rank Oldbie
Rank
Oldbie

I have a couple more of the CT6950 cards and the others do not have that huge HS on that voltage regulator.

This is the POST screen. It has 32MB and it is similar to the TNT2 M64 variant. It is detected as a CT6954 though. All of the three I have are CT6954.

CT6954-11.jpg

Reply 774 of 844, by Robert B

User metadata
Rank Oldbie
Rank
Oldbie

I made a jig on which I put a voltage regulator heatsink, so that I could drill a hole in it and be able to fix with a nut and bolt the replacement part, without desoldering the heatsink. 😁

I'll give more details when and IF the VS440FX will be brought back to life.

PRW-2021-412.jpg

More later.

Reply 776 of 844, by Robert B

User metadata
Rank Oldbie
Rank
Oldbie

Hi! Hi! Ho Ho! He! He! Basshunter DotA

Dual CPU stuff is AWESOME!!!

I still need a few Opteron 200 series CPUs, Coolers and brackets for the H8DAE. The Supermicro H8DAE motherboard was a complete basket case. Repairs are done. 38+ missing parts, cut traces, missing various plastic bits, mangled caps and everything in between! As expected an FX51 was a no go in the finicky H8DAE. She's a needy mother of all boards! 😀 I had to try even if I knew that it was a long shot!

PRW-2021-418.jpg PRW-2021-426.jpg PRW-2021-427.jpg PRW-2021-416.jpg PRW-2021-417.jpg PRW-2021-428.jpg

More later.

Reply 778 of 844, by Robert B

User metadata
Rank Oldbie
Rank
Oldbie

On MSI K7D Master-L there are some OC options as I just briefly powered it up to check the vitals.

On the other true server boards I didn't check but I'm not holding my breath that there are such extras. 😁 I'll post at a later date if I find something in the OC department.

I also got another dual Opteron board, a TYAN THUNDER K8SD PRO S2882-D (THUNDER K8SD PRO) as the Supermicro isn't ok. I'm still trying to revive it but I think that the Grim Reaper got to it before me ...

Also I am not planning to purchase too many server boards in the future. The hard line for me is Opteron 200 series stuff. I already refused a complete dual Xeon E5440 server. 😁

PRW-2021-433.jpg PRW-2021-434.jpg PRW-2021-441.jpg PRW-2021-442.jpg PRW-2021-443.jpg PRW-2021-444.jpg PRW-2021-445.jpg PRW-2021-446.jpg

Reply 779 of 844, by Robert B

User metadata
Rank Oldbie
Rank
Oldbie

Christmas Special in the works. Paradis - Toi Et Moi (Official Video)

CPU Socket "replacement" without special tools aka MSI K7D Master-L

Yes! No special tools required! This is no clickbait posting!

If I did it YOU CAN DO IT TOO! 😀

PRW-2021-447.jpg

More later.