A delve into the world of cosmetic surgery aka MSI MS-6191
As we all know, flea market stuff is bound to have a few problems that can range from just a few scuffs and scratches to total carnage.
"Back in the day", I mean a few years ago 😁, I used to discard the thought of buying basket cases and I chose the safe route of buying nothing but the best examples of old tech that I could find.
This approach quickly changed when my skills regarding the restoration of electronic relics (and more) have increased. Today I feel confident to tackle even the most difficult cases. As I said in the past, where people see stuff beyond rescue I see opportunity.
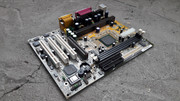
The star of today's episode is a Slot A motherboard that had a few cosmetic issues but luckily was still in one piece.
I have a huge soft spot for slot A stuff and when I find such beauties I snatch them in a heartbeat. After 7 years of collecting I have 10 motherboards and 25 CPUs. It took a while to get here but I am not complaining. The only nagging thing is that all of the CPUs are in the range 500-800MHz and nothing in the 800-1000MHz range. No matter, I am patient and one day I'll find the rest of them. 😀
But I digress ... Slot A motherboard. Flea market.
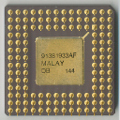
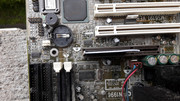
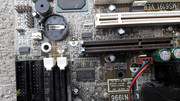
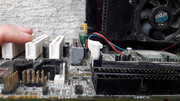
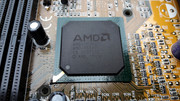
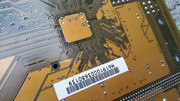
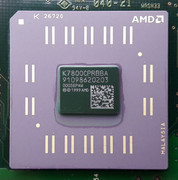
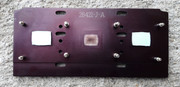
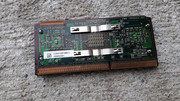
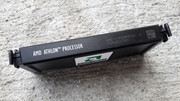
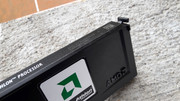
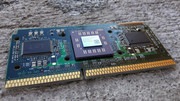
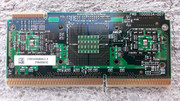
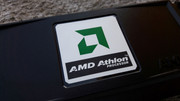
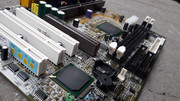
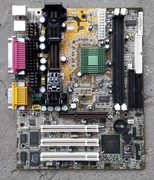
The Slot A setup I found was composed of an MSI MS-6191 VER:1 Micro ATX AMD-750 Irongate motherboard and an AMD Athlon 800MHz CPU - K7800MPR52B A.
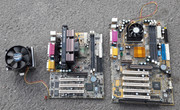
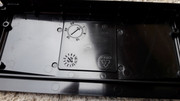
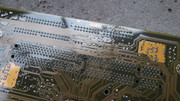
Apart from the fact that the kit was very dirty, the most obvious problems were:
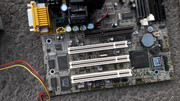
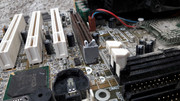
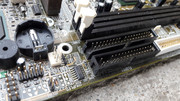
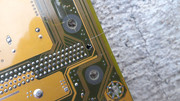
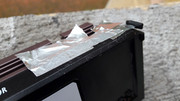
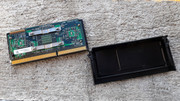
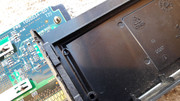
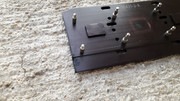
* a damaged AGP slot which was missing a piece of the plastic,
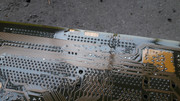
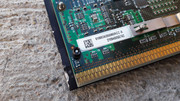
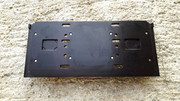
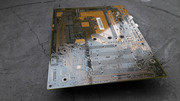
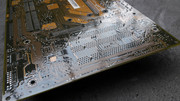
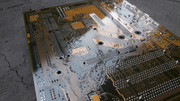
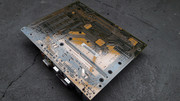
* a few minor scratches on the back,
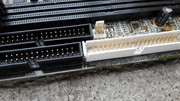
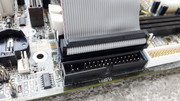
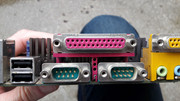
* the FDD connector had a torn piece of plastic
* one IDE connector was missing a piece of plastic
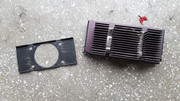
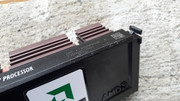
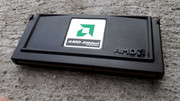
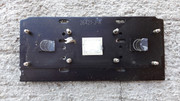
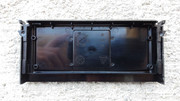
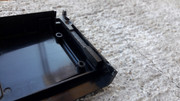
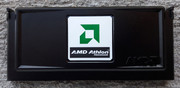
* the CPU cartridge was heavily scratched.
The problems above are nothing terminal and a very good example of the flea market being gentle for once. 😁
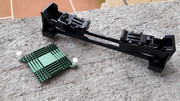
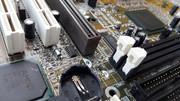
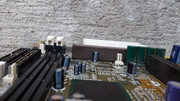
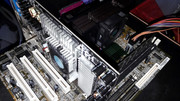
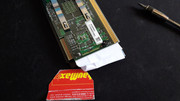
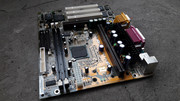
The AGP slot was like a sore eye and I had to deal with it ASAP as it made me hurt internally just by looking at it. The good news was that the pins inside the slot were in perfect condition so the damage was just cosmetic.
I looked for solutions and the first thing that came into my mind was the use of a two part epoxy. The stuff I used is called POXIPOL but any two part epoxy might work just as good.
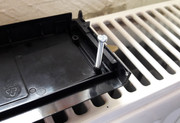
I cut some pieces from an old credit card and I made a formwork to try and mimic the shape of a regular AGP slot.


Next I prepared the two part epoxy and I put the correct amount to fill the gaps. After I put the epoxy, I used small bits of credit card to squeeze out the excess and also stabilize the adhesive.

The operation was a complete success from the get go.
A few hours later I removed the formwork and I was greeted by a lovely sight.

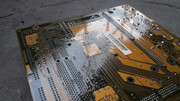
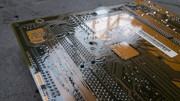
I was so captured by the problem of the AGP slot that I didn't even bother to clean the motherboard before I got to work.
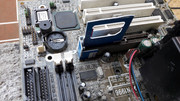
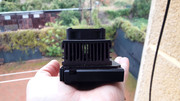
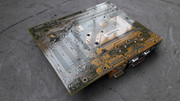
While the epoxy was left to dry a few hours more, I tackled the CPU which was destined to receive the full treatment that I am capable at this date.
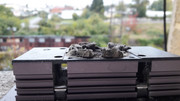
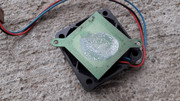
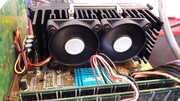
Like the motherboard, the CPU was also very dirty. The combo was a match made in heaven. Equally dirty but dirty in a different way. The motherboard was covered by a fine dust and the CPU was clogged with dust and some type of hair.
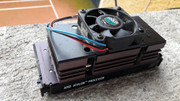

A dust cake of perfect shape.
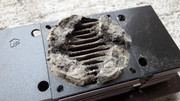
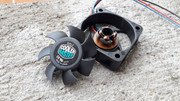
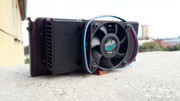
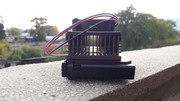
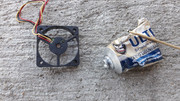
The poor cooling fan. Not a Cooler Master anymore. An asthmatic cooler at best.
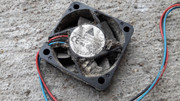
While I looked at this kit, I hoped that it will still be alive and kicking as I never powered it up before I started working on it.
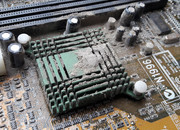
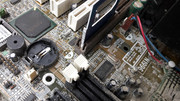
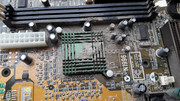
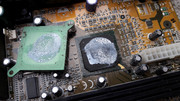
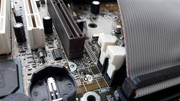
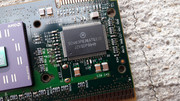
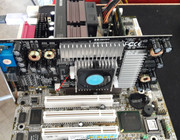
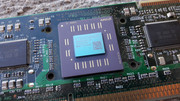
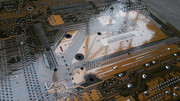
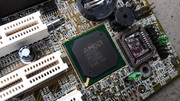
The NB was still covered in TIM. A sign that maybe the motherboard has survived this ordeal as the moment of pressing the POWER button was still far away.
I rolled up my sleeves and I got to work. Nothing was left to chance. Broken bits of plastic have been glued back. Missing bits have been scavenged from donor parts and made to fit. The results have been decent in my opinion.
A sign of things to come.
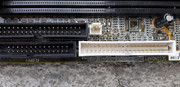
Tests have been made to ensure that the fix was viable. In regard to the broken side tabs on IDE and FDD ports due to the pulling of the cables when the PC has been taken apart, I have a couple of solution besides gluing back the missing bits. One is a complete change of the plastic socket with a new one after the old one was heated up a little with a hot air station set on a low temperature and removed. Steps to protect the surrounding area must the taken. The second solution is the trimming of the sides with a fine blade so that they look the same.
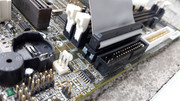
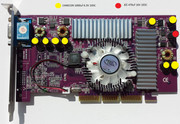
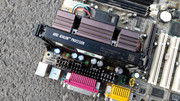
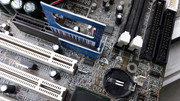
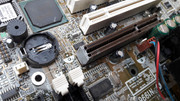
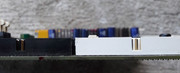
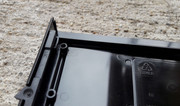
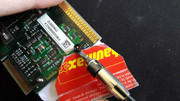
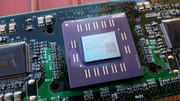
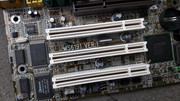
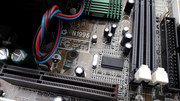
I am sure that you have observed that the AGP port is brown and the epoxy is grey. To cover the grey epoxy I used a combination of red, black and light brown markers. While I wasn't able to match the color exactly, one thing was obvious: this fix was just what was needed in this case.
Before I used the markers to cover the grey epoxy I took my sweet time to trim the excess epoxy and give the repaired area the best look it could possibly have, without compromising the strength of the repair.
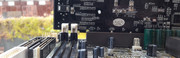
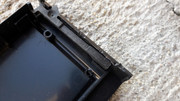
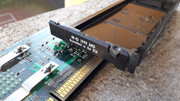
In the pictures we can see why the edge of the AGP slot tore off. Some motherboards of that era, had, on some slots, be it ISA, PCI or AGP, a small bit of metal in the shape of the letter "U" that acted as a protection against damaging the slot while the card was taken out. This measure was just plain old stupid in my opinion as it did more bad than good. That metal "clip" also had a couple of hooks that dug into the plastic, the double scars on the slot indicate this. So when the card was taken out by force this translated in the damage that we can see.
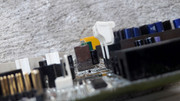
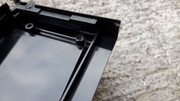
I was lucky when I judged the thickness of the epoxy as there is a very small gap between the video card and the edge of the slot. Ideally the gap would've had to be a smidgen bigger but I left it as is. More strength.
This is what I meant by decent results. Gluing broken stuff is not an exact science.
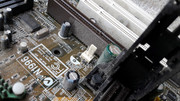
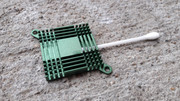
Minor scratches. To check if there are cut traces I use a magnifying glass. If I have doubts, I use some IPA 99% on the scratches and I check again. The liquid fills the gaps and gives a better look at the damage. Think of when you polish a scratch in the paint of a car. By polishing, you change the way light falls on the scratch.
Dull looking ports.
Let's return to the matter of the CPU which was destined to receive THE TREATMENT!
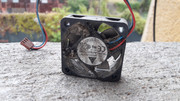
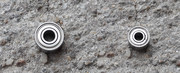
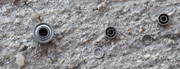
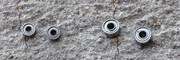
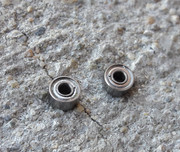
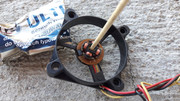
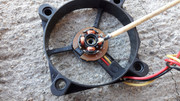
The cooling fan was taken apart. The ball bearing was cleaned and greased. Servicing ball bearings is a hit and miss situation but I do it regardless. Opening them means damaging the dust cover a little but I flip them when I put them back so that no dirt will get inside.


Looking good!
To make the plastic case of the CPU look better, I applied some aluminum tape for protection and I used a lighter to soften the edges of the scratches. I took great precautions regarding the time the flame spent on the plastic. The results have been very good. The marks will remain but they look better than before.

Nothing was left to chance.
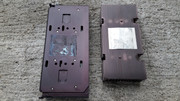
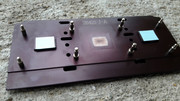
To open up the CPU cartridge I used a tried and true method that I presented many years ago.
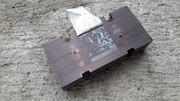
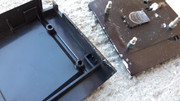
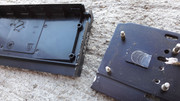
As it is always the case, one edge of the CPU heat plate is harder to remove. In some instances this results with a broken bit of plastic on the plastic case. This happened here too. The fix is to use some superglue.
I used a screw to hold the broken bit in place while the glue hardened.
I used a small drill and by twisting it using my hand, I enlarged the hole so that the plastic case will be easier to remove in the future. Alternatively you can use a fine round file.

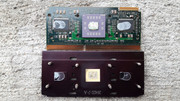
Naked.
The "glue" job.
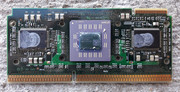
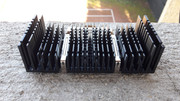
The CPU PCB, plastic case, heat plate and heatsink have been thoroughly cleaned.

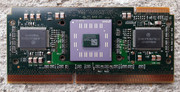
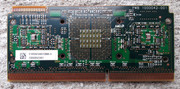
The sloppy applied TIM on the cache chips has been replaced with Arctic thermal pad that was custom fitted. I used a small metal cylinder to flatten and create the perfect custom width of thermal pad. Each PCB is different. I started doing this a while back. After each pass with the metal cylinder I check the gaps between the heat plate and the cache chips and not mention the all important CPU die. I repeat this until I get perfect results. Also I keep an eye out for PCB warping by checking the alignment of the edge connector of the CPU. The excess thermal pad is trimmed with a small blade.

After some work, the results speak for themselves.

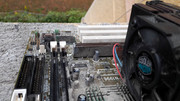
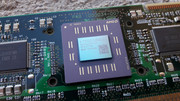
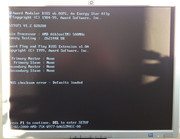
All this work and no test can make a man loose his temper. So, after restoring the CPU, a motherboard test was also necessary to establish if the combo was still among the living.
Would you look at that!
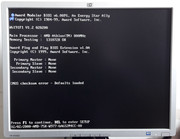
To my joy both the motherboard and the CPU were still alive and kicking!
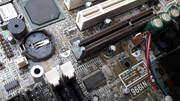
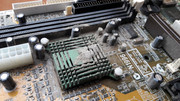
The original push-pins from the NB have been replaced with identical ones that were better in the sense that they stayed in the PCB holes not like the original ones that would just pop out unexpected. You really do not wan this to happen.

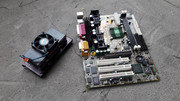
About the same time I was having fun with the MSI MS-6191 and the 800MHz beast,I also acquired a 500MHz slot A CPU. So as these were fit to each other like peas in a pod, I also decided to include it in this episode.
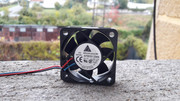
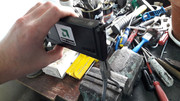
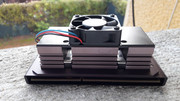
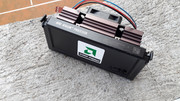
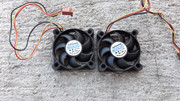
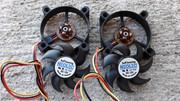
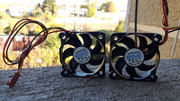
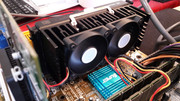
More "skull cracking" ensued. The CPU model was AMD-K7500MTR51B C. It sported a dual FAN setup and underwent the same treatment like the 800MHz CPU got.
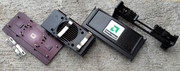
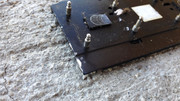
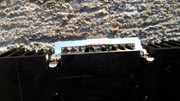
The plastic case was damaged as the ape that removed it from the slot used a screwdriver. Thankfully the PCB wasn't affected.
The job of separating the plastic case from the CPU was as easy as it can be as the stubborn bit was already torn. More gluing was in order. Like glue BOSS!!!
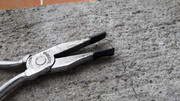
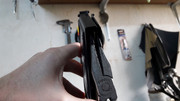
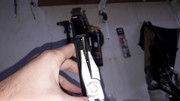
Removing the broken piece was hard. Initially I tried a flat screwdriver and a credit card piece to try an separate them. This didn't work, so I resorted to a pair of fine pliers.
The PCB was a few millimeters away from disaster.
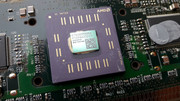
500! BABY! The OG AMD Athlon!

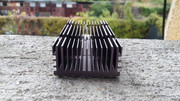
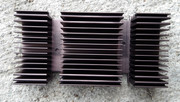
The heatsink was washed and some rust was eliminated.
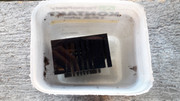
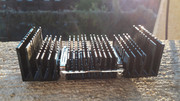
IPA 99%!

Done!

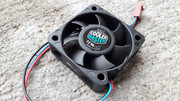
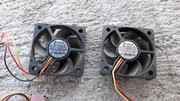
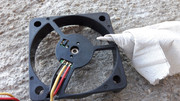
The Neolec fans were restored.
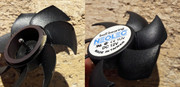
While I was cleaning them, I dropped one of the propellers and one blade broke off. Bummer! No matter as I managed to glue it back and it was as good as new. Even at full rpms there was no vibration. Nice! This stuff usually doesn't work but hey I am not complaining!

Just a regular day at the office.

The sleeve bearings were polished using a bamboo stick and some polishing paste. They were cleaned with IPA 99% after.

Ready to rumble in the jungle!

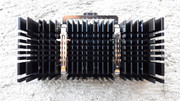

Black paint was used to cover the scars in the metal.
As expected, the CPU ran fine. No stress here. From all of the slot A CPUs that I have, only one is not working. A 750MHz model that looks like a tank has driven over it. These classic Athlon CPUs are hardcore and they can take some abuse without blinking and eye.
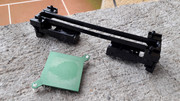
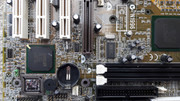
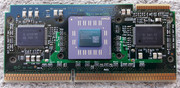
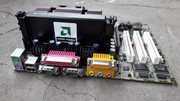
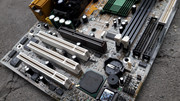
After I finished the 500MHz Athlon, I went on to restore the motherboard which ended looking as good if not better than it was new.
Glass!

No doubt about it. This motherboard is a looker alright!
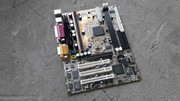
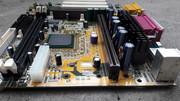


A small touch up and she's done and done!

From lost to found and loved.

This adventure reminded me of my first slot A motherboard, a PC CHIPS/PcCHIPS/PC-CHIPS M800LMR V1.3A and the four CPU I bought with it. That was the spark that ignited my passion for Slot A.
Now at the end of this episode, I can safely say that I have saved a fine combo from the jaws of the crusher. The fixes weren't something exotic or difficult. This stands as a testimony that simple things correctly applied can solve many problems as long as you are willing to try. There is no harm in trying. Even in failure there is much to be learned.
gallery: https://postimg.cc/gallery/NytC52G
More later.