VOGONS


Reply 720 of 844, by Robert B

User metadata
Rank Oldbie
Rank
Oldbie

Well, I've done my share of straightening pins and I'll straighten anyone on the right path to glory no matter the odds of success!!! 😁 Failure is not an option! 😁

Guys and gals, I've been away from this thread far too long but that doesn't mean that I've been slacking! 😁 NO SIR! 😁 NO REST FOR THE WICKED!!!

Spiller feat. Sophie Ellis Bextor - Groovejet

PRW-2021-073.jpg PRW-2021-074.jpg PRW-2021-075.jpg PRW-2021-076.jpg PRW-2021-077.jpg PRW-2021-078.jpg PRW-2021-079.jpg PRW-2021-080.jpg PRW-2021-081.jpg PRW-2021-082.jpg PRW-2021-083.jpg PRW-2021-084.jpg PRW-2021-085.jpg PRW-2021-086.jpg PRW-2021-087.jpg PRW-2021-088.jpg PRW-2021-089.jpg PRW-2021-090.jpg PRW-2021-091.jpg PRW-2021-092.jpg PRW-2021-093.jpg PRW-2021-094.jpg PRW-2021-095.jpg PRW-2021-096.jpg PRW-2021-097.jpg PRW-2021-098.jpg PRW-2021-099.jpg PRW-2021-101.jpg

More later? I ask? Well? What do you think?!?!? 😀

Reply 721 of 844, by Doornkaat

User metadata
Rank l33t
Rank
l33t
Robert B wrote on 2021-07-10, 12:29:

More later? I ask? Well? What do you think?!?!? 😀

Yes

Attachments

  • 1502951253971.jpg
    Filename
    1502951253971.jpg
    File size
    21.45 KiB
    Views
    1517 views
    File license
    Public domain

Reply 722 of 844, by Robert B

User metadata
Rank Oldbie
Rank
Oldbie

Thank You Doornkaat! Much appreciated! 😀

If that is Plastic Man, back in the '90s or so, after we got cable TV, and the communist regime was done for (1989), I watched Cartoon Network for 8 hours straight, I was 12 or so, it was like some sort of vengeance for all those years that were stolen for us. Plastic Man was a constant of those days ... such "naive" times, ... time is so unforgiving ...

Lana Del Rey - Summertime Sadness

More later. 4 sure! 😀

Reply 723 of 844, by Robert B

User metadata
Rank Oldbie
Rank
Oldbie

Back in saddle! Shakedown - At Night (Kid Creme Funksta mix)

Yamaha CRW8824E - The FANtastic ODD

What if I told you that an Optical Disk Drive that had an active cooling fan existed? For sure, some of you might say that I'm off the rails but I'm really speaking the truth. The people from Yamaha did this back in the day. Meet the Yamaha CRW8824E CD Writer unit, a marvelous piece of tech, a treat to work on.

I found this ODD quite recently. My eyes popped out and I grabbed the beauty from the bottom of the cardboard box where it sat silently. Upon closer inspection I found out that it is the IDE variant. Fact mentioned clearly on the back of the unit by a nice glossy black sticker.

This puppy oozed quality and immediately made me think if it really was profitable to manufacture such a nice unit. Who knows?

YMH-CRW8824-01.jpg

TAKE ME HOME! And take it I DID! Check out the miniature fan on the back. Something out of the ordinary for sure, at least for me. It never ceases to amaze me to see the evolution of tech from the early '90s to the late 2000s. I'm always caught off guard by what I find at the flea market, stuff that I never even knew existed. For instance, last Sunday I found an Intel RC440BX, the 3PCI 1 ISA version, damn I like that board. It begs for a nice V2 SLI action in a small unassuming case.

YMH-CRW8824-02.jpg

I asked politely the ODD to stick out its tongue to see if it was healthy or not. All was ok. Stuff that can be sorted in a blink of an eye.

YMH-CRW8824-03.jpg YMH-CRW8824-04.jpg YMH-CRW8824-05.jpg

To open the unit, you first have to remove two sets of screws on the back. One set holds the metal case, top and bottom, together and the second set holds the PCB to the bottom metal plate. In a normal unit the PCB is held by a set of plastic clips. The Yamaha people took this to the extreme, screws and a PCB that had to be warped a little to be taken out of the fixing slots in the black plastic frame from inside.

The bottom metal plate is made from high quality metal and it is quite heavy and thick. Notice the metal slots that act as vents to get air inside the unit or to equalize the pressure inside when a disk is spinning inside. I don't know the actual function of these slots and I just assume their role.

YMH-CRW8824-06.jpg

Boys we are IN! Yamaha YX581.

YMH-CRW8824-07.jpg YMH-CRW8824-08.jpg

To remove the front bezel (the tray must be ejected) as there weren't any clips visible on the outside, after I removed the bottom metal plate I tried to unclip two white plastic retainers that were present on the inside but that proved difficult, so I backed off and tried to find an alternative.

YMH-CRW8824-09.jpg

I went on to remove the top metal shroud and I was greeted by another "quirk". On a "normal" read low cost unit, the top metal shroud comes off quite easily after you remove the screws, on the Yamaha you also have to unclip two black plastic clips on the sides.

YMH-CRW8824-10.jpg YMH-CRW8824-11.jpg

Once I was inside I found the solution to the removal of the front bezel. Just two elegant plastic clips on the sides. Frigging slick I must say.

YMH-CRW8824-12.jpg YMH-CRW8824-13.jpg YMH-CRW8824-14.jpg YMH-CRW8824-15.jpg

When I remove any part from anything that I want to clean or restore I always use a marker to pinpoint the exact position from where it came. A trivial aspect for some, paramount for me. What is left for me to do is to also put the same screws in the same exact orientation and position too, but I'm not there yet. 😁

YMH-CRW8824-16.jpg

To remove the tray you must lift a small plastic clip. Be gentle. You really don't want to break it off. Unless you want some UT Ripper action when you eject a disk.

YMH-CRW8824-17.jpg

Check out the inside of the unit. No rubber belt in sight, just sprockets everywhere. I LIKE IT!!! RoboCop - I Like It

YMH-CRW8824-18.jpg

This must be the most beautiful laser head assembly that I saw to date.

YMH-CRW8824-19.jpg

Sprockets everywhere.

YMH-CRW8824-20.jpg

I must say that I am a FAN of your work. Do tell! 😁 SHICOH ICFAN 2510-5L DC 5V 0.09A. A 2.5cm mini precision cooling fan. KAWAII!

YMH-CRW8824-21.jpg

Always take pictures of every cable, connection or any other detail as you never know when you might need it.

YMH-CRW8824-22.jpg

The PCB in al its glory. Look at the IC density on square cm. Damn!

YMH-CRW8824-23.jpg YMH-CRW8824-24.jpg

While I was taking apart the unit, after I removed the ribbon cable from the PCB, when I flipped the black plastic frame I was amazed to see that the laser head moved smoothly on the rails just from gravity alone like it was on ice. This is the smoothest action I registered after I worked on 25+ ODDs over the years.

Such a nice unit. All ribbon cables beautifully routed and held down with tape or even small plastic removable clips. Damn!

YMH-CRW8824-25.jpg

The fan was a little dusty and at first I tried to clean it without taking it apart but that was a solid NO GO.

YMH-CRW8824-26.jpg YMH-CRW8824-27.jpg YMH-CRW8824-28.jpg YMH-CRW8824-29.jpg

A closer inspection of the front bezel was a confirmation of the fact the the plastic retainers weren't the good route to remove the bezel from the unit. These retainers just hold a reinforcing metal plate for the buttons and LED lenses. Notice the thickness of the metal. On a normal unit, you won't usually find LED lenses, just tiny holes, and the buttons aren't held by a reinforcing plate, just a small plastic strip that either is glued or held by melted plastic tabs.

YMH-CRW8824-30.jpg YMH-CRW8824-31.jpg

I dismantled the fan as I also didn't like the sound it made. I cleaned it with small paint brushes, cotton sticks and IPA 99%. The sticker received new 0.2mm double sided tape. No matter the size, all details are important.

YMH-CRW8824-32.jpg YMH-CRW8824-33.jpg YMH-CRW8824-34.jpg YMH-CRW8824-35.jpg YMH-CRW8824-36.jpg YMH-CRW8824-37.jpg

After I worked on the small bits and pieces and I saw that much of the original grease was still in great shape and the unit felt solid, I decided not to take it apart entirely as I wasn't going to get more out of this. If the unit would've been really dirty I would've made the choice to dismantle it to the last nut and bolt but since it wasn't the case, I applied the KISS principle. (Keep It Simple Stupid). The inside of the unit was just tidied up using cotton sticks, microfiber cloths and IPA 99%. I didn't go overboard.

YMH-CRW8824-38.jpg

The lens was gently cleaned with IPA 99% and a microfiber cloth. I applied minute pressure and with a couple of motions I removed a thin layer of dust. This operation is always risky but I do it regardless. I do not trust high spinning cleaning disks. Had one back in the day. It made quite a racket in my 16X LG CD-ROM.

YMH-CRW8824-39.jpg

The laser head cradle is held by tiny metal strips and screws instead of plastic clips. Neat stuff. Excess engineering.

YMH-CRW8824-40.jpg

Looking great.

YMH-CRW8824-41.jpg YMH-CRW8824-42.jpg

Small details that you usually do not see on a regular ODD.

YMH-CRW8824-43.jpg

Its mechanical! I LOVE IT!

YMH-CRW8824-44.jpg

The PCB is coated in a protective lacquer, that it is easily removed by IPA 99% and leaves streaks that are quite hard to get rid of. This stuff is not like that found on motherboards, so, after a test on a small area using cotton sticks and IPA 99% I decided to clean the PCB only using a small brush made from animal hairs and I limited the use of IPA 99% just on the really dirty areas, like the rear connectors and other parts. The results were quite good.

YMH-CRW8824-45.jpg YMH-CRW8824-46.jpg YMH-CRW8824-47.jpg YMH-CRW8824-48.jpg YMH-CRW8824-49.jpg

I cleaned the fan duct well.

YMH-CRW8824-50.jpg YMH-CRW8824-51.jpg

The fan was put back and the wires were carefully routed in the same way they were. Some 0.2 mm double sided tape was required to fix some of the original cloth tape that lost its stickiness.

YMH-CRW8824-52.jpg

The plastic and metal parts were washed with water and dish soap. Some stains that were present on the front bezel have been removed with small amounts of polishing paste and cotton sticks. Some small scratches remained as I didn't want to lose some of the texture that was present on the plastics due to the use of the polishing paste.

YMH-CRW8824-53.jpg YMH-CRW8824-54.jpg YMH-CRW8824-55.jpg YMH-CRW8824-56.jpg YMH-CRW8824-61.jpg

On the road to recovery. The gears, and the laser head rails received a small amount of clear silicone grease. Also the tray rails have been lightly greased.

YMH-CRW8824-57.jpg YMH-CRW8824-58.jpg YMH-CRW8824-59.jpg YMH-CRW8824-60.jpg

DONE!

YMH-CRW8824-62.jpg

If you want to know if I tested the unit before I started the restoration process I must say that I did not. 😁 Why? No reason really. Such a good looking unit can't be dead, right? 😁

One aspect that I forgot to mention is that on the front tray cover there are also vents/tiny slots present, that get fresh air inside the unit. An over the top ODD that is for sure. This unit made my cogs turn every step I took and everywhere I looked I saw attention to detail and craftmanship. I must say that they are really not making them as they used to and this is true for many things not just computer HW.

YMH-CRW8824-63.jpg

NICE!

YMH-CRW8824-64.jpg

The LED action was interesting, to say the least. They even tell you if you have a disk inside. Neat stuff. The LEDs are quite nice and the amount of light they put out is carefully dosed. If you look closely to the PCB you will see that the LEDs have some kind of diffuser in addition to the lenses that are present on the front bezel.

YMH-CRW8824-65.jpg

Enough chit-chat I guess. The unit was running great and at the specified speeds. The scratched CD-ROM was read brilliantly. This unit is @ 100%!

YMH-CRW8824-66.jpg

I praised this unit but I didn't say anything about the all important fan. Is such a fan doing anything? Well, I used a small piece of toilet paper and I saw that some air was moved by it. As to the real benefit of it I really can't say for sure. Maybe it has something to do in regard to the CD writing process where it might reduce the temperature inside the unit, but I have some doubts as some of the hot air from inside of the PC case is sucked inside the ODD via the vents in the bottom metal plate. Maybe the design of this unit was inspired by some car stereos or high end Hi-Fi stuff where cooling might be more important. Who knows?

YMH-CRW8824-67.jpg

Also I must mention an annoying fact. This fan is ON all the time even if you have a CD inside or not. I thought that the fan would kick in only when you use the ODD but NO SIR! It is ON ALL THE TIME. This was quite unexpected and it made me think why this design choice was made. I guess that I will never know.

It isn't loud but it has a higher pitched sound that was noticeable only when I put my ear near the unit. Also the bearing is a little grindy. I guess that much of its life, due to the very low level of wear and tear inside, this ODD just sat unused, with the tiny fan blasting away, doing nothing more than getting dust inside, a real treat to any ODD. Dusty dust dustiner checking out the premises aka all the holes, nooks and crannies.

All of the few shortcomings are only noticeable when you are really close to the unit and if the Yamaha CRW8824E would've been closed inside a case they would go unnoticed.

Now at the end, I must say again, that I really like this ODD and any respectable PC case would be insane not to want this piece of tech inside it. 😁

gallery: https://postimg.cc/gallery/TWTfnZS

More later.

Last edited by Robert B on 2021-08-18, 04:32. Edited 1 time in total.

Reply 724 of 844, by bjwil1991

User metadata
Rank l33t
Rank
l33t

Never seen an optical drive with a fan integrated. Must be the cooling for burning CDs since those things were space heaters back then.

Discord: https://discord.gg/U5dJw7x
Systems from the Compaq Portable 1 to Ryzen 9 5950X
Twitch: https://twitch.tv/retropcuser

Reply 725 of 844, by PC Hoarder Patrol

User metadata
Rank l33t
Rank
l33t

Robert B, nice write-up as always on the Yamaha. Have just done something very similar with a Yamaha CRW6416S, and it's a really quiet & smooth runner.

bjwil1991, fans on drives is certainly not commonplace - the only two I have are both Yamaha SCSI (didn't know their ATAPI drives could have them as well)

Yamaha SCSI CD 01.JPG
Filename
Yamaha SCSI CD 01.JPG
File size
440.22 KiB
Views
1391 views
File license
Fair use/fair dealing exception
Yamaha SCSI CD 02.jpg
Filename
Yamaha SCSI CD 02.jpg
File size
622.87 KiB
Views
1391 views
File license
Fair use/fair dealing exception

Reply 726 of 844, by Robert B

User metadata
Rank Oldbie
Rank
Oldbie

Thanks! 😀 Much appreciated. It feels good to be back and put down some lines of text. I feel refreshed after a pause. 😁

Those YAMAHA units rock! 😀

Next episode will feature a "two headed beast" from 3dfx! 😁 - CJ#1 is DONE!!! Good thing that donor cards are available. 😁 Some of you might remember the dismembered card I found at the flea market. A treasure trove of parts. Even to this day, years after I found it, it still pains me to see it. Regardless, I appreciate the offering from the GODS of HW and I'm sure that parts from it, will live on, completing other 3dfx monsters in need of attention. 😀

PRW-2021-211.jpg

More later.

Reply 729 of 844, by Robert B

User metadata
Rank Oldbie
Rank
Oldbie

Pirupa Party Non Stop

PRW-2021-214.jpg PRW-2021-215.jpg PRW-2021-216.jpg

SOYO SY-D6IBA full PANASONIC FR RECAP! 512MB PC-100 SDRAM, 2x P3 600E SL3H6. 😁 Untested. 😁 Just the way I LIKE IT!!! 😁 57 junk caps sent to the dumpster.

Will it work or I'll be left with a sour taste in my mouth!?

The V5 5500 episode is almost ready for print. 😁

More later.

Reply 731 of 844, by Robert B

User metadata
Rank Oldbie
Rank
Oldbie

Hi pshipkov 😁

Well, first signs aren't too good. It seems that the SOYO SY-D6IBA is damaged.

The board starts on its own while it is connected to power. The PW button terminals get the required voltage but I am unable to use the button to stop or start the board.

I've tried many BIOS versions to no avail.

I tried 3 types of PSUs of different generation. No change.

I read 3 manuals for jumper settings but to no avail. Nothing seems to do anything.

I used all kinds of CPUs but to no avail. I tried one CPU. No change.

I tried many sticks or RAM. No change.

The NB and the SB put just a mild amount of heat so either there is a short on the board or there is an undocumented setting somewhere.

There are no debugging BEEPS. Just silence.

I'll check the clock generator just for kicks. 😁

I know that you like dual CPU boards so I must tell you that in other turn of events, today, among many other things, I found a SUPER P4DCE+ i860 RAMBUS DUAL CPU MONSTER! https://www.supermicro.com/products/motherboa … /860/P4DCE_.cfm 😁 The SUPER is friggin' Huuuuuggggeeee and complete with 4x256MB of Corsair RAMBUS sticks and coolers. I have to test it soon to see if it is ok.

Attachments

  • PRW-2021-218.jpg
    Filename
    PRW-2021-218.jpg
    File size
    1.23 MiB
    Views
    1215 views
    File license
    Fair use/fair dealing exception
  • PRW-2021-217.jpg
    Filename
    PRW-2021-217.jpg
    File size
    1.09 MiB
    Views
    1215 views
    File license
    Fair use/fair dealing exception
Last edited by Robert B on 2021-08-28, 20:24. Edited 1 time in total.

Reply 734 of 844, by Robert B

User metadata
Rank Oldbie
Rank
Oldbie

I need to extend the table a bit to fit the board. 😁 Yep. SM is flea market loot!

I really liked the SOYO. That was also a flea market find. I still haven't given up yet. Maybe I'll sort it out in the end. I have a sneaking suspicion that maybe because I used PANASONIC FR caps all around and those caps are LOW ESR the board doesn't like it. Maybe for the 22uf and 100uf caps I should've used general purpose stuff instead of the better ones. Regardless, on the entire board only one brand was present WENDELL. The two spec sheets I found for the WENDELL caps weren't helpful and not to be trusted either.

Reply 735 of 844, by PC Hoarder Patrol

User metadata
Rank l33t
Rank
l33t
Robert B wrote on 2021-08-28, 22:32:

I need to extend the table a bit to fit the board. 😁 Yep. SM is flea market loot!

I really liked the SOYO. That was also a flea market find. I still haven't given up yet. Maybe I'll sort it out in the end. I have a sneaking suspicion that maybe because I used PANASONIC FR caps all around and those caps are LOW ESR the board doesn't like it. Maybe for the 22uf and 100uf caps I should've used general purpose stuff instead of the better ones. Regardless, on the entire board only one brand was present WENDELL. The two spec sheets I found for the WENDELL caps weren't helpful and not to be trusted either.

Can'r see any obvious series markers in your pic of the removed caps, so maybe have a look thru here for some pointers from the Wendell archive page

https://web.archive.org/web/20010718020850/ht … ontenttable.htm

Reply 736 of 844, by pshipkov

User metadata
Rank Oldbie
Rank
Oldbie

The only electronics flea market in LA that still counts rarely exhibits any such items.
Need to check if it actually survived Covid ...

When have to recap, usually as an extreme measure, i do it in batches.
Swap 1, or 2, or 3 capacitors at once then test.
Often get lucky and things are back on track after very few replacements.

This morning, for example, GeForce2 MX400 PCI was not shining.
Based on a gut feeling, or dumb luck, started swapping the capacitors closest to VRM.
After the first one - lights are on.

retro bits and bytes

Reply 737 of 844, by Robert B

User metadata
Rank Oldbie
Rank
Oldbie
PC Hoarder Patrol wrote on 2021-08-29, 06:57:
Robert B wrote on 2021-08-28, 22:32:

I need to extend the table a bit to fit the board. 😁 Yep. SM is flea market loot!

I really liked the SOYO. That was also a flea market find. I still haven't given up yet. Maybe I'll sort it out in the end. I have a sneaking suspicion that maybe because I used PANASONIC FR caps all around and those caps are LOW ESR the board doesn't like it. Maybe for the 22uf and 100uf caps I should've used general purpose stuff instead of the better ones. Regardless, on the entire board only one brand was present WENDELL. The two spec sheets I found for the WENDELL caps weren't helpful and not to be trusted either.

Can'r see any obvious series markers in your pic of the removed caps, so maybe have a look thru here for some pointers from the Wendell archive page

https://web.archive.org/web/20010718020850/ht … ontenttable.htm

For old caps specs I usually turn to this page: http://www.paullinebarger.net/DS/

On the Wendell caps it is only written VENT 105C nothing else besides the name.

pshipkov wrote on 2021-08-29, 07:08:
The only electronics flea market in LA that still counts rarely exhibits any such items. Need to check if it actually survived C […]
Show full quote

The only electronics flea market in LA that still counts rarely exhibits any such items.
Need to check if it actually survived Covid ...

When have to recap, usually as an extreme measure, i do it in batches.
Swap 1, or 2, or 3 capacitors at once then test.
Often get lucky and things are back on track after very few replacements.

This morning, for example, GeForce2 MX400 PCI was not shining.
Based on a gut feeling, or dumb luck, started swapping the capacitors closest to VRM.
After the first one - lights are on.

Looking back that would've been the right choice but I decided to be "creative". 😁 Only the 1000uf 6.3V caps were bulged. A few of them spilled their stuff on the board and have discolored the eyelets a little but the "damage" was superficial. Now I will never know if the board was dead to begin with or I messed up something. Well, 2 EUROS for the board and 10 EUROS for the caps plus work, at least I'm not pissed for paying too much for it, besides, we all know that experience is priceless. 😁

I wanted that board to last at least 20 years more with top of the line caps. Well ... tomorrow I'll try something as a last resort and if that doesn't work I'll send it to the sector of lost causes aka a few boxes with dead components.

Reply 738 of 844, by Robert B

User metadata
Rank Oldbie
Rank
Oldbie

Space Frog & The Grim Reaper - Follow me (Original)

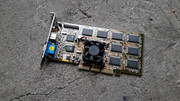
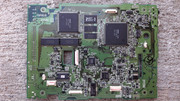
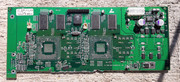
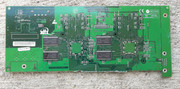
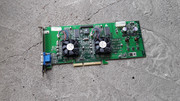
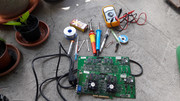
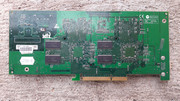
CJ#1 aka Client Job No. 1 - 3dfx Voodoo 5 5500 64MB AGP

Usually I don't take repair jobs from anybody, for various reasons, but as they say, never say never, here I am performing one.

In this instance, this particular card came from my best supplier of retro HW. A contact from the not so distant past, when I used to buy many things from him until I discovered the local flea market. I keep a good relation with this guy and we write to each other on WhatsApp to present what treasures we have found. Each week we have something as a "duel" to see what we got. Lately I started selling him stuff from the flea market that I don't need. It is a WIN WIN situation. He also sells newer stuff and does this on a bigger scale.

In July 2021 I received a picture with a card that looked familiar, as I have one of these beauties, even if it is only @50%, as my card has only one working VSA chip.

I still cherish the card as it means more to me as a physical object that I can touch and feel, than to put it to work. I could send it to be repaired but I won't do it for now. I searched for it for years and when I got it I was struck by its aura and also by it fragility. The first thing that came into my mind when I got my card, was: You're only "human" but I still dig you with or without a shovel. 😁

As soon as I saw the card I knew what it was. The V5 5500, came from a scrap lot and had some damage. It had been powered but it didn't output any image on the screen. The only thing that gave a hint that the card was alive were the leds on the keyboard lighting up at startup.

I was asked to repair the card and I said that I need clear pictures and a day to think it over.

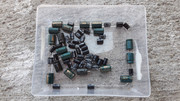
The first thing I did was to see if I had all of the required components, ceramic caps, capacitors, SMD power inductors, etc.

I had a dismembered V5 5500 AGP that a few years back, I found at the flea market and this was the starting point of this adventure. Also I had another damaged card that provided the required power inductors.

As we all know, it takes a VooDoo to repair a VooDoo ( not really 😁 ) and an nVidia Geforce 4 Ti 4200 to repair a VooDoo ( not really 😁 ). So I was set on the right path and I accepted the job. You will see later that I also had to do an operation that I never did before as the card had a little more damage than just a few ICs flying off the board.

CJ-1-V5-5500-01.jpg

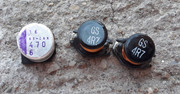
I cross referenced the card I received with mine and I found out that I had all I needed except the SMD power inductors marked with 4.7 aka 4.7uH.

CJ-1-V5-5500-02.jpg

I searched through my pile of dead cards and I found a Leadtek WinFast Geforce 4 Ti 4200 64MB AGP A250 LE that had two matching SMD power inductors marked GS 4R7. I searched the Internet and I found out that they are equivalent with the ones marked 4.7. I asked the guy that sent the card if he is okay with this and he laughed at me and he told me to repair it the best way I could as this was more than he hoped to get out of the whole situation.

CJ-1-V5-5500-03.jpg

Get ready! Set! GO!

CJ-1-V5-5500-04.jpg

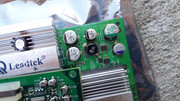
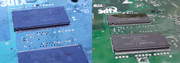
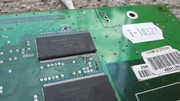
One of the details that give a V5 5500 its originality are the big OS-CON SMD caps near the auxiliary power plug. I removed the needed capacitor from the donor card and I also removed the SMD power inductors from the Leadtek card.

CJ-1-V5-5500-05.jpg

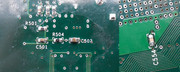
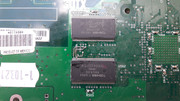
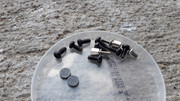
In total, the card was missing ceramic caps at C501, C502, C554, a resistor at R504, an SMD OS-CON 470uf 6V at C90 and two SMD power inductor at L20 and L21. Not too bad, taking into consideration from where it came.

The card was looking pretty well, and the lacquer was shiny, a sign that not long ago it sat protected inside a case, only to be taken out and thrown into a pile by careless individuals.

The repair operation went forward. Each missing part was removed with great care. The donor card was very cooperative and I was also in great spirits as everything went smoothly, like a COPY PASTE procedure. I was ZEN and I don't mean Ryzen. 😁 It was like the card wanted me to repair it and it guided me each step I took.

CJ-1-V5-5500-06.jpg CJ-1-V5-5500-07.jpg

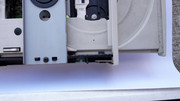
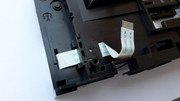
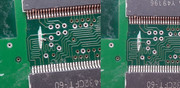
After a close inspection of the card, I found out that I had more work to do, besides soldering the missing parts.

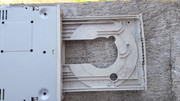
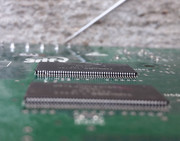
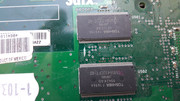
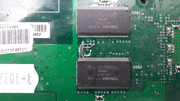
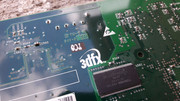
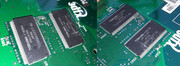
The card received a blow that bent a couple of pins on one of the memory chips on the back, but this was not the worst problem, as the object that bent those pins, also cut a few traces that went to the neighbouring memory chip.

CJ-1-V5-5500-08.jpg

At first I tried to rearrange the tiny copper traces that were visible and I thought that I might rebuild them using solder. This was my first choice but later you will see that I gave up on this idea.

CJ-1-V5-5500-09.jpg

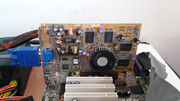
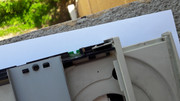
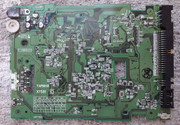
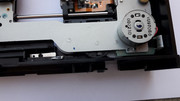
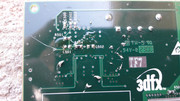
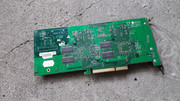
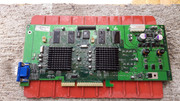
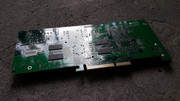
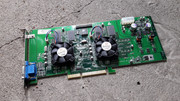
Here it is the back of the card I received.

CJ-1-V5-5500-10.jpg CJ-1-V5-5500-11.jpg CJ-1-V5-5500-12.jpg

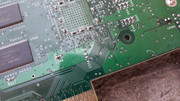
Even if the lacquer was shiny it didn't mean that the card was by any means clean.

CJ-1-V5-5500-13.jpg

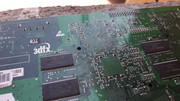
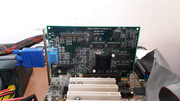
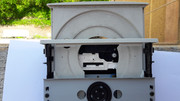
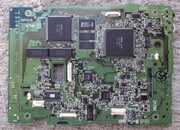
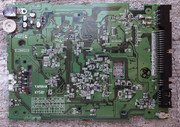
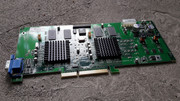
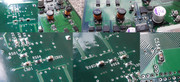
And now lets see the face of this beauty.

CJ-1-V5-5500-14.jpg

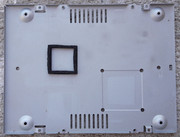
The missing components on the front of the card.

CJ-1-V5-5500-15.jpg CJ-1-V5-5500-16.jpg CJ-1-V5-5500-17.jpg

Using a fine needle I gently checked and I also separated more the bent pins so that no contact was ever possible. As they were bent inside any chance of making them to look better flew out of the window. The only way to do this professionally would've been to remove the chip and replace it with the same exact thing, date code and all. Good luck finding one. So it was left as it was.

I must say that during the entire operation I never ever thought that the card wasn't alive. I was like someone who just has to adjust some things and let the card do the rest.

CJ-1-V5-5500-18.jpg CJ-1-V5-5500-19.jpg

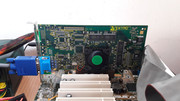
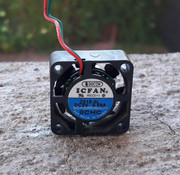
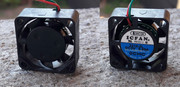
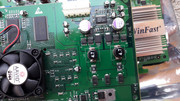
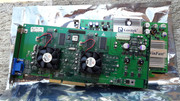
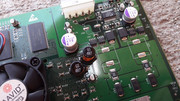
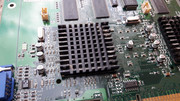
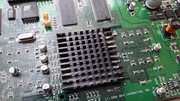
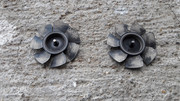
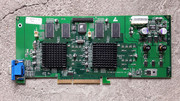
Looking good. This example of a V5 5500 was oozing personality from all its pores. It had the heatsinks glued almost perfect. Flat, correctly centered with the thermal glue nicely spread albeit a little too thick as it is always the case. The only thing that bothered me (and maybe just me) were the slightly mismatched cooling fans. 😁

I already knew how it will look once my job was done. I visualized this since the beginning.

CJ-1-V5-5500-20.jpg

The donor card was of great help and it also made me feel at peace that the originality would be still intact once I'll place down the soldering iron.

CJ-1-V5-5500-21.jpg CJ-1-V5-5500-22.jpg

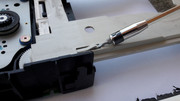
While I went on performing the various tasks required to revive this relic of times gone by, my mind was also searching for a solution to the cut traces. I knew that bridging the copper traces with solder wasn't my best solution. The reasons were a few and among them the most important were: the durability of the repair and not knowing if the cut traces would make contact with other traces or layers of copper beneath as I had no way to check this and I also didn't want to dig deeper into the crater.

So, I was in for a trace repair using jumper wires. I chose a wire that was solid and it was the thickness I deemed optimal as I didn't want this thing flapping around. I wanted to buy a dedicated wire for trace repair but I didn't find anything localy. Also this was my first ever trace repair and I wanted it to be a success. I watched how trace repair is done professionally but I lack the required tools to do it. That stuff is for pros who do this everyday not for someone like me. Option A) a muscle car or Option B) an Italian super car. 😁 Guess what I chose or should I say I had to use whatever was available. 😁

I cleaned the copper wire with sandpaper to remove any coating it might have.

CJ-1-V5-5500-23.jpg

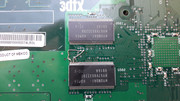
In the end I decided to remove each piece of the cut traces that were visible. Even if I managed to solder the bits that survived, one trace in particular, that snaked through, would've been impossible for me to repair without the correct tools. All in all 3 traces needed repairs.

I had a clean slate to begin with.

CJ-1-V5-5500-24.jpg

As you might've expected, I first tried the proposed repair on the donor card. This was a job that I didn't want to rush no matter what.

CJ-1-V5-5500-25.jpg CJ-1-V5-5500-26.jpg CJ-1-V5-5500-27.jpg

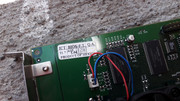
Don't mind the wavy wire, baby steps if you know what I mean. In my mind the procedure was a walk in the park. In reality it was quite fiddly.

And now on the actual thing. The real deal. Before any wire was soldered I filled the crater with a two part epoxy to eliminate any possible contact with some phantom traces/layers even if I knew that none was possible.

CJ-1-V5-5500-28.jpg CJ-1-V5-5500-29.jpg

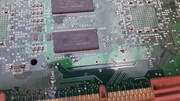
The missing parts have returned to their rightful position.

CJ-1-V5-5500-30.jpg

The wires have been soldered. The shape of the wires wasn't perfect but I was still proud of my work. I wanted to follow the shape of the "lost" traces. One wire in particular went near two eyelets. Don't be fooled by the optical illusion as there is no contact between the exposed wire and the eyelets. Remember, the wire is round and the part that sits close to the eyelets is thinner that the diameter of the wire.

CJ-1-V5-5500-31.jpg

All things considered I liked the results. One step was quite a challenge. Soldering the end of the wires to the tiny legs of the memory chips. I decided not to intervene on the shape of the wires once I soldered them. Remember that the area where I worked was small and the last thing I needed was a damaged memory chip or a torn pad. Sometimes it is better to choose your battles than rush in.

I soldered the OS-CON cap and the SMD power inductors. To solder the SMD power inductors I used a method I saw on YT. I added some solder to one pad on the PCB and while the solder was still liquid by holding the tip of the soldering iron on the pad, I slided in the power inductor gently. Then I removed the soldering iron and I waited for the solder to cool. Soldering the other end was easy afterwards.

CJ-1-V5-5500-32.jpg

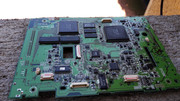
So there you have it. ALL DONE!

CJ-1-V5-5500-33.jpg CJ-1-V5-5500-34.jpg

Using basic tools and my common sense, plus experience, I was ready to wake up the two headed monster. Rise and shine you wonderful card.

CJ-1-V5-5500-35.jpg CJ-1-V5-5500-36.jpg

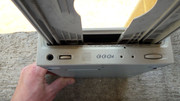
Well?!?!?!?!?! Well what? You mean the card? A! Yep! It's firing on all its cylinders. 😁

CJ-1-V5-5500-37.jpg CJ-1-V5-5500-38.jpg

After testing it was obvious that I had a winner in my hands.

The card ran solid and never missed one beat. I wished that it was mine but ever since I accepted to repair it I knew that I will have to let it go once I was done with it.

CJ-1-V5-5500-39.jpg CJ-1-V5-5500-40.jpg

For the extra comfort and to be 1000000% sure, I also fixed the jumper wires with some transparent two part epoxy. If I would've had some green epoxy/solder mask the repair would've looked even better.

CJ-1-V5-5500-41.jpg

After my job was done and after I informed the owner that the card is @100% I asked him if he would like me to restore it. The answer was swift and I guess that you know what comes next. 😁

Nothing was left to chance. Every nook and cranny was inspected and cleaned.

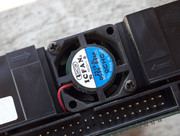
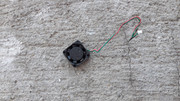
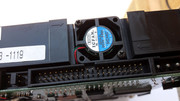
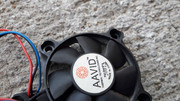
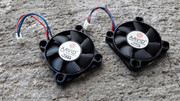
The fans were dusty and the bearings were grindy.

CJ-1-V5-5500-42.jpg

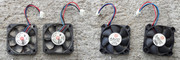
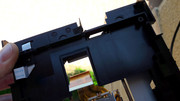
This card wasn't handled with gloves. The frames of the cooling fans have managed to mitigate some of the damage.

CJ-1-V5-5500-43.jpg

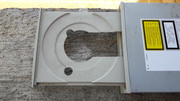
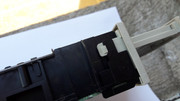
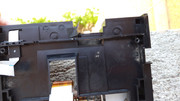
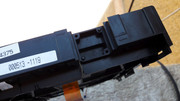
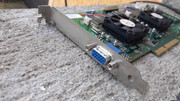
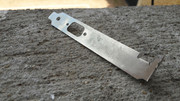
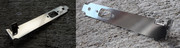
The bracket had seen better days.

CJ-1-V5-5500-44.jpg CJ-1-V5-5500-45.jpg

IPA 99% FTW!!!

CJ-1-V5-5500-46.jpg CJ-1-V5-5500-47.jpg CJ-1-V5-5500-48.jpg CJ-1-V5-5500-49.jpg CJ-1-V5-5500-50.jpg

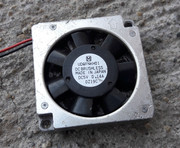
Extra attention was given to the cooling fans, a hallmark of a V5 5500. I used some oil and some grease and I was able to make them more quiet. They turned out great and after treatment I would say that they are at 85-90% of how they were when they were new, in regard to their functionality. The bearings are still a little grindy but very little. A major improvement than before. This was quite unexpected as this operation is a hit and miss affair and you don't know what you will get in the end.

CJ-1-V5-5500-51.jpg CJ-1-V5-5500-52.jpg CJ-1-V5-5500-53.jpg CJ-1-V5-5500-54.jpg

Uhhhh shiny!!!

CJ-1-V5-5500-55.jpg

Attention to detail.

CJ-1-V5-5500-56.jpg

SHOW ME WHAT YOU GOT!

CJ-1-V5-5500-57.jpg CJ-1-V5-5500-58.jpg CJ-1-V5-5500-59.jpg CJ-1-V5-5500-60.jpg

DONE & DONE!

CJ-1-V5-5500-61.jpg CJ-1-V5-5500-62.jpg CJ-1-V5-5500-63.jpg CJ-1-V5-5500-64.jpg CJ-1-V5-5500-65.jpg

After I was done I knew that it had been a very special day. Not every day you get to work on a rare card and not every day everything goes without a hitch. Even the flowers on my window smiled at me. 😀

CJ-1-V5-5500-66.jpg

Before I sent the card I tested it one more time and after it got the green light it was time to let it go.
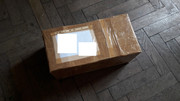
CJ-1-V5-5500-68.jpg

SHIP IT!

I put the card in a box that was way too big and I sent it on its way towards the happy owner.

CJ-1-V5-5500-69.jpg

Now, at the end I must say that it was an absolute treat to work on this puppy and I'm happy that I got to do it. Also, many things were learned especially in regard to fine repairs using just basic tools. If I were to do something differently I would use a wire that would be just a fraction thinner but I do not regret using something that it is above what it was required. What I do must be solid in more ways than one this is my motto ever since I was a kid.

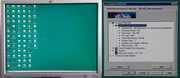
To wrap this up. The card arrived at the very happy guy and he played NFS II SE on it plus many other games. In return, I didn't want any money for this job as I said to him that this is a way to repay him for all the great parts that got into my collection even if I had to pay for them.

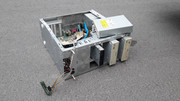
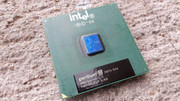
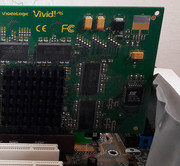
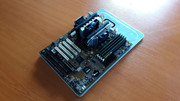
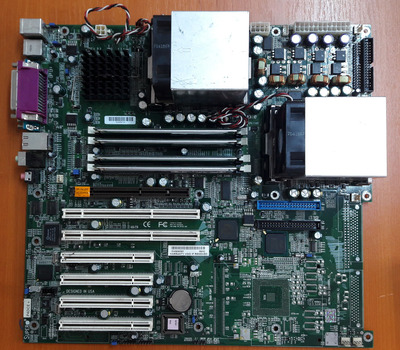
Because he wanted to send me something I accepted to receive an Abit KR7A-Raid motherboard that had some problems but when I got the package I was struck by its contents. Inside were also a couple of Celeron Tualatin CPUs, a Diamond Fire 1k Pro card and the icing on the cake the card for the next episode. 😁 Not just any other card, you will see what I'm talking about in the next episode.

gallery: https://postimg.cc/gallery/rT2X3jf

More later.