Reply 340 of 844, by Robert B

Rank
Oldbie
- Rank
- Oldbie
NEXT WEEK: Creative, the manufacturer with unmistakeble labels 😀 CT! CT! CT!

More later. 😁 😁 😁
NEXT WEEK: Creative, the manufacturer with unmistakeble labels 😀 CT! CT! CT!
More later. 😁 😁 😁
Daso - Meine https://www.youtube.com/watch?v=h7qTI6Njp9g
RAMBUS - 😁 - MINI-episode.
Last Sunday I went to the flea market because I didnt have anything else to do.
It was almost closing time but even then, you could find something: a socket 7 motherboard with an intel chipset, some socket A stuff, Matrox cards, HDDs, various CPUs, graphic cards in various states of decay etc. Because my "HW hunger" isnt as strong as in the past, I dont buy each piece I find. I've become a lot more selective.
I found an acquaintance and I looked at what he had to offer.
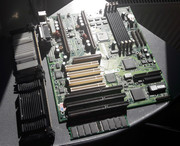
I browsed some 20 CPUs and in the end I stopped at two Pentium 4 CPUs. Why P4? Because my i850 RAMBUS wanted the fastest it can take.
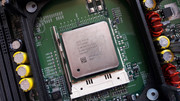
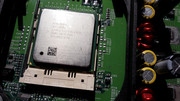
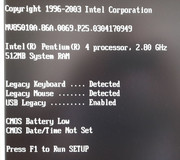
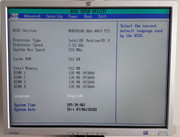
So, I found a 2.80GHz Northwood, the maximum the revision of my Intel Desktop Board D850EMV2 motherboard supports. And to top it off, I also found a 2.53GHz Northwood. I wanted the 2.80GHz P4 eversince I knew that the RAMBUS kit I bought had a 2.26GHz CPU.
With the 2.80GHz P4 I put to rest a few of the many demons that haunt me. The other demons want 2GB of PC1066 RIMM or at least PC800-40 😁
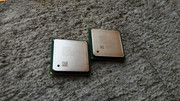
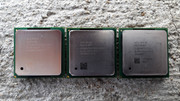
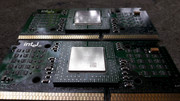
For my RAMBUS system I have the following CPUs:
Pentium 4 SL683 2.26GHz 533/512 - came with the kit
Pentium 4 SL6EG 2.53GHz 533/512
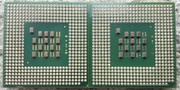
Pentium 4 SL6QB 2.80GHz 533/512
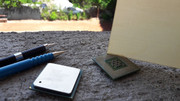
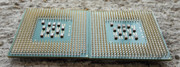
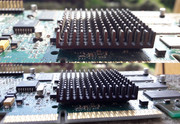
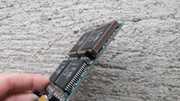
The 2.53GHz and 2.80GHz CPUs had many bent pins. Surprisingly, I managed to straighten all of them and I even came close to the ideal ZERO INSERTION FORCE 😁. Please dont ask how many hours it took 😁 I wasnt going to dump the 2.80 CPU as I really wanted one.
I've never straightened the pins on a P4 - s478. The pins were so soft that they got bent just by looking at them. They are more densely packed that other CPUs and more difficult to put into the correct position . I used credit cards and a thin piece of textolite. I had to use a 0.5mm mechanical pen as I didnt have something else. The tip was way bigger than the pins. Even so, my sensitive fingers helped me and I finished the job. I was surprised that no pin broke off as they look fragile.
Picture time.
gallery: https://postimg.cc/gallery/218ndd6zg/
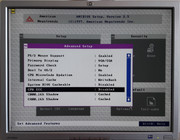
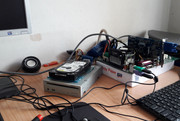
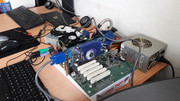
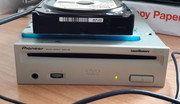
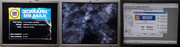
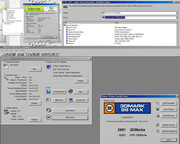
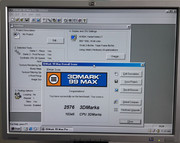
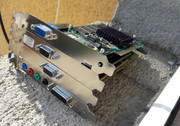
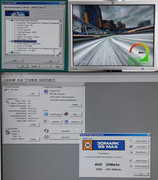
I didnt stop at straightening the pins and I took out of storage the cleaned Intel Dektop Board D850EMV2 motherboard and I tested the rescued CPUs. SUCCESS! All systems are GO!. Windows XP time. BIOS - DEFAULTS - NO TWEAKS - GF3 Ti200 Hercules 3D Prophet III.
Pentium 4 SL6EG 2.53GHz
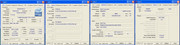
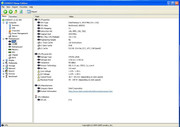
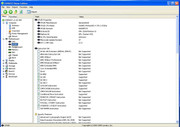
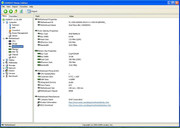


gallery: https://postimg.cc/gallery/l6bmpiu4/
Pentium 4 SL6QB 2.80GHz


gallery: https://postimg.cc/gallery/mbo2dva4/
All is well that ends well.
More later. 😁
Creative, the manufacturer with unmistakeble labels CT! CT! CT!
Ahhh CREATIVE. Only hearing this name makes me recall many nice components that I couldnt afford back in the day. Annihilators, Blasters and such.
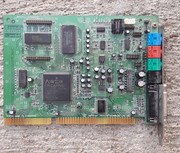
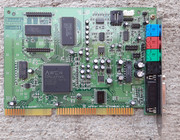
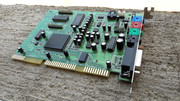
My first contact with CREATIVE came in 1999 and it took the shape of an integrated sound card Creative AUDIO PCI 128 - Creative® ES1373. Nothing fancy. I never had a Sound Blaster 16/32 or AWE.
My first good sound card was a Creative Sound Blaster Live! 5.1 Digital bulk. I was in extasy after I installed the Demo Audio stuff from the setup CD. Good times! This was roughly around ~2002 when I bought the 1.2GHz Duron / SiS 735 which was soon replaced by an Athlon XP 1900+ / KT333.
Only in 2016 I bought another Creative product, a Creative Sound Blaster ZX sound card. (Second Hand)
So, "my history" regarding Creative isnt something to speak about, but I like many Creative products, especially those launched before 2000.
The cards featured in this episode "are pretty common" but I liked to return them to their former glory. All of them were bought from the flea market at very low prices.
Every time I see a label that has a CT model number my pulse spikes. Some time ago I found at the flea market two Creative 3dfx Banshee PCI graphic cards at a very low price as the seller didnt know what they were. Their plain Jane looks helped me to buy them very very very cheap.
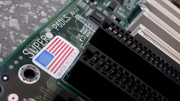
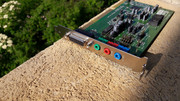
Creative cards are easy to identify. The CT product numbers are visibile, the label are made from quality materials and the Creative logo is usually present on the PCB. When you see the CT letters you know what you have in your hands, no question about it.
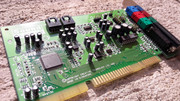
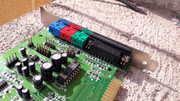
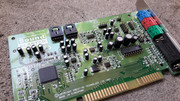
*** Creative Labs Sound Blaster CT4170 ISA
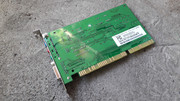
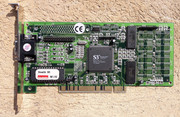
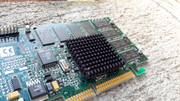
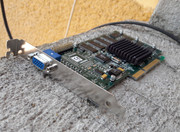
*** Creative Graphics Blaster CT6710 nVidia RIVA TNT AGP 16MB
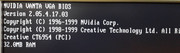
*** Creative Labs CT6950 nVidia Vanta 32MB PCI (CT6954)
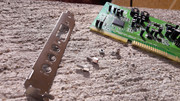
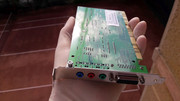
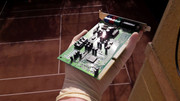
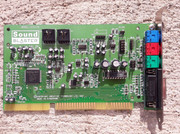
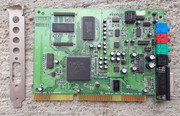
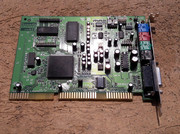
Creative Labs Sound Blaster CT4170 ISA
The card was dirty and it was missing a screw that holds the bracket. Easy fix.
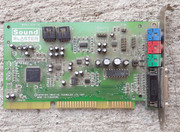

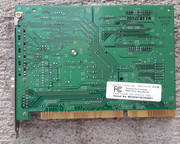
I took the necessary steps to protect the stamped ink markings that are easily removed by IPA 99%.
I did what I do best.
Like new!

gallery: https://postimg.cc/gallery/1dca02zta/
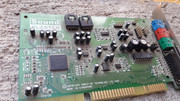
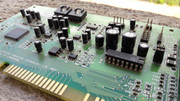
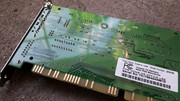
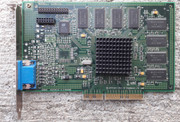
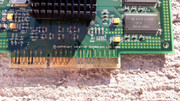
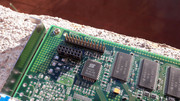
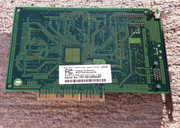
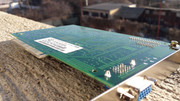
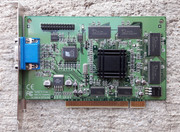
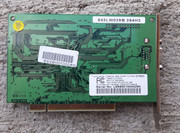
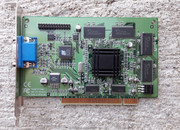
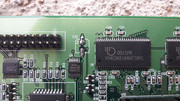
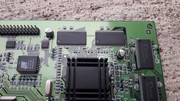
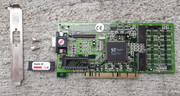
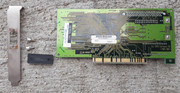
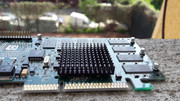
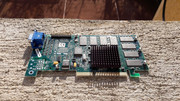
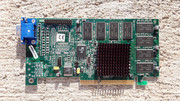
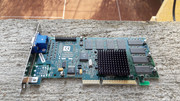
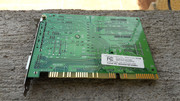
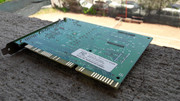
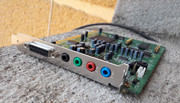
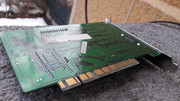
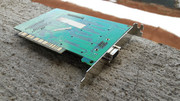
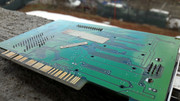
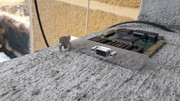
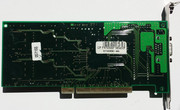
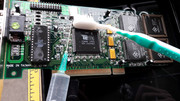
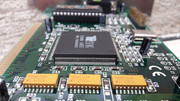
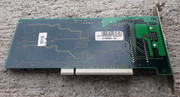
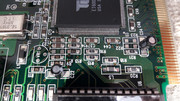
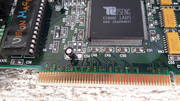
Creative Graphics Blaster CT6710 nVidia RIVA TNT AGP 16MB
This is my second CT6170.
I like RIVA TNT cards and I buy them every time I see them. Usually collectors have eyes for TNT 2 and sometimes overlook the first TNT.
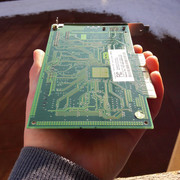
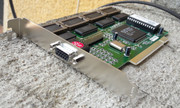
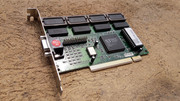
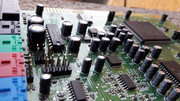
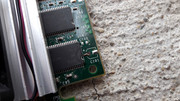
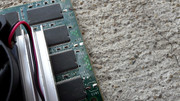
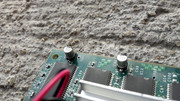
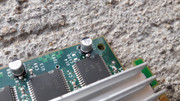
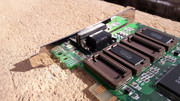
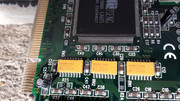
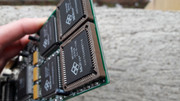
I found this card in a cardboard box at the flea market. I saw a corner of it popping out from one side. The green squares from the top of the PCB attracted my eyes like a magnet and I soon was all over it 😁 . RIVA TNT? YEAH! NICE!
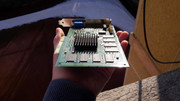
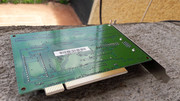
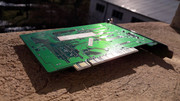
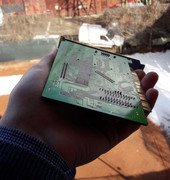
Initial state.
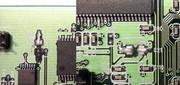
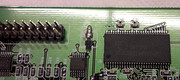
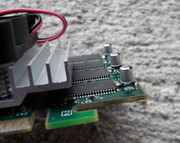
A little magic. I also had to solder a missing ceramic capacitor. The solder job isnt my best but I left it alone as the solder job is strong. I need better equipment for fine soldering than what I have now.


 v
v 
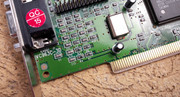
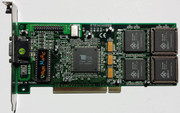
Running like a champ!

gallery: https://postimg.cc/gallery/14xzvvefi/
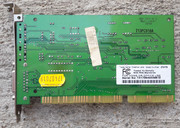
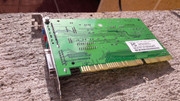
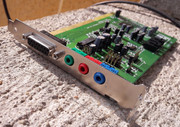
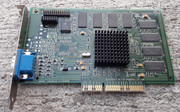
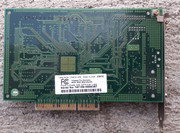
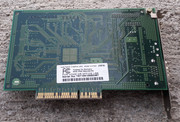
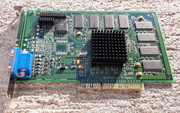
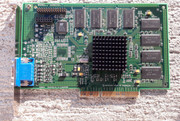
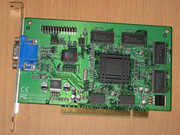
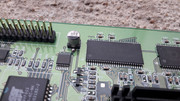
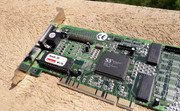
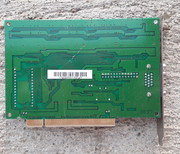
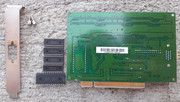
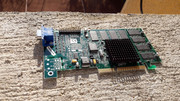
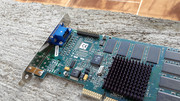
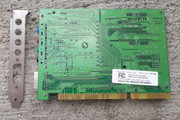
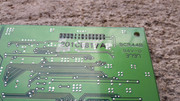
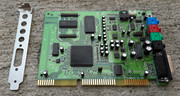
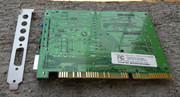
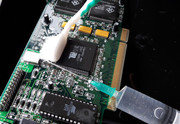
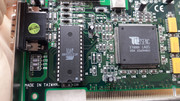
Creative Labs CT6950 nVidia Vanta 32MB PCI (CT6954)
I had to repair this card but it wasnt too difficult.
On the Saturday I found the Ati Radeon All-In-Wonder 8500DV 64MB I also found a Creative Vanta PCI graphic card. I looked at it and I saw that it was missing two capacitors and a pad was torn from the PCB so I said MEH and I put it back where I found it.
When I got home I searched on the internet the model number CT6950 and I found more about the card.
On the night between Saturday and Sunday I had on my mind only the damned Creative card, so, early in the morning I took a cold shower, yeah right, I went to the flea market of course. 😁 I looked for the seller and I found him. Initially I didnt find him as he wasnt in the same place as the day before. That's what you get when you dont pay attention 😁 I said to myself! Next time peel your eyes MORE! I walked around the flea market and I found him.
Behold! The card was still there but it looked like it had a few more scratches than before.
I paid the price and I took it home.
After I got home I started the restoration process.
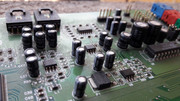
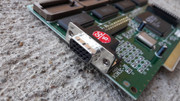
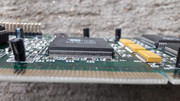
I looked for ways to replace the missing pad. I wanted to thread a fine wire through the PCB but the hole didnt communicate with the back of the card. Bummer....what to do???
I took a fine solder wick wire. I cut a little piece and the thing broke into small pieces of wire all over my desk. DAMN!!! $^@*$*(@&^(*###~~~@@$$$$...let's add some solder in a thin layer and then cut a small piece. SUCCESS!!!
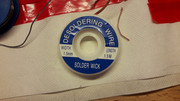
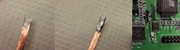
I glued the small solder wick piece with super glue then I added a little more solder to establish the contact with the PCB.
I searched on the internet for pictures with the CT6950 and it took me a while to find what I wanted. I needed the specs for the missing caps.
When I found what I needed I saw that I didnt have replacement capacitors. I wanted to use regular electrolytic caps but I didnt have something even remotely close, so I used what I had at hand.
The required caps were 22uf/6.3V (good luck finding those)...so I used solid caps with 47uf/6V. I said lets shoot and see what falls down. 😁
Not only that nothing happened but the card worked well.

I was pleased with my repair but the fact that I used caps that had different specs was still nagging me, so when I had to order caps for the repair of 3dfx cards, i850 motherboard, etc I also bought 22uf/16v caps.
After I repaired the card I was back to SQUARE ONE 😁 Talk about obsession...
I had to make another pad as the first one went MIA after I desoldered the capacitor....
This time the repair came out better. Like a BO$$!
NICE! LIKE NEW! Almost...

I successfully repaired the card (AGAIN) but is it still working?!?!
No stress MAN! ALL IS WELL!!!
gallery: https://postimg.cc/gallery/1zqk5b2z2/
Remember to not pass on Creative stuff. Remember the CT label. Sometimes you might find better cards than the ones presented above.
C ya later with more shiny stuff. 😁
French Horn Rebellion - Won You Over (Jamie de Von Remix)
Flea market surprise!...without the fleas of course 😁
The parts that I am going to present, are the result of a visit at the local flea market made on 21.04.2018. The weather was superb.

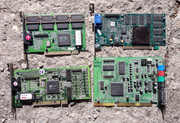
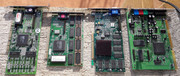
THE LOOT!
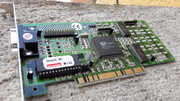
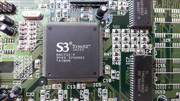
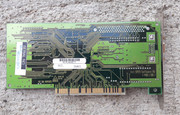
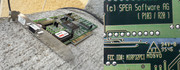
1. V7 Mirage P32/PCI / Diamond Stealth SE V1.02 / SPEA Software AG (P103/R20) / MIRP32PCI - S3 Trio 32 - 1MB PCI
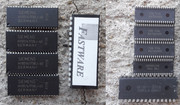
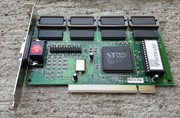
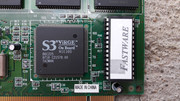
2. Fastware VC963C-3D - S3 Virge/Dx 86C375 - 4MB PCI
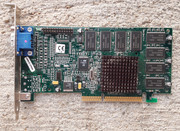
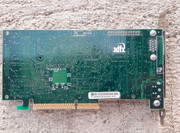
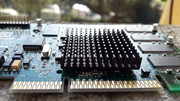
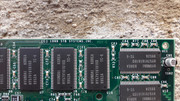
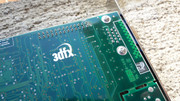
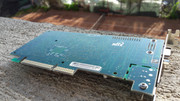
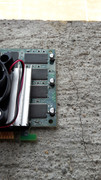
3. 3dfx VooDoo 3 2000 - AGP 16MB - 1999 STB Systems 210-0364-003 Rev. C
4. Creative AWE64 Value CT4520 ISA
V7 Mirage P32/PCI / Diamond Stealth SE V1.02 / SPEA Software AG (P103/R20) / MIRP32PCI - S3 Trio 32 - 1MB PCI
I tested the card and I found out that it was dead. YEP! Black screen aka no signal...oh well...it happens...
Initial state.
Cleaning time.
Shiny!
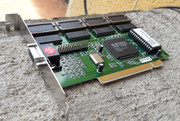
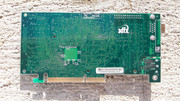
Fastware VC963C-3D - S3 Virge/Dx 86C375 - 4MB PCI
I bought this card for the EXTRA VRAM. You never know when you might need the mighty 2MB. Better safe than sorry. 😁
Initial state.

In working order.
Dismantled.

Clean as a whistle.

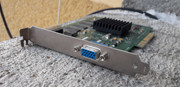
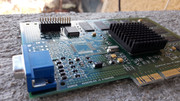
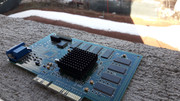
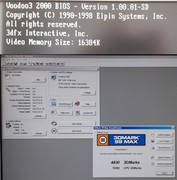
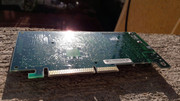
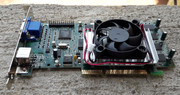
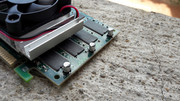
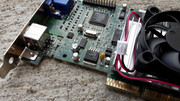
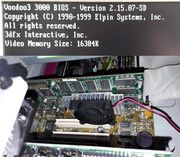
3dfx VooDoo 3 2000 - AGP 16MB - 1999 STB Systems 210-0364-003 Rev. C
2.17 EUR / 2.56USD well spent! 😁
Initial state.
Test OK!!!
Lets get on with the show.
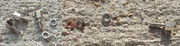
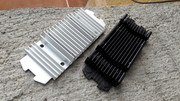
The card was missing a screw from the VGA port. Me being me, I had to find a screw and a washer as close to the original as possible. After some searching, I found a washer that fit the bill. I also found two screws that were a little bit shorter. So, I took off the washer from the factory screw and by magic I restored "the equilibrium". Now it was whole again. 😁
Looking at the card I saw that the heatsink had a few bent fins. I straightened the fins as much as I thought it was safe. I didnt want to remove the heatsink from the chip by using too much force. Again, the card was on its way to a full recovery.
Some polish, some IPA 99% FLOWING!!! OVERFLOWING!!! and don't forget the correct dose of ELBOW GREASE. HIGHLY RECOMMENDED!
10/10!


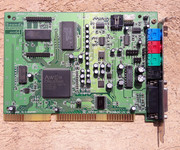
Creative AWE64 Value CT4520 ISA
Restored to its former glory.
Initial state.
Lights, Camera, Action!
Final results.
If all the visits to the flea market would have the same outcome I would go there a lot more often 😁
Group photos.
As I said in the past, the Flea market surprise! episodes are presented in a short and concise manner. Don't worry though, I still have a few heavy shells left in the ammunition depot. 😁
As usual, all my adventures will be posted here. 😁
These days I'm waiting for something interesting. I said that I'm not going to buy more HW but ... as they say: NEVER SAY NEVER. 😁 I dont know where I heard this before...maybe I said it myself... 😁

More later.
Pascal Junior - Don't Slow Down (Original Mix)
Work In Progress 😁

gallery: https://postimg.cc/gallery/1tf8xzua6/
More later.
Solomun - Somebody's Story (Original Mix)
Today, after a quick nap, I woke up and one thought kept popping in my mind: One's work is never finished. 😁 Something along the lines: Art is never finished, only abandoned. - Leonardo da Vinci
This made me want to post a quick update on one of my 3dfx cards.
Maybe you remember the hero of The GREAT Voodoo 3 3000 16 MB rescue episode that I posted a while back.
Re: Hello, World! :D - Robert B's PC builds - oogle away freely :)
It was about a 3dfx V3 3000 16MB AGP, Made In China, which was bought for a trivial sum of money from the good ol' flea market. It was in bad shape but somehow I managed to repair it and it proved to be alive and kicking.
A moment of great satisfaction at that time.
Years have passed and I didnt forget that particular card.
So, this June, came the moment to make it right and again I was successful in my attempt.
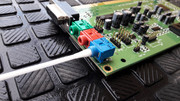
The regular electrolytic capacitors I used to repair the card were replaced by new ones made by Panasonic. 22uF/16V, SMD, Panasonic EEE1CA220SR, 10uF/16V, SMD, Low Esr, EEEFP1C100AR PANASONIC.
The problem was that everytime I took the card in my hands I touched the capacitors and there was a risk I could snap them off because they were too tall. The looks were important too.
Initial state.
I removed the four caps and I prepared the card to receive the new ones.
Almost good as new.
Success.
Because I dont like to leave matters at the whims of chance I decided to fix the caps that were mounted on the missing PCB pads with some transparent Poxipol. Better safe than sorry. The glue is easy to remove if needed.
gallery: https://postimg.cc/gallery/16dkvkhwc/
More later.
SOON: Tseng duo 4000/6000
More later.
Tseng DUO
This episode features two Tseng video cards. Both of them are the PCI version.
I was searching for a Tseng ET4000/W32P video card for some time. In the end I found it at the good ol' flea market. I would've wanted the VLB or at least the ISA version but beggars can't be choosers, I guess.
The Tseng ET6000 4MB was bought a few years ago, also from the flea market. A test made after that moment, revealed that it was dead, so I put in a box and that was it. At least until this year 😁
Let's meet the two video cards:
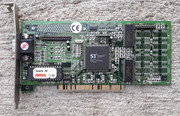
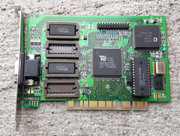
* JATON TSENG LABS ET4000/W32P PCI - KY2-JAX-EVGA32PCI - 8248D/V2
* Vision Magic Tseng Labs ET6000 4 MB MDRAM
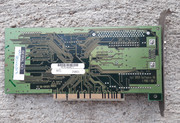
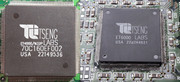
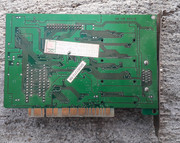
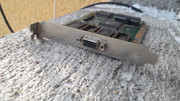
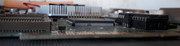
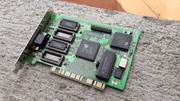
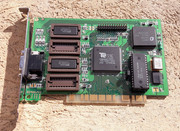
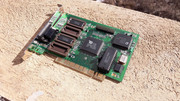
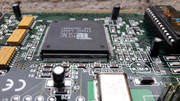
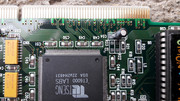
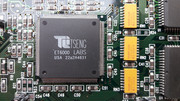
JATON TSENG LABS ET4000/W32P PCI - KY2-JAX-EVGA32PCI - 8248D/V2
The card was in a rough shape but as soon as I saw Tseng ET4000/W32P written all over it, I knew I had to have it. I paid very little for it and I took it home.

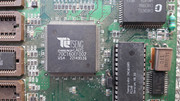
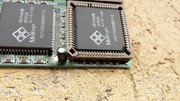
The card took a hit before I got to it and a few pins from the graphic chip were affected but they didnt separate from the PCB. Lucky me!
I took the card apart.
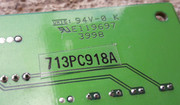
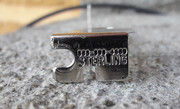
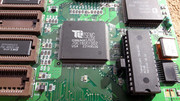
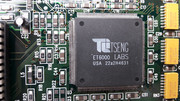
The BIOS chip had a few light scratches which werent removed by IPA 99% and cotton sticks, so, I searched for other options.
It became clear that I would need an abrasive paste which would also have to be friendly with the markings on the chip.
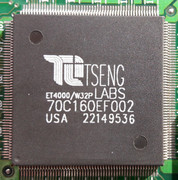
I decided to try a little metal polish paste, the kind I use to restore the shine of the chromed brackets, and a cotton stick. I rubbed gently the graphic chip and afterwards I washed it well with IPA 99%.
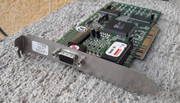
After two passes I got the desired results. GOOD AS NEW!!!
The satisfaction I got after this step was off the scale.
I applied this treatment to other IC's on the board.
The final results were notable. The downside is that now I have to apply this step to other cards I restore and the time that I spend with each component will get even longer than already is. Regardless, after these many electronic artifacts recovered from the crusher, one more stage dedicated to the restoration process isn't much. By now, all I do is like a reflex. I'm not kidding. Also, I never say STOP until I am completely satisfied.
Enjoy.

gallery: https://postimg.cc/gallery/jyxc9xso/
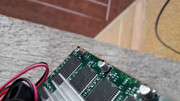
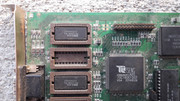
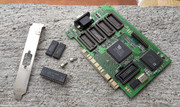
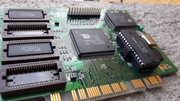
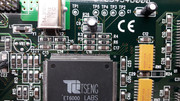
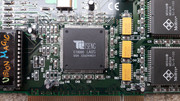
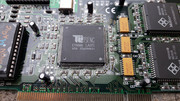
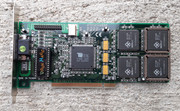
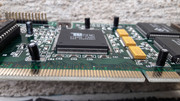
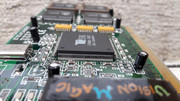
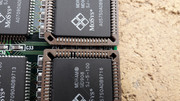
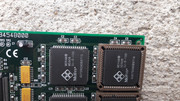
Vision Magic Tseng Labs ET6000 4 MB MDRAM
I was so proud when I bought this card. Tseng ET6000 with 4MB, NICE! Lucky find!
After I tested it I was deflated. Dead!
This year, right after I managed to exorcise all the demons from the socket 4 / Pentium 66MHz setup (which will be presented at a later date), amadeus777999, a fellow vogons user, asked me to run some DOOM Shareware 1.9 timedemo tests with some of my graphic cards. These results were needed for a project of his. In the end I made over 100 DOOM Shareware 1.9 runs, so it was obvious that the ET6000 could not miss from the line-up. Needless to say, the P66+ASUS PCI/I-P5MP3 rev. 2.4 combo was rock solid, even if I got a few gray hairs during the process of eliminating all the demons that took over the socket 4 setup, and believe me they were many! (The P66 story will also be very interesting). (The results of the DOOM Shareware tests will be presented at the appropriate time)
I checked the ET6000 and I couldn't find anything wrong with it.
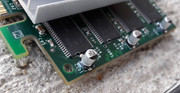
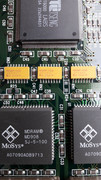
At first, I decided to remove the extra 2MB video memory from the PLCC sockets. This task was unbelievably hard. What could possibly go wrong?
The PLCC exctractor that I have is a cheap chinese model and it didnt grab the memory chips as it should. The plastic of the PLCC was brittle and old. After I applied the force required, I was faced with a disaster. One of the metal hooks of the PLCC extractor, dug into a memory chip, broke off a corner if it and then left a diagonal scratch.
You should've seen my face. NOOOOOOOOOOOOOOO!!!!
&*($@#*($&###!!!! Curses, ()&%#*%#&*~)@%~~~!!!
Before I resorted to the chinese PLCC extractor, I tried two small screwdrivers but I couldn't remove the memory chips. The PLCC sockets groaned and flexed and I couldn't remove the chips.
In the end I managed to remove the memory chips. The PLCC sockets were cracked, the chips looks like hell....
I tested the card again. STILL NOTHING!. No change.....^$@#&$*^@*!@!@!!##
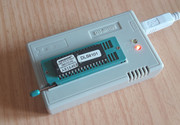
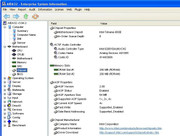
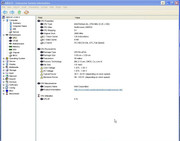
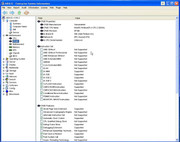
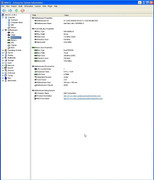
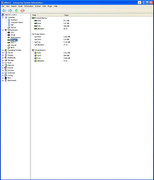
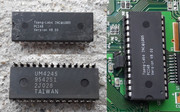
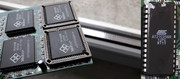
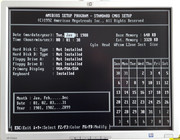
Reluctantly, I removed the Vision Magic sticker from the BIOS chip and I verified if the BIOS image was good. I had to know what model the chip was. This information was vital. I placed it into my MiniPro TL866A BIOS programmer and I did a READ and VERIFY test. ALL WAS OK! Foiled again! - ATMEL AT27C256R
I used double sided tape to put back the Vision Magic sticker and I inserted the memory chips I removed earlier.
Damn it!
What could be the problem?
And then IT HIT ME!!!
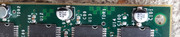
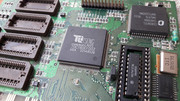
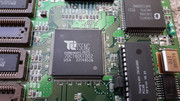
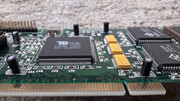
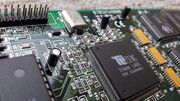
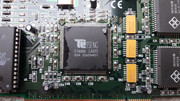
I saw some marks on the pins of the graphic chip, so, I decided to investigate them thoroughly. Flea market cards usually have a few marks on them and I investigate the chips to see if the pins make contact with each other.
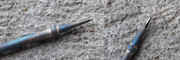
I took a fine needle and I checked the pins. Needless to say that I found out soon why the ET6000 wasnt running. Lots of pins were separated from the PCB.
I knew the cause of the problem and I needed a solution.
Ideally I would've needed a hot air station and the required supplies. At the start of this year I thought of buying a hot air station but in the end I gave up. I couldn't justify the costs as I dont have many card to repair.
The second option was represented by a repair shop but where's the fun in that? 😁 I think you know me well after the V4-L saga. 😁
For some time I wanted to try the drag soldering tehnique. After I got accustomed with the use of flux and I got a little courageous, I said LET'S DO IT!!!
The brain-dead ET6000-ul was the perfect candidate!
I looked at a demo of the drag soldering tehnique.
I looked a few times over these videos.
Professional SMT Soldering: Hand Soldering Techniques - Surface Mount
Professional Hand Soldering: Surface Mount QFP 208 Fine-Pitch
I couldn't be bothered with the lower stages and I went straight to MASTER class, crash course style 😁 just the way I LIKE IT!!! 😁 QFP 208 Fine-Pitch drag soldering. How hard can it be? 😁
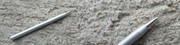
Because I couldnt find angled tips for my soldering iron I decided to make my own.
Dont forget the sponge.
Let's inspect the pins closer. Not GOOD!!! Some are bent and some are separated from the PCB due to some force applied over them.

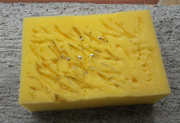
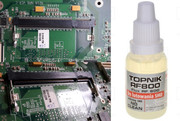
Before I took over the main task, I practiced on a dead laptop motherboard.
I used liquid flux branded Topnik RF800.
The results were encouraging so I tackled the ET6000.
I applied Topnik RF800 flux and I placed the tip of the soldering iron over the pins. Unfortunately, the flux was liquid and it wouldn't stay in one place. It quickly evaporated at the contact with the soldering iron and it didnt help me. I used a low quantity of solder.
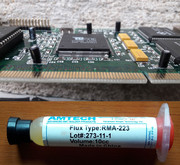
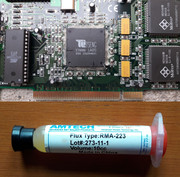
A few weeks before, I bought from the flea market, some Amtech RMA-223 flux, which in the end proved to be fake. I decided to use it after I saw a comparative video in which it was said that it is OK. To my surprise, I found the exact fake flux at the local electronic shop. YAY!!! 😁 The label has spelling errors and the packaging is not like the original.
I applied Amtech RM-223-FAKE flux.
TOO LITTLE!
TOO MUCH!
After a soldering pass.
The Topnik RF800 flux is a NO CLEAN flux. The Amtech RMA-223-FAKE flux was an unknown quantity so I had to clean it.
The weather was cold during this operation. The lack of experience meant that I used too much flux and I had to clean A TON OF IT!
Cleaning the leftover flux proved to be a challenge. The difficulty was due to the fact that it was behind the pins and in contact with IPA 99% it would turn in a substance like cheese.
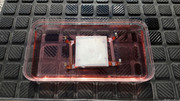
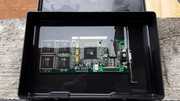
I was afraid that some of the pins I soldered back might separate again, so, I placed the card in a IPA 99% bath. I used a container with a lid to reduce evaporation.


The IPA 99% bath didnt remove the flux so I had to use an old tooth brush and a syringe.
After almost an hour, I managed to remove all the flux. DAMN SON!
I inspected the solder job and I was pleased with the results. I didnt straighten any of the pins because I was afraid I might break them. Before I got to solder them back I checked that each one of them made contact with their pad.


I placed the card in the PC and I saw that the orange led of the monitor turned to green but the screen remained black.
It looks like I'm on the right path. I inspected again all of the pins, 208 of them....
I found a few pins that werent making contact. It looks like my solder job wasnt as strong as I thought and during cleaning I separated some of them.
BACK TO SQUARE ONE!
This time I used the right amount of flux.
I soldered again all the pins and I cleaned the card.
Final results.
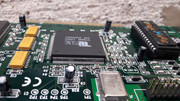
Close view of the soldered pins.
I DID THIS! When all was said and done, I was satisfied with my results.
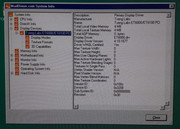
I tested the card again and it ran flawlessly, almost.
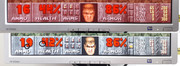
The image was crips, the drivers installed without a hitch, I ran a DOOM test. ALL OK!
I was happy and I wasnt bothered anymore with the looks of the card. I will remember these battle scars for a long time from now. They look bad from every angle. (One of the soldered memory chips had some chips when I bought it.)

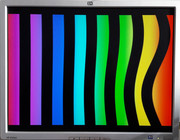
Unfortunately, the victory was bitter sweet. When I ran the timedemo benchmark from DOOM Shareware 1.9, I saw on the lower part of the screen, that some pixels werent displayed correctly.
I removed the extra VRAM and I left the card with the soldered chips. When I booted in WIN 95 I saw that the image wasnt right.
I inspected again all of the pins of the graphic chip. All was well.
After I put back the extra VRAM chips the video card didnt show the anomalies that were present with just the soldered 2MB and I was left with the odd pixels.
At this moment I gave up. There was no way I could recover this card completely.
Some fights you cannot win. I could find some memory chips and try something, but this might come sometime in the far far far future.
The upside is, that I can execute drag soldering at a reasonable level of quality. Practice makes perfect and I'm sure I'll need this skill someday.
gallery: https://postimg.cc/gallery/31f9xa72w/
C ya next time with more good stuff. 😁
NEXT WEEK: My first 80386! 😁
More later.
wrote:Green Onions - Booker T & the MG's […]
Green Onions - Booker T & the MG's
😁 😁 😁
More l a t e r . . . ....
3870x2?

wrote:wrote:Green Onions - Booker T & the MG's […]
Green Onions - Booker T & the MG's
😁 😁 😁
More l a t e r . . . ....
3870x2?
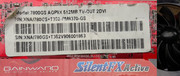
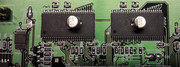
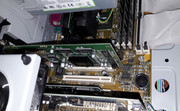
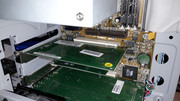
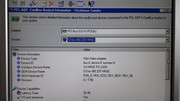
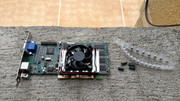
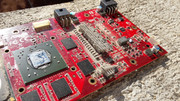
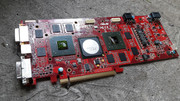
Bingo, a Google search of the top text in the light led me to ASUS EAH3870x2 TOP/G/3DHTI/1G/A.
"Enter at your own peril, past the bolted door..."
Main PC: i5 3470, GB B75M-D3H, 16GB RAM, 2x1TB
98SE : P3 650, Soyo SY-6BA+IV, 384MB RAM, 80GB
You are right PcBytes.
3870X2 DONE!

I picked up two of those about six years ago for £20 each, one was DOA else I would of tried a fourway crossfire
Awesome job on that ET6000!
I would strongly encourage you to buy a hot-air station - the 858D goes for only 40-50Euros and has a reasonable quality for the, in your case strongly dedicated, hobby-ist. Since you have made it to soldering on such SMD components, a hot air station enables you to perfectly service all kinds of semi-old hardware.
Regarding the pixel problem,
I remember another vogoner who experiences a similar problem and i think it had to do with faulty ram(kinda obvious but one never knows for sure).
The problem in Windows might stem from memory interleaving, which could indicate that the card was not meant to run with only the "hard-wired" 2 MB.
It's interesting that the problem in Dos does not occur when 4MB are present. Maybe the cards maps the buffer to a different region where the memory cells are intact(by design only and not because faulty cells are present).
Does the pixel error occur in other DOS software/games?
The pixel problem is present in DOS when I run DOOM.
Sometimes it was visible on the Win 95 loading logo but it wasnt present on screen after Win 95 finished booting.
For sure it is a bad RAM chip. If I get to buy a hot air station I might try something. I'll replace the PLCC sockets too.
Thank for the input 😀
I'm glad that you like my "work". 😁
Some of my stuff is from a few contacts that sell old HW. Some have connections with recycling centers, other buy from the flea market and sell them on. Other are BIG collectors.
I also got a fair share of good stuff from the local flea market.
I try to not buy everything I see, otherwise I would run out of space. Lately I'm more and more selective.
ATM I have:
70 working graphic cards and 10 dead
14 soundcards
80 working CPU's and 1 dead
19 working motherboards and 6 damaged
12 optical units
10 working HDDs and 2 dead
3 lan cards
3 completed builds - AT - 5x86, K6-2 400 and ATX - PIII-800.
1 box of RAM
4 extra PSUs - 2xAT / 2xATX
1 box of coolers / fans
1 box of cables
I store them at my workplace and they don't occupy a lot of space. They are kept in boxes. Because I focus mainly on components, the footprint of my collection is smaller.
I know I went past what I need a LOOONNNNGG TIME AGO! 😁
I plan to change the way I store my parts and I want to buy 200 ESD bags and three bigger plastic containers. If I need to move them they must be safe.
All my stuff has been cleaned and restored. They have been, are and will be presented here on vogons.org.
I got better and better at cleaning and restoring my parts. The first parts I got arent at the level of my later parts, but they are still very clean.
As soon as I get to change my storage tactics I'll post a special episode dedicated to this matter.
More later.