VOGONS


First post, by CharlieFoxtrot

User metadata
Rank Member
Rank
Member

I've been gradually working with this model 35SX during the last couple of months and I've pretty much finished it during the last week or so. I will post the build log here probably in few parts in short succession within a day or two [edit: ALL PARTS ARE HERE, SO BUILD LOG IS COMPLETE]. So, without further ado, let's begin:

PART I - The Starting Point

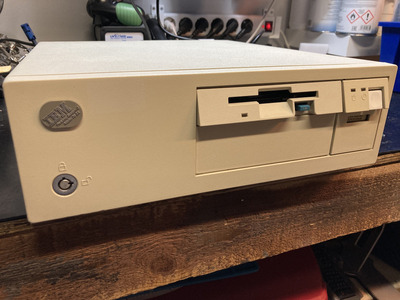
I got just the box couple of months ago. It was in very original condition that is, it had the 386SX-20 processor, 4MB RAM (upgraded from 2MB at some point), 40MB IDE HDD and that's about it. It has a Dallas CMOS thingy, but some previous owner had made the CR2032 mod already. Many of these systems had horribly unreliable Magnetek manufactured PSUs, which tended to release magic smoke after couple of years. This probably had one too, but PSU had been replaced probably sometime in late 90s, as the PSU had date codes from 1997 and it was made in Taiwan. It was pretty clean, just some mild dust inside the case and PSU had pretty much none.

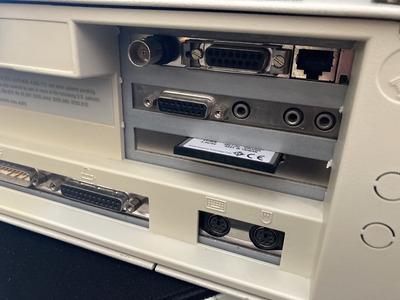
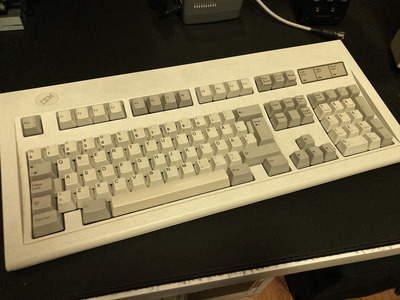
Pretty clean system overall and no major scratches or bumps to be seen:

IBM01.JPEG
Filename
IBM01.JPEG
File size
800.8 KiB
Views
777 views
File license
Public domain

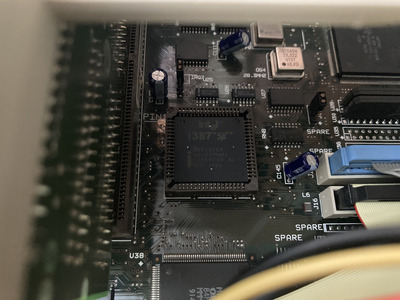
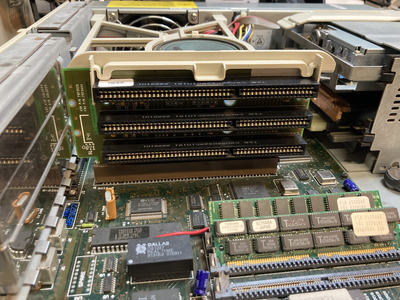
Looks clean inside too! Standard ISA, molex connectors on PSU and Dallas has CR2032 mod on it:

IBM02.JPEG
Filename
IBM02.JPEG
File size
884.02 KiB
Views
777 views
File license
Public domain

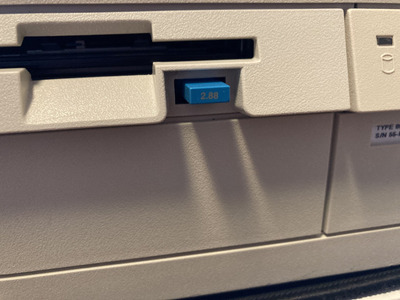
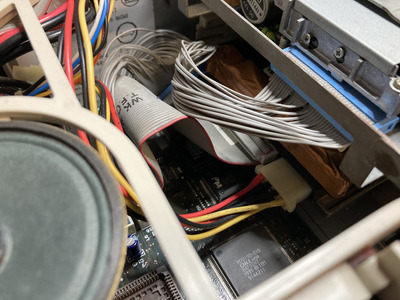
Standard IDE, but IBM proprietary floppy with 34-pin cable and without separate floppy power cable:

IBM03.JPEG
Filename
IBM03.JPEG
File size
646.17 KiB
Views
777 views
File license
Public domain

It was fully working besides the floppy drive. These systems pretty much require working floppy drives, because changes to the system require using setup floppy. However, drives are proprietary and depending on the system, making an adapter for standard floppy drive is either relatively easy or pretty much impossible. Mine is most likely the latter, because usually these newer PS/2s expect a media sensing drive. Pinouts and signals for a 34pin media sensing IBM floppy drives are completely different from standard, so adapter most likely requires some sort of logic and I couldn’t find any instructions for building one. So project started with repairs.

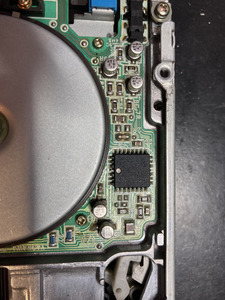
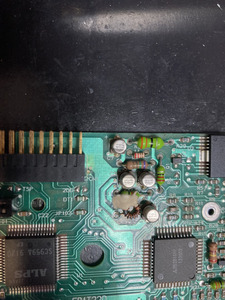
PS/2 floppy drives are known to fail. Usual suspects are dirt that gets inside because of open floppy slot and even more so, leaking SMD capacitors. My drive was pretty clean and it did rotate the floppy, but it just couldn’t read anything. My computer has a drive manufactured by Alps, and it has practically two circuit boards. The motor board, which has components visible from the underside of the drive and the controller board, which has components towards the top of the drive so they can't be accessed without removing the controller board. So, after removing couple of screws more and flat flex cables connecting the controller board, I had the drive disassembled in a way that I could change all the caps.

Gladly leaked electrolyte hasn't damaged anything, but pretty much all the caps had been leaking. It was evident when I cleaned the solder pads with wick as you can't help but notice that fishy electrolyte smell. Drive had all together 9 caps, five 10uf/16V, one 4.7uf/25V and three 4.7uf/16V of bipolar type. I had everything else except SMD bipolar caps so I replaced those with regular through hole stuff. There are plastic parts near some of the caps, so I was hesitant to use hot air while removing the caps so I went with a twisting method and I managed to rip one pad from one of the bipolar caps on the motor board. Fortunately it was still easy to trace and ripped pad was connected to the leg of one the SMD resistors near it, so I just soldered the leg of the through hole cap to the resistor.

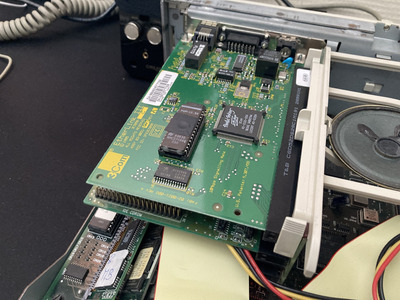
Motor board before recapping, top three caps are bipolar:

IBM04.JPEG
Filename
IBM04.JPEG
File size
411.63 KiB
Views
777 views
File license
Public domain

Controller board before recapping:

IBM05.JPEG
Filename
IBM05.JPEG
File size
417.83 KiB
Views
777 views
File license
Public domain

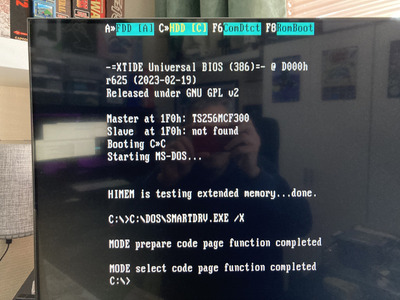
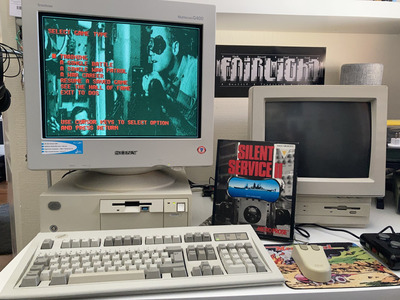
So, I recapped and re-lubricated the drive and after that it worked 100%. Unfortunately I didn't took photos of the end result, but on the other hand, there is not much to see. Now that the floppy was functioning, it was time to start building the rest of the system.

To be continued...

Edit: fixed some typos

Last edited by CharlieFoxtrot on 2023-06-22, 15:04. Edited 4 times in total.

Reply 1 of 8, by CharlieFoxtrot

User metadata
Rank Member
Rank
Member

PART II - RAM, networking and storage

Now that I had fully working system, I certainly needed to make some improvements. I already had planned stuff during the floppy repair and first testing and started to search parts I needed.

As I said, my machine came with 4MB memory, which is more than enough for 386SX, but of course I wanted more. Now, PS/2s don't work with standard FPM, although my system has regular 72-pin memory slots. They need parity RAM, but of course standard parity RAM won't still work. Also, many PS/2s don't like 60ns RAM. There are instructions how you can modify many standard parity SIMMs, but I managed to find two 4MB and one 8MB original PS/2 SIMMs with IBM FRU numbers cheaply, so I went with that route. With those I should be able to max out the system memory to 16MB. However, when the memory arrived I couldn't get them completely working together so I had to settle with 2+4+8 configuration utilizing one of the 2MB sticks that came with the system. 14MB/70ns RAM is still an overkill and with 14MBs, memory check at the power-on takes one full minute now before system even starts to think about booting!

That 40MB HDD needed to go too. It was small back then and for today's tinkering it is even smaller. And it is loud. It doesn't make any abnormal sounds and I remember that those IBM drives were generally considered loud and slow already back in the day. I have few old HDDs, but I decided to go with CF route as I have both cards and adapters. Now, I had no clue what kind of HDD support IBM had implemented on these things. From the factory they were sold either with 40MB or 80MB HDDs. 35SX had also two BIOS releases and apparently later version had support for larger drives (mine is installed with later BIOS). But how large drive does it support? I guess I needed to test that myself. Smallest CF card I have is 256MB so I threw that in and hoped for the best.

Testing HDD support with 256MB CF:

IBM06.JPEG
Filename
IBM06.JPEG
File size
851.47 KiB
Views
715 views
File license
Public domain

It worked just fine! I installed DOS and even tested OS/2 1.4 on the 256MB card. So my system supports at least that, most likely a lot more and possibly the "usual" 500MB or so. While 256MB is more than enough for a system like this, it didn't quite end here.

I have installed networking to every DOS system I have. It just makes life so much easier when moving data in and out of these old systems. I had two 3COM Etherlink IIIs laying around, so one of them was definitely going into the IBM. I have Etherlink IIIs running in a couple of my other systems besides an odd SMC card already and I find 3COM cards a pleasure to use: They just work and are easy to setup.

Two Etherlink IIIS, one of these went inside the IBM:

IBM07.JPEG
Filename
IBM07.JPEG
File size
920.78 KiB
Views
715 views
File license
Public domain

These old ISA cards have BOOTROM slot and it was time to move HDD size issues aside completely. I downloaded the XT-IDE binary and configured it in the IBM while 256MB was still acting as a HDD. After configuring the binary, I programmed an 8KB EEPROM I had in my components bin with it.

Programming the EEPROM:

IBM08.JPEG
Filename
IBM08.JPEG
File size
712.06 KiB
Views
715 views
File license
Public domain

EEPROM installed on NIC:

IBM09.JPEG
Filename
IBM09.JPEG
File size
889.13 KiB
Views
715 views
File license
Public domain

Testing if it boots with XT-IDE:

IBM10.JPEG
Filename
IBM10.JPEG
File size
858.12 KiB
Views
715 views
File license
Public domain

XT-IDE works beautifully! I removed the 256MB card and replaced it with 4GB one. With DOS 6.22 it certainly required two partitions, but I now have a ridicilous amount of HDD space available for a lowly 386SX. I left the 40MB drive inside the system, because frankly I don't have any use for it elsewhere and I don't plan on installing anything else in the bay. On with the next stuff!

To be continued...

Edit: fixed some typos

Last edited by CharlieFoxtrot on 2023-04-07, 16:10. Edited 2 times in total.

Reply 2 of 8, by CharlieFoxtrot

User metadata
Rank Member
Rank
Member

PART III - FPU and sound

Now that the basics were up and running, there practically was only two things I could still do inside the case: installing a soundcard and a math co-processor. Now, I did consider installing an SVGA card as this has a plain old vanilla 256KB VGA and I have few cards laying around including a Mach64 ISA (which I even tested on the system). SVGA itself is relatively useless on this system, but I was at first little bit wary how slow the IBM on board VGA is. But I tested few benchmarks with the on board graphics and it is as fast as you can expect from an ISA system. For example, Landmark showed 3400+ characters while you usually cap at around 3500 with a stock ISA bus.

I managed to find i387SX for a relatively cheap price and so I got one:

i387 installed, this was the first math co-processor I have ever installed!:

IBM11.JPEG
Filename
IBM11.JPEG
File size
691.73 KiB
Views
713 views
File license
Public domain
IBM12.JPEG
Filename
IBM12.JPEG
File size
755.01 KiB
Views
713 views
File license
Public domain

For sound I was first looking for something period correct, but I didn't have any such cards available and couldn't find anything for a reasonable price. So, I went with a trusty ES1688 card with jumper configurable settings:

IBM13.JPEG
Filename
IBM13.JPEG
File size
961.37 KiB
Views
713 views
File license
Public domain

ESS cards are fine sounding and IMO OPL emulation is really good, although they sound a bit different from the original. Above everything, they sound really clean. I wish Creative would've achieved the same with their CQM emulation. Now that I had pretty much everything installed, I could close the case and focus on finalizing the experience!

All the stuff I want is finally installed:

IBM14.JPEG
Filename
IBM14.JPEG
File size
710.17 KiB
Views
713 views
File license
Public domain

To be continued...

Edit: fixed some typos

Last edited by CharlieFoxtrot on 2023-04-07, 16:12. Edited 2 times in total.

Reply 3 of 8, by CharlieFoxtrot

User metadata
Rank Member
Rank
Member

PART IV - Wrapping up the project

System was up and running and it was time to wrap up the project. But wait! I only have Compaq and some unbranded peripherals and while latter would perhaps be suitable for IBM, using Compaq keyboard and mouse with IBM would be a travesty. So, I guess I needed to get some IBM stuff to complete this thing.

White label Model M from 1991, needs a good clean but otherwise in pretty good condition. It already has a bolt mod for the back plate:

IBM15.JPEG
Filename
IBM15.JPEG
File size
845 KiB
Views
671 views
File license
Public domain

IBM PS/2 mouse. It's a bit crusty too, but nothing that a wash up wont fix:

IBM16.JPEG
Filename
IBM16.JPEG
File size
697.53 KiB
Views
671 views
File license
Public domain

So, I disassembled the mouse and keyboard for a good cleanup. Keyboard actually looked better outside than inside, there was quite a lot of nasty crap within the case, but otherwise it was in a good condition and membrane also looked like it would still last good few years without starting to crack. While I cleaned the key caps, one of the clips of the spacebar stabilizing bar broke down as they had become extremely brittle. Replacement key is already on the way, as well as "End" key cap which now just has a blank replacement. Spacebar still works as it is, you just need to give the key a relatively determined and straight push or it may miss.

And with the peripherals, I can finally call this project finalized. My model 35SX in its full glory with a "rival" machine sitting next to it:

IMG_1611.JPEG
Filename
IMG_1611.JPEG
File size
977.98 KiB
Views
671 views
File license
Public domain

All I'm missing is an IBM CRT monitor, but in reality I do not even want one. That G400 is a great tube and it is shared by many different systems and consoles through a KVM, so I really do not want more limited monitor in its place. Also, the place the IBM is sitting is, let's say, rotational. I swap different desktop systems there depending on what system I want to fiddle with and most likely after few weeks there will be some of my 486 or Pentium desktops in its place.

All in all, this was a very fun project. It had pretty much everything in it from repairs to installing wide variety of upgrades. What made this different from many of my earlier projects is that I had a clear vision and goal pretty much from the start what I want from this system, that is a package that pretty much maxes the system out, but it still retains the original and period correct feel as well as it can. Hence, the correct keyboard and mouse too.

What about the machine itself? I think model 35SXs (applies to model 40SX too) are extremely hobby friendly PS/2s as they are as close to a standard PC as PS/2 can be. Pretty much only proprietary thing you can find in this is the floppy drive and you most likely need to be able to do some repairs or maintenance to them if you get one in an original condition. Memory is also not quite standard parity FPM, but if you can't find correct memory, modification of standard SIMMs shouldn't be too difficult. PSU is a proprietary (that is not an AT style one), but this also applies to many other big brand computers of the early 90s and which used LPX type cases and motherboards. Otherwise it is extremely well built computer and materials are top notch. It has a small footprint but it still weighs a lot and the steel case and chassis are made of from thick materials. Chassis doesn't have that typical steel wall in the middle of the case that goes from the front to the back to the case, but this machine has no problems with carrying the weight of the G400 (~26,5kg). It has also very neat, almost toolless consruction. Only screws you find on the case are in the motherboard and ISA slot covers and one screw locks the PSU in place. System was a pleasure to take apart for cleaning.

So, if you want to have PS/2, but you do not want to go down to the MCA, ESDI etc. rabbit hole, then 35SX and 40SX are definitely for you. High level of standardization is the reason why I actually got this system too. Unfortunately, compared to model 30s and 50s out there, these seem to be relatively rare. But they are still not something that are completely unobtanium either.

Last edited by CharlieFoxtrot on 2023-04-08, 14:50. Edited 1 time in total.

Reply 4 of 8, by Blavius

User metadata
Rank Newbie
Rank
Newbie

Thanks for the write-up, that was fun to read! Beautiful machine. I have a 76i that has the same case, but is a MCA machine with a 486DX.
What do you plan to run on it? And do you have a socket for a cpu ugrade? There is a wealth of upgrade possibilities to turn your 386 in a half decent 486 😀

Reply 5 of 8, by CharlieFoxtrot

User metadata
Rank Member
Rank
Member
Blavius wrote on 2023-04-08, 11:24:

Thanks for the write-up, that was fun to read! Beautiful machine. I have a 76i that has the same case, but is a MCA machine with a 486DX.
What do you plan to run on it? And do you have a socket for a cpu ugrade? There is a wealth of upgrade possibilities to turn your 386 in a half decent 486 😀

Thanks, glad you enjoyed it! I need to write the last part to sum all up and about the final touches, so check that out too somepoint when its out.

This model is really bare bones PS/2 as ISA and IDE implies, so there are no processor upgrade slots or processor boards on this one. On the otherhand, I already have few 486s, so I’m generally happy with it and it is what it is. It is still good system to play late 80s and most 90/91 released games and for example speed sensitive Wing Commander runs pretty good on this system. I think I also experiment with software supporting i387, such as CAD, now that I have the co-processor installed.

I also find 386SX an interesting platform. First, I had 386SX-20 for a short while around 91/92 until I upgraded the mobo and processor to 486SX-20. Second, it was this transitional processor which brought 32-bit computing to homes as the price was closer to 286 systems, but it still offered the core features of full 386. From user stand point of view processor doesn’t differ from a 386DX or 486 other than being a lot slower, but you still get much better memory management options and improved Windows 3.x functionality.

Reply 6 of 8, by ramon

User metadata
Rank Newbie
Rank
Newbie

Nice build! Good read, thanks for the details 😀

Tandon 286/n 286-12 | 4MB | PVGA1A-JK | ES1869F
Highscreen Pentium 233 MMX | 64MB | S3 ViRGE/DX | Voodoo I | AWE64
AOpen K6-2+ 450 | 512MB | GF MX2 400 64MB | SB Live!

Reply 8 of 8, by CharlieFoxtrot

User metadata
Rank Member
Rank
Member

Final surprise update to system:

I found compatible ED-drive for 9€ and couldn't resist. A 2.88MB drive with same FRU as this was an option for the system, but I think very few customers actually chose it. There is not much use for it compared to 1.44MB drive, but as it was cheap, 35SX disk controller supports it and it is a nice curiosity, then why not?

Another nice surprise was that this particular Sony drive doesn't appear to have leaky SMD capacitors and after a good clean I tested it and it worked straight out of the box. It would be nice to test the full capacity, but unfortunately I don't have any ED-floppies at hand, which hardly is surprising.

I have now two working original drives, which is a nice thing as working floppy is pretty much a mandatory thing. Recently an adapter for media sensing drives became available, so regular floppy drive can be used in 35SX too, but at least I have a drives where eject buttons fit perfectly to the face plate.

Attachments

  • IMG_1744.JPEG
    Filename
    IMG_1744.JPEG
    File size
    736.31 KiB
    Views
    437 views
    File license
    Public domain