VOGONS


486 Motherboard Shipment Arrived

Topic actions

First post, by Malik

User metadata
Rank l33t
Rank
l33t

Just got a 486 mobo yesterday. Didn't know what was the make or the maker name, because it was clearly not stated by the seller. It came with all the ram slots loaded with a "cpu onboard", no idea of the cpu type nor the amount of total ram onboard.
And no. This time it's not from Blackmore IT. 😜
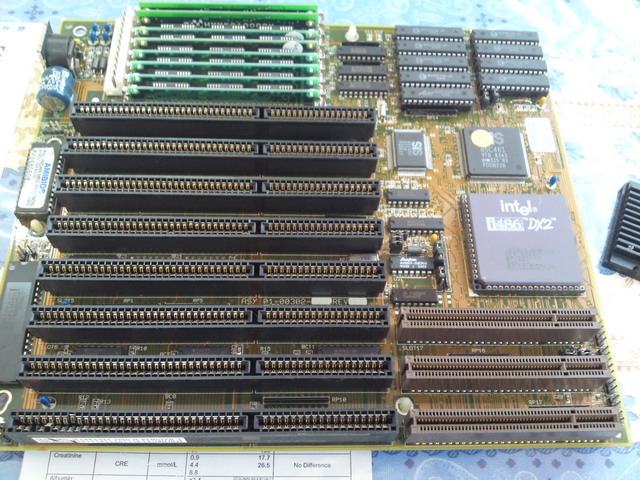
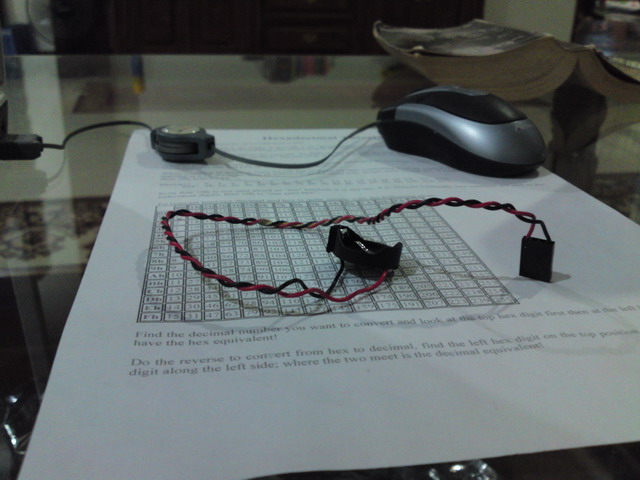
Anyway, I opened up and found a nice (filled with dust) baby AT mobo.
The first thing I did was cleaning it.
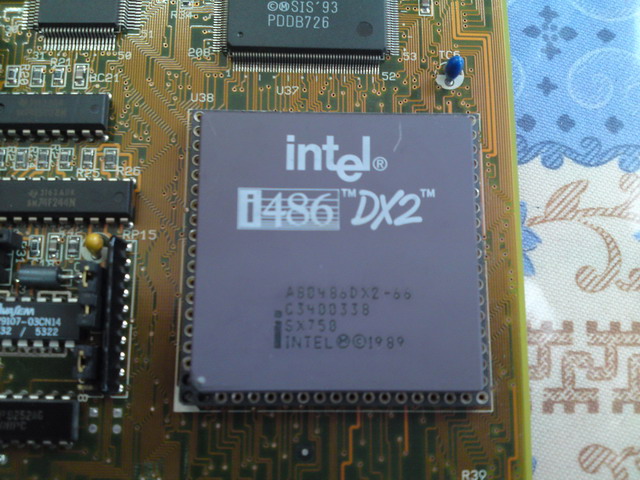
I opened up the heatsink and fan combo to clean them. And luckily, I've got the 486DX2 -66 cpu. I haven't tested the board yet and I can't comment on the ram yet.
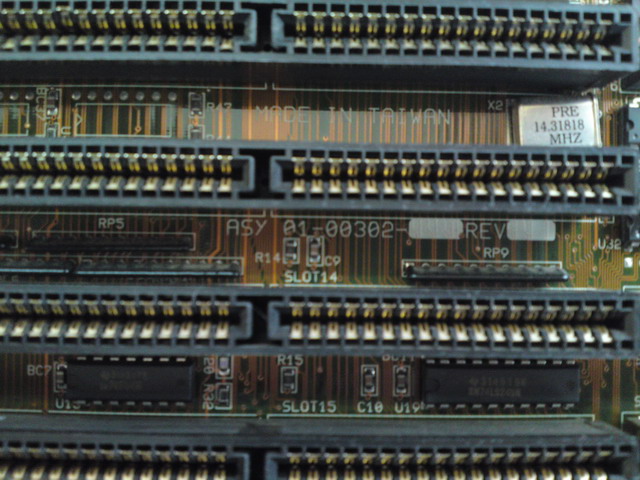
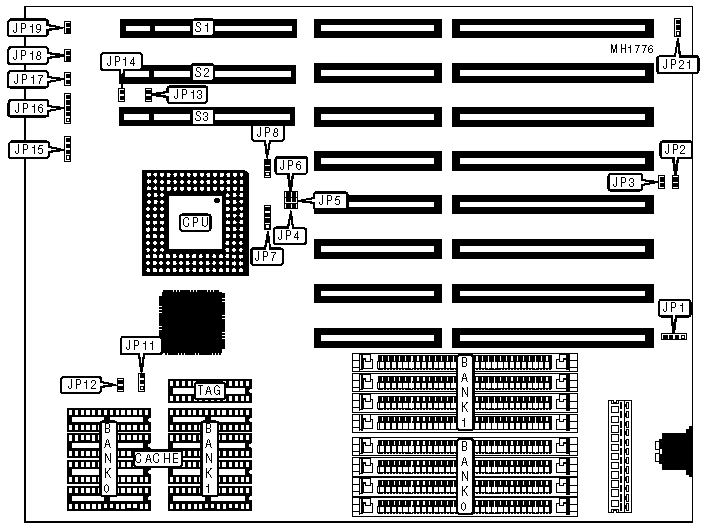
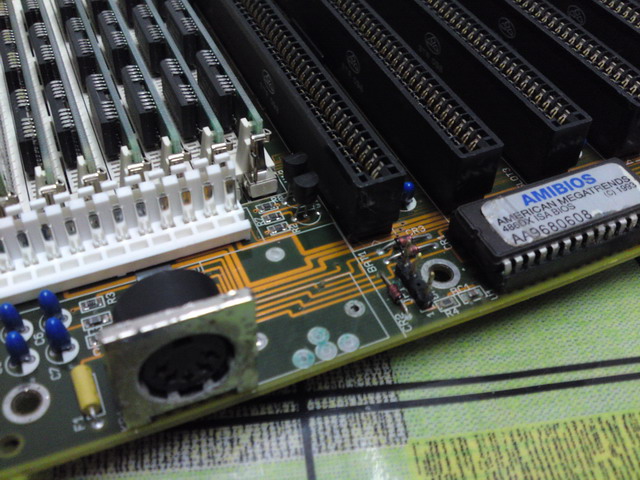
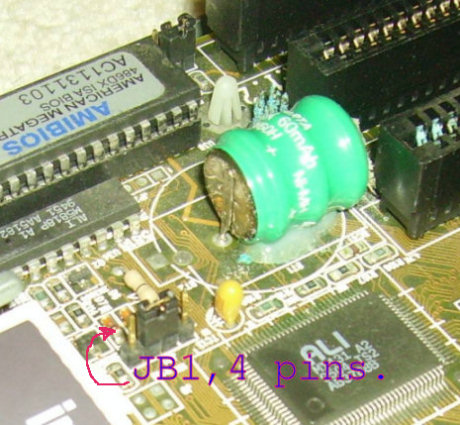
After spending some time at Total Hardware 99, I came to know this is a GENOA SYSTEMS CORPORATION TURBOEXPRESS 486VL motherboard.

Before I go into setting up this board, I would like to know if anyone has any experience with this board before.
Thanks!

Attachments

  • 486model.jpg
    Filename
    486model.jpg
    File size
    111.13 KiB
    Views
    3798 views
    File license
    Fair use/fair dealing exception
  • Genoa486turboexpress.png
    Filename
    Genoa486turboexpress.png
    File size
    4.83 KiB
    Views
    3798 views
    File license
    Fair use/fair dealing exception
  • 486cpu.jpg
    Filename
    486cpu.jpg
    File size
    109.84 KiB
    Views
    3798 views
    File license
    Fair use/fair dealing exception
  • 486bios.jpg
    Filename
    486bios.jpg
    File size
    137.61 KiB
    Views
    3798 views
    File license
    Fair use/fair dealing exception
  • 486mb full.jpg
    Filename
    486mb full.jpg
    File size
    142.58 KiB
    Views
    3798 views
    File license
    Fair use/fair dealing exception

Reply 2 of 28, by Moogle!

User metadata
Rank Member
Rank
Member

It's not too hard to desolder that battery and put a coin battery clip down on it. I recently did it to my 486 slc2 board. Just remember, the bottom prong is negative, the side prong is positive.

Reply 4 of 28, by Malik

User metadata
Rank l33t
Rank
l33t
h-a-l-9000 wrote:

Don't do that, normal coin batteries are not meant to be recharged. Connect it to the 4-pin connector instead.

Are there any pictures available for doing this? That would be very helpful, since I haven't done this before.

EDIT : Will it be easier if I can de-solder the CR2032 battery holder from another motherboard and connect that to a 4-pin pc speaker wired connector and connect this complex to the external battery pins?
Thanks again.

Reply 5 of 28, by h-a-l-9000

User metadata
Rank DOSBox Author
Rank
DOSBox Author

That sounds like a good plan. You should test the board first though so you don't do the work for nothing.
Take care of the polarity, + is pin1, - is pin4.

From the photo it seems the acid has already spread at least to the 4-pin connector, so you should clean or replace that. After removing the battery you should clean the area thoroughly with something like alcohol. You can get rid of the cyan-colored stuff at the solder joints by first scratching off the surface (not the conductor path), then heating it with the soldering iron and adding lot's of tin solder. Same goes for soldering joints near that look grey-dim. Some brown crap (acid reacting with something) will be produced during that, you can wash that off with alcohol once again. With this procedure I have stopped the acid from spreading further on a few boards.

1+1=10

Reply 6 of 28, by Malik

User metadata
Rank l33t
Rank
l33t
h-a-l-9000 wrote:

That sounds like a good plan. You should test the board first though so you don't do the work for nothing.
Take care of the polarity, + is pin1, - is pin4.

From the photo it seems the acid has already spread at least to the 4-pin connector, so you should clean or replace that. After removing the battery you should clean the area thoroughly with something like alcohol. You can get rid of the cyan-colored stuff at the solder joints by first scratching off the surface (not the conductor path), then heating it with the soldering iron and adding lot's of tin solder. Same goes for soldering joints near that look grey-dim. Some brown crap (acid reacting with something) will be produced during that, you can wash that off with alcohol once again. With this procedure I have stopped the acid from spreading further on a few boards.

Thanks a lot! I'll try as you've said.

Reply 8 of 28, by Amigaz

User metadata
Rank Oldbie
Rank
Oldbie

I would desolder the battery and put an external battery on instead, these can still be found on Ebay for small sums

My retro computer stuff: https://lychee.jjserver.net/#16136303902327

Reply 10 of 28, by Malik

User metadata
Rank l33t
Rank
l33t

I have managed to remove the battery. I also managed to desolder a battery holder from another motherboard.
Found a unused pc speaker complete with the wires and the connector. Had cut it and soldered this to the battery holder.

Couldn't test yet since the PSU seems not working. I'm awaiting for the ATX to AT converter connectors to move away from this diificult-to-replace AT PSUs. The converters come complete with the AT switch. Bought a couple of them.

I guess now I could use this self-made external battery complex in any other old mobos!

Attachments

  • soldered.jpg
    Filename
    soldered.jpg
    File size
    87.86 KiB
    Views
    3622 views
    File license
    Fair use/fair dealing exception
  • batcls.jpg
    Filename
    batcls.jpg
    File size
    120.03 KiB
    Views
    3622 views
    File license
    Fair use/fair dealing exception
  • bathldr.jpg
    Filename
    bathldr.jpg
    File size
    105.07 KiB
    Views
    3622 views
    File license
    Fair use/fair dealing exception

Reply 12 of 28, by Malik

User metadata
Rank l33t
Rank
l33t
h-a-l-9000 wrote:

I think you swapped + and -

Thanks for the comment. Seems like this is consistent with my "novice" work. 😁
So I just turn around the connector before inserting on the pins, I guess.

Reply 13 of 28, by h-a-l-9000

User metadata
Rank DOSBox Author
Rank
DOSBox Author

Now that I did a closer look I see something scary - On your first photo the bottom ISA slot has at least -5V shorted with a data line - I hope you fixed that before supplying power? If not, it might have killed the board and maybe the power supply.

1+1=10

Reply 14 of 28, by retro games 100

User metadata
Rank l33t
Rank
l33t

I'm having a spot of bother with one of these chunky batteries. 3 red arrows point to some "creeping blue death". A 4th arrow (middle right) points to some white/grey goo, which is effectively gluing the battery to the mobo. I can't remove the battery from the mobo - I think if I tried, it would tear away some of the mobo with it.

ATM, this machine boots up, but won't allow me access to the BIOS setup area. It asks me for a "ROM password", which I do not know. I have tried a few unsuccessful techniques to erase the BIOS password.

One option is to replace the BIOS chip, but that won't fix the battery problem. Question - do you think it's wise to cut in to the white/grey goo, in an attempt to free the battery from the mobo, so I can begin some kind of clean up operation?

Thanks a lot for any comments. 😀

Attachments

  • bat2.jpg
    Filename
    bat2.jpg
    File size
    95.14 KiB
    Views
    3472 views
    File license
    Fair use/fair dealing exception

Reply 15 of 28, by retro games 100

User metadata
Rank l33t
Rank
l33t

Malik, I've copied a section of your photo, in order to ask you a question about it. I've labelled the two "battery pins" 1, and the pin section stuck to the battery 2.

Did you remove your battery by cutting both pins (with a small knife?), labelled 1? Or is it possible to remove the battery by bending back the pin section, labelled 2?

Thanks a lot for any info. 😀

PS - if anyone lives in the EU and would be willing to replace the battery on my mobo (because I'm only going to make a mess of it), and (if required) replace/reflash the BIOS chip, then please PM me. Naturally, I'd make it worth your while in terms of a paypal payment.

Attachments

  • bat3.jpg
    Filename
    bat3.jpg
    File size
    74.77 KiB
    Views
    3450 views
    File license
    Fair use/fair dealing exception

Reply 16 of 28, by Malik

User metadata
Rank l33t
Rank
l33t

I'm not well experienced in the detailed hardware stuff (you know my profession, right? 😁. Vintage and Contemporary computing is my hobby. Hehehe... I guess the same holds true for most of us - different professions with the same hobby! 😀), but I think there shouldn't be any problem in removing the "goo" and shouldn't cause any problem thereafter if removed without causing any other adherent damage.

But there might be a problem in removing the barrel battery itself. If I'm not mistaken, it is soldered to the pole plates on both sides. You might have to desolder them. And then, may have to re-solder back. (I tried to scrape off using a fine knife to slice in between the battery and the adherent pin, but I was able to see this might cause some other damage.

This is just from my (little) experience. A second opinion is highly a must to proceed further.

Reply 17 of 28, by h-a-l-9000

User metadata
Rank DOSBox Author
Rank
DOSBox Author

I'm not sure if it's possible to save that board as the acid will continue to etch even when you remove the battery. You'd have to find a way to wash this off altogether.

To get the battery off bend it to the side until the hot glue lets go (it doesn't hold as tight as it may seem) and then un-solder it. The board even has the option to maybe (other parts might be missing that make contact to it) directly place a coin battery holder on it.

1+1=10

Reply 18 of 28, by retro games 100

User metadata
Rank l33t
Rank
l33t

Hi Malik, thanks a lot for the info.

In the photo below, there's a 4 pin jumper set on the mobo, labelled JB1. This website -

http://stason.org/TULARC/pc/motherboards/M/MI … 4143-VER-1.html

says that jumper JB1 is for "external battery".

Am I right in thinking that the speaker connector plug which is featured in one of your photos above, is supposed to fit on to 4 jumper pins, just like the JB1 jumper set in the photo below?

Thanks a lot for any further info! 😀

Attachments

  • pins2.jpg
    Filename
    pins2.jpg
    File size
    92.58 KiB
    Views
    3429 views
    File license
    Fair use/fair dealing exception

Reply 19 of 28, by retro games 100

User metadata
Rank l33t
Rank
l33t
h-a-l-9000 wrote:

I'm not sure if it's possible to save that board as the acid will continue to etch even when you remove the battery. You'd have to find a way to wash this off altogether.

To get the battery off bend it to the side until the hot glue lets go (it doesn't hold as tight as it may seem) and then un-solder it. The board even has the option to maybe (other parts might be missing that make contact to it) directly place a coin battery holder on it.

Thanks very much for your advice h-a-l-9000. ATM, I do not possess any soldering equipment, either a soldering iron, or a desolder tool. I'm in "two minds" about this situation. Do I spend money, and purchase the necessary equipment? Or do I pay someone to do the job for me? I would prefer the second option, but of course, I need to find someone willing and capable to perform this job! 😀