VOGONS


First post, by Jinxter

User metadata
Rank Member
Rank
Member

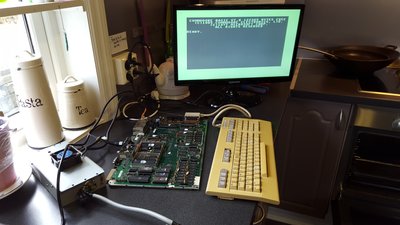
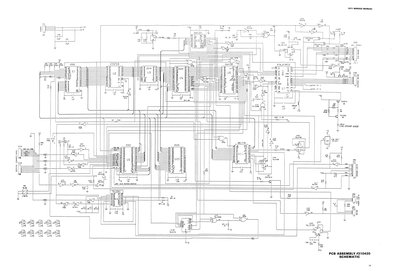
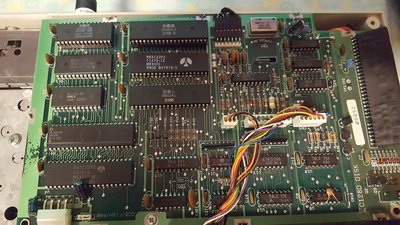
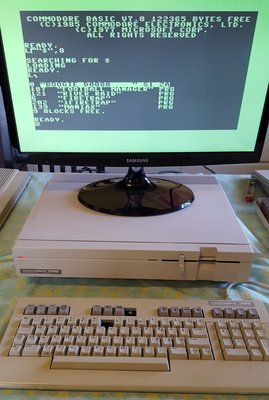
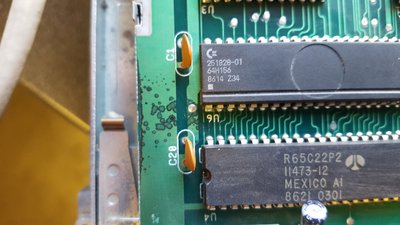
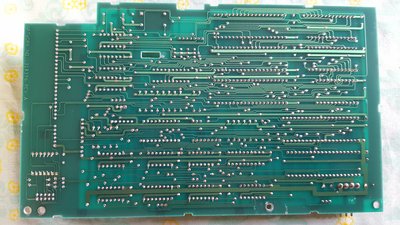
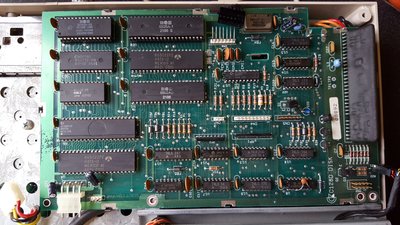
I have and original (first gen) 128D Pal, that needs repair.

It workes (as far as i can tell) without the internal Floppy Drive connected. This leads me to beleive that the floppy driver or the floppy controller is the problem.
External Floppy connected to the serial port workes fine - when the Internal floppy is disconnected.

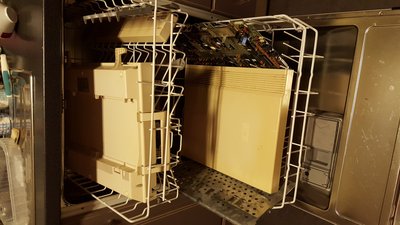
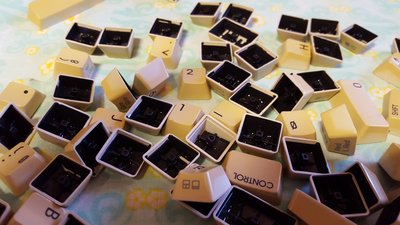
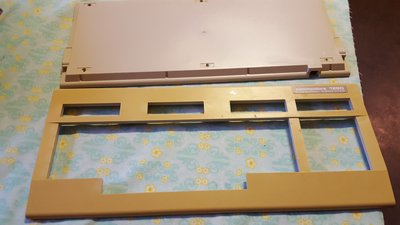
I have attached some pictures. I have earlier got some good ideas from you exelent people here at vogons.

Attachments

  • 20160418_193117.jpg
    Filename
    20160418_193117.jpg
    File size
    1.56 MiB
    Views
    1480 views
    File comment
    Could it be a problem with the tracs? They look damaged.
    File license
    Fair use/fair dealing exception
  • 20160418_192229.jpg
    Filename
    20160418_192229.jpg
    File size
    2.42 MiB
    Views
    1480 views
    File comment
    Backside
    File license
    Fair use/fair dealing exception
  • 20160418_192551.jpg
    Filename
    20160418_192551.jpg
    File size
    2.34 MiB
    Views
    1480 views
    File comment
    Front.
    File license
    Fair use/fair dealing exception

Check out my YouTube channel: Retro Erik https://www.youtube.com/c/RetroErik
My collection: https://retro.hageseter.com

Reply 1 of 12, by BloodyCactus

User metadata
Rank Oldbie
Rank
Oldbie
Jinxter wrote:

External Floppy connected to the serial port workes fine - when the Internal floppy is disconnected.

is the external floppy jumpered to be device #9? as the internal is hard wired to be device #8, and you cant have two device #8's on the IEC bus.

--/\-[ Stu : Bloody Cactus :: [ https://bloodycactus.com :: http://kråketær.com ]-/\--

Reply 2 of 12, by Jinxter

User metadata
Rank Member
Rank
Member

This is what i have done so far.
1. Dismantle and wash all components, except power supply - in dishwasher. 35 degrees Celsius. No soap
2. Connect and try. All works except Internal Floppy Drive: 1571D - I have not found a manual for the 1571D yet.
3. Damaged tracks on the PCB card for the Floppy Drive. Planning to solder on Wednesday-
4. Dismantled and cleaned keyboard. Cleans all spring with Coca Cola for 20 minutes, then put the spring and the keys in the dishwasher (as above)

Things to do.
1. Retrobright with 12% Hydroperoxide (H2O2). Put all plastic in a bath for 8 hours in the sun. (if we get some here in Bergen/Norway)
2. Wait for the two missing keys to get here.
3. Solder the Controller for the Internal Floppy Drive.

4. Dismanteled and clean keyboard. Cleans all spring with Coca Cola for 20 minutes, then put the spring and the keys in the dishwahser (as above)

Attachments

  • 20160418_172954.jpg
    Filename
    20160418_172954.jpg
    File size
    1.66 MiB
    Views
    1399 views
    File comment
    Workes fine after cleaning.
    File license
    Fair use/fair dealing exception
  • 20160417_223044.jpg
    Filename
    20160417_223044.jpg
    File size
    1.83 MiB
    Views
    1399 views
    File comment
    Cleaned in dishwasher
    File license
    Fair use/fair dealing exception
  • 20160419_204630.jpg
    Filename
    20160419_204630.jpg
    File size
    1.63 MiB
    Views
    1399 views
    File comment
    Missing two springs...
    File license
    Fair use/fair dealing exception
  • 20160419_204806.jpg
    Filename
    20160419_204806.jpg
    File size
    1.53 MiB
    Views
    1399 views
    File comment
    Clean keys for the 128D keyboard
    File license
    Fair use/fair dealing exception
  • 20160419_204851.jpg
    Filename
    20160419_204851.jpg
    File size
    1.47 MiB
    Views
    1399 views
    File comment
    128D Keyboard cover
    File license
    Fair use/fair dealing exception

Check out my YouTube channel: Retro Erik https://www.youtube.com/c/RetroErik
My collection: https://retro.hageseter.com

Reply 3 of 12, by BloodyCactus

User metadata
Rank Oldbie
Rank
Oldbie

that last pic in tour top post of the pcb, def looks like something has been wiped over it, i can see better where it looks like some traces might be gone like at U20 between the two top middle chips.

--/\-[ Stu : Bloody Cactus :: [ https://bloodycactus.com :: http://kråketær.com ]-/\--

Reply 4 of 12, by Jinxter

User metadata
Rank Member
Rank
Member

I checked all the solderings tonight (with the help of my friend Francis)
No problems where the solderings looks bad.
According to Commodore 128 trouble shooting guide i have decied to replace the ROCKWELL R65C22P2 DIP-40 Versatile Interface Adapter (VIA) 16 I/O.
I orderes two on eBay just know - when i install them i will be back with more info.

Check out my YouTube channel: Retro Erik https://www.youtube.com/c/RetroErik
My collection: https://retro.hageseter.com

Reply 5 of 12, by badmojo

User metadata
Rank l33t
Rank
l33t

I got nothing useful to add other than some encouragement - the C128 is a classic, good to see this one getting some love 😎

Life? Don't talk to me about life.

Reply 6 of 12, by BloodyCactus

User metadata
Rank Oldbie
Rank
Oldbie
Jinxter wrote:
I checked all the solderings tonight (with the help of my friend Francis) No problems where the solderings looks bad. According […]
Show full quote

I checked all the solderings tonight (with the help of my friend Francis)
No problems where the solderings looks bad.
According to Commodore 128 trouble shooting guide i have decied to replace the ROCKWELL R65C22P2 DIP-40 Versatile Interface Adapter (VIA) 16 I/O.
I orderes two on eBay just know - when i install them i will be back with more info.

did you test continuity across the traces? some of those traces look completly gone.

why do you suspect the R65C22P2 is bad? I can see traces from it to the 6526 look gone. traces look gone in a couple of other places too.

--/\-[ Stu : Bloody Cactus :: [ https://bloodycactus.com :: http://kråketær.com ]-/\--

Reply 7 of 12, by Jinxter

User metadata
Rank Member
Rank
Member

I have measured the traces on the left (in the detailed Picture) arround U6.
I have not yet (will do on Friday) meassured the traces arround U20.
When saying meassured i mean following the possible faulty traces from one end to the other end using the PCB diagram.
The reason that i belive the R65C22P2 to be faulty is that according to the "1751 Troubleshooting guide": http://www.retroisle.com/commodore/c64128/Tec … bleshooting.php
I have this Symptom: "Normal drive boot up, but computer locks up."
Solution is then: "Replace 65SC22 VIA chip at location U9."

Attachments

  • 1571 Floppy Drive.jpg
    Filename
    1571 Floppy Drive.jpg
    File size
    4.31 MiB
    Views
    1279 views
    File comment
    1571 Diagram in JPEG. I have TIFF in better quality
    File license
    Fair use/fair dealing exception

Check out my YouTube channel: Retro Erik https://www.youtube.com/c/RetroErik
My collection: https://retro.hageseter.com

Reply 8 of 12, by Jinxter

User metadata
Rank Member
Rank
Member

I Finally fixed my C128D.
The Floppy drive was the problem.

First i placed (with some help from my friend Fr@ncis) the R65C22P2. Now computers boot up with floppy attached, but Floppy only had error: File not found.
I then clean the heads - still only errors.
I could see the heads did not move at all, so i forced the head to more back and forth a few times. Then the heads started to move when i tried to load from floppy. But still only error message.

I then typed inn and ran this program:

Head Alignment Program from RUN Magazine

0 REM REVERSE KNOCK YOUR DRIVE - STEPHEN CHEUNG
10 OPEN 15,8,15,"I"
20 SP=1:FORI=1 TO 100:GOSUB40:NEXT
30 FORI=1 TO 20:SP=-1:GOSUB40:NEXT:PRINT"ALL DONE!":PRINT#15,"I":CLOSE15:END
40 PRINT#15,"M-R"CHR$(0)CHR$(28):GET#15,A$:A=ASC(A$+CHR$(0)):BI=A AND 3
50 BI=BI+SP:BI=BI AND 3
60 R=(A AND 252) OR BI: PRINT#15,"M-W"CHR$(0)CHR$(28)CHR$(1)CHR$(R):RETURN

I could see that the head moved, but still error. I ran the program several times (apx. 10) and tried LOAD"$",8 between every run.
Then suddenly - it worked. Tried with a few games and they all loaded with no errors.

This troubleshooting guide was a good help: http://www.retroisle.com/commodore/c64128/Tec … bleshooting.php

Attachments

  • 20160427_232142.jpg
    Filename
    20160427_232142.jpg
    File size
    2.03 MiB
    Views
    1237 views
    File comment
    1571D with new Chip: R65C22P2
    File license
    Fair use/fair dealing exception

Check out my YouTube channel: Retro Erik https://www.youtube.com/c/RetroErik
My collection: https://retro.hageseter.com

Reply 10 of 12, by Jinxter

User metadata
Rank Member
Rank
Member

Here is a picture of my C128D after repair and cleanup.

1. Stripped, Cleaned (in dishwasher) and inspected.
2. Fixed internal Floppydrive 1571D - faulty IC, dirty and stuck heads.
3. Retrobright the casing/keyboard incl. keys

Voila

Have ordered the two missing keys - one from Canada and one from Australia.

Attachments

  • 20160428_103737.jpg
    Filename
    20160428_103737.jpg
    File size
    755.8 KiB
    Views
    1219 views
    File comment
    My cleaned and working C128D
    File license
    Fair use/fair dealing exception

Check out my YouTube channel: Retro Erik https://www.youtube.com/c/RetroErik
My collection: https://retro.hageseter.com

Reply 11 of 12, by BloodyCactus

User metadata
Rank Oldbie
Rank
Oldbie

nice. can you do 80 column on that monitor? I have my 128DCR hooked to a 1902A which is nice as it can do the 40/80 col 128 modes. I have an c128 to vga adapter from back in the commodore128.org forum days but never got around to using it since I have the 1902a.

now you just need to buy the C128 jiffydos roms! makes a huge difference.

--/\-[ Stu : Bloody Cactus :: [ https://bloodycactus.com :: http://kråketær.com ]-/\--

Reply 12 of 12, by Jinxter

User metadata
Rank Member
Rank
Member

I cannot use 80 column. I onlu use a Scart input.
I tried making a RGBi to SCART cable with electronics, but it did not work.

Check out my YouTube channel: Retro Erik https://www.youtube.com/c/RetroErik
My collection: https://retro.hageseter.com