First post, by 386_junkie

- Rank
- Oldbie
The Systempro Project
1) Beginnings (The modified System): - 386_Junkie’s duo core 386; The modified Systempro!
2) Build (The Systempro): - The Systempro Project; The Build
3) Bios: - <----------You are here
4) Bugs: -
5) Benching (386 class): - The Systempro Project; Benchmarking (386 class)
6) Benching (386 class) round 2: -
7) Benching (4/586 class): -
______________________________________________________________
The Bios
After the amount of accumulative hours I’ve spent constructing from scratch the System Configuration (Compaq’s bios), and afterwards entering to make changes for any hardware change from system boards and memory, to graphics… I figured this could do with a thread of its own anyway. This and giving a worthy heads up to anyone who is planning on undertaking such a Compaq adventure or even those who are genuinely interested in the Systempro, or even Compaq bios of this era.
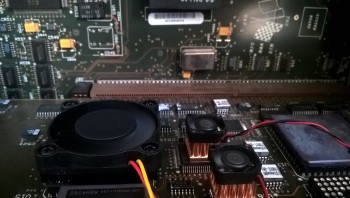
I’ll start by saying this technically is not a bios as such, it is actually NVRAM, a similar to (1287) Dallas RTC clock chip that has limited battery life which few here have modified, retrofitting a coin cell to revive their beloved and most cherished.
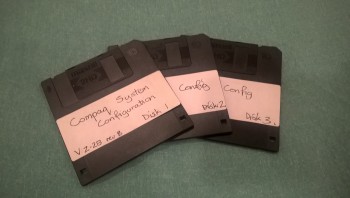
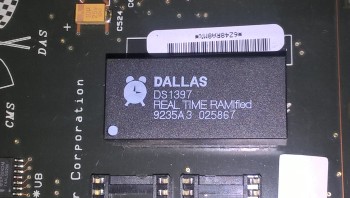
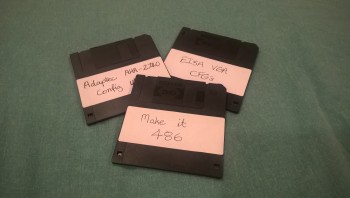
Well on the Systempro there is instead a (1397) Dallas, which is where the System Configuration is created (from scratch when the RTC is blank) loaded in by three floppy discs, or is where any change to the hardware is made, also requiring the three floppies. Some other cfg’s and tools I’ve been using: -
I’ve learned the hard way and through time that the system likes to be loaded with hardware added in a certain order. Not adding hardware in a specified order results in system hang up’s, configuration error messages, and locking (write protect!) of the NVRAM, and a lot of frustrating time! The order in the addition of hardware is as follows: -
1 System bus hardware (CPU & Memory boards)
2 EISA bus boards
3 Fixed Disk controllers
If you need to make a change at any one level you need to remove the below levels first, make the change, and then replace the levels… very time consuming it can be, though can be streamlined a little once you figure the routine.
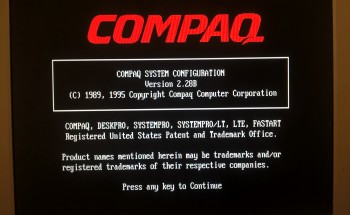
So the System Configuration, once you’re in looks like this: -
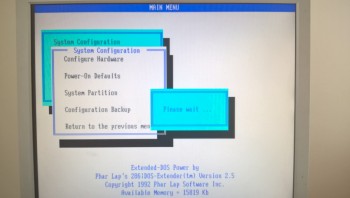
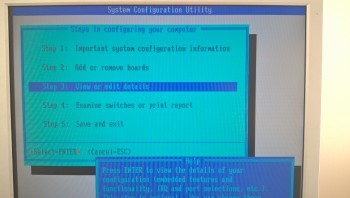
There is really only one area to hardware, which is of course; - “Configure Hardware”. In here you can make changes the system, but for the benefit of the viewing public I’ll go right into “view or edit details”.
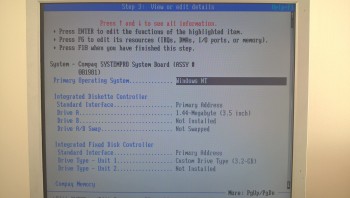
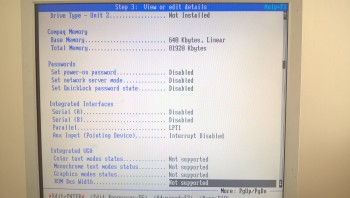
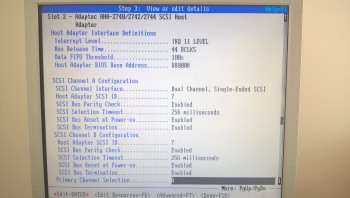
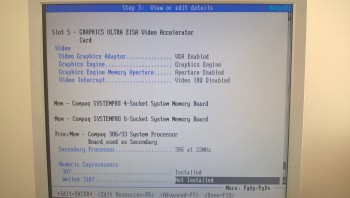
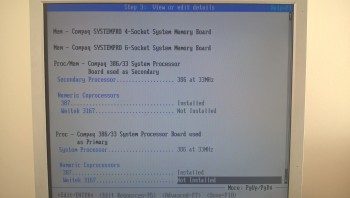
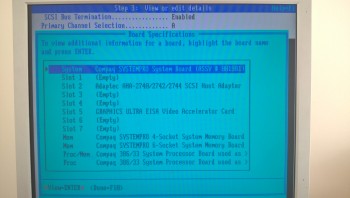
It can be seen from the photos that this System Configuration is relatively primitive compared to some of the higher end 386 motherboards that have advanced chipset options, and user configurable timing. Instead this is just a humble 1989 software loaded from floppy into NVRAM, configuring system hardware… nothing more, nothing less. It does not even detect the system FSB change… the software being fixed to see the 386 (33MHz only) processor boards, but not the change I made to the system bus, changing out the oscillator to make the system run at a steady 40MHz.
With the system setup and configured, it’s time to test and bench.