VOGONS


First post, by aries-mu

User metadata
Rank Oldbie
Rank
Oldbie

Hey retro-fellows,

we've all been there: our old computer's CMOS battery is dead (5V lithium button-like battery), but it is soldered on the motherboard.

The battery is actually "suspended", being held just by a little metal pin underneath (to which it is soldered), and by a thin metal clamp on top of it, to which it is soldered too, exactly like this one:

s-l1600.jpg
https://i.ebayimg.com/images/g/vUoAAOSwmvtcXZYE/s-l1600.jpg

Instead of going through time consuming desoldering and resoldering procedures, how about this. After, of course, completely isolating the entire motherboard, slots, and everything (so that no debris or metal dust can end up anywhere, what if, instead of desoldering, I use those small diamond rotor blades (to attach to a battery-powered screw driver) and I cut those metal pins that hold the battery?

Do you see any danger in this for the computer? vibrations? other issues?

Thanks

They said therefore to him: Who are you?
Jesus said to them: The beginning, who also speak unto you

Reply 1 of 14, by root42

User metadata
Rank l33t
Rank
l33t

Well, I would still simply add some flux and fresh solder and then wick or suck away all of the solder on the two pins. Before starting to go anywhere near with rotating blades to that thing... 😀

YouTube and Bonus
80486DX@33 MHz, 16 MiB RAM, Tseng ET4000 1 MiB, SnarkBarker & GUSar Lite, PC MIDI Card+X2+SC55+MT32, OSSC

Reply 2 of 14, by retardware

User metadata
Rank Oldbie
Rank
Oldbie

In a HP service manual I read that a recommended way is to remove the battery by snipping off the leads.
After that it is easy to remove the soldered pin remains without overheating/overstressing anything.

Reply 3 of 14, by Deunan

User metadata
Rank Oldbie
Rank
Oldbie

I concur, one sneeze with that rotating blade and that mobo is going to to require a lot of repair to work again, if ever.
Also if you remove the battery along with the terminals you can put a socket in there (assuming there is enough space) - that would greatly simplify future replacements. Might even be cheaper than a special battery like this.

Reply 4 of 14, by aries-mu

User metadata
Rank Oldbie
Rank
Oldbie
root42 wrote:

Well, I would still simply add some flux and fresh solder and then wick or suck away all of the solder on the two pins. Before starting to go anywhere near with rotating blades to that thing... 😀

I'm not very familiar with soldering, I did it only once, there are a lot of other tracks and things very close to the pins of the battery, I'm afraid to damage something else with the soldering iron.

They said therefore to him: Who are you?
Jesus said to them: The beginning, who also speak unto you
Reply 5 of 14, by aries-mu

User metadata
Rank Oldbie
Rank
Oldbie
Deunan wrote:

I concur, one sneeze with that rotating blade and that mobo is going to to require a lot of repair to work again, if ever.
Also if you remove the battery along with the terminals you can put a socket in there (assuming there is enough space) - that would greatly simplify future replacements. Might even be cheaper than a special battery like this.

I would solder black and red cables of an external AA batteries socket to the soldered pins that would be left on the mobo.
I'm worried about damaging close tracks and other very close solderings with the iron

They said therefore to him: Who are you?
Jesus said to them: The beginning, who also speak unto you

Reply 6 of 14, by CrossBow777

User metadata
Rank Member
Rank
Member

As was stated, just use some wire cutters to snip the legs as close to the battery as you can. then you can leave the legs in place to use as easy solder attachment points for wire leads to a new battery holder or something for easier changeouts in the future.

Ideally, would be to install an actual battery holder in place of the current battery. But that would require removing the actual pins by desoldering them from the main board completely.

g883j7-2.png
Midi Modules: MT-32 (OLD), MT-200, MT-300, MT-90S, MT-90U, SD-20

Reply 7 of 14, by aries-mu

User metadata
Rank Oldbie
Rank
Oldbie
CrossBow777 wrote:

As was stated, just use some wire cutters to snip the legs as close to the battery as you can. then you can leave the legs in place to use as easy solder attachment points for wire leads to a new battery holder or something for easier changeouts in the future.

Ideally, would be to install an actual battery holder in place of the current battery. But that would require removing the actual pins by desoldering them from the main board completely.

I like the idea, and I tried in the past for an identical mobo. Unfortunately, the space under the battery is too narrow.
I would require a very flat and long wire cutter... unless components nearby will prevent it from passing...

They said therefore to him: Who are you?
Jesus said to them: The beginning, who also speak unto you

Reply 8 of 14, by Nvm1

User metadata
Rank Member
Rank
Member
aries-mu wrote:
CrossBow777 wrote:

As was stated, just use some wire cutters to snip the legs as close to the battery as you can. then you can leave the legs in place to use as easy solder attachment points for wire leads to a new battery holder or something for easier changeouts in the future.

Ideally, would be to install an actual battery holder in place of the current battery. But that would require removing the actual pins by desoldering them from the main board completely.

I like the idea, and I tried in the past for an identical mobo. Unfortunately, the space under the battery is too narrow.
I would require a very flat and long wire cutter... unless components nearby will prevent it from passing...

Snip the high ("top"), bend the battery on the little leg below it and cut agian. Enough room to even use a huge cutter.
If you are worried first put a cloth over the mobo where you use the cutter incase it "jumps" a bit when you snip the little leg.

Reply 9 of 14, by aries-mu

User metadata
Rank Oldbie
Rank
Oldbie
Nvm1 wrote:

Snip the high ("top"), bend the battery on the little leg below it and cut agian. Enough room to even use a huge cutter.
If you are worried first put a cloth over the mobo where you use the cutter incase it "jumps" a bit when you snip the little leg.

Thanks!!!

Yeah that's what I ended up doing last time on the identical mobo.

The problem were 2:

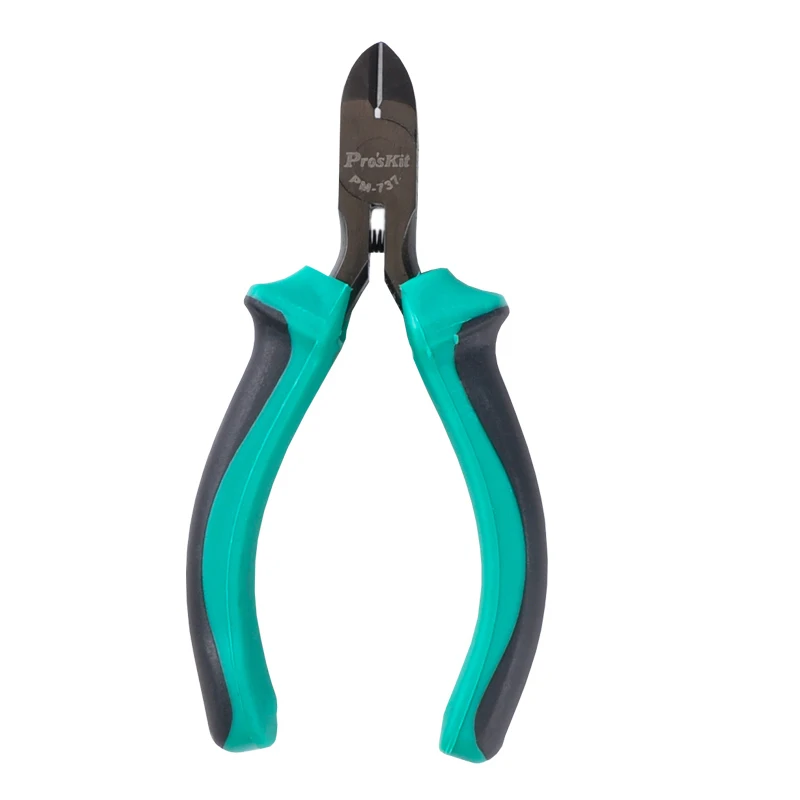
1) I didn't have a wire cutter. I had something like this:
PM-Mini-tipo-Multifunzionale-S45C-Durezza-Permenorm-Lega-Pinze-Elettricista-Strumenti-Pinza-Per-Tagliare-Filo-di.jpg

2) It was incredibly difficult to cut those pieces of metal. I had to play around a lot, that's why I thought of the rotating blade. They seemed indestructible.

Do you think because the cutting tool was an improper one?

They said therefore to him: Who are you?
Jesus said to them: The beginning, who also speak unto you

Reply 10 of 14, by wiretap

User metadata
Rank Oldbie
Rank
Oldbie

I replaced that type battery on my Compaq Presario 9232 a few months ago. I didn't even need to take the motherboard out of the case. With a soldering iron, I heated up each leg at a time and pulled them out of the hole. Then I used a solder sucker to clean up the holes. Then I just plugged the replacement battery (same type) into the holes and filled it up with solder. The whole process took maybe 5 minutes and it was really easy.

Cutting things on a PCB is really undesirable because you can ruin the hole/sleeve/pad and it makes it harder to clean out properly if you want to solder it after. Using the right tools for the job should be priority if you're planning on saving old computer parts from dying.

My Github
Circuit Board Repair Manuals

Reply 11 of 14, by aries-mu

User metadata
Rank Oldbie
Rank
Oldbie
wiretap wrote:

I replaced that type battery on my Compaq Presario 9232 a few months ago. I didn't even need to take the motherboard out of the case. With a soldering iron, I heated up each leg at a time and pulled them out of the hole. Then I used a solder sucker to clean up the holes. Then I just plugged the replacement battery (same type) into the holes and filled it up with solder. The whole process took maybe 5 minutes and it was really easy.

Cutting things on a PCB is really undesirable because you can ruin the hole/sleeve/pad and it makes it harder to clean out properly if you want to solder it after. Using the right tools for the job should be priority if you're planning on saving old computer parts from dying.

Oh wow, I'm not alone in dealing with highly-proprietary branded stuff!

Our systems are sisters.

the one I already worked on (when I cut the pins) was a Compaq Prolinea 4/66

The one I will have to work someday (having free time, good luck with that) is a Compaq Deskpro 4100.

wiretap wrote:

I didn't even need to take the motherboard out of the case. With a soldering iron, I heated up each leg at a time and pulled them out of the hole. Then I used a solder sucker to clean up the holes.

And you actually did that!!!!???!
Man, when I did that on the Prolinea 4/66, I left the two pins holding the larger battery clamp because they were too close to other tracks and I was afraid of using the iron there. So I just soldered a wire to that ugly-cut clamp that was left (the positive pole basically).

But the little pin underneath the battery, which was sharp and cut, I removed it by de-soldering.
I disassembled the motherboard and went from underneath. MAN THAT WAS TOUGH! I had to push the soldering iron tip for a LOOOONG time to be able to pull that little pin away (by pulling with the pliers from the other side of the mobo (components side) at the same time, and I had to pull hard!
I was afraid I would have melted the board...

How did you manage to just heat it a little bit from above and pull out the pins??? Doesn't it risk to break everything for the excessive force needed?

wiretap wrote:

Then I used a solder sucker to clean up the holes.

And was it able to suck the solder from above the motherboard, instead of removing it and going from underneath? How did you do that?

wiretap wrote:

Then I just plugged the replacement battery (same type) into the holes and filled it up with solder. The whole process took maybe 5 minutes and it was really easy.

The same type? Do you mean with a socket? What kind of socket did you buy?

Thanks a lot!!!

PS: damn soldered batteries though! Manufacturers could have used a little more foresight in designing things. A Motherboard is the heart of a computer, not just an ISA lan card or a parallel flat cable. Especially branded computers, which aren't like DIY/clone computers, are expected to last long. What were they thinking when soldering batteries to motherboards? That a WHOLE branded computer (and expensive!) should have its life limited by a tiny battery?
We're not talking high-tech. A simple socket for batteries were well within the reaches of 80-90s technology, come on!

They said therefore to him: Who are you?
Jesus said to them: The beginning, who also speak unto you

Reply 12 of 14, by DaveJustDave

User metadata
Rank Member
Rank
Member

I just picked up a packard bell that had the same setup, except the battery is like half the size. the bad thing with these machines is that with a bad CMOS battery it won't even boot. the second you set the hard drive settings and save, it reboots and instantly loses your settings.

I have no clue what I'm doing! If you want to watch me fumble through all my retro projects, you can watch here: https://www.youtube.com/user/MrDavejustdave

Reply 13 of 14, by wiretap

User metadata
Rank Oldbie
Rank
Oldbie
aries-mu wrote:
Oh wow, I'm not alone in dealing with highly-proprietary branded stuff! […]
Show full quote
wiretap wrote:

I replaced that type battery on my Compaq Presario 9232 a few months ago. I didn't even need to take the motherboard out of the case. With a soldering iron, I heated up each leg at a time and pulled them out of the hole. Then I used a solder sucker to clean up the holes. Then I just plugged the replacement battery (same type) into the holes and filled it up with solder. The whole process took maybe 5 minutes and it was really easy.

Cutting things on a PCB is really undesirable because you can ruin the hole/sleeve/pad and it makes it harder to clean out properly if you want to solder it after. Using the right tools for the job should be priority if you're planning on saving old computer parts from dying.

Oh wow, I'm not alone in dealing with highly-proprietary branded stuff!

Our systems are sisters.

the one I already worked on (when I cut the pins) was a Compaq Prolinea 4/66

The one I will have to work someday (having free time, good luck with that) is a Compaq Deskpro 4100.

wiretap wrote:

I didn't even need to take the motherboard out of the case. With a soldering iron, I heated up each leg at a time and pulled them out of the hole. Then I used a solder sucker to clean up the holes.

And you actually did that!!!!???!
Man, when I did that on the Prolinea 4/66, I left the two pins holding the larger battery clamp because they were too close to other tracks and I was afraid of using the iron there. So I just soldered a wire to that ugly-cut clamp that was left (the positive pole basically).

But the little pin underneath the battery, which was sharp and cut, I removed it by de-soldering.
I disassembled the motherboard and went from underneath. MAN THAT WAS TOUGH! I had to push the soldering iron tip for a LOOOONG time to be able to pull that little pin away (by pulling with the pliers from the other side of the mobo (components side) at the same time, and I had to pull hard!
I was afraid I would have melted the board...

How did you manage to just heat it a little bit from above and pull out the pins??? Doesn't it risk to break everything for the excessive force needed?

wiretap wrote:

Then I used a solder sucker to clean up the holes.

And was it able to suck the solder from above the motherboard, instead of removing it and going from underneath? How did you do that?

wiretap wrote:

Then I just plugged the replacement battery (same type) into the holes and filled it up with solder. The whole process took maybe 5 minutes and it was really easy.

The same type? Do you mean with a socket? What kind of socket did you buy?

Thanks a lot!!!

PS: damn soldered batteries though! Manufacturers could have used a little more foresight in designing things. A Motherboard is the heart of a computer, not just an ISA lan card or a parallel flat cable. Especially branded computers, which aren't like DIY/clone computers, are expected to last long. What were they thinking when soldering batteries to motherboards? That a WHOLE branded computer (and expensive!) should have its life limited by a tiny battery?
We're not talking high-tech. A simple socket for batteries were well within the reaches of 80-90s technology, come on!

On those type batteries, it is easy to start with the single leg under the battery.. stick a small tip soldering iron underneath (it can easily reach), then lift up on the battery gently -- it comes right out of the hole with little force. Then you can do the two rear legs of the battery the same way. If you have to pull it with any sort of effort, the solder isn't melted.

For sucking up the solder, you just add a little more solder/flux to the empty hole, then vacuum it out. It gets all the solder out without a problem since the flux makes the solder only stick to the interior of the hole when wetted. Going at it from the top or bottom side is no different.

For my replacement battery, I used the exact same type, not one with a socket. I think I ordered the exact replacement battery from Element14/Mouser/Farnell or somewhere like that. If you search my posts, you'll probably find the exact link because I'm sure I posted it on the forums. (possibly in the "what retro activity did you get up to today?" thread)

As far as batteries back in the 80's and 90's.. manufacturers weren't very forward thinking. They also didn't want to make it too easy for an end-user to service it. Companies that sold whole computers wanted extra revenue from performing repairs or selling replacement parts. There's also the aspect of upgrading in the time frame before the battery even dies, since the personal computer was relatively new and advancing quickly.

My Github
Circuit Board Repair Manuals

Reply 14 of 14, by aries-mu

User metadata
Rank Oldbie
Rank
Oldbie
wiretap wrote:

On those type batteries, it is easy to start with the single leg under the battery.. stick a small tip soldering iron underneath (it can easily reach), then lift up on the battery gently -- it comes right out of the hole with little force. Then you can do the two rear legs of the battery the same way. If you have to pull it with any sort of effort, the solder isn't melted.

• But do I have to still "heat" the base of the single leg using the soldering iron before pulling up the battery?
• What do you mean that "the solder isn't melted"? That I just have to pull the battery? Or do I have to somehow soften the bases?

wiretap wrote:

For sucking up the solder, you just add a little more solder/flux to the empty hole, then vacuum it out. It gets all the solder out without a problem...

• If the hole is "empty", what should I vacuum out?
• To suck/vacuum up the solder, will any such tool do the trick, even the cheapest one, or is there any particular suggestion for purchasing?
• I bet if I go to the electronics store to buy this "flux" thing I'll find myself starting at dozens of different types of flux (like it happened when I went to buy "just some solder wire"). What kind of "flux" should I get?

wiretap wrote:

For my replacement battery, I used the exact same type, not one with a socket. I think I ordered the exact replacement battery from Element14/Mouser/Farnell or somewhere like that. If you search my posts, you'll probably find the exact link because I'm sure I posted it on the forums. (possibly in the "what retro activity did you get up to today?" thread)

Thanks again. Well, if I have to do the whole thing, I prefer to install something that will allow me to replace the battery again without any particular tool/soldering.

wiretap wrote:

As far as batteries back in the 80's and 90's.. manufacturers weren't very forward thinking. They also didn't want to make it too easy for an end-user to service it. Companies that sold whole computers wanted extra revenue from performing repairs or selling replacement parts. There's also the aspect of upgrading in the time frame before the battery even dies, since the personal computer was relatively new and advancing quickly.

Good points. Still, although I see the "reason" behind extra revenues, I consider it unfair. I understand manufacturers were trying to run a business, but asking for money to customers/clients for heavy interventions (like replacement of a motherboard / or soldering activities on the mobo) just because a battery run out is and remains unfair for me. A battery is a battery and should be replaceable by any end user with no effort other than unscrewing the case of whatever equipment.
It would be like sealing the hood of the car, and then you'd need to send the car back to the manufacturing facility just to replace or recharge its battery.

thanks again!

They said therefore to him: Who are you?
Jesus said to them: The beginning, who also speak unto you