VOGONS


First post, by Intel486dx33

User metadata
Rank l33t
Rank
l33t

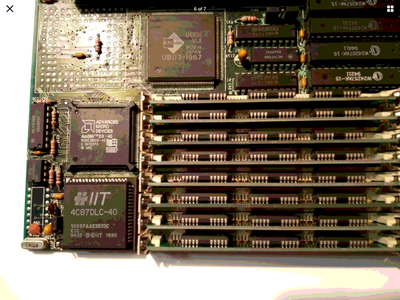
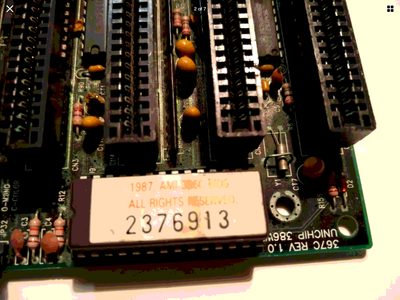
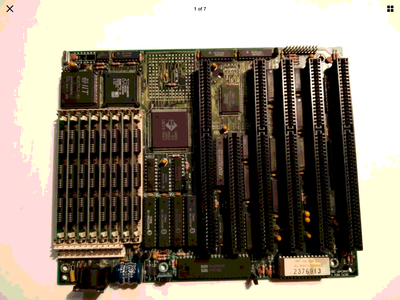
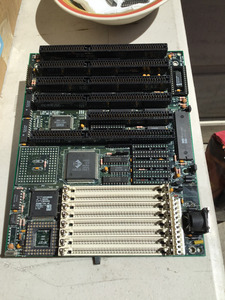
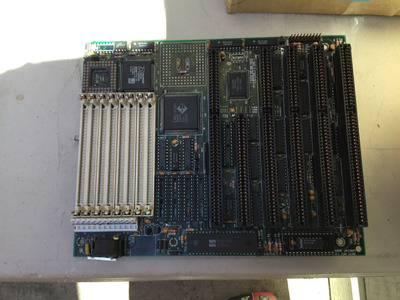
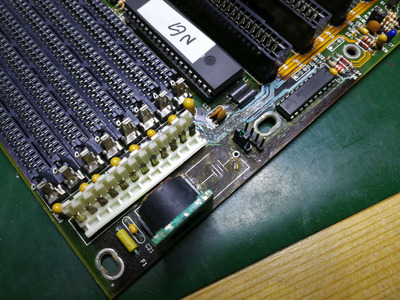
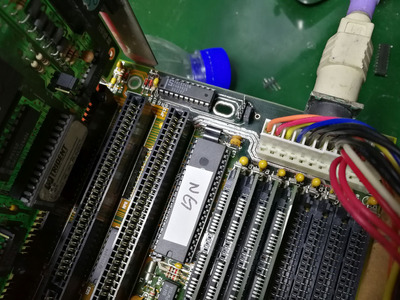
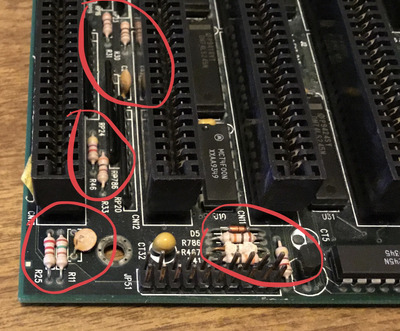
I received a 386 motherboard that needs restoration. It is not working.
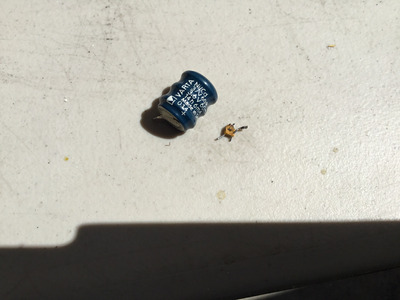
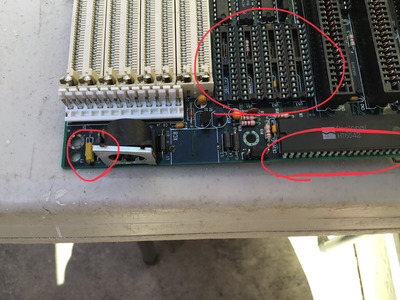
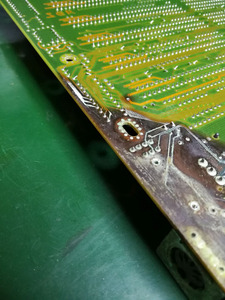
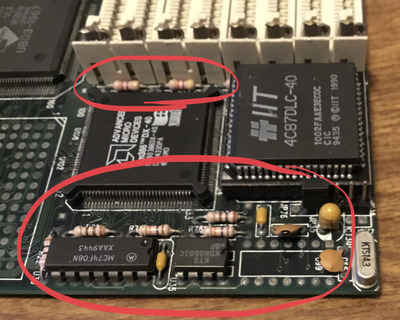
The barrel battery has leaked acid all over the motherboard and it also has one busted capacitor and maybe some bulging caps ?

1) First thing I am going to do is cut off the barrel battery.
2) remove bad capacitors.
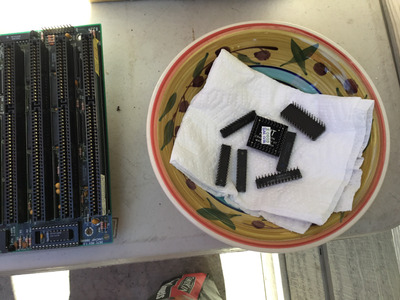
3) remove all removable Ram , cache, bios, and chips.
4) wash motherboard.

Question:
What’s the best way to wash this motherboard to remove all acid, corrosion and residue ?

What else should I do before reassembling this motherboard for repair ?

Attachments

Reply 1 of 13, by imi

User metadata
Rank l33t
Rank
l33t

please don't use .png for photos, I can barely see anything with the few colors.

there doesn't seem to be a lot of corrossion anyways (from what I can make out), just put a bit of vinegar on the corroded places and rub with a q-tip and then clean it off with alcohol, remove the battery obviously.
can just wash the board with water if you want it and let it thouroughly dry.

I don't see any electrolytic capacitors on this board, where do you see a bulging cap?
the tantals are probably still fine, if not they'll let you know upon powering up with a loud pop 😉

Reply 2 of 13, by Intel486dx33

User metadata
Rank l33t
Rank
l33t
imi wrote on 2020-07-03, 15:28:
please don't use .png for photos, I can barely see anything with the few colors. […]
Show full quote

please don't use .png for photos, I can barely see anything with the few colors.

there doesn't seem to be a lot of corrossion anyways (from what I can make out), just put a bit of vinegar on the corroded places and rub with a q-tip and then clean it off with alcohol, remove the battery obviously.
can just wash the board with water if you want it and let it thouroughly dry.

I don't see any electrolytic capacitors on this board, where do you see a bulging cap?
the tantals are probably still fine, if not they'll let you know upon powering up with a loud pop 😉

Yes, there is at least one busted tantal cap. I want to know if tantal caps bulge or just pop ?

Reply 4 of 13, by konc

User metadata
Rank l33t
Rank
l33t

What on earth did you do to these photos and why?
From what I can make out there is quite a lot of corrosion, even under chips/connectors, but better pictures are needed. I'd try removing one or two after cleaning to see what's going on underneath.

Reply 5 of 13, by Intel486dx33

User metadata
Rank l33t
Rank
l33t

Okay, I pulled off all the chips from the 386 and soaked them in Vinegar and they cleaned up nice.
I washed the motherboard in vinegar too but it still has a lot of green corrosion on it.

How can I clean this up better. Will “electronic clean” remove this corrosion ?

The motherboard looks repairable I found only one bad Capacitor and dead battery and one broken resistor leg.

Reply 6 of 13, by Intel486dx33

User metadata
Rank l33t
Rank
l33t

I pulled all the chips off the motherboard and washed with vinegar but there is still allot of green corrosion on the metal chip legs and socket connector.

How can I clean this up better.

Will “electronic cleaner” remove the corrosion ?

The Chips cleaned up fine just the motherboard still has corrosion.

Attachments

Reply 7 of 13, by kalohimal

User metadata
Rank Member
Rank
Member

The corrosion looks real bad, and affected areas as far in as the U4800 chipset (the white stuffs on the pins). There are also signs of corrosion on the traces underneath/around the ISA slots, e.g. those around R29/U25. Even the pins of the HMC chip looks oxidized. For the U8400, I would use isopropyl alcohol and a toothbrush to gentle brush following the direction of the pins. For traces underneath the ISA and RAM slots, can only hope for the best. For the 28 pins DIP sockets of the cache, if you're skilled in soldering, I would suggest replacing all the sockets, as it is not easy to remove the corrosion inside the sockets. I would also desolder the keyboard controller and discreet components/keyboard socket around the battery and check each trace for continuity. In some instances, might need to sand away the corroded solder mask, reconnect the traces and tin them to protect the copper from oxidization. I had repaired a board with much worse corrosion this way, but luckily the corrosion was localized. Your corrosion is not as bad but wide spread, so it would be hard.

IMG_20171110_210546.jpg
Filename
IMG_20171110_210546.jpg
File size
567.34 KiB
Views
489 views
File license
Fair use/fair dealing exception
IMG_20171110_210758.jpg
Filename
IMG_20171110_210758.jpg
File size
303.36 KiB
Views
489 views
File license
Fair use/fair dealing exception
IMG_20171110_224241.jpg
Filename
IMG_20171110_224241.jpg
File size
520.82 KiB
Views
489 views
File license
Fair use/fair dealing exception
IMG_20171111_014428.jpg
Filename
IMG_20171111_014428.jpg
File size
358.02 KiB
Views
489 views
File license
Fair use/fair dealing exception
IMG_20171111_014449.jpg
Filename
IMG_20171111_014449.jpg
File size
506.87 KiB
Views
483 views
File license
Fair use/fair dealing exception

Slow down your CPU with CPUSPD for DOS retro gaming.

Reply 8 of 13, by Intel486dx33

User metadata
Rank l33t
Rank
l33t

Can anyone tell me what type of components these are.

1) I have the 10uf 16v Tantalum capacitors already.
2) small flat round capacitors read “10” ?
3) small long components is what ?

Attachments

Reply 9 of 13, by imi

User metadata
Rank l33t
Rank
l33t

ok now those are photos... yeah the corrosion seems worse than what I saw in the first pictures, pretty much goes all over the board, but nothing seems to be too heavily corroded, you can try brushing the pins with diluted vinegar and clean it with alcohol or your "electronic cleaner" after.

the marked components are mostly resistors ("long") and ceramic capacitors ("small round"), those are pretty resilient, tantal only need to be changed if they actually blow like yours.
it's also apparent by the component-number markings on the pcb silkscreen.
C is a capacitor
R is a resistor
D is a diode
...and so on

Reply 11 of 13, by adalbert

User metadata
Rank Oldbie
Rank
Oldbie

Probably 1/4 watt, exact value shouldn't be too important here. I had corrosion problem with exact same mainboard and didn't manage to fix it, but I was able to get some "beeps" (it was dead silent before). Here is the thread Rescuing Unichip 367c 386DX mainboard (battery leak). Desoldering memory sockets and soldering some wires was necessary, you should definitely check the continuity of corroded tracks with a multimeter.

Repair/electronic stuff videos: https://www.youtube.com/c/adalbertfix
ISA Wi-fi + USB in T3200SXC: https://www.youtube.com/watch?v=WX30t3lYezs
GUI programming for Windows 3.11 (the easy way): https://www.youtube.com/watch?v=d6L272OApVg

Reply 13 of 13, by kalohimal

User metadata
Rank Member
Rank
Member

Those would be ceramic capacitors. The marking on them are in pico farads, so e.g. 103 means 10x10^3 pico => 10 nano farads. If it is just 10 means 10 pico farads. You don't need to replace these as they rarely fail.

Slow down your CPU with CPUSPD for DOS retro gaming.