VOGONS


First post, by my03

User metadata
Rank Member
Rank
Member

Hi all,

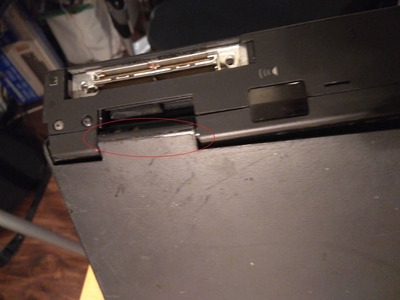
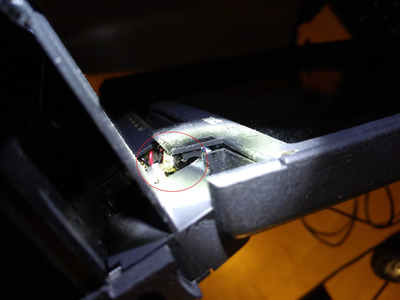
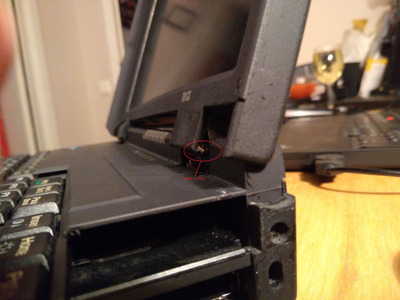
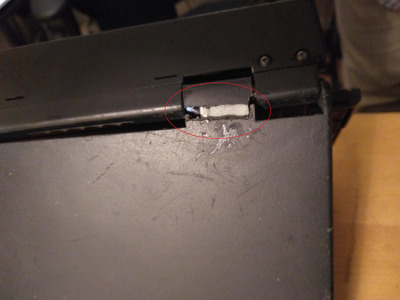
unfortunately, my "butterfly" decided to make life difficult and cracked the screen on the left-hand side where the hinge is. The actual screen cover is not too busted, but the hinge itself peeks out on the back 🙁

I have found the hmm for this model (including a bunch of others in the same document) and i'm going to make my absolute best to restore it as good as i can. While reading up on this particular model online, i often come across descriptions of disassembling it as a nightmare (some even say that some service-centers were not allowed to do it themselves, but had to send them to IBM to fix them).

How bad is it really? Have anyone successfully fixed a similar issue? Since spare parts for this model seems to be unobtanium, my plans are (if possible) to take it apart so much so that i can detach the lcd-assembly (inkl. facia and cover) and see if i can "loosen up" that hinge somehow, then try to "glue" it back again as neatly as possible. Would that be feasible?

I had to do the exact same thing to a much newer machine that i have (Y50-70) that i got fairly cheap that had a cracked hinge attachment against the back-plate and in that case, i could just order the spares and loosen the hinge-screw somewhat (after lubing it), after which it was like new again.

Any advice?

Reply 1 of 6, by adalbert

User metadata
Rank Oldbie
Rank
Oldbie

Here you can look up some hardcore methods for case restoration: https://retrohax.net/commodore-sx-64-keyboard-restoration/

do you have a photo?

Last edited by adalbert on 2020-09-01, 18:46. Edited 1 time in total.

Repair/electronic stuff videos: https://www.youtube.com/c/adalbertfix
ISA Wi-fi + USB in T3200SXC: https://www.youtube.com/watch?v=WX30t3lYezs
GUI programming for Windows 3.11 (the easy way): https://www.youtube.com/watch?v=d6L272OApVg

Reply 2 of 6, by Warlord

User metadata
Rank l33t
Rank
l33t

Show us pictures. There is also a method of repairing ABS plastic that I came up, you may give a try if it its applicable to your situation. Its called ABS slurry repair.

Scroll all the way down for pics, and instructions kinda The video in the Original post is where I got my ideas.

ABS plastic repair

Also I might know where I can get parts for that, but I dont reveal my sources for parts and items on this forum, reasons.

Reply 3 of 6, by my03

User metadata
Rank Member
Rank
Member

Hi Adalbert and warlord,

Thanks for looking at my dilemma 😀

i do. I took a few photos now of the cracked area(s) where the left-hand side seems to be the worst side (right is cracked as well, but not as protruding as the left side).

While i did manage to slide the left hinge back in again, there seems to be a "roller-bearing" of sorts (in lack of better term to describe it) in between the screen facia and the lcd itself that (imho) have misaligned itself. Maybe i could try to undo the facia, carefully lifting it off and see if i can put that "thing" back in place again?

Regarding the hinge (the part that sits towards the back-side/against the lid itself) i was thinking if it would be possible to superglue it back in place, thinking it should stay firm, flush against the lid-part (and not move freely in there) but i'm not 100% sure about that and would really need some advice.

Which leaves the plastic cracks themselves... i looked at that restoration job on the SX-64 and.... wow... that is true craftmanship and dedication. Truly amazing job. For for personally, it does not have to be 100% perfect, but it would of course not hurt either to have those cracks as invisible as possible. With that in mind, would it be possible to glue them (maybe not super-glue if thats too strong)?

Attachments

Reply 4 of 6, by adalbert

User metadata
Rank Oldbie
Rank
Oldbie

I've had good luck with superglue only when glued parts didn't receive any mechanical stress (like glueing a decorative panel to a case). When there was any kind of flexing involved, parts would separate very quickly and it would be hard to clean off the remaining glue before trying something better (it leaves a white residue). And the screen probably is flexing near that hinge. Two part epoxy worked better for me in such cases, but it isn't a perfect solution because such glue leaves a thicker gap, and also requires some surface area to have proper strength. I sometimes cut a piece of fine fiberglass mesh (from anti-insect window screen), cover the surface of both parts with additional epoxy and glue them together with that mesh acting as a patch (there is also glue between that parts). Excessive glue can be wiped with wet q-tip in first few minutes of curing. But maybe it would be good to try that acetone welding method Warlord suggested, although you should be careful not to damage other parts with acetone drops.

Repair/electronic stuff videos: https://www.youtube.com/c/adalbertfix
ISA Wi-fi + USB in T3200SXC: https://www.youtube.com/watch?v=WX30t3lYezs
GUI programming for Windows 3.11 (the easy way): https://www.youtube.com/watch?v=d6L272OApVg

Reply 5 of 6, by my03

User metadata
Rank Member
Rank
Member

adalbert, i think that the enforcement method (fibre-glass) sounds like a solid plan imho. I will definately go down that route in the end. But first i think i need to get the bezel off the unit in order to see what that metal thing is that seems to be shifted 95 degrees (imho making the back-cover crack due to resistance). Afaik, the bezel is fastened together using 2.5 inch torx. But is it enough just to release those 4 screws to lift it i wonder?

Reply 6 of 6, by pentiumspeed

User metadata
Rank l33t
Rank
l33t

No. Don't do what others suggests. The actual mounts are in the lid top itself, excessive load stress by poor design. The plastic is fibre-reinforced (mine broke away with loud crack) when I had to cut away extra posts in the new lid, and the plastic posts were molded around 4 brass anchors that 4 screws are threaded through, 2 screws per hinge.

Mine broke same way after a drop by previous owner, and had to source a new top lid back in the day after I purchased 701C used around 1997.

Best way is drill through the lid's exterior where 4 screws are and make a strengthening plate (external on top of lid) for the screws and nut, and cut away the old posts, and make 2 blocks and 2 holes each, of same height as old posts were and the hinge bracket holding all together via screws and glue. Screws and nuts and epoxy is way stronger using this method. I had to do same repair to LTE 386s/20 when I owned it, again same flawed design, except mine was not dropped, just cracked away with use.

Cheers,

Great Northern aka Canada.