I owe a lot to this community - maybe it didn't save me much money in terms of wanting to buy more hardware 🤣 , but it most certainly saved tons of time hunting down drivers, lots of frustration with known hardware issues, so on, and so on.
In my desire to contribute back, I started looking into something that interested me personally - what if I could simplify these systems such that they only have permanent storage attached, and are fed everything else over the network?
No more floppies, CD/DVD's..not even to install the operating system. Moreover, I want turn-on-and-game reliability. If something goes sideways, I want the ability to return to a known good state.
Back in the day, I spent I don't know how many hours setting up and configuring Windows 3.1, 95, 98 and eventually XP systems. Every couple of months I'd get frustrated with the stability or performance, blow it all away and start over. Back then I daily drove the machine of course, but I have a whole lot less time for such things now, and I've started to accrue and archive quite a bit of old software. Where do I put this stuff? How do I back it up? Most importantly, how do I make it accessible to actually enjoy?
Aside from that, it opens up interesting possibilities (in my opinion), to use the most modern of chassis, cooling and power supplies. It's tough to find drive bays, nowadays!
I'm delighted to say that I was fairly successful in this mission; to the point where I can even conjure up an MS-DOS 6.22 install on a Socket 7 machine over the network. My Pentium 233 with its Voodoo Banshee and AWE32 are proudly hosted in a megamodern tempered glass case, and to me, it looks pretty darned awesome.
In the next couple of posts, I'm going to walk through how I set up my retro server, explain how I accomplish OS setup and mounting game images, and share some scripts that might help you.
Before I get to that, many thanks in particular to blougaville, who started down a similar path and really helped me round out some big parts of the process. Thanks!!
Approach to configuration and security on an unsupported Server OS..
You're running an ancient operating system, which is now surrounded by a very different Internet than what it was designed for.
This has huge benefits for retro systems; enabling you to run completely media-free (saving wear/tear on physical media), including to install operating systems. You can also backup your clients, run old game servers (retro LAN party!).
Depending on the range of operating systems you want to support, security of your retro server will vary, but in general you should treat it as "not worthy" for connections outside of your retro LAN.
THIS IS SIMPLY PRESENTED AS ONE WAY TO ACCOMPLISH THE ABOVE, NOT AS BEST PRACTICES. This all comes from far, far too many hours of research in pretty much the opposite direction of what you'd normally do - which is in this case to create the best environment for old systems.
Here are some guidelines I use to run my retro network infrastructure:
Isolate the server(s) and client(s) running older operating systems from your more modern machines. This is best done via VLAN/firewall configuration. You could also potentially separate the retro LAN by putting it behind a different NAT device; that device should deny inbound connections so that you can get out to the Internet, but nothing unsolicited arrives inbound.
Don't install unneccesary software on the server machine. This includes components like .NET Framework, PowerShell and so on. These components are not maintained, just like the OS itself is not maintained, so it just increases attack surface.
Do not install unnecessary server components, especially things like SQL Server or Exchange Server. Run only the services that you need.
Don't browse the Internet on the server machine (this is good practice even on a supported server).
Absolutely do not allow inbound connections to your server from the Internet.
Do install security updates. In IE, you'll need to disable SSL 2.0 and 3.0, and enable TLS 1.0, in order to connect to Windows Update.
Back up archived games and other software that you care about offline, in case a mistake is made or in a super unfortunate instance, the server is compromised (which..risk should be very low, if you limit inbound connections).
When it comes to Windows Server, the most widely capable version is Server 2003 R2.
It has no problem with larger capacity disks, modern-ish network protocols, and can be adjusted (well enough anyway) to fully support downlevel clients including MS-DOS, but will still play nice with new clients including Windows 10 (with SMBv1 enabled, of course).
There are 32 and 64-bit versions of this Windows Server version. For simplicity's sake, I suggest the 32-bit version.
Hypervisor selection:
Hyper-V up to Server 2016 works OK (and is free). 2012 R2 was the last to technically support 2003 guests and it may be the ideal case.
I have terrible network/disk performance problems on 2003 guests in the newest versions of Hyper-V.
VirtualBox or Proxmox should work fine. I don't know much about VMWare/ESXi, so double check compatibility.
I suggest 2 disks, about 80GB for an OS disk (C:) and as much as you think you need to store for drive D:.
For Hyper-V (Gen1 VM), attach these disks to a virtual IDE controller. Just like a real system, use Primary Master and Secondary Master.
You can remove the virtualized SCSI controller.
2 vCPUs work fine - 4096MB RAM is plenty and the max for a 32-bit system.
Physical hardware:
I personally run my retro server on a Dell Optiplex 7010. The quad-core, 3rd gen i5 and 4GB RAM makes for a speed demon, and it has a built-in Intel NIC.
These machines are cheap (around $100US, for the above configuration) and were designed to run in a business environment, so they'll do nicely for this purpose.
Server Installation
Install the 2003 system from the CD. You can accept most defaults.
Hyper-V and several other hypervisors require Guest additions of some sort; on a 2012 R2 host this is in %SYSTEMROOT%\system32\vmguest.iso.
Continue Setup with the 2nd CD, this installs the R2 extras, "Plus!" style.
Head straight for Windows Update. In IE you will need to enable TLS 1.0 (Settings->Advanced tab->Security).
This will take a long time to even determine what updates are required. Detection after the first round of ~150 updates will be much faster.
Getting the first round of updates to install can be tricky - if you see a taskbar notification indicating that "Updates are ready for your computer", you can abandon IE and use that opportunity to install the first large batch of updates.
"There's always a few more.." run the update detection in IE several times, rebooting every time you install more updates. Once you've completed role installation, it's wise to do another couple of update passes. You can stop once all updates are installed.
Once you're updated:
Set a static IP.
In File and printer sharing for Microsoft networks -> Make browser broadcasts to LAN manager 2.x clients.
Enable Remote Desktop in System properties, if you wish.
INSTALL INITIAL SERVER ROLES
Install the File Server role. Optionally, enable NFS - this will allow you to netboot Linux distributions.
Install the Active Directory Domain Controller role. Select pre-Windows 2000 compatibility. Feel free to stop and read the documentation about SMB Signing and other changes we'll need to make, to compensate for older OSs.
Reboot.
Back in Manage Your Server:
Install WINS.
Install IIS. Accept the defaults - no need to enable ASP.NET/etc.
SECURITY SETTINGS
If you want to support clients running operating systems older than Windows 2000, we need to decrease the security and authentication level to accomodate.
Active Directory Users and Computers->Domain Controllers OU->Properties->Group Policy tab
Edit the Default Domain Controller policy.
Computer Configuration->Windows Settings->Local Policies->Security Options
Network access: Let Everyone permissions apply to anonymous users->Enabled
Network security: Do not store LAN Manager hash value on next password change->Disabled
Network security: LAN Manager authentication level->Send LM & NTLM - use NTLMv2 session security if negotiated
Microsoft network server: Digitally sign communications (always)->Disabled
Repeat these settings changes at the domain level, for the Default Domain Policy.
Run gpupdate /force.
DEPLOYMENT SERVICES CONFIGURATION
Add/remove Windows Components->Install Windows Deployment Services. Reboot.
This is a good time to configure your 2nd disk, if you have not done so already.
Computer Management->Disk Management:
move CD-ROM to E:
partition and format 2nd disk, and assign drive D:
Administrative Tools->Windows Deployment Services:
Right click server name, then click Configure Server.
Set path to D:\RemoteInstall.
Respond to all (known and unknown) client computers.
Allow the initial configuration to complete.
So that we can support RIS images, do the following:
1wdsutil /uninitialize-server
2risetup
Insert a Windows XP Pro SP3 CD.
Check 'Respond to client requests.'
Point at D:\RemoteInstall for the local images store, and then E:\ for the Windows CD.
Instead of WINDOWS, call the target folder WindowsXPProSP3, or something similar.
Accept the new image defaults and allow the files to copy to the RIS share.
While the XP files copy, in Active Directory Users and Computers:
Reset the password for the Administrator account so that it will have a LM hash.
Create a domain joining account. This is just a standard user account.
Right-click the Computers OU and select Delegate Control.
Create a custom task to delegate.
Delegate control of Only the following objects in the folder->Computer objects->create, delete
On the next screen, select General permissions, and select the following:
-Reset password
-Read and write account restrictions
-Validated write to DNS host name
-Validated write to service principal name
If you create other OUs for computer accounts, you will need to delegate control to this account, from those OUs as well.
Create a user account for yourself, family, friends, dog, if you like. You can use these to control access to network shares.
If you want to deploy more modern operating systems (Vista or later), you can add both Boot and Install images as necessary in WDS.
At this point it's a great idea to add:
at least an x86 boot image for Windows Vista (for P4's onward - this is great for Windows PE capability)
x86 Windows 7, or Windows 8.1 (hey - it's a supported operating system) boot/install images
x64 boot/install images as you see fit or have hardware that will support.
Why Vista? 374MB boot.wim versus 1006MB in Windows 8.1. oof!
If you have an unattend.xml for these systems, you can define its location in the WDS properties.
ADDING PXELINUX
Even if you do not intend to boot anything Linux-flavored, the functionality provided by PXELINUX is a massive improvement over WDS alone.
For example, with the 'memdisk' capability, we can boot MS-DOS from the network and completely install DOS/Win3 without media!
1 DEFAULT      vesamenu.c32
2 PROMPT       0
3 NOESCAPE     0
4 ALLOWOPTIONS 0
5 # Timeout in units of 1/10 s
6 TIMEOUT 300
7 MENU MARGIN 10
8 MENU ROWS 16
9 MENU TABMSGROW 21
10 MENU TIMEOUTROW 26
11 MENU COLOR BORDER 30;44		#20ffffff #00000000 none
12 MENU COLOR SCROLLBAR 30;44		#20ffffff #00000000 none
13 MENU COLOR TITLE 0 		#ffffffff #00000000 none
14 MENU COLOR SEL   30;47		#40000000 #20ffffff
15 MENU TITLE PXE Boot Menu
16 #---
17 LABEL wds
18 MENU LABEL Windows Deployment Services
19 KERNEL pxeboot.0
20 #---
21 LABEL nfmsdos
22 MENU LABEL NetBoot Floppy (MS-DOS 6.22)
23 KERNEL memdisk
24 APPEND initrd=Floppy/NETFLOPPY_UNI_MSDOS.img edd
25 #---
26 LABEL Abort
27 MENU LABEL AbortPXE
28 Kernel	abortpxe.0
29 #---
30 LABEL local
31 MENU DEFAULT
32 MENU LABEL Boot from Harddisk
33 LOCALBOOT 0
34 Type 0x80
35
In WDS server properties->Boot tab, change the x86 boot program to pxelinux.com.
Repeat all of this for x64, if you want to enable a similar PXELINUX menu for x64 systems.
The above menu creates an example boot entry for a floppy image. You can model from this example to boot other .img files; copy them to the Floppy\ directory.
I suggest creating floppy images in WinImage; either the 1.44MB or 2.88MB standard sizes work well.
To access RIS deployments, select Windows Deployment Services, and then Remote Installation Services.
(OPTIONAL) ADDITIONAL USEFUL PXE TOOLS
Clonezilla: follow the directions at https://clonezilla.org/livepxe.php.
Essentially, you want the kernel and initrd files to transfer over tftp.
It will be MUCH faster to ferry the filesystem.squashfs file over http, however - good thing we have IIS!
I like to reconfigure IIS to use D:\webroot, and I put the .squashfs files in a subdirectory under that (e.g. 'clonezilla').
Don't forget to add a new MIME type in IIS Manager - .squashfs, application/octet-stream will do the trick.
At that point, you can change the 'fetch=' directive to something like 'fetch=http://retroserver.name/clonezilla/filesystem.squashfs'.
The Gparted live distribution is helpful to have, too. It follows a very similar paradigm.
FILE SHARES
Create your shares. You can do whatever you like here, but I have had good luck with:
xyzPostInstall (e.g. W2KPostInstall, WXPPostInstall, W98PostInstall..): post-Setup files that are needed for fully automated OS deployment
archive: disc images (floppy, CD)
images: clonezilla images
NETBOOT: "8dot3" land where DOS based operating systems can be installed from
Copy over your stuff, or begin the archival process for your games and software.
(OPTIONAL) NETBEUI
If you want to support NetBEUI (NetBIOS Frame Protocol), which likely will only work on 32-bit versions of Windows Server:
From the Windows XP CD, copy from VALUEADD\MSFT\NET\NETBEUI:
NBF.SYS -> %SYSTEMROOT%\system32\drivers
NETNBF.INF -> %SYSTEMROOT%\inf
Then, in your network adapter's properties, install the NetBEUI protocol.
Final steps..
Windows Update will likely take two or more passes/reboots to get all of the necessary updates.
You should be able to activate your license after you've installed all updates.
NOW WHAT?
You can materialize fully functional client machines out of thin air, from MS-DOS to supported versions of Windows - assemble hardware, boot to network.
Use Daemon Tools or a similar piece of software to mount disc images.
For floppy images, I use DOSBox; my systems are generally geared to start running games natively that came on CD-ROM.
Running just DOS? Couple of options..
- Bring Windows for Workgroups 3.11 in; you'll be able to transfer files to and from the network in Windows
- Set up a config.sys/autoexec.bat menuitem to load up the TCP/IP stack, enabling you to NET USE a share in DOS. This unfortunately takes a load of memory so it might be best to copy locally what you need, then reboot without the networking tools.
Game servers! This ain't a bad way to keep old multiplayer games alive.
Set up known good images of your retro client(s), and CloneZilla them.
Pretty good start for when I finally get around to doing this. It's about mid way on my "todo" list below stuff I really want to do and stuff I know I will probably never do realistically.
It is a pretty sexy setup once done right 😉
Question, why do you have to to the security settings policy hack?
I would think if you added the Win9x PC's to the domain, and your logging in with a domain account "domain users" would work fine?
WFW may have issues, but I've found as long as long as the work group is the same name as the domain is works pretty well, No idea for Dos or other Win3x versions though.
Oh, and next upgrade I recommend is a old server for the full retro experience 😀
The security reductions are an interesting topic that I should explain further. I'll admit my MCSE was originally on Windows 2000, so I am not as well versed in the auth model pre-Kerberos, Active Directory, etc as we were sprinting away from older NT versions, NetWare, and so on, at the time. However, my experiments showed that:
- Windows 98 SE, Windows 2000 onward played well with the default domain controller security settings on Server 2003 R2, including the use of SMB packet signing.
- Anything Windows 95 and older generally didn't work well, or at all: in some cases, username/SID translation didn't work (let everyone perms apply to anon access policy became necessary), share access rarely worked as expected unless severely wide open permissions were granted. SMB signing does not work.
So, the guidance I give is an attempt to achieve sort of a balance between completely ridiculous security policy and OS compatibility; or in other words, absolutely nothing has changed in the sysadmin world 🤣
Certainly, experiment with the configuration and tailor it to your needs. NetBEUI for example you may absolutely not want flying around on your network. RIS/WDS may not be important to you at all, in which case you could also think about throwing out Active Directory. My history is with Windows - so I'd be super keen on seeing whether you could wrangle (ideally) a modern version of Samba into working nicely with these old operating systems. In terms of security play and data protection, that could be the best; I just don't have enough experience with it yet to be sure.
MS restricts the 32bit versions of Windows to 4gb (3.2) for licensing and driver compatibility reasons. If you don't use the hacks available on the Internet then 2003 Enterprise can support more.
For those that want an updated OS, to reduce the install time for Windows Updates I highly recommend updating the install media with all of the updates. For those that don't want to do so themselves there are packs out there that already have them all included you just apply them with nlite and you're good to go. Otherwise you'll be sitting there waiting on Windows Update and the computer to install them which can be frustrating.
The below is what I use for 95 to access the CIFS shares on my FreeNAS server. I can access CIFS from 95,95,ME,NT4 and above. Haven't tried with DOS but doen't see why it wouldn't work.
The above options (one may only be necessary) will allow access to Freenas from 9x clients. The below smbpasswd command will allow access to shares requiring authentication. If the below smbpasswd does not work then your only option is to setup another share and allow guest access:
Create guest share and allow guest access. Change permissions for "Everyone" to write access
From FreeNAS command prompt:
smbpasswd -a username
Use the same username on the client OS as on the FreeNAS host
Fantastic!! Thanks! This gives me a really good place to start tuning up a lean, supported Linux or BSD version.
I'm going in no particular order here. Since it was brought up - I did indeed try the Server 2003 update pack at https://ryanvm.net/forum/viewtopic.php?f=8&t=5591. It's my own personal aka stubborn and dumb preference, but I just ended up taking the pain of going through Windows Update over and over. I was successful in integrating this pack, but WU would offer the same 3 .NET framework patches no matter what I tried; strange.
On the other hand, I was pretty darned successful with XP and 2000, and I can fully automate a network install that needs no updates.
WINDOWS 2000:
Using the thread at https://ryanvm.net/forum/viewtopic.php?f=28&t=10622 as a guideline, slipstream the provided hotfixes as well as Unofficial Service Pack 5.
I don't add any of the DriverPacks or anything else - RIS provides the unattended .sif answer file, where we can add drivers as needed; I also use this to kick off a series of batch files that install software or do anything else we might want. Load up the resulting files once you've slipstreamed in nLite in Windows Deployment Services Legacy, and then be sure to robocopy (which you can install on Server 2003 from the resource kit, here: https://www.microsoft.com/en-us/download/deta … s.aspx?id=17657) any files it missed to your RemoteInstall directory.
Example ristndrd.sif follows. You can use the Support tools on the Windows CD to customize this further if desired.
61    DomainPassword=!!domainJoinUser!!
62    DoOldStyleDomainJoin=Yes
63
64    [NetProtocols]
65    MS_TCPIP=params.MS_TCPIP
66
67    [params.MS_TCPIP]
68    ; transport: TC (TCP/IP Protocol)
69    InfID=MS_TCPIP
70    DHCP=Yes
71
72    [NetClients]
73    MS_MSClient=params.MS_MSClient
74
75    [params.MS_MSClient]
76    InfID=MS_MSClient
77
78    [NetServices]
79    MS_Server=params.MS_Server
80
81    [params.MS_Server]
82    ; service: SRV (Server)
83    InfID=MS_Server
84    BroadcastsToLanman2Clients=No
85
86    [ServicesSection]
87
88    [RemoteInstall]
89    Repartition=No
90    UseWholeDisk=No
91
92    [OSChooser]
93    Description="Microsoft Windows 2000 Professional USP5"
94    Help="Automatically installs Microsoft Windows 2000 Professional without prompting the user for input."
95    LaunchFile="%INSTALLPATH%\%MACHINETYPE%\templates\startrom.com"
96    ImageType=Flat
97    Version="5.0 (2195)"
WINDOWS XP:
This follows a very similar process as you might expect, but there's one giant pack of post-SP updates that should net you a fully updated installation out of the box.
In nLite:
-Integrate the unofficial SP4 version 3.1b
-Integrate post-SP4 update pack (I use the "NET35-OFF" version, to help simplify the install process, but it is of course your choice)
Once again, load up the resulting files in RIS and robocopy anything that is missing.
I'll go over the mysteries of adding network drivers to RIS in a future post.
By the way: these steps aren't only useful for over-the-network installations; if you wanted to burn fully updated Windows XP install CDs, just create an .iso instead.
- Windows 98 SE, Windows 2000 onward played well with the default domain controller security settings on Server 2003 R2, including the use of SMB packet signing.
- Anything Windows 95 and older generally didn't work well, or at all: in some cases, username/SID translation didn't work (let everyone perms apply to anon access policy became necessary), share access rarely worked as expected unless severely wide open permissions were granted. SMB signing does not work.
Ah ok. Can see how that would be the case. Thinking back I think I was still running NT4 when I had a 95 PC on the domain and if I ever did have 95 on a 03 network patch levels would have been at what was currant round mid 2000's and wouldn't be surprised if later patches broke compatibility with earlier OS's.
But yeh, thanks to this post getting my deployment server has moved up my priority list now 😀
I suggest also to create your personal windows update server (WSUS server) and download every patch you can, maybe a day Microsoft will decide to delete Windows XP or 2000 patches from its servers. So you have your WSUS server on a virtual machine and you can get patch from this.
You can pick Windows Server 2008 R2 as base system for WSUS server.
This topic has been inactive for 1205 days...my, how time flies
Here we are now with the Extended (we really mean it this time!) Support period for Windows 7 closing, and just about everything but recent Windows 10 out of support.
@mrgreen - you were right on the money of course. Microsoft has deleted just about everything as we're now painfully aware, along with Intel and several others.
I failed to build my own WSUS server, but I have followed the progress of many 3rd party update packs that have materialized in the last few years.
Where I previously wanted to support at least Windows 7 and maybe Windows 8.1, I find far lesser of a need to do so now. That stance may change again in a while, and depending on how Windows does or doesn't maintain backward compatibility.
I also attempted again more recently to move my retro server to virtualization from physical hardware, so that I could get the benefits of data protection via zfs, automated backup and so on. I integrated the OnePiece update pack for this, but I immediately ended up with a really strange bug to do with third party network drivers in RIS, which definitely should have been fixed in any unmodified Server 2003 SP2 installation. So, sadly, that was a few hours of wasted time.
From there, I took the opportunity to take a second look at the 64-bit flavor of Windows Server 2003. Being the thing that eventually evolved into Vista, I figured it was worth a shot; it also seems to need fewer updates overall in its lifetime. You're already playing kind of a dangerous game by running such old software, and with third party software (especially web browsers, perhaps) no longer supporting any of these OSs it does not matter much I suppose whether you've got a "fully patched" system, or not.
Back onto the Optiplex 7010, I found a great refresher on how to integrate the Intel chipset and AHCI/RAID drivers into a Server 2003 x64 CD. This got me past a "STOP 0x7b" error on boot without having to resort to IDE compatibility mode. Performance remains tip-top.
I also integrated the Intel HD Graphics, MEI and Network drivers onto the CD in as minimal a way as I could (in other words mainly so that "unknown" devices do not appear), by pointing nLite to the relevant inf files. I did not try any update packs for Server 2003 x64 however. Pretty sure I'm going to leave it as-is as I only really need this thing to store and deliver files, act as a DNS and/or WINS server for my retro vlan only, and provide RIS/WDS.
I've taken a different approach to Windows XP especially as I do want some things integrated out-of-box (DirectX, MSI, .NET, ...). I'll type up some notes on that as I work my way through it.
Anyway: bottom-line lesson for the last couple of days - in this hobby you absolutely need to be a bit of a data hoarder..lots of software packages we took for granted in years past, are disappearing quickly!
Windows Update (2000, XP, 2003) Now that much has changed from my original post - you will need to do some additional work to get either WU, and/or Windows Activation working.
There's a couple of giant threads on MyDigitalLife and MSFN on this topic, but I chose to start with this:
After taking a look at the ActiveX code and the Privacy Policy, I felt that it was pretty reasonably sane - do what's necessary to restore the windows update frontend, but actually get the update bits from Microsoft.
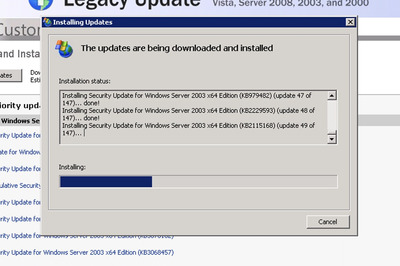
And, well, yeah - after installing the client and then waiting a bit for update detection, both my Server 2003 x64 test system and the "real" one got all the updates I believe they should..
There are other methods that seem to act more as a MitM, WSUS "proxy" of sorts; but this solution actually seems to restore the functionality of the original. This may overall be "safer" as now we're relying on legacyupdate.net to be up and running. However..we're not exactly dealing with a moving target: updates for all of these systems are done..final. So for XP or 2000 clients? I'd still run with the update packs that are already really well figured out (and a huge time saver anyway). But for this server on the other hand Legacy Update is a huge help.
https://legacyupdate.net That web site is beautifully designed both nostalgic and clear and simple....oh how i miss those days.
While I agree with the statement not much point fully patching an OS that hasn't had any new hotfixes in the last few years I can appreciate the nerdy retro sys admin side of projects like this.
Still want/need to deploy my retro builds over the network though guess it didn't get bumped up my todo list far enough
Applying this in nLite, installing in a VM and then checking against legacyupdate.net: no updates required*.
* note no registry mods to enable POSReady/embedded updates, this is just pure "consumer/retail" Windows XP.
---
Note that these packs do contain some "addons" that you may or may not need - DirectX, PowerShell, .NET, Silverlight..libraries/components you may have installed back in the day and may yet still be necessary for some applications/games. I don't personally consider any of these packs overly invasive but just for heads-up.
Why not Unofficial Service Packs?
To me the unofficial 98, 2000, and XP Service Packs take lots of creative freedoms of sorts to change or add things - yes they may be aimed at quality-of-life improvements but definitely take a close look at them. In the spirit of minimal deviation from "gold standard" yet still netting us fully patched and operational..these update packs fit the bill for me.