First post, by stevejking
Hey Vogons community!
A brief intro.. I'm Steve, I live on the west coast of Canada and I like building stuff. 😀
I've been bitten by the retro PC bug over the past few months and I decided to restore my old P2-400, as it was the oldest system I still had (edit: with a suitable case..) or so I thought. But it turns out at some point in the (many..) years since I moved out of my parents house, my father decided to "declutter" all of the old computers we had in storage.. (insert sobs here.... we had everything we'd ever used, back to an Olivetti 286...) which has left me with the oldest system I still actually have with me in my own house, a P3-1GHz... so that's what I'm working with.
I really wanted to recreate the systems from 1993-1994, as that was when I was just getting into PCs. I have, as everyone else here most likely does as well, very fond memories of the early days of PC gaming.. editing autoexec.bat to squeeze a bit more ram so TIE Fighter would load, ahh I miss it.
I started out looking for a very specific case, only to find I'm so many years late to the retro build party that the exact one I wanted is now essentially impossible to find, and even if it wasn't, modding it to run the hardware I actually have available to me would be a significant task unto itself.. That's where I got the idea to do what I could with what I had... which in this case is a black Chieftec Dragon tower case, currently housing the P3 system. I love that case, and I've been a bit reluctant to mod it like this, but I figure I can always put it back to *almost* factory with a bit of painting. But I'll get to that.
The case as it is now:
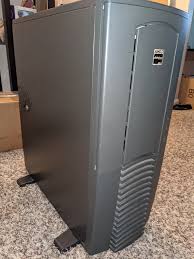
(Not my photo, I found it online)
THE PROJECT
Phase 1:
I started with underclocking the system to 500MHz.. still way faster than I'd wanted, considering my plan is to run DOS 6.22/Win 3.1 on it. I've also disabled L1/L2 cache to slow it down a bit more.
It's currently got 1.5GB of RAM, but I will be taking all but 256MB out.
It's got a PCI Soundblaster Live card
I'm actually not sure what video card is in this, I'll need to check.
I partitioned a 16GB compact flash card and burned a DOS 6.22 image to it, then installed Win 3.1 from an image. - I searched high and low for a workable solution, and finally found this: REMOVED which I burned with Balena Etcher. I hope that part helps someone else!
Phase 1 works great, it boots into windows 3.1 like a champ.
Phase 2:
This is the part that gets interesting.
I've stripped the Dragon case down to the bare steel, and will be painting the panels a nice early 90s beigey-grey, I'll append this with the actual colors once I make the final decision.
The front panel is going to be resin 3D printed, using a case front I've designed that is very reminiscent of a system at my dad's office had when I was a kid:
The inspiration:
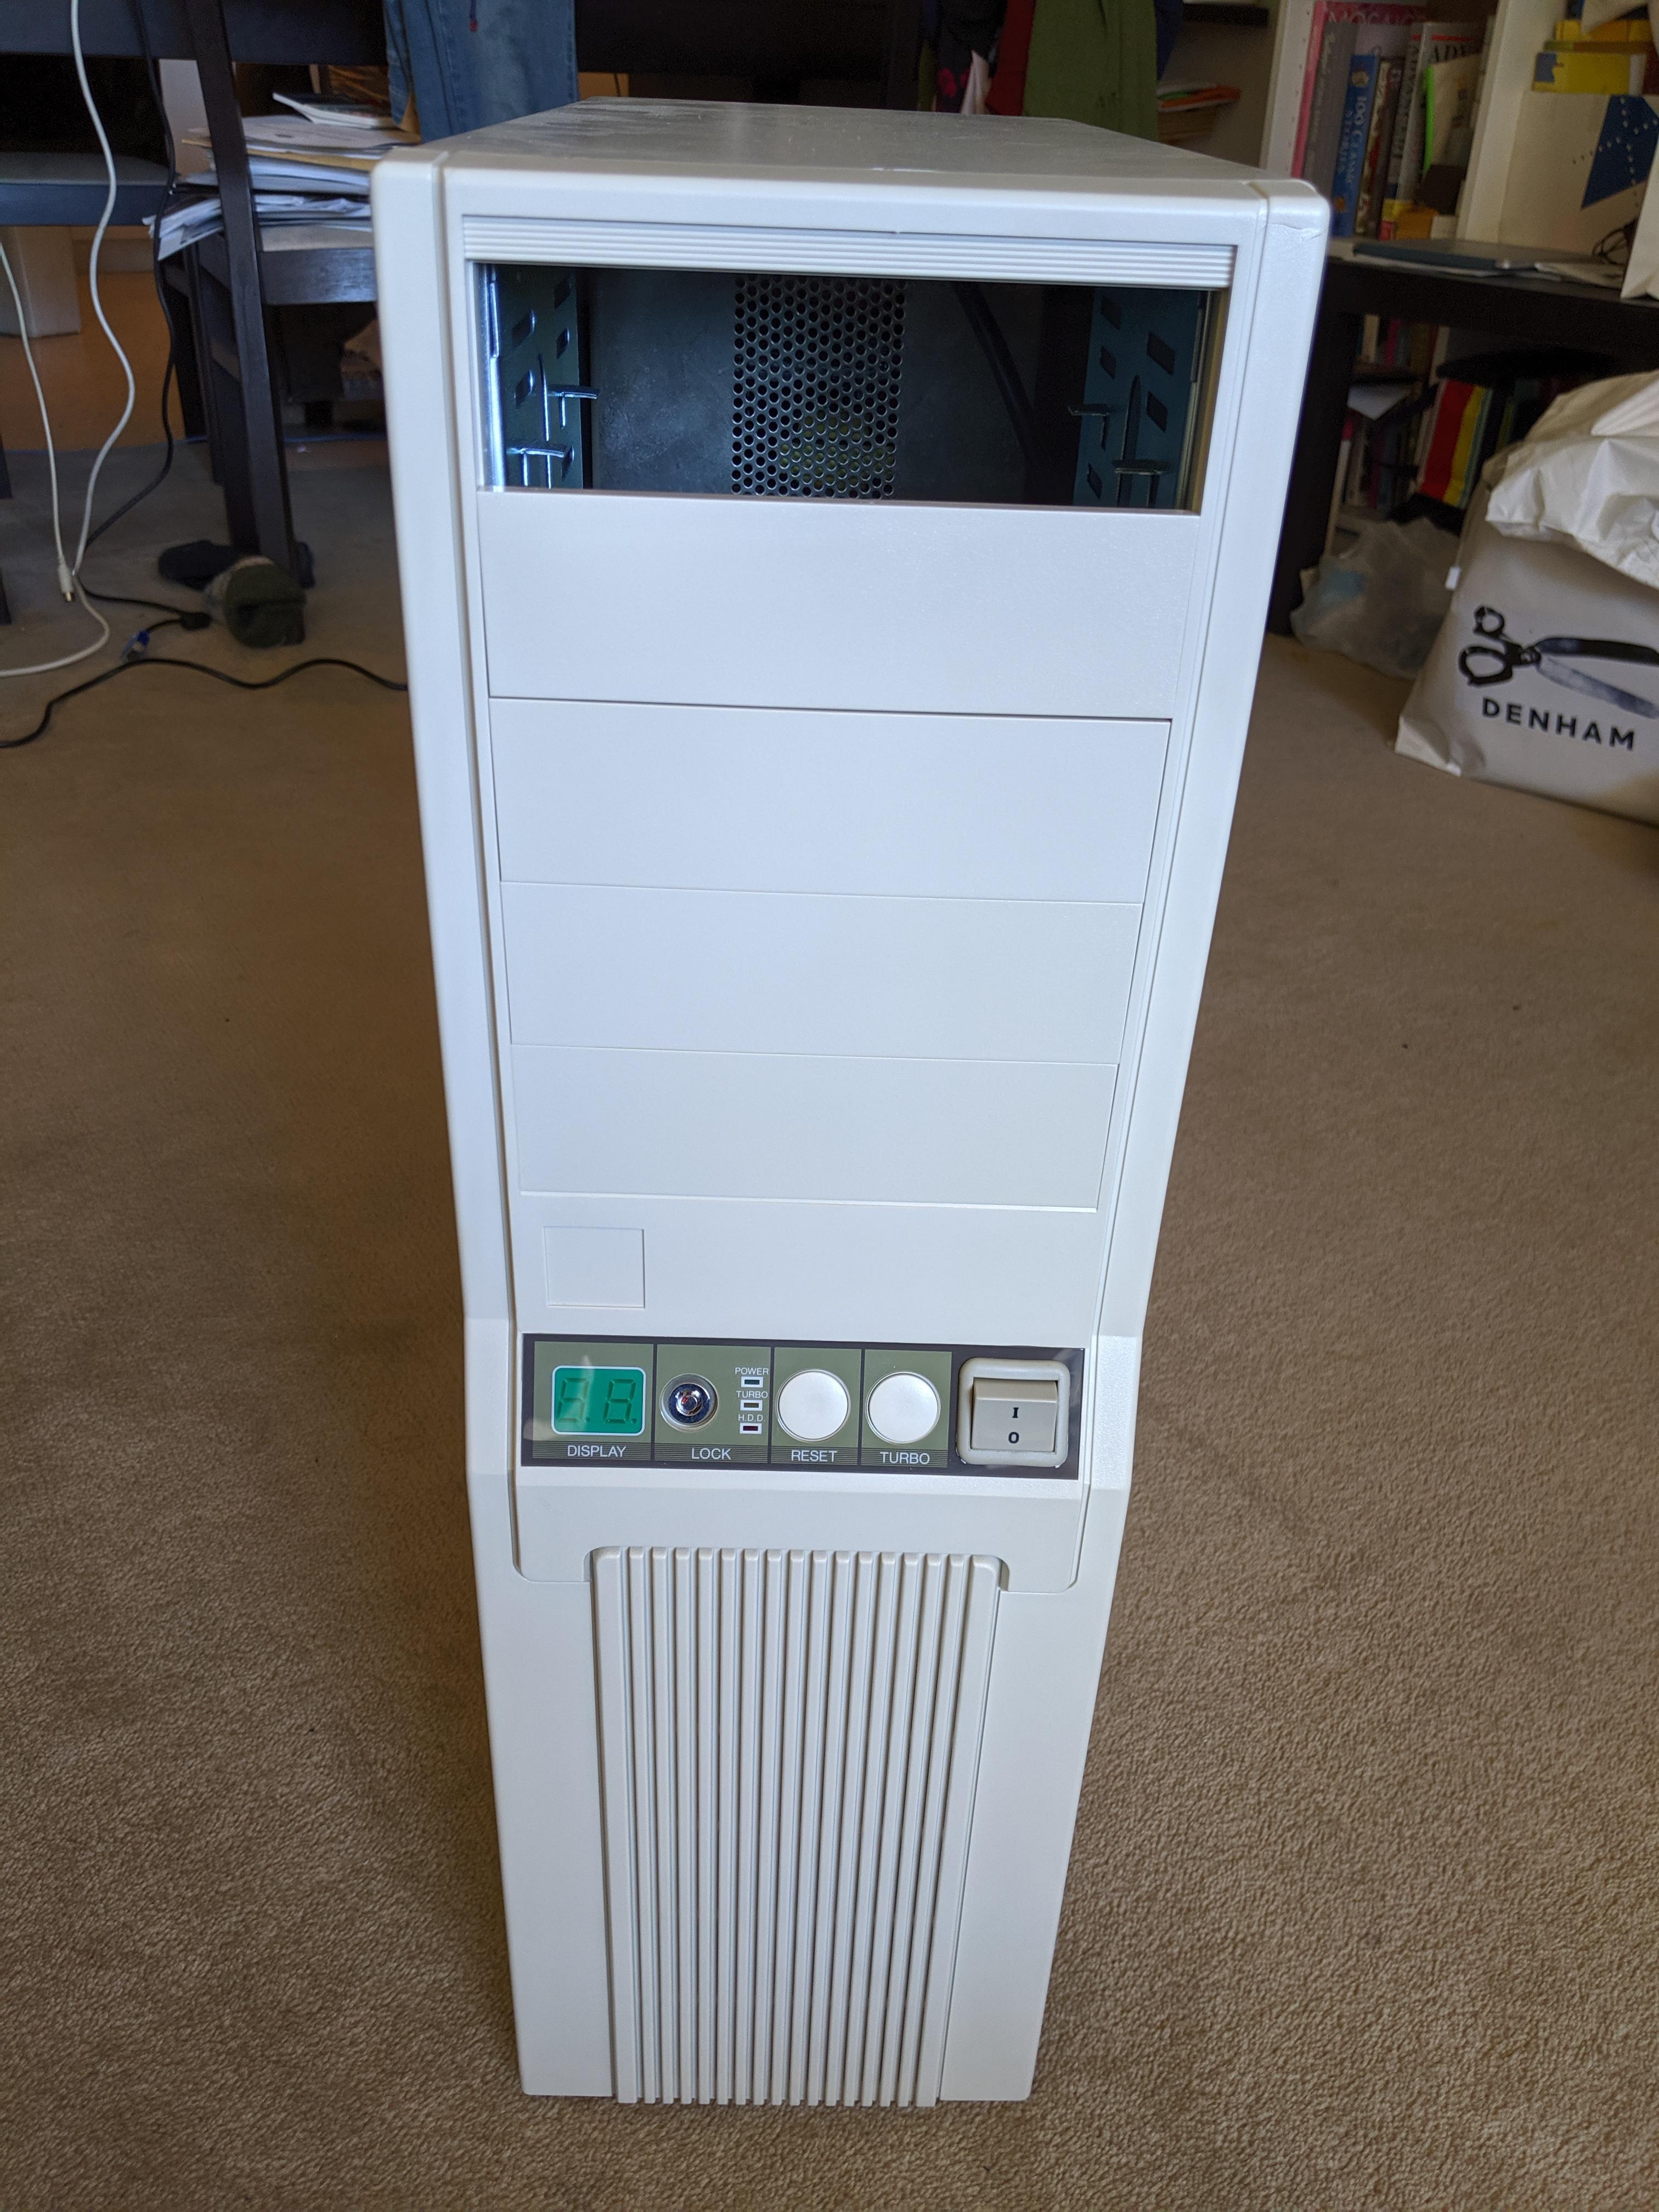
(not my photo, found it online.. ebay I think)
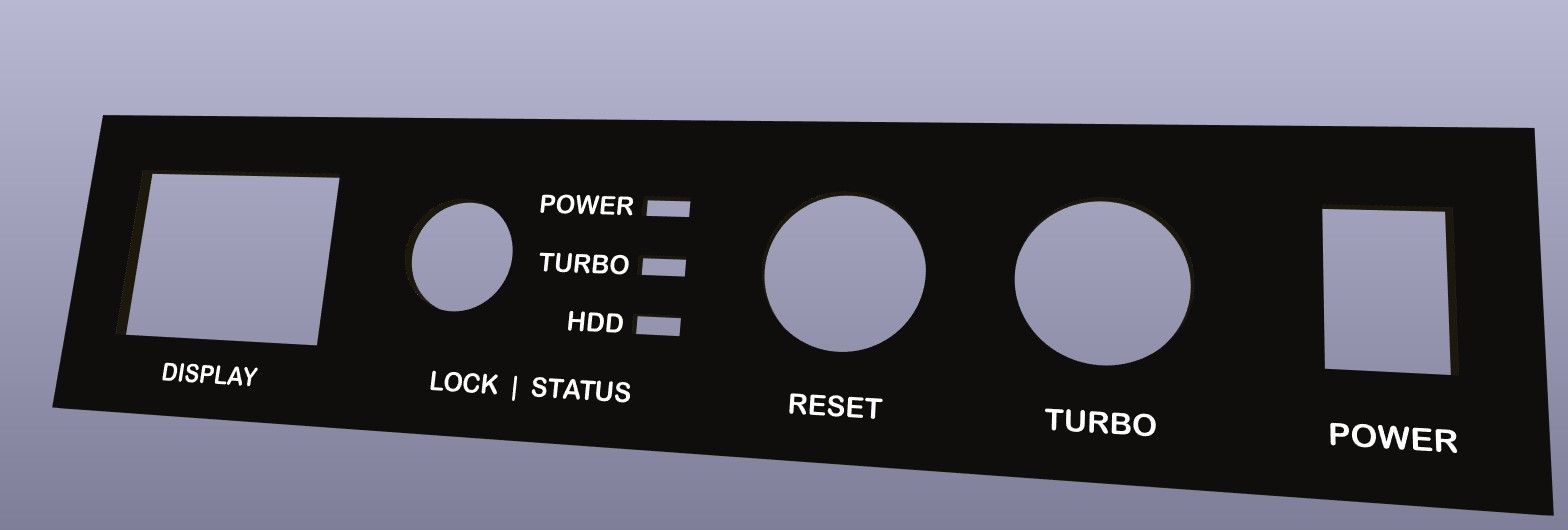
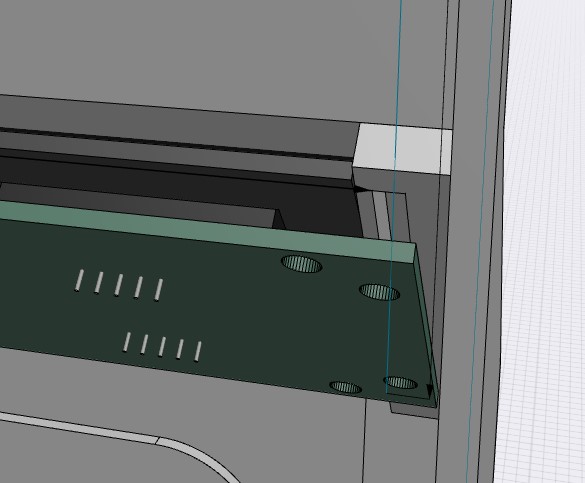
First draft of the CAD model:

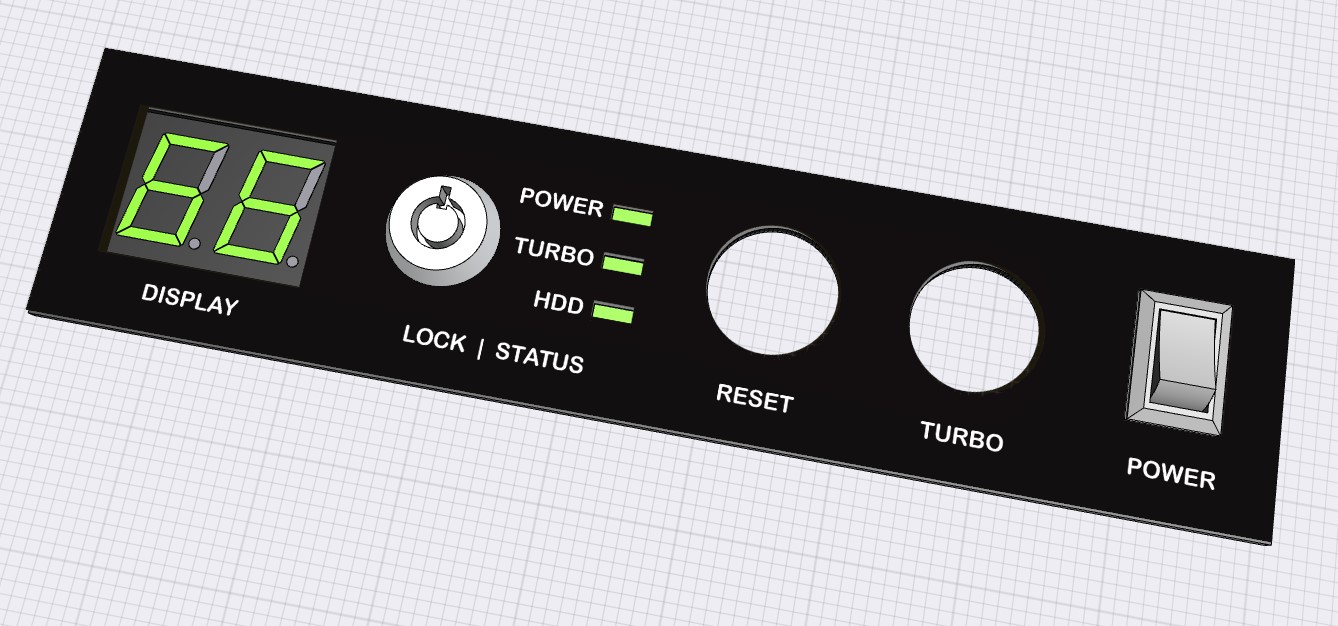
The control panel is where I'm spending most of my time; it's got a custom black PCB for the face plate, a custom PCB for the functionality of the buttons and display, and buttons & power switch to match the general aesthetic of the era:
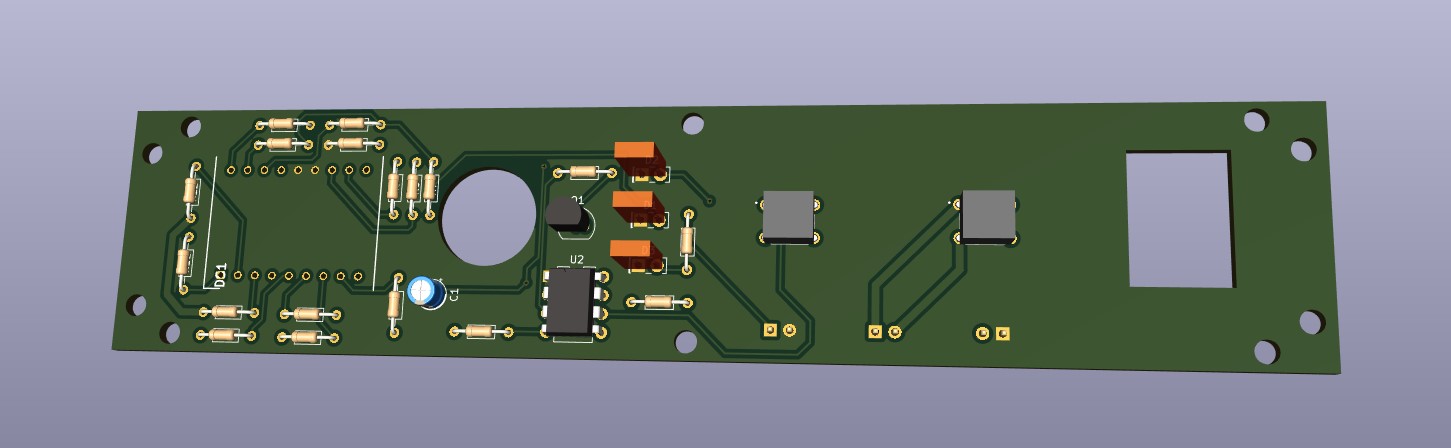
I typically prefer to work with SMD boards but I feel like this project needs some hands-on work for every aspect.. so custom boards, but I'll assemble the rest from parts here. 😀
- The display is for cosmetic purposes only - the system is running at 500MHz, but since it's meant to feel like my favorite old system it will show 66.. reducing to 16 when turbo is off. Not at all realistic, but it was simple to implement. I have a plan in mind for a V2 design that uses DIP switches to make the display selectable, but for now it's hard-wired.
- The lock is.. also for cosmetic purposes only, it's just a small cabinet lock, not a key switch.
- Power LED is functional
- Turbo LED is functional, as far as the panel goes at least
- HDD LED is going to be functional, if the mobo HDD activity pins don't pick up the activity from the CF/IDE interface card, it will be easy enough to pull the signal off the CF interface directly
- Turbo button is basic latching circuit with a tactile switch underneath, it just changes what the display shows.
- Reset button is fully functional, direct connection to the reset pins on the mobo.
- Power switch is fully functional, just a simple SPST rocker switch.
I just got a 3.5" drive in the mail yesterday, and some 5.25" bay covers have just shipped as well. I'm still looking for a suitable CD ROM.. those will all be painted the same color as the case.
This is still VERY much a work in progress, there are some design changes needed to improve the front panel, both for aesthetics and for getting a good result with resin printing. I'm still working out the best option for the reset & turbo buttons. I've also swapped the position of the turbo & reset buttons since I laid out the silkscreen on the faceplate panel.
If anyone's interested, I can share some of the part links that are finalized.. I'm still sorting some of it out.
Otherwise I'll post some more updates as I've got some progress worth sharing. 😀
edited: I fixed one part to improve clarity..

