So it's been a while as I've not been able to work on the system. After some steps in between, I was able to get it to function fairly properly last week. For archiving purposes I'll provide an update and attach some files that helped me out.
The system seems compatible with the video @imi posted. From that video I managed to get the following information:
- Settings for the micro switches
- Configuration for the memory banks
- Type of CMOS battery
- Indication of other pin boards (Power led, IDE led, speaker)
Since I still didn't get any visual confirmation or beeps as far as I could tell, the system could at that point be dead.
I refused to give up, so ordered a POST card which turned out to be very helpful - even if it was only to give a sparkle of hope because it showed various POST codes.
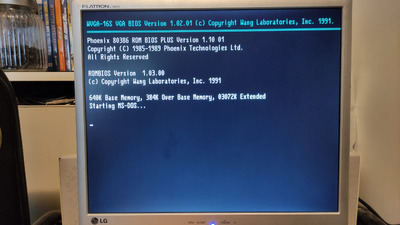
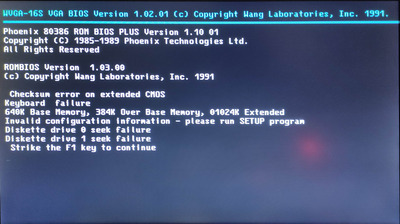
After switching some SIMM's I initially didn't have, I managed to get the BIOS screen displayed - but unfortunately we weren't there yet.
Checksum error; Keyboard failure, Invalid configuration - please run setup; Diskette drive 0 and 1 seek failure, Hard Disk controller failure... Strike the F1 key to continue 😀
Sure enough the keyboard works almost ok with the AT keyboard I have (KeyTronic MPR II) - 2 keys are not which is a minor inconvenience (slash / question mark key and the comma / quote key).
I couldn't solve the on board floppy and IDE controller, but was able to lend one from a friend. Switching micro switches 3 and 5 to off (the rest is on) disables the floppy and IDE controller, thus allowing for another one in one of the ISA slots to function as a primary. This at least allowed me to boot using a floppy drive and use the system for some investigative tools.
The Phoenix BIOS requires to be accessed through a separate DOS program. There seems to be no hotkey (e.g. DEL or F2 or CTRL-ALT-ESC).
I started out with a generic Phoenix AT configuration program (ATSETUP.COM) which allowed me to make some basic changes to solve some of the errors shown.
Later on I found on an archived forum (thank you Archive.org) a set of BIOS programs specific to WANG. These allowed me to make further updates to the bios, e.g. correct memory size.
With the ISA multi i/o controller unfortunately I was not able to boot from a hard drive nor a CF card. The CF-IDE adapter I ordered was populated with a 128mb CF card that I still had laying around.
Preconfigured it for DOS on a Pentium 166 system so I know it could work, unfortunately I was unable to get it up and running and gave up (perhaps the ISA controller is not happy with this configuration?).
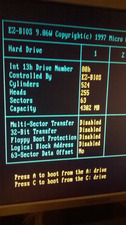
The one ancient hard drive I did have was an MFM type drive, but also started out with no controller. I found one for a reasonable price (what's reasonable on retro nowadays?) and installed it instead of the multi i/o card.
Floppy still works and after some configuration and reading on MFM drives got that one up and running as well. Unfortunately the drive had to be formatted in order to get it running properly.
From the video the original battery appears to be a Rayovac 844 battery pack.
Buying a 3xAA battery holder to get 4.5 volts and attaching it to the mainboard resolved the final issue of retaining BIOS settings.
I'm not an artist but did my best to document my knowledge of the board best as I could. Hope it helps somebody else one day.
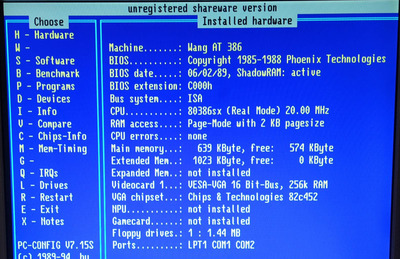
Conclusion:
I am now the proud owner of a working 386 running at 20 Mhz! Never had a 386 before so I'm ready to explore what I couldn't do when I was a kid with a 8086.
Next up will be the challenge of finding a case that fits this enormous board and load it with some goodies as for example a sound card.t