VOGONS


Reply 18360 of 27422, by fosterwj03

User metadata
Rank Member
Rank
Member

Some friends of mine 3D-printed a custom IO panel for my sleeper build. I’m retro-fitting this Gateway 2000 low-profile 486 (don’t worry, I restored and preserved the 486 parts) into my new workhorse computer.

The IO panel for USB, networking, audio-out, and HDMI turned out great! I can’t wait to get the rest of the build in place.

The case is now just about ready to host an 11th gen Core i5 as soon as I can get one. I’ll fit the mini-ITX motherboard with new stand-offs next weekend.

I just wish I could buy a modern video card to make this build truly special. That part will have to wait a bit longer.

Attachments

Reply 18361 of 27422, by TheMobRules

User metadata
Rank Oldbie
Rank
Oldbie
Shagittarius wrote on 2021-03-08, 00:55:

Thanks for your feedback. I want to learn from this.

I'm not a pro by any means, but having desoldered many components with lots of pins (CPU and SIMM sockets in particular) here are my thoughts:

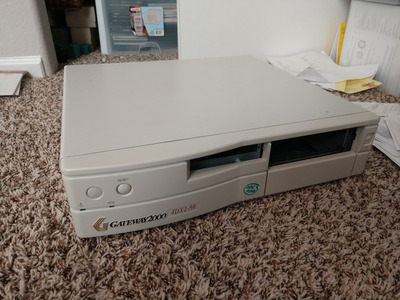
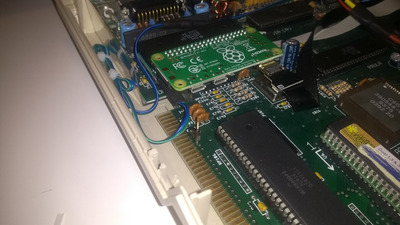
My first few attempts were wildly inconsistent, going from a flawless 72-pin SIMM socket removal which gave me a lot of confidence to a complete catastrophe trying to desolder a simple keyboard controller chip. It was nothing particularly valuable, but still felt guilty about ruining a Socket 7 board. So I'd say my early experiences were not too different from yours (I have no experience on Amiga boards, but I've heard they sink a lot of heat, so that makes it more difficult).

I was unable to get successful results using a manual desoldering pump. Maybe it was of bad quality, but I found that it was too "violent" and it would frequently damage the solder mask or just rip the pads in the process. If you keep trying with the manual pump, be really really patient and make 100% sure that all the solder has melted before activating the pump. Also, keep the tip of the pump as close to the pad as possible, leave no gaps to improve the suction.

In the end I caved and bought a cheap chinese ZD-915 desoldering station and it has been a really useful thing since then, so I would 100% recommend one if you intend to do these kinds of repairs every once in a while (no need to spend big bucks on professional tools for hobbyist work IMO).

Even if you get a desoldering gun, it's important to get the technique right, this may take a while and you'll have to adapt depending on the thickness of the board, size of the pads, and so on. If there is one thing that has helped me a lot and don't see mentioned very often, is holding the board perpendicular to the table, that way you hold the gun straight and gives you more precision. Also, it makes it easier to wiggle the component leg with the gun without actually touching the pad, which reduces the risk of overheating and ripping it.

Reply 18362 of 27422, by pan069

User metadata
Rank Oldbie
Rank
Oldbie

Today I spend my time dreaming about the brand new IBM 5160 with 640KB of ram and a CGA color monitor that is sitting brand new in a forgotten warehouse somewhere waiting for me to pick it up.

Is this considered a "retro activity"? 😀

Reply 18363 of 27422, by HomeLate

User metadata
Rank Newbie
Rank
Newbie

Added an Adaptec SCSI controller and Seagate 68Gb SCSI disk in my PIII-500 build. Plan is to install the OS on that drive. Not sure what OS yet. Either Windows 98SE or Windows 2000.

I'm now troubleshooting a C64 with probably a bad PLA. Waiting for parts to arrive to continue troubleshooting.

Reply 18364 of 27422, by wiretap

User metadata
Rank Oldbie
Rank
Oldbie
Shagittarius wrote on 2021-03-08, 00:55:
I was replacing the 84 pin PLCC socket on my Amiga motherboard, when I decided to give up. To me it appears that someone had do […]
Show full quote

I was replacing the 84 pin PLCC socket on my Amiga motherboard, when I decided to give up. To me it appears that someone had done some repairs to the traces on this motherboard at some point and by desoldering the socket I removed their fix. I'm very much a novice at this so I doubt I could properly rebuild the traces or the holes at least one of which appears that it may not have any metal left in it. Anyways I'm posting this because want your opinions.

How much of this was my fault? All I did was desolder with a solder sucker manually. I had trouble with the 2 pins where you can see the PCB had the masking scratched away but I don't think I'm responsible for that. This is however very disheartening. I have done several repairs and I was starting to feel more confident but now this has shattered my confidence.

Don't go easy on me, let me know what you think. Here are images after I had removed the socket:

download/file.php?mode=view&id=104781

download/file.php?mode=view&id=104782

I'm going to keep the board for parts at least, but perhaps I can revisit someday when I have more skill, it doesn't look too bad but I don't know how to go about dealing with those traces in the state the board is in.

Thanks for your feedback. I want to learn from this.

It looks to me like the eyelets in some holes aren't even there anymore. To fix that, you'd need a new eyelet set, which are like a two piece flared tube that fits in from both sides of the board. Then you land the trace to the eyelet. You can see the procedure for this in my circuit board repair help signature link. It isn't too difficult with holes and traces this large and spread that far apart (and only a 2 layer board), but it does take a little practice. I had to replace a eyelet on my Amiga 2000 board because the battery leg corrosion was really bad, but that one was pretty easy since it was all just part of the ground plane.

To me, it looks like your iron temperature was too high, and there was still some solder on some of the legs. When the socket was removed, it ripped out some eyelets and traces with it. Sockets aren't super easy to take out, and if it was your first attempt on something like this with 84 pins, that is expected. You really need to practice on a trainer board for something that large, especially if you're attempting it on an expensive motherboard like an Amiga.

What I usually do for sockets like this is clear all the solder from the holes with a solder sucker. If the socket doesn't just lift out with near-zero force, I'll use the hot air pencil on the solder side to melt the remaining solder so the socket pretty much just falls out. Then you can clean the holes completely with a solder sucker to make way for the new socket. When done properly, there is no resistance involved and the socket should just fall right out when desoldered, and fall right into place upon installation.

What you need to fix this is called a "plated through hole repair kit" or "plated eyelet repair kit" and some 32ga - 36ga wire solid core wire.

My Github
Circuit Board Repair Manuals

Reply 18365 of 27422, by Ozzuneoj

User metadata
Rank l33t
Rank
l33t
wiretap wrote on 2021-03-08, 13:45:

What I usually do for sockets like this is clear all the solder from the holes with a solder sucker. If the socket doesn't just lift out with near-zero force, I'll use the hot air pencil on the solder side to melt the remaining solder so the socket pretty much just falls out. Then you can clean the holes completely with a solder sucker to make way for the new socket. When done properly, there is no resistance involved and the socket should just fall right out when desoldered, and fall right into place upon installation.

I was just going to mention using a hot air gun in the way you're describing here. I would preheat the entire area of the board where you'll be working, using a desoldering gun set at a moderate temperature (as in, not delaminating the board). Take as much solder out of the pins as possible with a vacuum (I highly recommend an electronic one... I've never had good results with the manual ones. I have one of these.), if possible, shine a light through the holes to see if any look to have more solder remaining. Once every hole looks mostly clear, don't try to remove the thing with the board cold! You'll rip up traces and remove pads this way. Heat the socket again with the hot air gun and try to use as little force as possible to remove it.

I don't have much experience with many-pinned chips or sockets, but I recently discovered using my desoldering station only AFTER preheating components with a hot hair gun. I bought one similar to this, though mine was $39.99 when I bought it a couple years ago when I got it. https://www.amazon.com/YIHUA-959D-Digital-Eff … /dp/B08BK3M6YW/

I recently replaced all of the memory chips on an Apple IIe with this method and had zero PCB damage.

It's also worth mentioning, if you're getting serious enough into it to be replacing sockets, get yourself a PCB holder. I got an old beat up one of these on ebay for about half the price of a new one. You need a nice smooth surface for it to stick to though. I actually use an old computer side panel for that since my desk has a bit too much of a wood grain. Total game changer when working on PCBs.

Now for some blitting from the back buffer.

Reply 18366 of 27422, by brostenen

User metadata
Rank l33t++
Rank
l33t++

Did some more Amiga related stuff today. As I have installed one of the RGB-to-HDMI adaptors in my Amiga500 Rev. 8a.1 machine (full ECS chipset). And I installed a push button in my Amiga500-PC-Case convertion the other day. Then why not install a button in my 500 that are in standard case. I installed the button between the boot selector switch and the Kickstart Switcher. That way I have access to all these mod's right below the Floppy drive. The nice thing about the standard Amiga500 case, is the there are rooms for stuff like flat-cable (the HDMI output) and wires between the bottom shield and the Floppy drive.

Amiga500-RGBtoHDMI-Button-01.jpg
Filename
Amiga500-RGBtoHDMI-Button-01.jpg
File size
158.84 KiB
Views
1212 views
File license
Fair use/fair dealing exception
Amiga500-RGBtoHDMI-Button-02.jpg
Filename
Amiga500-RGBtoHDMI-Button-02.jpg
File size
173.45 KiB
Views
1212 views
File license
Fair use/fair dealing exception
Amiga500-RGBtoHDMI-Button-03.jpg
Filename
Amiga500-RGBtoHDMI-Button-03.jpg
File size
66.97 KiB
Views
1212 views
File license
Fair use/fair dealing exception

Don't eat stuff off a 15 year old never cleaned cpu cooler.
Those cakes make you sick....

My blog: http://to9xct.blogspot.dk
My YouTube: https://www.youtube.com/user/brostenen

001100 010010 011110 100001 101101 110011

Reply 18367 of 27422, by stoof

User metadata
Rank Newbie
Rank
Newbie
bearking wrote on 2021-03-07, 21:30:

Finally managed to make a passthrought cable for my Miro HISCORE 3D, and it works! This was my second atempt, after waiting for almost 2 months for the 9 pin mini DIN connectors from China. Good thing, I ordered three of them...
This card will go into my P233MMX build.😀

Do you actually need the passthrough cable to use the card?

I always assumed one could just connect each output to separate inputs. I.e. my Sony CRT has two vga inputs; I'd connect the 3D-output to one and the 2D-output to the other, and then just manually switch between the two as needed. A similar setup would be to use a KVM.

Reply 18369 of 27422, by bearking

User metadata
Rank Member
Rank
Member
stoof wrote on 2021-03-08, 17:26:

Do you actually need the passthrough cable to use the card?

I always assumed one could just connect each output to separate inputs. I.e. my Sony CRT has two vga inputs; I'd connect the 3D-output to one and the 2D-output to the other, and then just manually switch between the two as needed. A similar setup would be to use a KVM.

chrismeyer6 wrote on 2021-03-08, 18:15:

If your monitor has two inputs then you don't need to use the pass through cable with the VooDoo 2.

What you are saying is correct, but in my case it's like this:
- I have two inputs on my Eizo LCD, but one is a DVI and I don't want to use a DVI to VGA adapter. Also I think it's not very common to have two VGA inputs on monitors...
- I just don't like to switch between inputs manually.
- I have a simple VGA only, passive KVM box, but this solution means, I need to use two more cables... and still need to switch manually between the cards, what I really don't like.
- I have a very limited space/desk for my retro setup, basically it's a 100cm*50cm desk 😀, and I already have 3 systems connected to my monitor + keyboard + mouse using a Belkin powered KVM. So another KVM and some more cables is what I didn't wanted.

So this is why I made the cable... Or maybe I'm just getting old... 20+ years ago, probably I would just switch the cables directly without any problem, just to be able to enjoy the Voodoo experience... but I didn't had a Voodoo card 🙁

Reply 18370 of 27422, by Shagittarius

User metadata
Rank Oldbie
Rank
Oldbie
wiretap wrote on 2021-03-08, 13:45:
It looks to me like the eyelets in some holes aren't even there anymore. To fix that, you'd need a new eyelet set, which are lik […]
Show full quote
Shagittarius wrote on 2021-03-08, 00:55:
I was replacing the 84 pin PLCC socket on my Amiga motherboard, when I decided to give up. To me it appears that someone had do […]
Show full quote

I was replacing the 84 pin PLCC socket on my Amiga motherboard, when I decided to give up. To me it appears that someone had done some repairs to the traces on this motherboard at some point and by desoldering the socket I removed their fix. I'm very much a novice at this so I doubt I could properly rebuild the traces or the holes at least one of which appears that it may not have any metal left in it. Anyways I'm posting this because want your opinions.

How much of this was my fault? All I did was desolder with a solder sucker manually. I had trouble with the 2 pins where you can see the PCB had the masking scratched away but I don't think I'm responsible for that. This is however very disheartening. I have done several repairs and I was starting to feel more confident but now this has shattered my confidence.

Don't go easy on me, let me know what you think. Here are images after I had removed the socket:

download/file.php?mode=view&id=104781

download/file.php?mode=view&id=104782

I'm going to keep the board for parts at least, but perhaps I can revisit someday when I have more skill, it doesn't look too bad but I don't know how to go about dealing with those traces in the state the board is in.

Thanks for your feedback. I want to learn from this.

It looks to me like the eyelets in some holes aren't even there anymore. To fix that, you'd need a new eyelet set, which are like a two piece flared tube that fits in from both sides of the board. Then you land the trace to the eyelet. You can see the procedure for this in my circuit board repair help signature link. It isn't too difficult with holes and traces this large and spread that far apart (and only a 2 layer board), but it does take a little practice. I had to replace a eyelet on my Amiga 2000 board because the battery leg corrosion was really bad, but that one was pretty easy since it was all just part of the ground plane.

To me, it looks like your iron temperature was too high, and there was still some solder on some of the legs. When the socket was removed, it ripped out some eyelets and traces with it. Sockets aren't super easy to take out, and if it was your first attempt on something like this with 84 pins, that is expected. You really need to practice on a trainer board for something that large, especially if you're attempting it on an expensive motherboard like an Amiga.

What I usually do for sockets like this is clear all the solder from the holes with a solder sucker. If the socket doesn't just lift out with near-zero force, I'll use the hot air pencil on the solder side to melt the remaining solder so the socket pretty much just falls out. Then you can clean the holes completely with a solder sucker to make way for the new socket. When done properly, there is no resistance involved and the socket should just fall right out when desoldered, and fall right into place upon installation.

What you need to fix this is called a "plated through hole repair kit" or "plated eyelet repair kit" and some 32ga - 36ga wire solid core wire.

Thanks for the critique and advice. Could I not also just put a new socket in check for continuity and run a bodge to the trace from the socket pin? This board unfortunately is becoming my trainer to some degree, obviously my goal is to fix it. I talked with Jens about this and he said that with these old Amigas the carrier material has degraded over 30 years and it can be really easy to lift the traces.

However like I said it I just make sure to run the correct bodges I wouldn't need to fix the eyelets right? Also I heated 2 of the pins and wiggled the PLCC free because I couldn't get the solder out of 2 of the holes. I'm sure you can tell which. If I can't get the solder sucked out of the holes can I just drill it out? Sounds like a crazy question but if I run bodges would it matter? Yes I'm a newb. Please give me a better technique than this idea =)

Jens says since I didn't scratch off the Solder stop on the top that someone probably worked on this previously. So I'm thinking some of my bad luck here may have had to do with these unkown repairs. Still I own my failure. Thanks to you all for the feedback.

Reply 18371 of 27422, by overdrive333

User metadata
Rank Newbie
Rank
Newbie

Made 1.73ghz cpu for my 440bx system ( asus cusl2 for now).

Even doom 3 and halo are playable. I believe this cpu is faster than p3-s 1.4ghz, but mine died so I can't check.

Attachments

  • 999.JPG
    Filename
    999.JPG
    File size
    183.48 KiB
    Views
    1102 views
    File license
    Fair use/fair dealing exception

Reply 18372 of 27422, by stoof

User metadata
Rank Newbie
Rank
Newbie
bearking wrote on 2021-03-08, 18:51:

- I just don't like to switch between inputs manually.

That alone is a perfectly viable reason to make the cable. 😀

I was mostly curious whether the Miro had some special sensing or whatever that made the cable necessary. Now I know.

Reply 18373 of 27422, by wiretap

User metadata
Rank Oldbie
Rank
Oldbie
Shagittarius wrote on 2021-03-08, 19:27:

Thanks for the critique and advice. Could I not also just put a new socket in check for continuity and run a bodge to the trace from the socket pin? This board unfortunately is becoming my trainer to some degree, obviously my goal is to fix it. I talked with Jens about this and he said that with these old Amigas the carrier material has degraded over 30 years and it can be really easy to lift the traces.

However like I said it I just make sure to run the correct bodges I wouldn't need to fix the eyelets right? Also I heated 2 of the pins and wiggled the PLCC free because I couldn't get the solder out of 2 of the holes. I'm sure you can tell which. If I can't get the solder sucked out of the holes can I just drill it out? Sounds like a crazy question but if I run bodges would it matter? Yes I'm a newb. Please give me a better technique than this idea =)

Jens says since I didn't scratch off the Solder stop on the top that someone probably worked on this previously. So I'm thinking some of my bad luck here may have had to do with these unkown repairs. Still I own my failure. Thanks to you all for the feedback.

You can put a new socket in, but some of those holes won't solder to the board since there is nothing there to solder to. For the messed up holes, you will need to check the top and bottom side of the hole to see if there's traces on the top, bottom, or both. You'll need to run some 32-36ga wire from the pin to the traces that were ripped, or the next closest solder point of that trace.

As for drilling out the hole - no. Just add more solder and flux, heat it up and suck out the solder. Adding fresh new solder and flux will make the hole clean out easier. Also, before removing anything from an old board like that, it helps to add fresh solder beforehand.

Read through the first link in my signature, it has step by step for trace repair.

Last edited by wiretap on 2021-03-08, 23:27. Edited 2 times in total.

My Github
Circuit Board Repair Manuals

Reply 18375 of 27422, by Shagittarius

User metadata
Rank Oldbie
Rank
Oldbie
wiretap wrote on 2021-03-08, 23:15:
You can put a new socket in, but some of those holes won't solder to the board since there is nothing there to solder to. For th […]
Show full quote
Shagittarius wrote on 2021-03-08, 19:27:

Thanks for the critique and advice. Could I not also just put a new socket in check for continuity and run a bodge to the trace from the socket pin? This board unfortunately is becoming my trainer to some degree, obviously my goal is to fix it. I talked with Jens about this and he said that with these old Amigas the carrier material has degraded over 30 years and it can be really easy to lift the traces.

However like I said it I just make sure to run the correct bodges I wouldn't need to fix the eyelets right? Also I heated 2 of the pins and wiggled the PLCC free because I couldn't get the solder out of 2 of the holes. I'm sure you can tell which. If I can't get the solder sucked out of the holes can I just drill it out? Sounds like a crazy question but if I run bodges would it matter? Yes I'm a newb. Please give me a better technique than this idea =)

Jens says since I didn't scratch off the Solder stop on the top that someone probably worked on this previously. So I'm thinking some of my bad luck here may have had to do with these unkown repairs. Still I own my failure. Thanks to you all for the feedback.

You can put a new socket in, but some of those holes won't solder to the board since there is nothing there to solder to. For the messed up holes, you will need to check the top and bottom side of the hole to see if there's traces on the top, bottom, or both. You'll need to run some 32-36ga wire from the pin to the traces that were ripped, or the next closest solder point of that trace.

As for drilling out the hole - no. Just add more solder and flux, heat it up and suck out the solder. Adding fresh new solder and flux will make the hole clean out easier. Also, before removing anything from an old board like that, it helps to add fresh solder beforehand.

Read through the first link in my signature, it has step by step for trace repair.

Thanks I'll try that technique again, but I did that when desoldering and even when adding more solder it never managed to clear the hole. What temp do you recommend for these Amiga motherboards?

Reply 18376 of 27422, by wiretap

User metadata
Rank Oldbie
Rank
Oldbie
Shagittarius wrote on 2021-03-09, 00:10:

Thanks I'll try that technique again, but I did that when desoldering and even when adding more solder it never managed to clear the hole. What temp do you recommend for these Amiga motherboards?

The temperature you use is the lowest temperature to thoroughly melt the solder. On solder joints with a ground plane or power pin, extra heat may be needed to overcome the conductive heat transfer to a large trace or plane.

My Github
Circuit Board Repair Manuals

Reply 18377 of 27422, by bjwil1991

User metadata
Rank l33t
Rank
l33t

Archived the files from the HardCard 20 to the 64MB CF card (used a DOS 6.22 360KB boot diskette to boot from that) and copied the files from the CF card to my main laptop.

Discord: https://discord.gg/U5dJw7x
Systems from the Compaq Portable 1 to Ryzen 9 5950X
Twitch: https://twitch.tv/retropcuser

Reply 18378 of 27422, by EvieSigma

User metadata
Rank Oldbie
Rank
Oldbie

Worked on getting my Aptiva working good. Replaced the failing AGP card, upgraded the RAM to 256MB, and installed all the necessary drivers. I love this thing so much.

qxpYEDs.jpg

Reply 18379 of 27422, by Bruninho

User metadata
Rank Oldbie
Rank
Oldbie
EvieSigma wrote on 2021-03-09, 01:52:
Worked on getting my Aptiva working good. Replaced the failing AGP card, upgraded the RAM to 256MB, and installed all the necess […]
Show full quote

Worked on getting my Aptiva working good. Replaced the failing AGP card, upgraded the RAM to 256MB, and installed all the necessary drivers. I love this thing so much.

qxpYEDs.jpg

I see an iBook G3 right there! At least isn’t the tangerine one 🤣. Is it still working great for you?

"Design isn't just what it looks like and feels like. Design is how it works."
JOBS, Steve.
READ: Right to Repair sucks and is illegal!