VOGONS


First post, by Vipersan

User metadata
Rank Oldbie
Rank
Oldbie

I have in my collection a very nice Jetway motherboard..but sadly it is not really possible to mount a cooler on the cpu any longer due to the hooks ..2 per side having been damaged.
Perfect on one side of the cpu ..but damaged on the other with the centre hook totally missing.
I have a cooler with the 3 mount points but even this wont do the job properly as it pulls to one side ..thus the cooler block isn't tight down on the cpu die.
I mused over a solution for some time ..and wondered if the socket could be replaced..but I dont have suitable soldering tools so gave up on that idea.
I did find a seller in the US (ebay) offereing 3 x replacement 370 zif sockets and although the shipping cost more than the sockets ..ordered them.
My plan is to mount a new ZIF socket on top of the old socket ..
A ZIF in a ZIF so to speak..
Has anyone ever tried this ???
If it does work the cpu would sit about a CM higher ...
Something I could live with.
Thoughts anyone ?
rgds
VS

Reply 1 of 13, by cyclone3d

User metadata
Rank l33t++
Rank
l33t++

If the old socket holds it in and gets good connection, I would think it would work.

Just make sure it is used in a desktop system and not a tower since the weight of the heatsink would probably eventually pull the top socket out of the bottom one.

Yamaha modified setupds and drivers
Yamaha XG repository
YMF7x4 Guide
Aopen AW744L II SB-LINK

Reply 2 of 13, by Vipersan

User metadata
Rank Oldbie
Rank
Oldbie
cyclone3d wrote:

If the old socket holds it in and gets good connection, I would think it would work.

Just make sure it is used in a desktop system and not a tower since the weight of the heatsink would probably eventually pull the top socket out of the bottom one.

Thanks..
I shall be reporting back on this one once I have tried it.
If it does get a good connection I will be tempted to lay down a thin layer of double sided tape and push the new sockets pins through it for extra bonding.
I'd really like to get the Jetway working as it comfortably takes a coppermine.
rgds
VS

Reply 3 of 13, by kaputnik

User metadata
Rank Oldbie
Rank
Oldbie

Can't see why it wouldn't work. Just install the new socket in the old one before clamping the heatsink, to avoid stressing the plastic in the new socket more than necessary. Also, if you ever want to remove the new socket, release the heatsink clamp first 😀

Good idea by the way, much better than trying to desolder the old socket. Would guess that's more or less impossible without damaging the board if you don't have access to professional equipment, or a good amount of Cerrolow 136 or similar alloy.

Reply 4 of 13, by The Serpent Rider

User metadata
Rank l33t++
Rank
l33t++

You can carefully replace the whole plastic part, it's just hotglued to the PCB.

I must be some kind of standard: the anonymous gangbanger of the 21st century.

Reply 5 of 13, by Vipersan

User metadata
Rank Oldbie
Rank
Oldbie
The Serpent Rider wrote:

You can carefully replace the whole plastic part, it's just hotglued to the PCB.

Yet another option ..
many thanks ..but I will wait to see a new socket off pcb to get a idea just how it fits together.
So ..another good reason to be patient and wait for the replacements.

Attachments

  • skt370.jpg
    Filename
    skt370.jpg
    File size
    65.31 KiB
    Views
    1303 views
    File license
    Fair use/fair dealing exception

Reply 7 of 13, by Doornkaat

User metadata
Rank l33t
Rank
l33t

I am doubtful you will be able to mount one socket on top of the other without going through much more effort than desoldering the old socket would have been.
Your first problem is the pins of the new socket are likely too thin to be held in place by the old socket. CPU pins are rather thick contacts, the pins on the socket are rather thin.
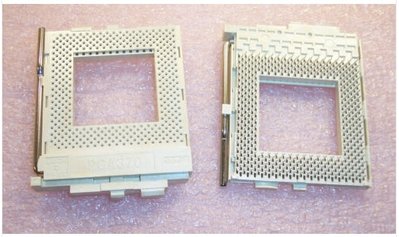
Second problem is pin length. The pins on a 370 ZIF socket are only long enough to go through the PCB it's going to be soldered on to.The socket is not flat on top because the mechanism for the locking lever stands out a bit. This is no problem for the CPU because it's smaller than the socket but another socket will have to have longer legs than even a CPU to reach into the old socket.
Third problem is locking the top socket on the bottom socket. The lever on both sockets are at the same spot. This might be the least of the hurdles as you can probably modify the top socket so as long as the lever on that is up you can at least open the bottom lever to a certain degree for istallation of the top socket. Still it's another problem you will run into.
Now that I have voiced my concerns I want to say since you have already purchased the parts I'm really hoping you'll prove me wrong! 😀

In case I am actually right with my pessimism: Why don't you get a light aluminium heatsink (PIII doesn't have a high TDP so a relatively light heatsink is totally sufficient) and use silicone to attatch it to the CPU substrate? The surface area on the CPU substrate is more than large enough for silicone to hold a good aluminium heatsink.
Clean the CPU and cooler with IPA, apply good thermal paste (or a graphite pad since those don't age/dry up), apply the silicone on the substrate (not too close to the die and leaving a wide path for air to escape) and press the cooler firmly in place holding it down until the silicone has cured. Take your time so the heatsink is flat on the die and the silicone is completely cured so nothing shifts.
I once built a coppermine celeron with 'integrated' heatsink for quick motherboard test setups just like that. No problems ever. 😎

The Serpent Rider wrote:

You can carefully replace the whole plastic part, it's just hotglued to the PCB.

Have you seen this yourself? I have unsoldered ZIF sockets before using a desoldering gun and I have never found hot glue. The contacts in the socket are bent around the bottom plastic part and secure it against the pcb.

Reply 8 of 13, by The Serpent Rider

User metadata
Rank l33t++
Rank
l33t++

Have you seen this yourself? I have unsoldered ZIF sockets before using a desoldering gun and I have never found hot glue.

On a Socket A board, but a Socket 370 shouldn't be all that different.
Also: http://www.avs-info.ru/uploads/rem_mb/rem_mb_socket.html

I must be some kind of standard: the anonymous gangbanger of the 21st century.

Reply 9 of 13, by Doornkaat

User metadata
Rank l33t
Rank
l33t
The Serpent Rider wrote:

Have you seen this yourself? I have unsoldered ZIF sockets before using a desoldering gun and I have never found hot glue.

On a Socket A board, but a Socket 370 shouldn't be all that different.
Also: http://www.avs-info.ru/uploads/rem_mb/rem_mb_socket.html

Well, I have to take your word on this one but I can't imagine hot glue on a socket 462 being stock. The socket is designed to be held by the pins that are soldered into the pcb. Adding hot glue would immensly complicate the production process for no reason at all.
The link you posted shows no hot glue as well, as far as I can tell it isn't mentioned in the text either.
The method described to change the socket also bends up the contacts within the socket so the socket itself is no longer held firmly on the PCB. I'm always open to good hacks but to me this one looks more like the last resort type of thing. Again I'm always happy to be proven wrong and learn something. 😀 Maybe your board was fixed with this method and that's how hot glue ended up on the socket of your board. 😉

Last edited by Doornkaat on 2019-09-19, 16:11. Edited 1 time in total.

Reply 10 of 13, by Vipersan

User metadata
Rank Oldbie
Rank
Oldbie

If all else fails ..at least I will have a new zif socket ...so I guess a generous amount of Chipquik on the pins and my desoldering gun might get the old socket off the pcb.
I only have a hotplate and a cheap desoldering gun ...so not sure if this would be adequate.
resoldering with the new socket is imo the easy part ..removal of the old one the main hurdle.
Is anyone aware of a youtube vid which highlights socket 370 removal with primitive tools ??
rgds
VS

..as an afterthought..
perhaps there is someone in the UK with professional tools that could do this job for me ?

Reply 11 of 13, by Doornkaat

User metadata
Rank l33t
Rank
l33t

Another thought:
Since you have already bought the sockets, why not carefully remove the socket using the method The Serpent Rider suggested?
After that you can remove the pins one by one using tweezers and a regular soldering iron (plus a solder sucker to free the holes, bonus pionts for desoldering gun 😁) and put in the new socket.
It's a bit time consuming but in the end it's a complete repair and you're good to go. 😀

Reply 13 of 13, by RoberMC

User metadata
Rank Newbie
Rank
Newbie
Vipersan wrote on 2019-09-14, 10:51:
I have in my collection a very nice Jetway motherboard..but sadly it is not really possible to mount a cooler on the cpu any lon […]
Show full quote

I have in my collection a very nice Jetway motherboard..but sadly it is not really possible to mount a cooler on the cpu any longer due to the hooks ..2 per side having been damaged.
Perfect on one side of the cpu ..but damaged on the other with the centre hook totally missing.
I have a cooler with the 3 mount points but even this wont do the job properly as it pulls to one side ..thus the cooler block isn't tight down on the cpu die.
I mused over a solution for some time ..and wondered if the socket could be replaced..but I dont have suitable soldering tools so gave up on that idea.
I did find a seller in the US (ebay) offereing 3 x replacement 370 zif sockets and although the shipping cost more than the sockets ..ordered them.
My plan is to mount a new ZIF socket on top of the old socket ..
A ZIF in a ZIF so to speak..
Has anyone ever tried this ???
If it does work the cpu would sit about a CM higher ...
Something I could live with.
Thoughts anyone ?
rgds
VS

I am surely a bit too late, but think i better write this here for future searchers 😉 I have repaired a lot of boards with this problem a long time ago. I just screwed a tiny screw to the socket in place of the missing tabs, and maybe give them some shape with a Dremel, that's all.