When I did that display about two years ago I never thought someone would like to know more about it so I haven't documented any […]
Show full quote
appiah4 wrote on 2022-11-09, 06:33:
a_h_adl wrote on 2022-11-09, 02:27:
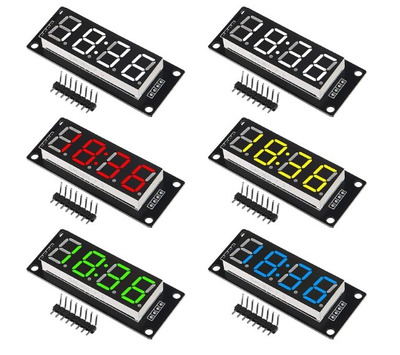
I simply using an arduino nano or just an ATMega328 plus one of those 0.36" 7-Segment Display TM1637. Fits perfectly and way cheaper. Plus you can program it to your own taste. Mine is scrolling and glowing up at start for example.
OK now you need to share this project..
When I did that display about two years ago I never thought someone would like to know more about it so I haven't documented anything yet. But I'm pretty sure most of you have already figured it out what I have done. It's basically an I2C display using only 4 wires from arduino. You can find more about it from here:
https://create.arduino.cc/projecthub/ryanchan … tutorial-ca8a93
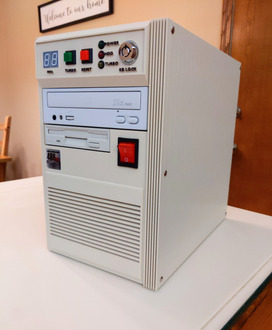
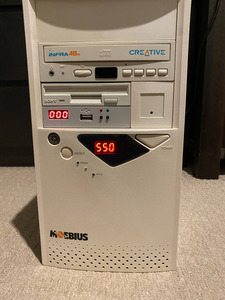
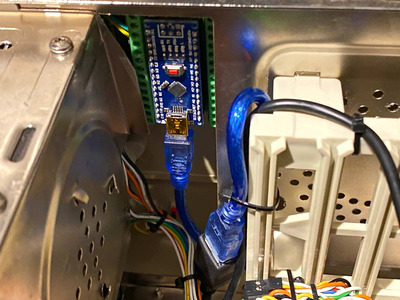
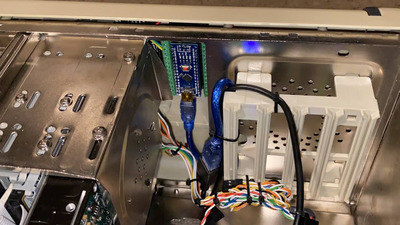
I created a YouTube channel just for uploading a couple of videos of my two cases which I have already installed TM1637 on them. I personally prefer the original display but these two cases didn't have any so I went ahead and did them on a Saturday afternoon. The installation and the programming is so basic. Here is a photo of one case and the inside as much as it lets me to show:
Case 02 Arduino Display.jpg
Case 01 Arduino Display 1.jpg
Case 01 Arduino Display 2.jpg
And the videos:
https://youtu.be/Aa9yrToP6V0
https://youtu.be/8yAOuXALf_o
The first PC is a Pentium 233 and the second one is a K6-III+ 550 so none of them uses the turbo mode so it hasn't been implemented. I will make a third one when I have some time in a couple of days showing wirings and also including the turbo switch functioning.