VOGONS


Fixing up an broken 486 I got from a local radio.

Topic actions

First post, by CalamityLime

User metadata
Rank Member
Rank
Member

Hello there,

I got an old broken 486 machine from a local radio, once upon a time they held some scheme where people of the town dumped their old PC down to the radio and the radio disposed of them. The one I got from them is the only known remaining one. There's a storeroom upstairs and it's a huge mess, so who knows.
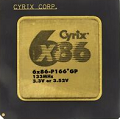
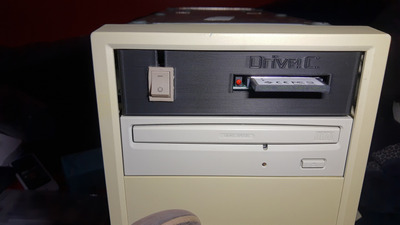
When I picked it up I thought maybe it would be an old win98 machine with a random Pentium or Celeron, but it was an old 486dx2-66 running windows 95. It looks like it might have been a custom build by someone once upon a time.

I've been slowly fixing it up a bit and I have been popping on here for tid bits of advice. I decided write up a small bit about the repair and modification process here. I'll stretch it across a few posts with several poorly framed pictures.
Just a bit of a note that I think is important. I never worked on a 486, repaired a PC motherboard or knew there was such as a thing as an AT form factor. This project had a lot of firsts for me, so if I goof something up, cut me some slack please.

So for Part 1.
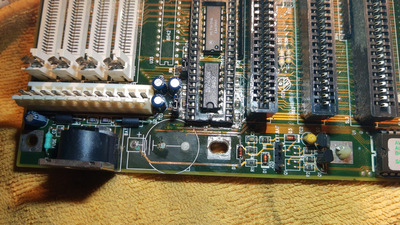
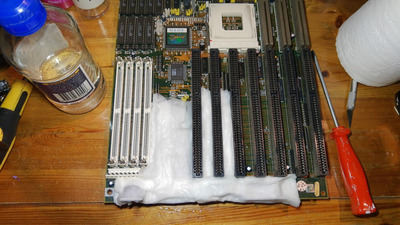
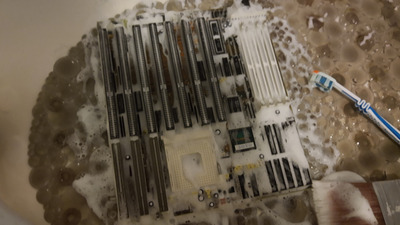
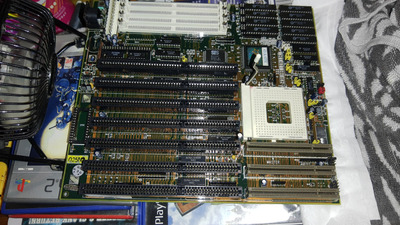
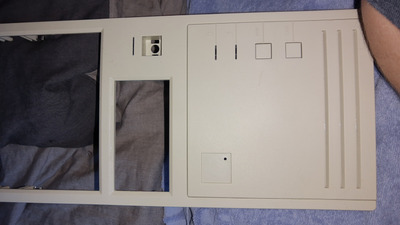
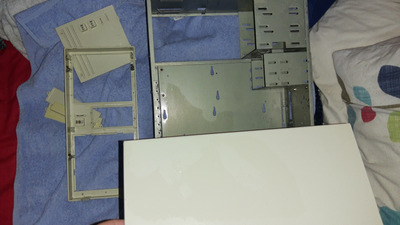
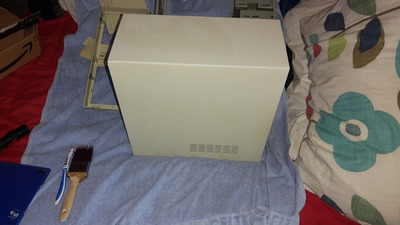
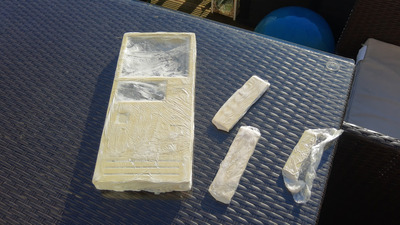
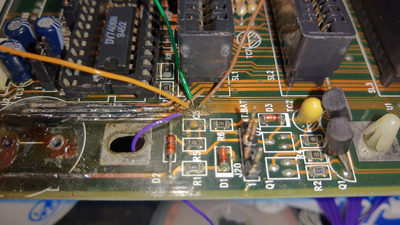
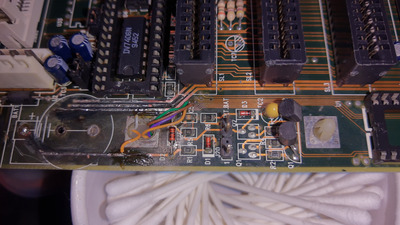
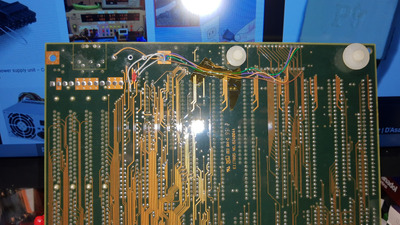
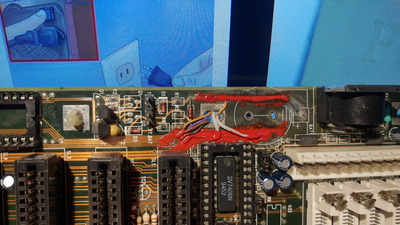
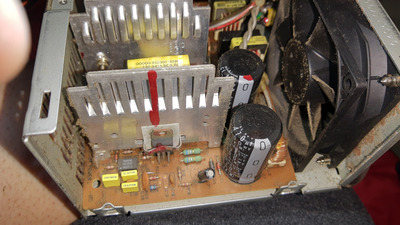
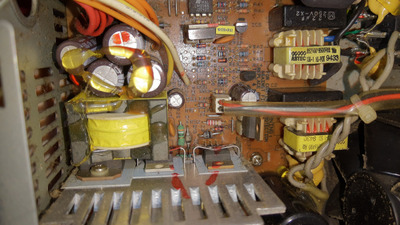
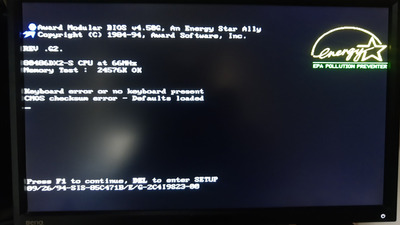
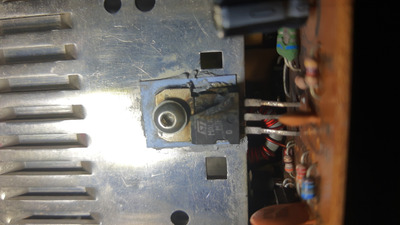
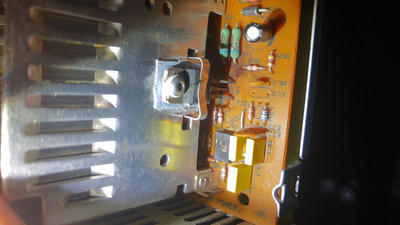
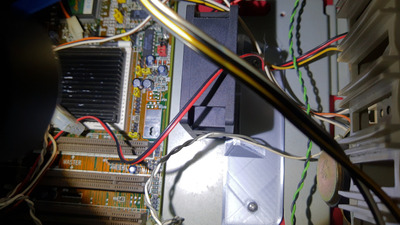
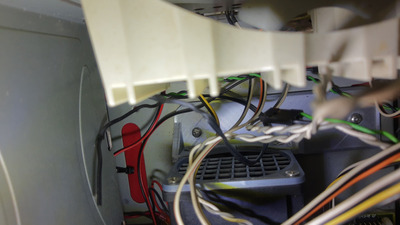
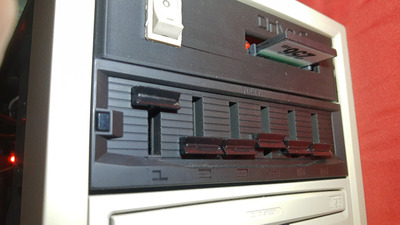
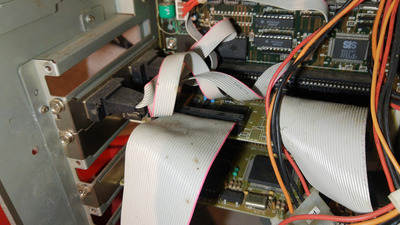
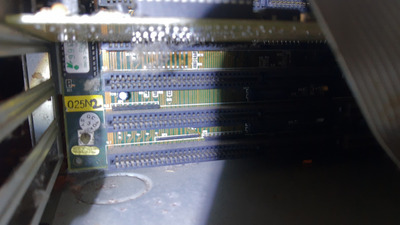
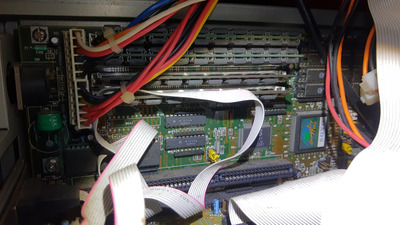
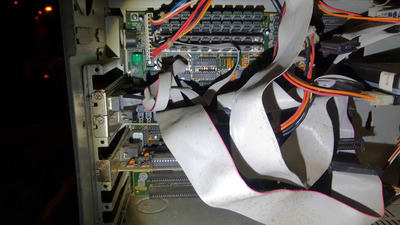
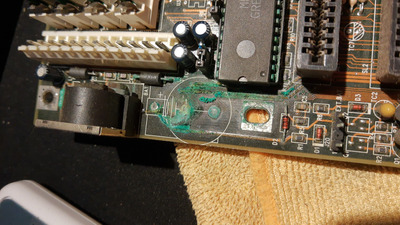
The machine was a mess, very dirty, dusty and smelly. It didn't seem to come from a smoking home the smell seemed to be just dust rotting or something. The Varta battery had leaked, much sadness ensued. Here are some pictures taken at night. before I was willing to bring it inside I wanted to open the thing to remove most of the dust or any bugs that may be inside it.

Attachments

Be Happy, it's only going to get worse.
- Projects
Limes Strange 3D models
USB-2-232

Reply 1 of 63, by CalamityLime

User metadata
Rank Member
Rank
Member

Part 2, Varta Battery damage.

I did indeed know that these batteries leak nasty basic fluid that loves destroying boards. So before even giving it power, I wanted to clean the corrosion and repair broken traces.
I checked in the shops for concentrated vinegar and the old bottle of it I found was 5 litres, so I went with normal white vinegar.

The first image is right after a quick clean with vinegar to get an idea of what the damage is. Thankfully it looked a lot better than I had feared but I was worried about the little traces that are just in front of the first isa slot. They ran to the bios chip.
I checked continuity on the little traces to the spots on the bios chip and about half of them had continuity with one being intermittent? Very annoying but still, I continued cleaning to get the last of the corrosion removed.

For the second image there, I covered the areas where I thought the battery juice might have reached and drenched it with vinegar. I could hear it bubbling away for about an hour, lots of bubbles came up from the isa slot. I left it there for about two hours, no more bubbles by then.

The third image is the motherboard in the bathtub, I gave it a wash with dish soap and lots of water. Scrubbing areas with corrosion with the little toothbrush and using a small paint brush to take any caked on dust off.
This was a bit unnerving, only tried doing this once before to an old graphics card and it didn't survive.

The forth image is the motherboard left on a towel after being sprayed down with lots of IPA. I left a fan pointed at it for the night to dry off. It looked cleaner anyway and I didn't see any corrosion left on the board.

You can see that I took the bios chip and keyboard chip out to be cleaned separately and to allow the vinegar to get into the socket!

Attachments

Be Happy, it's only going to get worse.
- Projects
Limes Strange 3D models
USB-2-232

Reply 2 of 63, by CalamityLime

User metadata
Rank Member
Rank
Member

Part 3: Cleaning

It was a nice day outside so I decided to retrobite the front cover. Never retro brited before so I decided to use the cream and cling film method. I had some creme from something left over.
Nothing too exciting happened. The tower got a wash, the cover got a wash and retrobite. It was fun watching it retrobite, I swear it looked like the creme was sucking something out of the plastic.

All the parts were left to dry for a day. They look nice.

Attachments

Be Happy, it's only going to get worse.
- Projects
Limes Strange 3D models
USB-2-232

Reply 3 of 63, by CalamityLime

User metadata
Rank Member
Rank
Member

Part 4: Repair.

The photos skip a bit here.
So I cleaned off the solder varnish? with a fibreglass pen from the traces heavily affected by the battery juice. I gave two spots a little bit of wire to bridge across spots where the battery juice had eaten into the trace before covering the tracing with some solder to protect them from the air. I figured those thicker traces deliver power to the isa slots. I have up on the traces that connected to the battery, not much left and with a ext battery header I didn't really need them either.

For for the little traces, I ran these little thin wires through the little via holes, ran the wire through a screw hole and soldered them to their points on the bios socket. I ran wires for the broken traces and the intermittent trace. I didn't leave that much bare wire exposed. For the first picture I was just focused on getting the wire into the via holes and positioned them better letter.

I ran some thicker wire for some of the power traces just because the their vias looked ugly. I'm pretty sure those vias only went to caps for filtering and connected to the power source somewhere else.

I think the traces that went to the battery were important for the ext battery so I ran bodge wires for them too.

After a clean, continuity test, I covered the area in some solder mask to protect them and help keep the wires in place. I have ran the odd bodge wire for a repair before but nothing like this, this was a challenge for me.
I'm not super happy with the quality of the repair but for a first time with a 10€ iron, I thought it would have been much worse.

PS: while the soldering iron was hot, I reflowed some solder joints on the back that looked a bit suspect. The soldering on the back looked overall pretty good, I have seen much worse in apple laptops.

Attachments

Be Happy, it's only going to get worse.
- Projects
Limes Strange 3D models
USB-2-232

Reply 4 of 63, by Eep386

User metadata
Rank Member
Rank
Member

Nice work so far. Darn Varta bombs 🙁 I had to repair a Varta-eaten 486DX motherboard not long ago, required a lot of vinegar and a few flying wires. I also wound up replacing two damaged ISA slots as well.

Last edited by Eep386 on 2021-07-23, 15:54. Edited 1 time in total.

Life isn't long enough to re-enable every hidden option in every BIOS on every board... 🙁

Reply 5 of 63, by CalamityLime

User metadata
Rank Member
Rank
Member

Part 5: PSU.

The power supply in this machine was an old Dell one. The power switch for it was switched to on and left dangling inside.
I cracked open the psu to check for any obvious damage or rifa caps. The psu had the brown dust of a smoker's home but it didn't have the smell or the tar. I hadn't seen that before.

Nothing too exciting, no rifa caps, no obvious damage. So I gave it a clean with a brush and reassembled the PC.

It was ready for power!

Attachments

Be Happy, it's only going to get worse.
- Projects
Limes Strange 3D models
USB-2-232

Reply 7 of 63, by CalamityLime

User metadata
Rank Member
Rank
Member

Part 6: IT BOOTED!!!!

After plugging out everything of value from the wall, I armed the old pc, held the switch, stood back and flicked the switch.
It gave a happy post beep before booting to the bios screen!
486DX2@66mhz with 24MB of ram.

Cmos error as to be expected and no keyboard connected.
Without much else to do at that moment, I turned off the machine and made an external cmos battery out of cr2032 battery, bit of wire, heat shrink tubing and those little dupont connectors. I was surprised that it worked, I was just a shot in the dark.
I dug out an old alps DIN keyboard. It was new old stock that I rescued from the bin. I'm very happy to report that it works just fine.

I set the time and date, hooked up the old floppy drive and booted to a freedos floppy!

So overall a very happy moment, until....... something happened, but first, how about that hard drive?

Attachments

Be Happy, it's only going to get worse.
- Projects
Limes Strange 3D models
USB-2-232

Reply 8 of 63, by Eep386

User metadata
Rank Member
Rank
Member

Oooh, nice progress. ALPS keyboard too, is it a clicky or linear? (Either way ALPS SKCM switches feel great)

Life isn't long enough to re-enable every hidden option in every BIOS on every board... 🙁

Reply 9 of 63, by CalamityLime

User metadata
Rank Member
Rank
Member

Part 7: HDD.

The HDD included was a Caviar 2540, 540MB Drive. I expected it to be dead but I thought I'd give it a shot anyway.

I wired it in and booted the PC to listen to the hard drive for any spooky noises. It sounded very normal. I had to search up the Heads and cylinders information because the bios wanted something that wasn't written on the drive itself.
She booted straight to windows 95, acting like she hadn't been sitting still for about 18 years, the newest user file on it was from 2003. I quickly made a copy of the drive to a compact flash just to have a working windows 95 install ready to go. I won't show any personal files or anything because it shows the previous owner. I just backed it up as an easy way to test things on a working OS.

I had to google a guide for copying the windows 95 install from Drive C to a Drive D, I found one that was pretty good but the copy wasn't bootable. To fix that I installed the plop bootloader into the copy and removed it again. That somehow corrected the issue and the copy booted as normal. Just something I found in case it's useful for someone.

I switched the PC to use compact flash cards (I got a pile of industrial ones for next to nothing a few years back), the speed difference was amazing to see in person.

Attachments

Be Happy, it's only going to get worse.
- Projects
Limes Strange 3D models
USB-2-232

Reply 11 of 63, by CalamityLime

User metadata
Rank Member
Rank
Member
Eep386 wrote on 2021-07-23, 16:12:

Oooh, nice progress. ALPS keyboard too, is it a clicky or linear? (Either way ALPS SKCM switches feel great)

I don't know, some of the keys feel linear and some feel clicky. The little shafts on them are white if that helps.

I don't know much about ALPS keyboards, I know the switch itself but that keyboard I have is the only one I've seen that is an ALPS branded keyboards rather than an ALPS being an oem. There are Dell ones that looks just like it.

Last edited by CalamityLime on 2021-07-23, 16:36. Edited 1 time in total.

Be Happy, it's only going to get worse.
- Projects
Limes Strange 3D models
USB-2-232

Reply 12 of 63, by CalamityLime

User metadata
Rank Member
Rank
Member
Joakim wrote on 2021-07-23, 16:29:

Wow nice work, such enthusiasm is seldom seen!

Thanks mate.

It has been fun and trust me when I say: it gets more exciting.
I'll have to dig up some stl files for you guys, so give me a bit to find/edit them.

Be Happy, it's only going to get worse.
- Projects
Limes Strange 3D models
USB-2-232

Reply 13 of 63, by CalamityLime

User metadata
Rank Member
Rank
Member

Part 8: 3D Printing Part 1.

So, I wanted to use CF cards instead of HDDs but I wanted to be able to swap them easily. I had an IDE to CF adapter that goes into a pci slot to give rear access but I didn't like that very much. So I 3d modelled and printed a housing to mount the ide to cf board from the pci slot card (because of the forward facing activity light) in a cd/dvd drive slot.
I used the Orbitron font to indicate that it's drive C, I picked Orbitron because it looks like a techy sci-fi font to me.

I included a zip file of the STL's for printing your own if you wanted to. With edited variants.

In my printed version, I included chamfers on the side which came out very ugly but looked nice in fusion 360, those chamfers are removed in the STL's, I included a spot for the stock switch because I didn't have the kind that mounts on the front panel. In terms of variants, there is one with the CF slot centred and another with the centred slot and no text.
Feel free to print your own or edit them to suit yourselves. Up to you. It's made to fit the board shape that comes with the CF to IDE on the pci/isa slot cover.

PS: Ignore the fact that the front panel is yellow in the photo there. The retrobriting was done later.

Attachments

Be Happy, it's only going to get worse.
- Projects
Limes Strange 3D models
USB-2-232

Reply 14 of 63, by Eep386

User metadata
Rank Member
Rank
Member

A little yellowing adds character IMO. Don't worry too much about a slight tinge like that.
Nice work all the same!

Life isn't long enough to re-enable every hidden option in every BIOS on every board... 🙁

Reply 15 of 63, by CalamityLime

User metadata
Rank Member
Rank
Member

Part 9: BA BOOM!!

After finding out that the old PSU still worked I decided to go back into it and give it a better clean. I didn't do a very good job the first time because I didn't have high hopes for it working.

I have it a few sprays of IPA, brushed it down better. I remounted a few of the voltage regulators and the switching thyristor, given the machines age, I'd rather go overkill on the cooling.
I let it dry for two days with air flowing over it to make sure it was good and dry. Reassembled, plugged it and it promptly electrocuted me. I figured out afterwards that I was holding the switch with exposed contacts in one hand and my other hand on the case which was ground. If I had GFCI or similar, that would have popped, but I don't.

I took the electrocution as a bad omen and plugged out the pc main board before flicking the switch on the PSU. It did nothing for a few seconds before the thyristor exploded.
It was quite a bang too, as you can see in the photos, the thyristor cut through the little bit of aluminium in front of it, a little (what I think was) 555 timer blew open and two resistors chipped their paint.

I had to go out for a walk after that one to calm down a bit. Not a fun experience but that's what I get for breaking my golden rule of computers: "If it's Dell or HP, toss in the bin"
So that lead to the glorious rabbit hole of adapting an ATX PSU to an AT machine but more on that later.

Attachments

Be Happy, it's only going to get worse.
- Projects
Limes Strange 3D models
USB-2-232

Reply 16 of 63, by CalamityLime

User metadata
Rank Member
Rank
Member
Eep386 wrote on 2021-07-23, 17:14:

A little yellowing adds character IMO. Don't worry too much about a slight tinge like that.
Nice work all the same!

Oh yes, I'm totally on board with that. Part of the reason why I never retrobrited anything before.
However for this machine, I had so many firsts while preforming several changes, I decided why not make it my first retrobrite too? Make it look and preform as new as I want it too.

It's not completely bleached white or anything, I left it slightly yellow because I don't like the look of something that's completely retrobrited. It's like cleaning an old coin I guess, or the green off of copper. There's a point where it's too much.

Be Happy, it's only going to get worse.
- Projects
Limes Strange 3D models
USB-2-232

Reply 17 of 63, by Jasin Natael

User metadata
Rank Oldbie
Rank
Oldbie

Great project you are doing a superb job on this thing so far.

One thing to note though, you might have to install a resistor or something to prevent the CR2032 from trying to recharge. Depending on the motherboard some of those old Varta's were set to recharge and of course a modern lithium battery will not recharge. I'd hate to see it overheat or explode and kill your freshly repaired board.

A bit of redundant info here:

http://pc-restorer.com/replacing-cmos-batteries-in-old-pcs/

Reply 18 of 63, by CalamityLime

User metadata
Rank Member
Rank
Member

Part 10: Cooling & 3D printing part 2

So as I had mentioned before, given the PC's age I'd like to go overboard on the cooling.
The case does not have many options for cooling so I had to jerry rig my own solution.

So back into Fusion360 I go. I designed and 3d printed a mount to stick a 60mm fan right beside the cpu to blow air across it. It screws directly into the motherboard backplate using normal m3 screws. Because it screws directly into the motherboard back plate it should be compatible with other AT motherboard cases. I included a zip of that. I did print fan grills to stop the fan catching the front case wires, I used one I found on thingiverse and modified it for one side. I didn't include the stls for the fan grill because I can't find them.
It might be in the way for VLB cards in the first slot but ehhhh, anything I put in would be in the way of something.

The back of the case had a spot for a 60mm fan, I made a fan shroud to connect an 80mm fan instead, no stl of that since I don't think it would be useful for anyone else. I wired them into an NZXT fan controller I wasn't using. It has some lovely sliders on it!

Nothing too exciting to see here but it was fun to find a place to put fans in this old case. It really reminded me of my old windows XP machine and it's chronic overheating issues. Those were the days of soldering over a pc motherboard because the wire routing was a pain, no 3d printing shortcuts, not even zip ties; I just had bits of wire I salvaged from things going to the bin.

I just included that part to say that sometimes we can think that we don't have the means to do a project but with some creativity and the bare essentials, we can make things work. I am delighted that I have a 3d printer for this but it's just a tool; same with zip ties, wires, string, glue and toilet paper tubes. In terms of doing the worst thing you can do is not try at all.

Sorry if this is sounds silly or pretentious but this part in particular really reminded me of my starting days in tinkering with PC hardware. That is just something I wish I could tell my younger self.

Attachments

Be Happy, it's only going to get worse.
- Projects
Limes Strange 3D models
USB-2-232

Reply 19 of 63, by CalamityLime

User metadata
Rank Member
Rank
Member
Jasin Natael wrote on 2021-07-23, 17:47:
Great project you are doing a superb job on this thing so far. […]
Show full quote

Great project you are doing a superb job on this thing so far.

One thing to note though, you might have to install a resistor or something to prevent the CR2032 from trying to recharge. Depending on the motherboard some of those old Varta's were set to recharge and of course a modern lithium battery will not recharge. I'd hate to see it overheat or explode and kill your freshly repaired board.

A bit of redundant info here:

http://pc-restorer.com/replacing-cmos-batteries-in-old-pcs/

Ah yes, I kept that in mind. The external battery port, at least on this board, does not give out power while the pc is on. Nothing I could pick up on my multi meter anyway. I didn't know that for sure when I wired in the battery to begin with, I just needed it to boot to an OS.

Be Happy, it's only going to get worse.
- Projects
Limes Strange 3D models
USB-2-232