VOGONS

Common searches


First post, by bristlehog

User metadata
Rank Oldbie
Rank
Oldbie

My personal chart of people who make outstanding photos of their expansion cards and other tech stuff is:

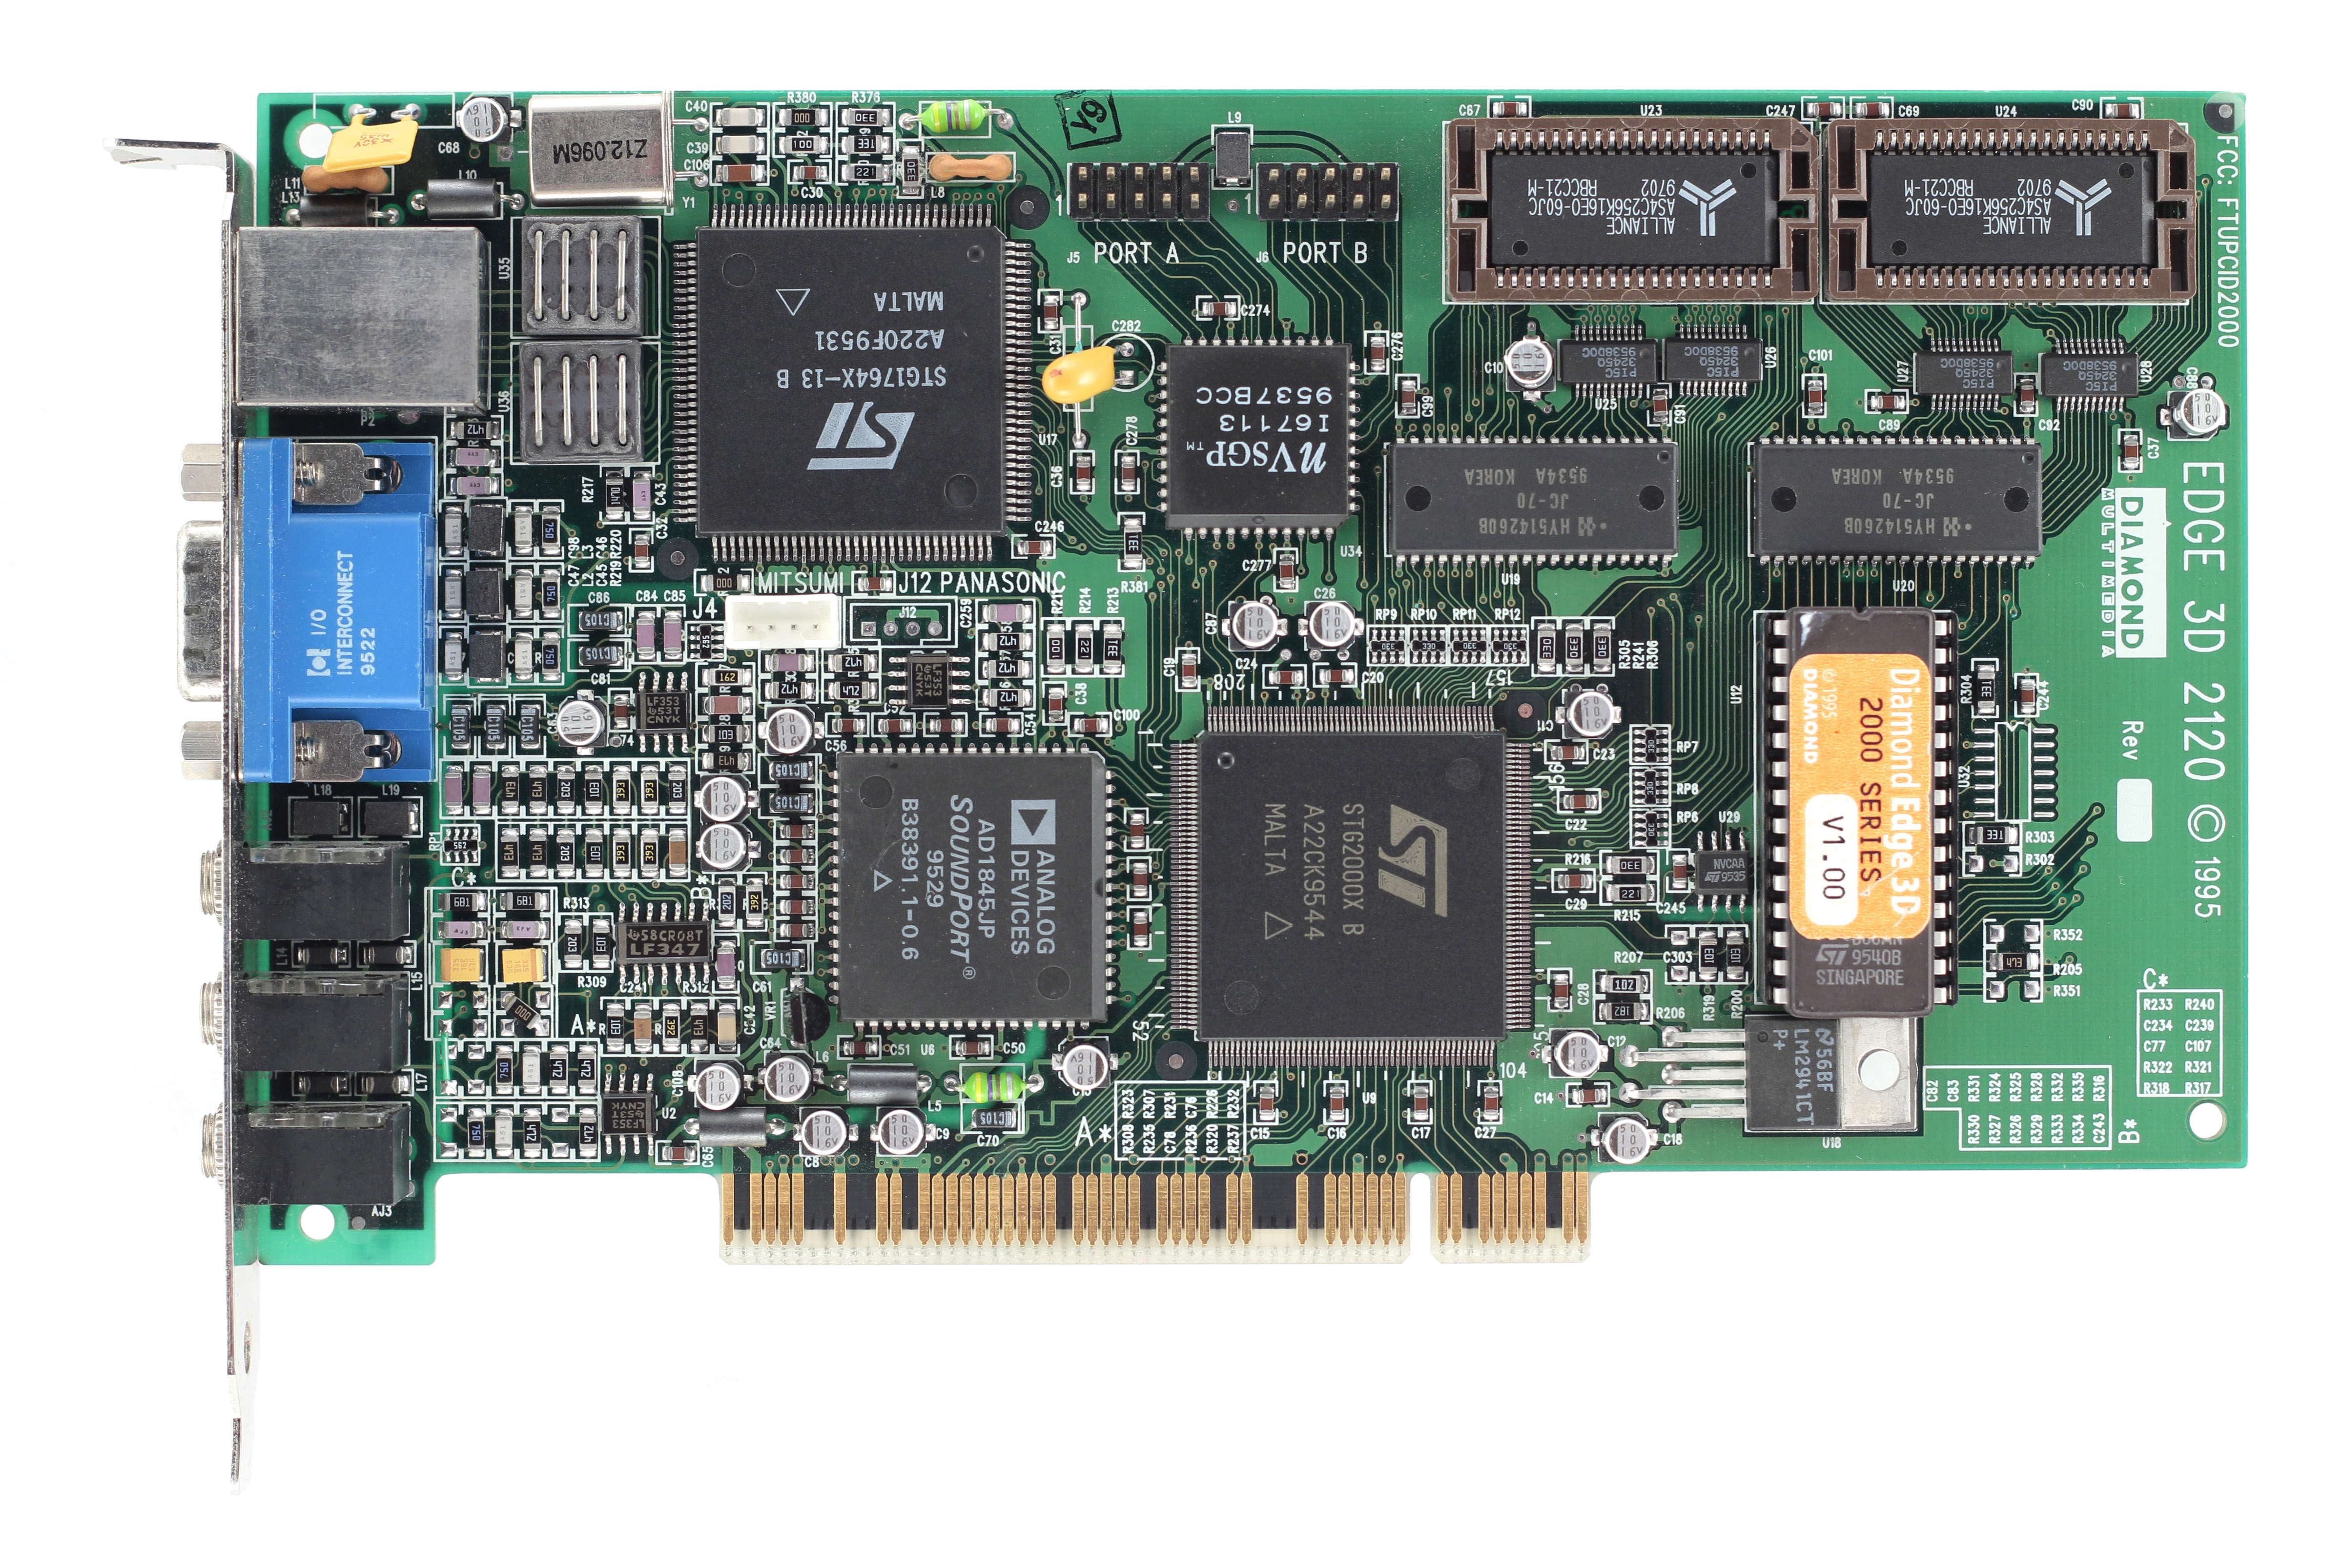
1) FGB: high resolution, no distortions, perfect light

mediavision_pro_audio_spectrum_dual_opl2-600x291.jpg

2) Cloudschatze: moderate resolution, good light (some shadows are seen), and barrel distortions are present

pas_s.jpg

3) easy_john: clear photos, but low resolution, and light screwed by flash usage

ISA_MediaVision_ProAudio_Studio_16_f.JPG

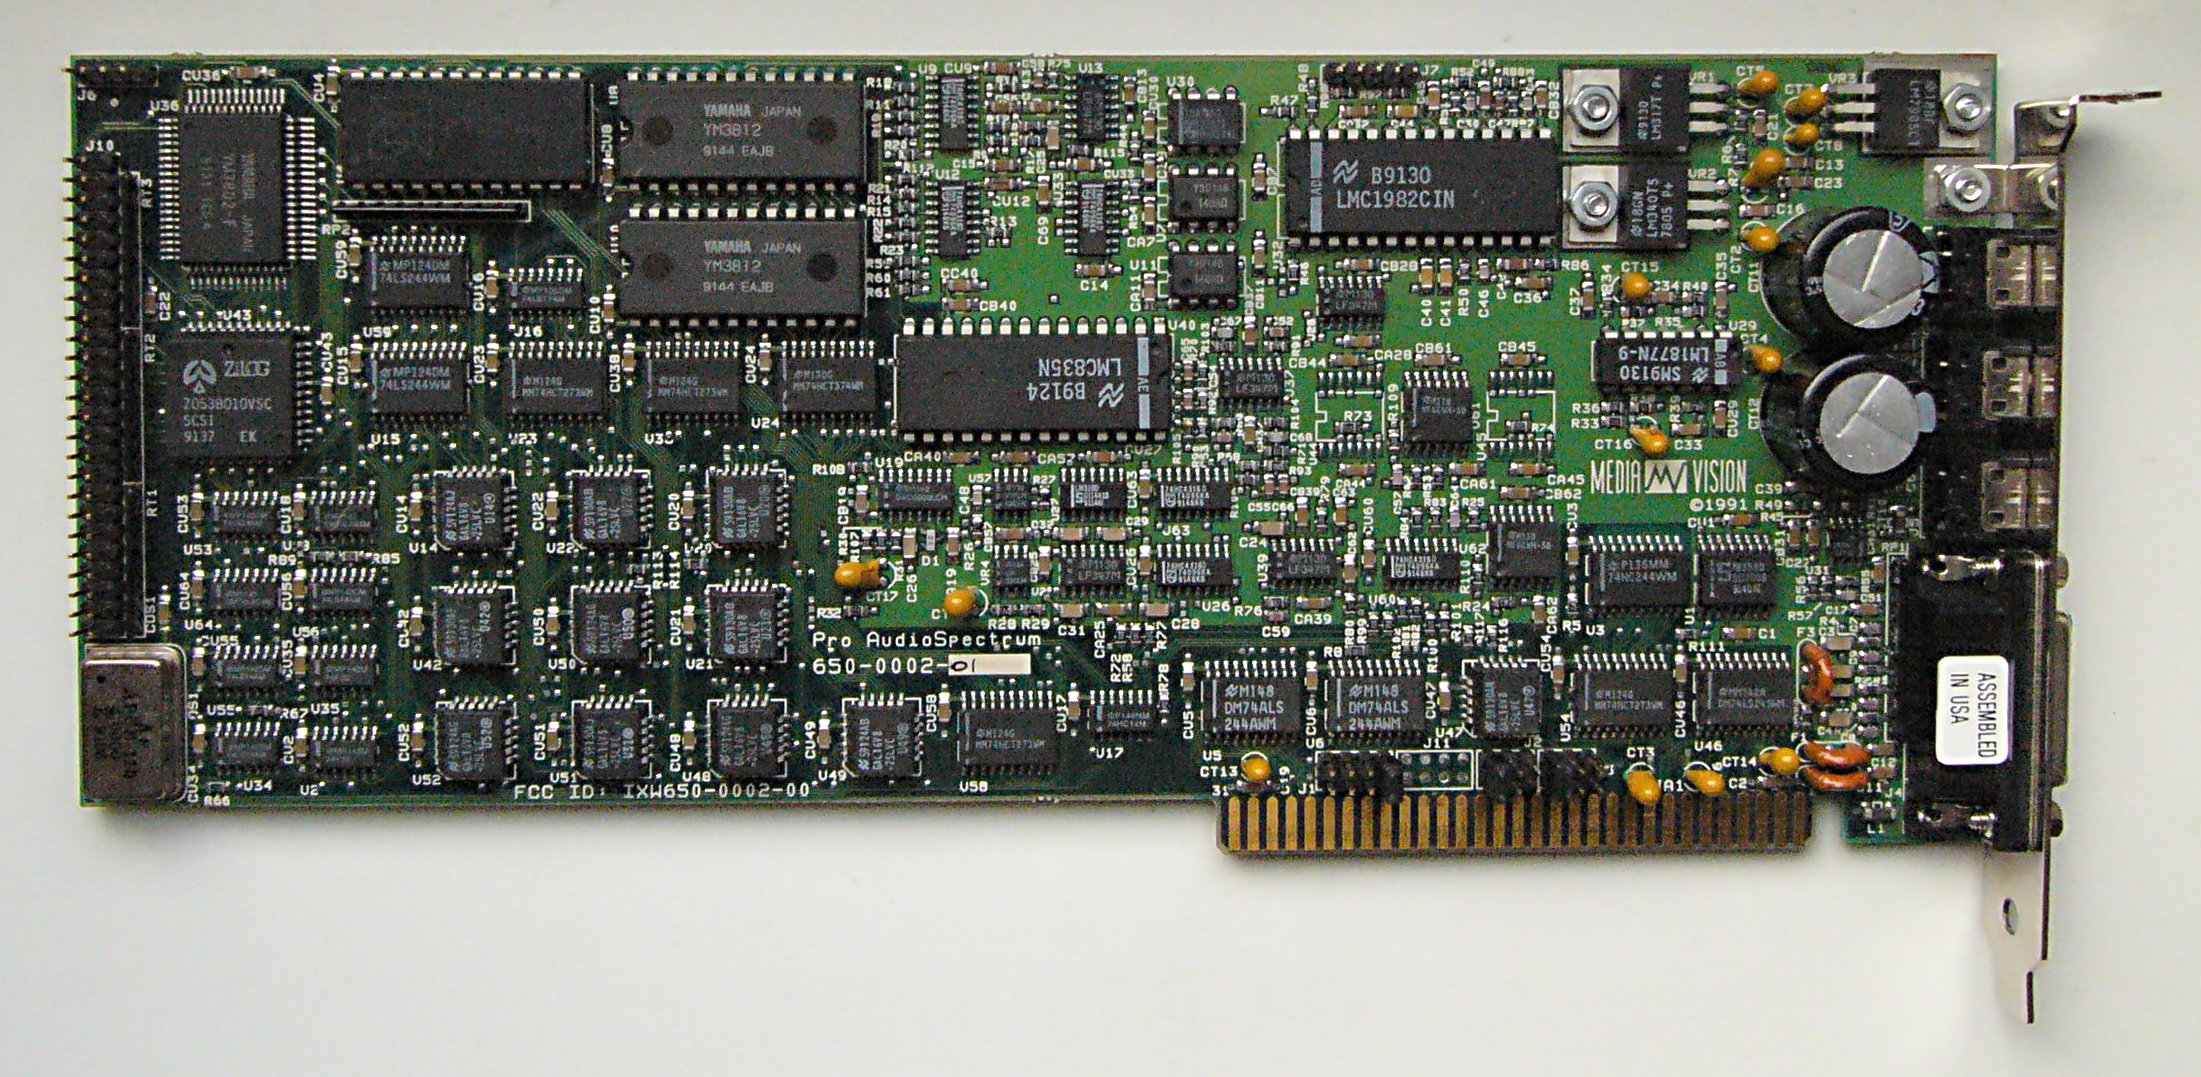
I myself stick to taking photos near a window during moody weather days to keep light in control. However, my photos are still plagued by noise:

650-0002_preview.jpg.

This was taken with old 4 MP Lumix camera and edited later to get rid of heavy barrel distortion.

Any tricks you use for your photos? What equipment do you use?

Hardware comparisons and game system requirements: https://technical.city

Reply 1 of 19, by NitroX infinity

User metadata
Rank Member
Rank
Member

I'm thinking of putting a piece of white paper over my camera's flash. I think that might diffuse it enough to make the lighting on shiny surfaces better.

NitroX infinity's 3D Accelerators Arena | Yamaha RPA YGV611 & RPA2 YGV612 Info

Reply 2 of 19, by sklawz

User metadata
Rank Member
Rank
Member

hi

bristlehog wrote:

Any tricks you use for your photos? What equipment do you use?

My guess is that the better photos are actually scans. Try it yourself. I just tried
using an ancient scanjet 2100C, the lamp is a bit dull but use of the colour curves tool
in GIMP enhances the image. It helps if you have a clean card to scan.

bye

edit: fix grammar

Reply 3 of 19, by MaxWar

User metadata
Rank Oldbie
Rank
Oldbie
sklawz wrote:
hi […]
Show full quote

hi

bristlehog wrote:

Any tricks you use for your photos? What equipment do you use?

My guess is that the better photos are actually scans. Try it yourself. I just tried
using an ancient scanjet 2100C, the lamp is a bit dull but use of the colour curves tool
in GIMP enhances the image. It helps if you have a clean card to scan.

bye

edit: fix grammar

I had tried that before but did not work. As soon as a part was not directly in contact with the glass it got out of focus. So the only thing that looked good was the top of capacitors. Everything else was a blur.

My personal pictures are decent I guess. I try to make them good enough to follow traces. It is still hard as I feel limited by my equipment. I have a pretty crappy point and shoot and no tripod or anything to make my camera 100% steady. I also never can get 100% rid of the light glare, even when using a desklamp and no flash.
SoundBlaster15.jpg

FM sound card comparison on a Grand Scale!!
The Grand OPL3 Comparison Run.

Reply 4 of 19, by sklawz

User metadata
Rank Member
Rank
Member

lo

MaxWar wrote:
I had tried that before but did not work. As soon as a part was not directly in contact with the glass it got out of focus. So t […]
Show full quote

I had tried that before but did not work. As soon as a part was not directly in contact with the glass it got out of focus. So the only thing that looked good was the top of capacitors. Everything else was a blur.

My personal pictures are decent I guess. I try to make them good enough to follow traces. It is still hard as I feel limited by my equipment. I have a pretty crappy point and shoot and no tripod or anything to make my camera 100% steady. I also never can get 100% rid of the light glare, even when using a desklamp and no flash.
SoundBlaster15.jpg

I done a 600 DPI scan on the obsolete scanjet 2100C and it was fine. I can see every
scrap of dirt on the card and read every chip label. The tif image is 98 megabytes so I will
not upload it. If it doesn't work you for then consider testing a friends scanner.

Personally I care little about image quality but on occasion I will use an LED lamp rather
than a flash, it can produce imperfect colour tone but is often good enough.

Bye

Reply 5 of 19, by sklawz

User metadata
Rank Member
Rank
Member

Lo, before I drink tea I prepared this reduced quality
scan for upload so you can judge for yourself how elite the
2100C is.

What I done with the TIF file was rotate, crop, adjust colour, adjust
saturation then later reduce the image resolution and quality.

You can see how dirty this piece of junk sound card is.

jazz16_t.jpg

Bye-bye

Reply 6 of 19, by MaxWar

User metadata
Rank Oldbie
Rank
Oldbie

I never doubted it worked well for you. I have no idea why it did not work on my Scanner, but I will try on a different one when I get the chance. This would sure make my life easier If it worked.

I find it very usefull to be able to follow traces on a high resolution PCB picture. It can be easier and more convenient than looking at it with a magnifying glass.

FM sound card comparison on a Grand Scale!!
The Grand OPL3 Comparison Run.

Reply 7 of 19, by 133MHz

User metadata
Rank Oldbie
Rank
Oldbie

Nice! The scanner I've been using seems to have a very short focal length or something, things come out blurry if the board's got tall components.

http://133FSB.wordpress.com

Reply 8 of 19, by RacoonRider

User metadata
Rank Oldbie
Rank
Oldbie

I have Astra 4900 and it is as good a scanner as I could ever need. Bought it new a long time ago and it still works well. I had to lube the slide rod to decrease vibration last year, that's the only maintenance it required.

Reply 9 of 19, by Slaventus86

User metadata
Rank Newbie
Rank
Newbie

I use Canon EOS 550D + Canon EF 50mm f/1.8 II + Lightbox and four 500W light sources. These are examples what I get:

3dfx_voodoo5_5500_f.jpg

nec_te4e_f.jpg

diamond_edge_2120_nvidia_nv1_f.jpg

For macro I use default Canon EF-S 18-55mm f/3.5-5.6 IS lens:

MG_3586-300x212.jpg

Click on image to see in full resolution.

The main problem is that it is very difficult to clean out the PCB since when I take the card in my hands and look at it I see no dust, but when I take shot - the dust becomes very visible with this lightning.

Videocard Virtual Museum

Reply 10 of 19, by elianda

User metadata
Rank l33t
Rank
l33t

I didn't developed the photography of the cards to a form of art, but this is what I get with my new camera:

graphics_card_elsa_winner_2000pro_pci_8_front.jpg

However I did not reshoot all the cards where I already made images with my old camera.
other images can be found here: http://mail.lipsia.de/~enigma/neu/pictures.html

Retronn.de - Vintage Hardware Gallery, Drivers, Guides, Videos. Now with file search
Youtube Channel
FTP Server - Driver Archive and more
DVI2PCIe alignment and 2D image quality measurement tool

Reply 11 of 19, by vlask

User metadata
Rank Member
Rank
Member
Slaventus86 wrote:

I use Canon EOS 550D + Canon EF 50mm f/1.8 II + Lightbox and four 500W light sources.

You got best photos of cards i ever seen online. I wonder about no distortions even at very long cards (thats mine plague).

What are you using for baground? (i standart white paper A3, but it gets dirty fast)

Not only mine graphics cards collection at http://www.vgamuseum.info

Reply 12 of 19, by NJRoadfan

User metadata
Rank Oldbie
Rank
Oldbie

The only scanners that can properly scan in cards are ones with a CCD sensor. The cheapo CIS units will not work and result in a blurred scan. If you want to diffuse a camera flash, use a coffee filter, it works wonders with built in flashes. The pros usually use adjustable flashes so they can bounce the light off of the ceiling.

Reply 13 of 19, by Slaventus86

User metadata
Rank Newbie
Rank
Newbie
vlask wrote:

You got best photos of cards i ever seen online.

Thanks 😀

I use white pizza box for background, I've also tried special white cloth and back side of computer case with paper on it. But pizza box is the most bright white surface I've found. I also use these pizza boxes as storage for my collection - they are ideal for IKEA Expedit shelves. As for distortion - lens with fixed focus distance are less affected to this problem.

Videocard Virtual Museum

Reply 14 of 19, by Cloudschatze

User metadata
Rank Oldbie
Rank
Oldbie

Most of the PCB photos I've taken are considerably poor (that PAS photo is especially bad), and I've not been impressed with my own flatbed-scanner results. I did construct a custom lightbox a few months back, which provides better light diffusion with two flanking fluorescent bulbs, but with which I've mostly been using a cell-phone camera for the sake of simplicity (resulting in distortion and lack of clarity - see the "MIDI General" thread for examples).

For general presentation, I've been much more pleased with the stylistic photos I've taken, most of which make use of natural sunlight.

sbv.jpg

I'm not sure how many people realize this, but the MPU-401 and MT-32 photographs on Wikipedia are mine. The MT-32 shot gets used for a fair number of eBay auctions, much to my amusement.

The gigantic dust speck in the upper-right-hand corner of the photo is incredibly bothersome every time I see it. 😵

MT_32.jpg

Reply 15 of 19, by sklawz

User metadata
Rank Member
Rank
Member

HI

There are only great images here, congratulations to all
with their creation.

I just got the Director's cut of Deus Ex Human Revolution so feel
compelled to boot into win7 but before I go I present one last
scan. This one is not for the squeamish, no puppies were harmed
but an innocent SB16 was sacrificed 😀

sb16_t.jpg

Have fun, bye-bye

Reply 16 of 19, by jwt27

User metadata
Rank Oldbie
Rank
Oldbie

Just had a quick browse through my pictures directory and this is one of the better PCB pics I could find... Nowhere near FGB- or Cloudschatze-level but I think it's okay:

4HWxylC.jpg

I also scanned a (very dirty) DB60XG once on an Officejet flatbed, and got this: http://i.imgur.com/f4Fx1Ox.jpg (2MB JPEG)
Notice how the caps on the left side are skewed a bit... I wonder how it did that.

Reply 17 of 19, by FGB

User metadata
Rank Oldbie
Rank
Oldbie

Hello,
i'm happy that you like my photos.

My setup is quite simple:

I have a mirrorless DSLR camera to capture a great amount of details (Nothing can beat a big sensor because the more light, the better the results...) I use a tripod and no flash, just a flood light of 300watts bouncing from the white ceiling. To keep the detail level high I use an ISO as low as 200 (not ISO 100 because the sensor of my camera has its peak dynamic range @ ISO 200). I also close the aperture to F8 to get a better depth of field (to enhance the range that is sharp). As a result I often have shutter times of 1-2secs. To reduce post processing I try to use the center of the lens and try to avoid the edges. This prevents the image from distortions but of course it's not possible with every PCB due to different sizes (I use the cheap 20-50mm kit lens, I think it does the job. The loss in quality to a fixed focal length is compensated by the much higher flexibility which gives me an easier setup).
I also use live view with a grid to align the objects. I also use a variable focus point and size to get sharp what I want to be sharp.
I don't use auto white balance because it's not reliable. It's better to use an adjusted preset, either with a grey value table or a celvin temperature.
My photos are taken in JPEG superfine, the best quality level my camera offers. I made a custom profile that suits my needs with a higher than standard contrast and saturation. Noise reduction is turned off because I don't want watercolor look. I don't use the RAW mode for my PCB-shots
My post processing only consists in resizing and a tad of sharpening (10 in a scale of 1-255). I use GIMP.

That's pretty much it, no big deal. The workflow is also very easy and optimized, I just have to press a few buttons to set up the camera for a PCB-session.

I have a bigger version of the picture of the PAS card online that the potential of the workflow a bit better: Take a close look at 1:1 to see the pixel per pixel resolution of the cam. No resizing, just cropped:
http://www.amoretro.de/wp-content/uploads/med … dkarte_20mp.jpg

Best regards from
Fabian

www.AmoRetro.de Visit my huge hardware gallery with many historic items from 16MHz 286 to 1000MHz Slot A. Includes more than 80 soundcards and a growing Wavetable Recording section with more than 300 recordings.

Reply 18 of 19, by VileR

User metadata
Rank l33t
Rank
l33t
jwt27 wrote:

I also scanned a (very dirty) DB60XG once on an Officejet flatbed, and got this: http://i.imgur.com/f4Fx1Ox.jpg (2MB JPEG)
Notice how the caps on the left side are skewed a bit... I wonder how it did that.

imgur isn't the best place for hi-res photos - go over a certain size limit and it gets recompressed at a lower quality... note that this one's 1MB now.

[ WEB ] - [ BLOG ] - [ TUBE ] - [ CODE ]