VOGONS


First post, by kikendo

User metadata
Rank Member
Rank
Member

I recently acquired a really cheap Gateway 386SX/25 but it's not booting and I am a bit confused as to how to proceed next.

On first try, the power supply wouldn't even power up, so I suspected it, and I am now 100% sure it's dead, since it doesn't even turn on its fan,. and I get no readings on the multimeter on any pin.

Now I got an ATX PSU to AT converter, and I tested it yesterday, but the PSU won't power up when I connect it to the Gateway. I hear a faint "click" in the PSU but there fan doesn't turn on and clearly there's no power to the machine, it's acting as if there's a problem with the computer.
Disconnecting the motherboard from the PSU, I can get all the other peripherals in the machine (hard drive, floppy drives)and the PSU to power up just fine.

Where should I be looking here? I see no fuse on the motherboard. But is the PSU acting as if the motherboard was shorted? No real idea what to do, visual inspection is inconclusive.

Any help appreciated, I would really love to restore this beast.

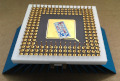
PS: my computer looks like this, but it's not a 486. I actually cannot find any info or pictures online whatsoever for my model.
https://www.youtube.com/watch?v=lZ3x9NaKjCs
Edit 2: actually that video shows an advert for the whole line and it mentions my model as the base one.

Reply 1 of 17, by babtras

User metadata
Rank Newbie
Rank
Newbie

I believe most modern ATX power supplies will immediately shut themselves off if they detect a short.
First thing I'd do is pull out all expansion cards, disconnect hard drives and floppies, everthing. Just bare mainboard with the speaker attached so you can get a POST beep. If it still doesn't seem to power up, inspect the mainboard for corrosion, leaking caps, free-range screws that are rattling around inside, dried up old fluid spills, etc. On the other hand, if it does power up, start adding components one at a time until you find the one that prevents it from turning on.

Reply 2 of 17, by kikendo

User metadata
Rank Member
Rank
Member
babtras wrote on 2020-06-03, 17:24:

I believe most modern ATX power supplies will immediately shut themselves off if they detect a short.
First thing I'd do is pull out all expansion cards, disconnect hard drives and floppies, everthing. Just bare mainboard with the speaker attached so you can get a POST beep. If it still doesn't seem to power up, inspect the mainboard for corrosion, leaking caps, free-range screws that are rattling around inside, dried up old fluid spills, etc. On the other hand, if it does power up, start adding components one at a time until you find the one that prevents it from turning on.

Yeah that was what I thought, that it was shorted. it's a shame really.
I did try without the peripherals but NOT the only card it has. I will dismantle it all and restart with the baseboard only. It could use a clean anyway.
Visual inspection showed no capacitor damage or corrosion, but I didn't yet look underneath the board.

Reply 3 of 17, by jakethompson1

User metadata
Rank Oldbie
Rank
Oldbie

Unclear if you tried this already, but if you try to power on an AT power supply with nothing connected to it, nothing will happen; not even the fan will turn. You would at least have to connect a hard drive in order to test the voltages.

Reply 4 of 17, by kikendo

User metadata
Rank Member
Rank
Member
jakethompson1 wrote on 2020-06-04, 18:05:

Unclear if you tried this already, but if you try to power on an AT power supply with nothing connected to it, nothing will happen; not even the fan will turn. You would at least have to connect a hard drive in order to test the voltages.

That's a good tip, I did not do that later, but initially, I tried to power the computer on with everything plugged and nothing worked so the PSU is dead.
And then, the motherboard is acting as if it was shorted when connected to the ATX PSU, so I think maybe the PSU took it with it or something. Need to inspect more.

Reply 5 of 17, by Deunan

User metadata
Rank Oldbie
Rank
Oldbie
kikendo wrote on 2020-06-08, 16:24:

And then, the motherboard is acting as if it was shorted when connected to the ATX PSU, so I think maybe the PSU took it with it or something. Need to inspect more.

Does it have tantalum capacitors? Those tend to fail short - it's a chemical reaction with water and oxygen from air if it cracks, and they do to various reasons (both handling and thermal cycling).
So if it does, try desoldering those first, especially on the +12V and -12V rails. Visual inspection might help but those cracks can be really hard to detect. Also, failures on +5V and +12V lines usually result in fireworks due to the amount of current the PSU can push before it detects a short.

Reply 6 of 17, by kikendo

User metadata
Rank Member
Rank
Member
Deunan wrote on 2020-06-08, 19:53:

Does it have tantalum capacitors?

I think so, but I have some updates!

I did as babtras said and stripped the whole thing, a good chance to clean it properly with contact cleaner aerosol too. Looking great!
I started to try to boot with the bare board and add one thing at a time.

- Bare board: powered up!
- Added the CPU board: powered up and beeped 3 times! It's alive!
- Added the RAM: wasn't doing anything. I closed a jumper that s aid "MFG test". It beeped one, and repeat.
- Decided to add a screen. I got video!!! It wasn't beeping before because 8MB of RAM apparently take forever to check. but the thing is definitely alive!
- Added the ISA riser port: PSU acts as if it's shorted. So the problem is the damn riser card or something in the motherboard related to it.

I have just spent several hours testing the machine all I could without the riser and everything seems to be working. Floppy drives, IDE, video, the beeper, keyboard... all good. Played a bunch of old DOS games I had around!

Now I don't understand what could be wrong here. Here's a pic of the riser board:
4756-ED73-B9-C3-45-CC-8-B6-E-3-AFC93-F07115.jpg
47944661-110-C-440-C-8-EAD-41-C225469222.jpg

As you see it's just a bunch of capacitors? and that's all.
I would like this to work because I want to add an Adlib or Sound Blaster card to complete the setup.

Here's some extra pics, there's a bunch of jumpers that I don't know what they do and I have been unable to find a user manual for this computer (info for this particular model seems scarce but I think both the 386 and 486 models of this line all use the same motherboard)

2-FE0-C38-E-1-FF4-44-FE-A4-CC-A5-BFE3772410.jpg
D3-C64-B76-0-CE3-40-D3-88-EC-647-E42840179.jpg

Any help greatly appreciated!

Reply 7 of 17, by Deunan

User metadata
Rank Oldbie
Rank
Oldbie
kikendo wrote on 2020-06-10, 16:21:

Now I don't understand what could be wrong here. Here's a pic of the riser board:
As you see it's just a bunch of capacitors? and that's all.

Yup. What I said, one or more of those are internally shorted. Most likely the -12V one as the +12V would likely just explode and catch fire, but possibly the resistance of the edge connector to slot contact is just high enough to prevent that. So check these as well. Then test the rest - in general the lower voltage caps can stay but I'd replace the 12V ones (shorted or not) for brand new.

Reply 8 of 17, by kikendo

User metadata
Rank Member
Rank
Member
Deunan wrote on 2020-06-10, 17:26:

Yup. What I said, one or more of those are internally shorted. Most likely the -12V one as the +12V would likely just explode and catch fire, but possibly the resistance of the edge connector to slot contact is just high enough to prevent that. So check these as well. Then test the rest - in general the lower voltage caps can stay but I'd replace the 12V ones (shorted or not) for brand new.

You mean the ones in the riser board or the motherboard? I mean the motherboard seems so far running just fine.
I have a transistor detector though, should work I guess, at least I need to identify what kinda capacitors these are so I can replace them.

Reply 9 of 17, by Deunan

User metadata
Rank Oldbie
Rank
Oldbie
kikendo wrote on 2020-06-10, 17:36:

You mean the ones in the riser board or the motherboard?

You lost me. Didn't you just state the mobo works but PSU acts like there's a short if you install the riser? If so, where do you think the shorted caps can be, the mobo or the riser? I'd say the riser is the logical conlusion.
Also why would you need a transistor tester to find shorted capacitors? An ohm meter will do, preferably one with a beep-on-short function but frankly a small battery and a lightbulb would work perfectly fine here as well.
The caps, if there are no markings, are 1uF or 10uF 16V ones. Polarity matters here, especially for the tantalum capacitors. You can probably find modern 25V ones in similar size and I'd recommend the higher voltage ones for 12V lines.

Reply 10 of 17, by kikendo

User metadata
Rank Member
Rank
Member
Deunan wrote on 2020-06-10, 18:50:

You lost me. Didn't you just state the mobo works but PSU acts like there's a short if you install the riser? If so, where do you think the shorted caps can be, the mobo or the riser? I'd say the riser is the logical conlusion.
Also why would you need a transistor tester to find shorted capacitors? An ohm meter will do, preferably one with a beep-on-short function but frankly a small battery and a lightbulb would work perfectly fine here as well.
The caps, if there are no markings, are 1uF or 10uF 16V ones. Polarity matters here, especially for the tantalum capacitors. You can probably find modern 25V ones in similar size and I'd recommend the higher voltage ones for 12V lines.

Wow ok you don't have to be mean like that, I was confused and I needed to double check. If I knew everything I wouldn't be asking questions here. I didn't understand if the riser creating a short meant the problem is on the riser or in the motherboard pertaining a component that connects to the riser.

I meant to use the transistor tester to know which value they are. The multimeter will not tell me what value they are. How would I even know the polarity even? I don't want to base myself on any assumptions.

Reply 11 of 17, by Deunan

User metadata
Rank Oldbie
Rank
Oldbie
kikendo wrote on 2020-06-10, 20:12:

I meant to use the transistor tester to know which value they are. The multimeter will not tell me what value they are. How would I even know the polarity even? I don't want to base myself on any assumptions.

That's usually not possible in-circuit but in this case, since the riser can be detached, it should work. Just keep in mind you might be measuring several of them in parallel so the capacitance will add. And, obviously, first you need to find that faulty one(s). Since again there might be several both connected together as well as shorted, either desolder or cut them out one by one if you detect short. Eventually you'll get rid of the faults.

As for polarity, it's easy. Look for PCB markings - if there are no obvious + signs then for positive voltages the capacitors are + to voltage, - to ground. For negative voltages it's the other way around, - to voltage line and + to ground. Do not trust any polarity markings on the caps themselves, the tantalum ones are more often than not marked in reverse vs the usual electrolytics. You get that wrong and there will be fireworks so check as many times as you need before soldering in replacements.

Reply 12 of 17, by Caluser2000

User metadata
Rank l33t
Rank
l33t

The riser doesn't look keyed. Is it fitted correctly? Sorry, but had to ask...

There's a glitch in the matrix.
A founding member of the 286 appreciation society.
Apparently 32-bit is dead and nobody likes P4s.
Of course, as always, I'm open to correction...😉

Reply 13 of 17, by kikendo

User metadata
Rank Member
Rank
Member
Deunan wrote on 2020-06-10, 20:53:

That's usually not possible in-circuit but in this case, since the riser can be detached, it should work. Just keep in mind you might be measuring several of them in parallel so the capacitance will add. And, obviously, first you need to find that faulty one(s). Since again there might be several both connected together as well as shorted, either desolder or cut them out one by one if you detect short. Eventually you'll get rid of the faults.

OK thanks for clarifying! I went at the card with a multimeter, and only one of them beeped! So I am guessing that's our culprit? I still would rather change them all for future proofing.

As for polarity, it's easy. Look for PCB markings - if there are no obvious + signs then for positive voltages the capacitors are + to voltage, - to ground. For negative voltages it's the other way around, - to voltage line and + to ground.

Problem is I have no schematic of this card. I have no idea where "voltage" or anything is. I'm going in blind. There are no markings on the card.
But now that I look again, I think I can guess which one is the ground, as that is shared among all. That'd be negative, right?
Also just noticed: these capacitors have a tapered edge where they connect to what I think is ground.

Do not trust any polarity markings on the caps themselves

Then how do I know which side is positive? I never worked with this type of capacitor before.

Caluser2000 wrote on 2020-06-10, 22:26:

The riser doesn't look keyed. Is it fitted correctly? Sorry, but had to ask...

No need to apologize. It was fitted correctly. It actually doesn't fit the otehr way around because the card is larger on one side than the other.

Reply 14 of 17, by Deunan

User metadata
Rank Oldbie
Rank
Oldbie
kikendo wrote on 2020-06-11, 00:31:

OK thanks for clarifying! I went at the card with a multimeter, and only one of them beeped! So I am guessing that's our culprit? I still would rather change them all for future proofing.

That's a good start at the very least. You can trace the copper back to the PSU connector and I'm pretty sure it'll be one of the 12V lines. Or -5V maybe.

kikendo wrote on 2020-06-11, 00:31:

Problem is I have no schematic of this card. I have no idea where "voltage" or anything is. I'm going in blind. There are no markings on the card.
But now that I look again, I think I can guess which one is the ground, as that is shared among all. That'd be negative, right?
Also just noticed: these capacitors have a tapered edge where they connect to what I think is ground.

Any sort of marking like that tapered edge should be identical for all the caps - but no, you can't assume that:
- the big copper plane is ground (it's often the case but it can also be +5V for example)
- that the plane is always the negative side of the capacitor (that's only true for positive voltages, as I've mentioned)

Another way to maybe tell is (and that's AFTER you remove the shorted capacitor!) is to plug the backplane and then use the meter beep to look for connection between various points on the backplane and the PSU connector. With everything else removed and powered off, obviously. Now, there might be some relatively low resistance between 5V and GND, all the mobo chips are the cause of that, but it'll be at least ohms or more when using the meter. A direct connection should be well below 1 ohm, even accounting for the small resistance of the edge connector.

Reply 15 of 17, by kikendo

User metadata
Rank Member
Rank
Member
Deunan wrote on 2020-06-15, 13:50:

Another way to maybe tell is (and that's AFTER you remove the shorted capacitor!) is to plug the backplane and then use the meter beep to look for connection between various points on the backplane and the PSU connector. With everything else removed and powered off, obviously. Now, there might be some relatively low resistance between 5V and GND, all the mobo chips are the cause of that, but it'll be at least ohms or more when using the meter. A direct connection should be well below 1 ohm, even accounting for the small resistance of the edge connector.

Great idea, I'll try to do that!

Reply 16 of 17, by kikendo

User metadata
Rank Member
Rank
Member

OK some progress on this, I finally removed all tantalum capacitors from the riser board, and now am trying to determine what replacements I need here. I'm gonna replace them all even though only one of them seems to be shorted.

I realize there's two values, and I used my transistor tester for checking what they are, and I am not sure I read them correctly.
The numbers it gave me were:
10V 10.66uF .20 ohm (marked as 106M, there's 7 of these)
15V 6711nF .25 ohm (marked as 685M, there's two of these)

Do you reckon these values are correct? What should I get?

And I am still confused about how to know which side of the tantalum capacitor is + or -, the ones I removed, clearly have a tapered side on one end. The board has clear + markings.

Reply 17 of 17, by kikendo

User metadata
Rank Member
Rank
Member

I know it's been forever, but I just fixed this problem! May help someone else.
The parts needed are these:
7x 10V 10 uF tantalum capacitors: https://www.mouser.com/ProductDetail/80-T322B106M010
2x 15V 6.8 uF tantalum capacitors: https://www.mouser.com/ProductDetail/80-T322B685K15AT

The 7x 10V caps go on C1, C2, C3, C4, C5, C6, C8
The 2x 15V caps go on C7 and C9

These were a bit hard to find, hopefully Mouser stays stocked when anyone else needs this.

Ah also, the Gateway part for this is "Gateway 16.0055 ISA Riser Card", there's on on eBay right now: https://www.ebay.com/itm/192855337306