VOGONS


Reply 580 of 844, by peido

User metadata
Rank Member
Rank
Member
Robert B wrote on 2020-06-09, 19:14:
https://i.postimg.cc/5HK9qLMT/PRW-FM20-72.jpg […]
Show full quote

PRW-FM20-72.jpg

Oh I've never seen a nvidia the size of the left one

BTW. Are flea markets open in your country right now?
In mine, due to COVID, some are still closed. In my city there is no flea market right now (I'm saving a lot of money that I used to spent).

Reply 581 of 844, by Robert B

User metadata
Rank Oldbie
Rank
Oldbie

The FX3000 came from a server / workstation. It is really something to look at I agree. 😀 SUN 900-50171-1800-000 Quadro 256MB Dual DVI AGP/ 370-6803-02 SUN MICROSYSTEMS FX3000 QUADRO 256MB DUAL DVI AGP

In my city Brasov(Romania) there are two flea markets. One is a public one (run by local authorities / city hall) and one is privately run. The private one has opened a few weeks ago. The public one it is still closed but that will change soon.

Last saturday I found at the flea market 2x GF3 Ti200 128MB cards for 1 EURO each. A pure case of NO BRAINER! One looks like a Palit Daytona and one is a Chaintech A-G320. Still untested though.

PRW-FM20-79.jpg

Some of my last cards were bought from the national OLX site so I'm still spending here and there. 😁 I hear you regarding expenses. These weeks I also came to the obvious conclusion that every little expense adds up in the end and I'm spending more than I thought on this "hobby". 😁

Reply 582 of 844, by peido

User metadata
Rank Member
Rank
Member
Robert B wrote on 2020-06-12, 19:10:

Last saturday I found at the flea market 2x GF3 Ti200 128MB cards for 1 EURO each. A pure case of NO BRAINER! One looks like a Palit Daytona and one is a Chaintech A-G320.

That's a great price 😮

Robert B wrote on 2020-06-12, 19:10:

Some of my last cards were bought from the national OLX site so I'm still spending here and there. 😁

I prohibited myself of going to eBay, OLX and to any similar sites. I did this because if I visit those sites and if I see anything I want to buy, I will buy it, I cannot stop myself. This way, because I'm not visiting those sites, I cannot see anything that I want and I managed to save a few more euros. I feel like an alcoholic in recovery 😁

Reply 583 of 844, by Robert B

User metadata
Rank Oldbie
Rank
Oldbie

Analysis - Climax

FX! fx? YEAH DUDE!!! ... is it a 3dfx? HECK NO!

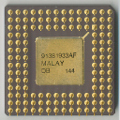
Good Ol' NV30. After the FX 3000 foreplay, a Geforce FX 5800 was obviously in order. As The FX 5800 Ultra cards sell for stupid money and I am at least 15 years late to the party, the odds of me finding a NV30 weren't all that great. I looked at pictures on the Internet and said to myself: I MUST GET ME ONE OF THOSE! Someday ... Someday ...

Well what do you know, someday, came in January 2020. 😁 Be careful what you wish for ... I wish for a V5 6K ... that ain't gonna happen anytime soon. 😁

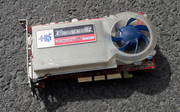
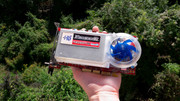
But I digress. Mr. X aka my best retro HW supplier of the land, came through and found a Mercury NVIDIA GeForce FX 5800 AGP 8X Graphic Card *** KOB N5800 *** KOB N5800TE-128MB *** GF FX5800 128MB DDR2 DVI TV . http://www.mercury-pc.com/product/324

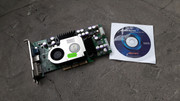
The card was looking great and it also had the original drivers CD. JACKPOT!

I received the pictures and even if it was obvious that I wanted the card, I beat around the bush a little until I made my decision.

The seller was patient and in the end the card landed into my hands.
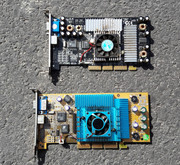
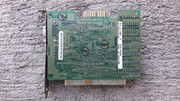
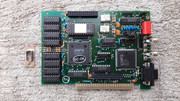
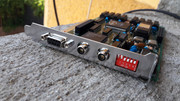
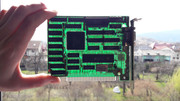
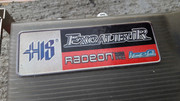
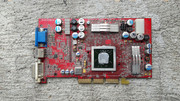
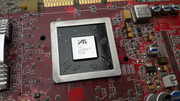
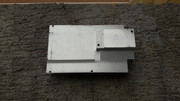
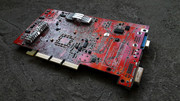
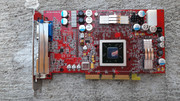
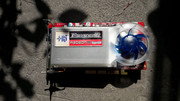
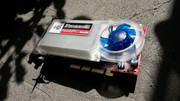
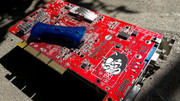
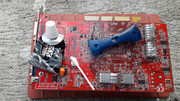
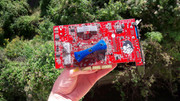
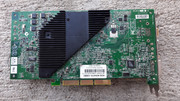
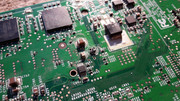
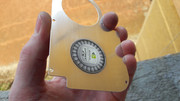
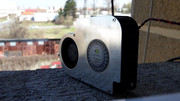
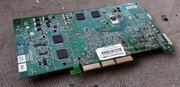
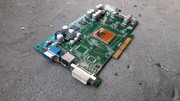
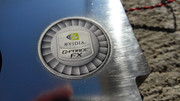
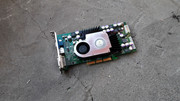
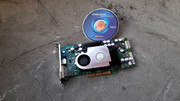
Check it out.

NV-FX5800-001.jpg NV-FX5800-002.jpg NV-FX5800-003.jpg NV-FX5800-004.jpg NV-FX5800-005.jpg NV-FX5800-006.jpg NV-FX5800-007.jpg

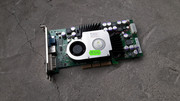
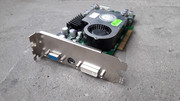
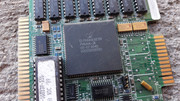
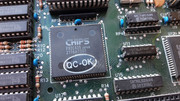
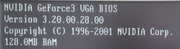
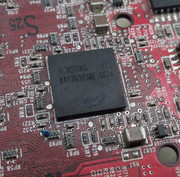
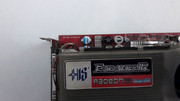
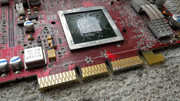
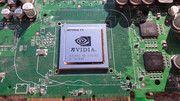
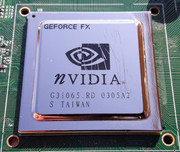
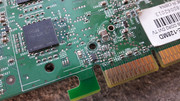
Yep. A true and true NV30 and it's MINE!

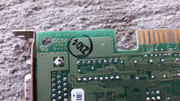
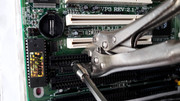
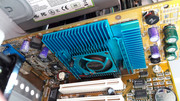
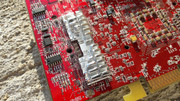
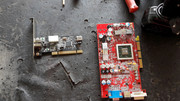
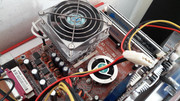
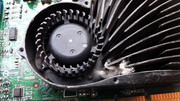
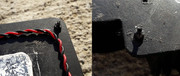
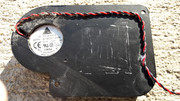
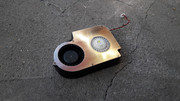
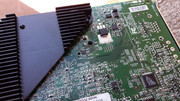
Ever since I got the first pictures, I noticed that the push pins from the heatsink looked a little strange and they seemed covered in something that looked like hot glue.

At that time I thought that this was an anti-tampering/warranty measure from the vendor of the card and I was sure that I could remove "the offending stuff".

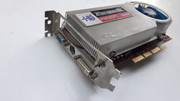
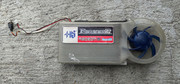
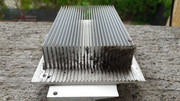
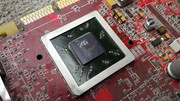
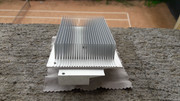
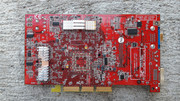
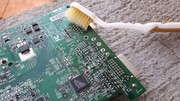
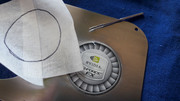
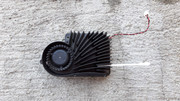
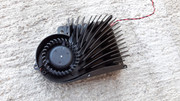
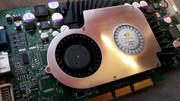
The first thing that I did when I received the card, was to remove the shroud of the heatsink and clean the wool that was inside. If in the case of the FX 3000 I had to deal with a lot of dirt, the case of the FX 5800 was child's play.

NV-FX5800-008.jpg NV-FX5800-009.jpg NV-FX5800-010.jpg

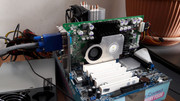
After I felt comfortable with the state of the card and after I also conducted a thorough inspection of the card, even if it had been tested by Mr. X, I finally powered up the monster.

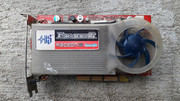
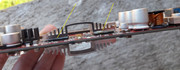
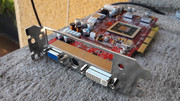
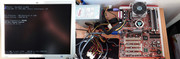
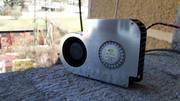
Lights! Camera! Action!

NV-FX5800-011.jpg NV-FX5800-012.jpg NV-FX5800-013.jpg NV-FX5800-014.jpg NV-FX5800-015.jpg

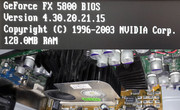
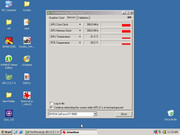
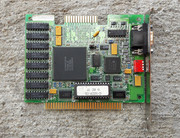
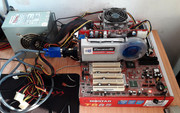
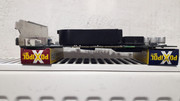
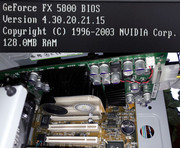
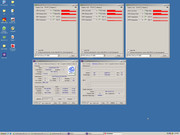
Alive and still going STRONG! I briefly tested the card in a PC with a PIII 800MHz CPU and AGP 2x motherboard just to check its vital statistics.

Psssstt. I have to tell you something and I'll have to whisper as I don't want the card to hear what I am about to tell you.

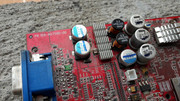
I think that deep inside this card would've wanted to be an ULTRA and howl like the legendary Dustbuster because it has a massive coil noise.

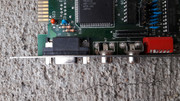
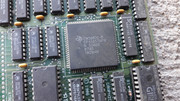
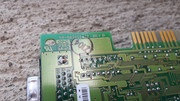
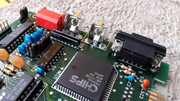
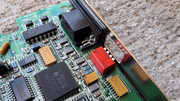
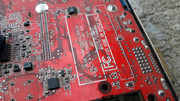
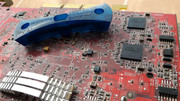
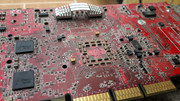
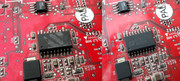
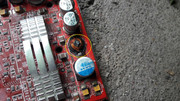
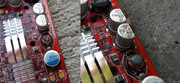
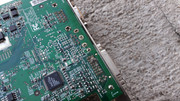
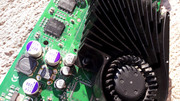
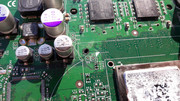
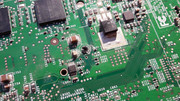
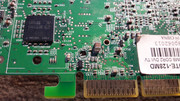
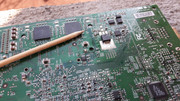
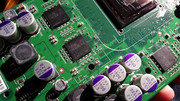
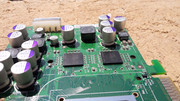
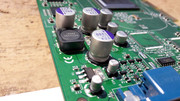
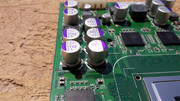
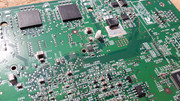
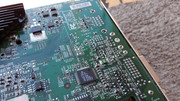
In idle it makes Reeeeeeeeeeee. In load it is the same story. REEEEEEEEEEEEEEEEEEEEEEEE!!!!!!!!!!!!! I isolated the source of the noise as best as I could and I think that the culprits are the SMD Power Inductors that are present in the power supply area. The noise isn't like capacitor squeal. Also on the board we have many solid Panasonic SVP caps that I think that are still okay.

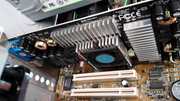
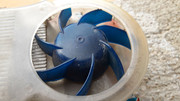
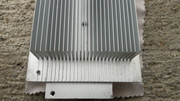
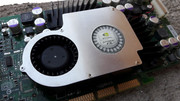
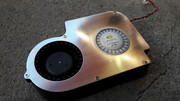
The cooler on the FX 5800 looks similar to that of the FX 3000 and I was expecting the same sound timbre. Wishful thinking! I quickly found out that is was just a presumption. Full throttle dBs galore.

By the looks of it I got my DUSTBUSTER ALRIGHT! 😁

All of the problems listed above didn't deter me as they just made me like the card a lot more. There was no time to waste so I got to work.

My mind was racing in search of solutions to each and one of the problems it had and I was sure that I will be able to solve them all.

My gut was telling me that all will be alright in the end.

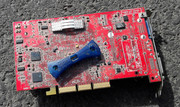
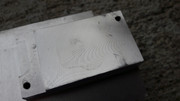
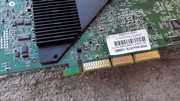
The first task was that of removing all of the non factory stickers. The sticker on the back was the kind that tears in small pieces and it was very stubborn to remove. After many minutes, using a small hair dryer, cotton sticks, IPA 99% and other tools I was finally able to get rid of all of them .

NV-FX5800-016.jpg NV-FX5800-017.jpg

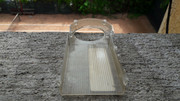
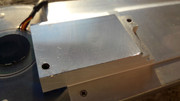
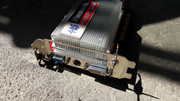
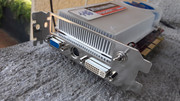
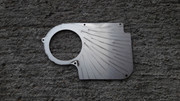
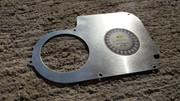
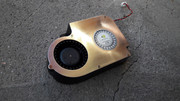
After the card was sticker free, I gazed at it and I didn't like the looks of the aluminium shroud from the heatsink so I used a microfiber cloth and some polishing paste.

NV-FX5800-018.jpg NV-FX5800-019.jpg NV-FX5800-020.jpg

The initial results were great but I decided to aim higher and I started thinking of going with a brushed aluminium texture. This is for later though.

Soon came the moment when I had to solve the hot glue problem.

NV-FX5800-021.jpg

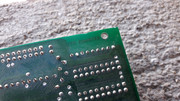
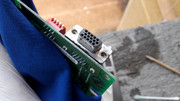
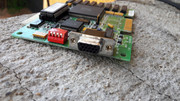
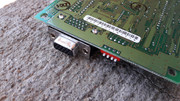
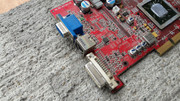
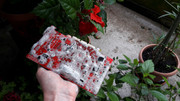
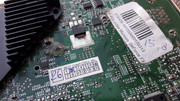
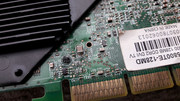
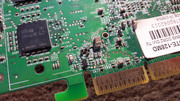
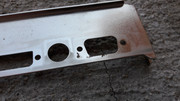
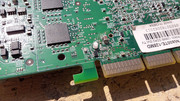
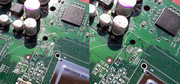
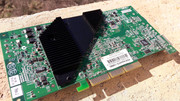
To make matters worse, on the back of the card, in the area of the VGA/DVI connectors, disgusting brown deposit was present. The heck is that!?

NV-FX5800-022.jpg

One problem at a time hot glue first, the rest later.

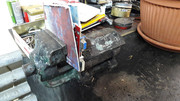
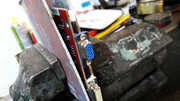
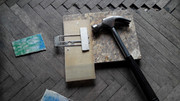
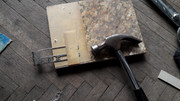
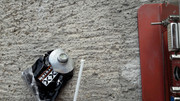
The hot glue was very stubborn so I placed the card on a radiator/heater for a few minutes. I used some spacers to protect the card.

NV-FX5800-023.jpg

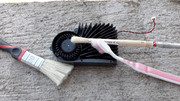
With the method presented above I was able to remove most of the hot glue. The leftovers were "softened" using very carefully a hair dryer and then eliminated with a bamboo stick that wasn't too sharp.

NV-FX5800-024.jpg

Little did I know that the hot glue held a nasty surprise. Under it I was greeted by a substance that was very hard and almost impossible to remove without damaging something.

I looked closely and I intuited what it was but I wasn't 100% sure.

NV-FX5800-025.jpg NV-FX5800-026.jpg

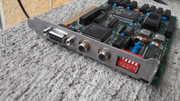
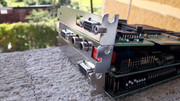
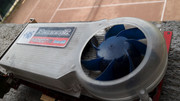
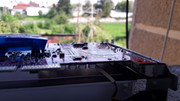
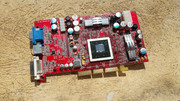
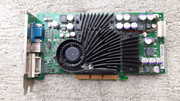
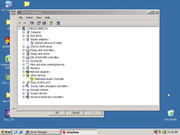
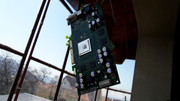
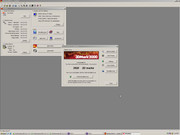
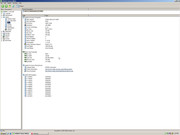
After the initial test on the AGP 2x motherboard I took out of storage an AGP 8x platform and I put the graphic card through the wringer.

NV-FX5800-027.jpg NV-FX5800-028.jpg NV-FX5800-029.jpg NV-FX5800-030.jpg NV-FX5800-031.jpg

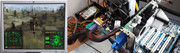
FX 5800 @ 100%! Great!

From the pictures above you can plainly see that the aluminium shroud isn't looking so great and as I decided to go above and beyond, it was obvious that I had to take care of this "shortcoming".

As we have to walk first before we run, I first had to remove the cooler from the card.

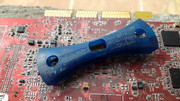
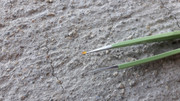
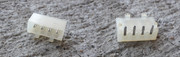
I tried very hard to remove the central pin from the old generation push-pins but to no avail.

NV-FX5800-032.jpg NV-FX5800-033.jpg NV-FX5800-034.jpg

Super glue my dear readers. Someone fixed the push pins with super glue and added the hot glue in top. What the actual F..K?

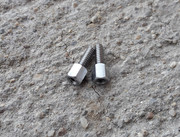
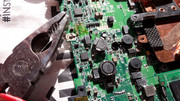
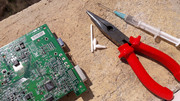
After tens of minutes in which I tried to gently remove the push pins, I took a pair of needle nose pliers and I twisted them off until they broke.
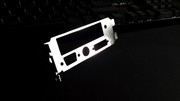
NV-FX5800-035.jpg

Finally free.

NV-FX5800-036.jpg NV-FX5800-037.jpg

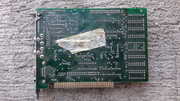
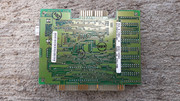
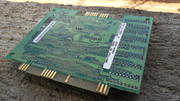
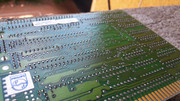
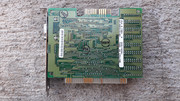
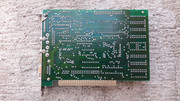
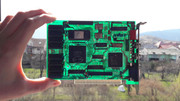
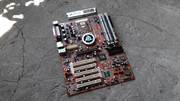
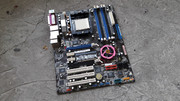
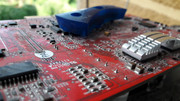
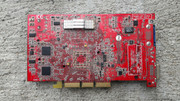
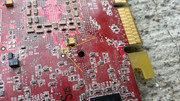
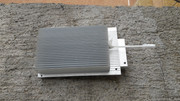
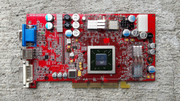
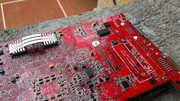
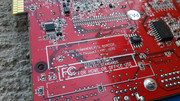
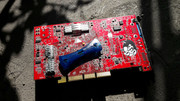
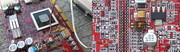
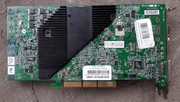
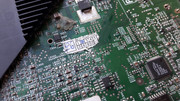
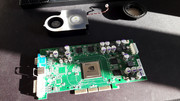
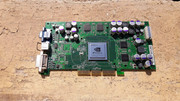
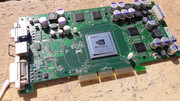
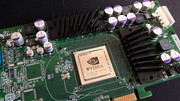
I was relived when I was able to see the whole PCB.

NV-FX5800-038.jpg

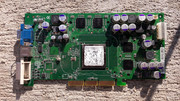
My enthusiasm was short lived though when I looked at the super glue disaster.

NV-FX5800-039.jpg NV-FX5800-040.jpg NV-FX5800-041.jpg NV-FX5800-042.jpg

Good push pin. Bad push pin. There was no way for me to remove the central pin and even if I would've been able to do it, the push pins were also held strong by the super glue.

NV-FX5800-043.jpg

The card had more surprises in store for me though.

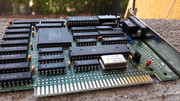
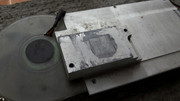
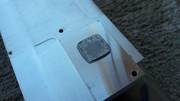
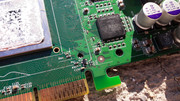
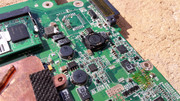
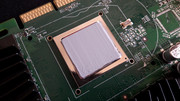
The push pins business should've given me some clues that I wasn't the first to remove the heatsink but nothing prepared me for the deep scratches on the heat spreader of the graphic chip. Hello Mr. whoever you have been, have you heard about acetone? Obviously not. In most cases, the heatsink of the FX cards is held with a soft pink thermal pad that has a toffee like consistency and is easily removed with cotton sticks and IPA 99%. It takes time and patience but as we like in the speed of sound era there is no time to waste. SCRATCH! SCRATCH! SCRATCH!

NV-FX5800-044.jpg NV-FX5800-045.jpg

Not even the heatsink escaped without scars. I rest my case ...

NV-FX5800-046.jpg

I looked again at the aluminiun shroud and it looked okay. One thing was still nagging me though. I knew that I wanted MORE!

NV-FX5800-047.jpg

I removed the leftovers from the push pin massacre.

NV-FX5800-048.jpg NV-FX5800-049.jpg

To clean the fixing holes I used a torx bit with the correct dimensions. I gently rotated the bit and I removed much of the super glue.

NV-FX5800-050.jpg NV-FX5800-051.jpg NV-FX5800-052.jpg

The results were very good and I finally had something that resembled a fixing hole.

NV-FX5800-053.jpg NV-FX5800-054.jpg

I tried to clean some super glue with a blunt bamboo stick but it was like pissing against the wind. I also tried some acetone and a cotton stick but the super glue gave me the middle finger.

NV-FX5800-055.jpg

The brown deposit on the back of the card, that was present in the VGA/DVI was swiftly removed by IPA 99%. YAY!

NV-FX5800-056.jpg

During all of the work my mind still searched for a solution for the coil noise problem and a path soon opened up in front of me. I was ready to follow it and see what I'll get in the end.

NV-FX5800-057.jpg

The moment when I gave the aluminium shroud my maximum attention soon came.

To protect the Geforce FX sticker when I was about to polish the aluminiun I decided to use some paper tape. Bad ideea!

NV-FX5800-058.jpg

I made a test to see if the paper tape would damage the sticker and I just pressed on an area and then I removed the paper tape. The sticker is glossy and I thought that I had nothing to worry about. Bad move. I lost from view one aspect. The sticker is also paper based so when I removed the paper tape I also damaged the sticker.

NV-FX5800-059.jpg

Damaged sticker! NOOOOOOOOOOOOO!!!!

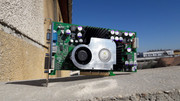
Well, this kind of sucks ... I'll polish you without protection and I'll fringe your ends. It is what it is! Brushed aluminium here I COME!

NV-FX5800-060.jpg NV-FX5800-061.jpg NV-FX5800-062.jpg

More polishing was required but I was on the right track. 😀

I cleaned the PCB with IPA 99%.

NV-FX5800-063.jpg NV-FX5800-064.jpg NV-FX5800-065.jpg NV-FX5800-066.jpg

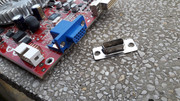
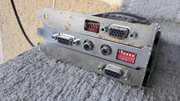
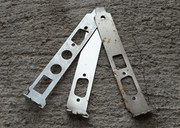
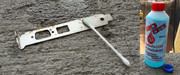
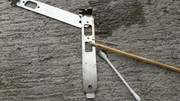
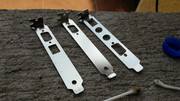
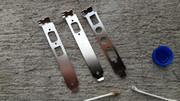
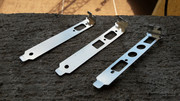
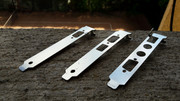
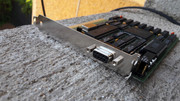
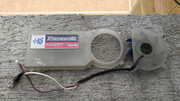
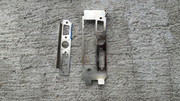
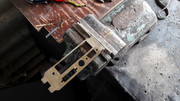
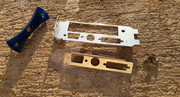
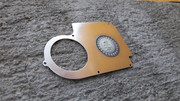
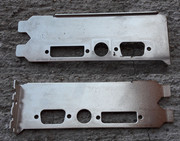
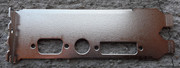
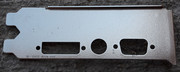
The bracket was cleaned of rust and I polished it manually.

NV-FX5800-067.jpg NV-FX5800-068.jpg NV-FX5800-069.jpg NV-FX5800-070.jpg

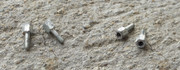
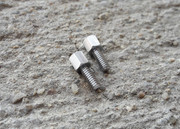
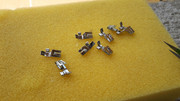
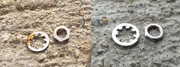
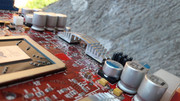
Replacement push-pins and clean bits and pieces.

NV-FX5800-071.jpg

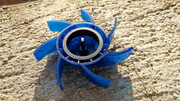
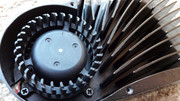
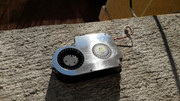
I cleaned the heatsink.

NV-FX5800-072.jpg NV-FX5800-073.jpg

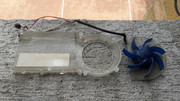
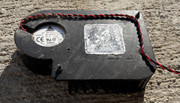
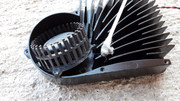
I didn't want to remove the fan because the wire is held with hot glue from factory. The wire sits very close to the PCB and if I removed it I would've had some difficulties to put it back as it was. If I didn't put the wire correctly in place the heatsink might've made bad contact with the graphic chip. The distance between the wire, the heatsink and the PCB is extremely small. Better safe than sorry.

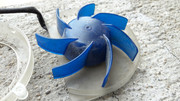
In the end, to clean the fan I had to remove the fixing screws and I was able to reach all the areas that needed to be cleaned.

I didn't had to tear up the cooling fan as it is still running great and the ball bearing is still young. Go figure. 😁
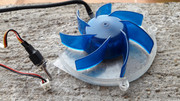
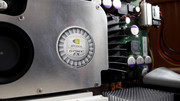
NV-FX5800-074.jpg NV-FX5800-075.jpg

Looking great!

NV-FX5800-076.jpg NV-FX5800-077.jpg NV-FX5800-078.jpg

And now for the final results! (Drum roll)

NV-FX5800-079.jpg NV-FX5800-080.jpg NV-FX5800-081.jpg NV-FX5800-082.jpg NV-FX5800-083.jpg

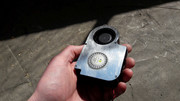
I wanted the brushed aluminium texture to be with a perfect parallel lines pattern but the sticker kept me from achieving perfection.

The final results were great though and I didn't had to insist.

More cleaning and drying.

NV-FX5800-084.jpg NV-FX5800-085.jpg

Ready to embark on the assembly line.
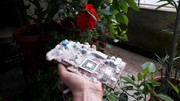
NV-FX5800-086.jpg

Some glamour shots.

NV-FX5800-087.jpg NV-FX5800-088.jpg NV-FX5800-089.jpg NV-FX5800-090.jpg NV-FX5800-091.jpg

The PCB looked the part but the super glue areas weren't looking so hot ... A solution to this problem came into my mind but first I had to tackle the coil noise.

NV-FX5800-092.jpg

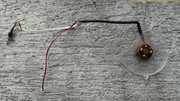
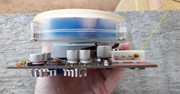
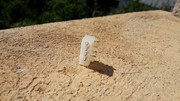
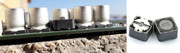
I took an old laptop motherboard and I tore an SMD Power Inductor to see what makes it tick.

NV-FX5800-093.jpg

Initially, "to solve" the coil noise problem I tried to use some RTV silicone but the results were kind of messy. As during the hardening process some of the compounds from the RTV silicone can damage the PCB I gave up on the idea of using it.

NV-FX5800-094.jpg NV-FX5800-095.jpg

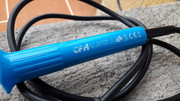
In the end I used a lacquer called Plastik 70. I used this stuff to coat the ferrite coils on my Enermax Modu 87+ 900W PSU and I got rid of the noise they made.

NV-FX5800-096.jpg

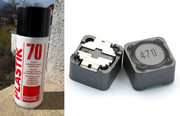
The whole plan was to inject this lacquer with a syringe inside the SMD Power Inductors. I conducted some tests using IPA 99% to see if I can inject liquid inside the cavity of the SMD Power Inductors. All was ok and inside the big SMD Power Inducors I was able to inject more than 0.1 ml of IPA 99%.

My plan looked like a winner so I decided to devise a procedure for the entire injecting operation.

NV-FX5800-097.jpg NV-FX5800-098.jpg

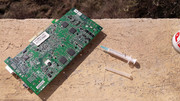
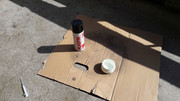
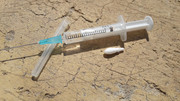
As the Plastik 70 lacquer at my disposal was in a spray canister I had find a way to get it into a container and fill a syringe with it. I placed on the ground a piece of cardboard, I held my distance from the area that was to be sprayed, I used gloves and safety glasses and I kept pressing the nozzle until I couldn't stand the smell.

NV-FX5800-099.jpg NV-FX5800-100.jpg

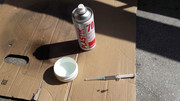
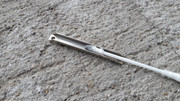
The syringe was full. The gun was loaded.

Before I was to tackle the main course I decided to do more tests. I knew from the past that this lacquer can easily be removed with IPA 99% so I tested this again. (The Plastik 70 spec sheet states acetone as a removal agent. I use acetone on PCBs only in desperate situations and this wasn't such a case. In the past I covered with this lacquer, some scratches on the back of a card and I let it dry for 24h. The second day I washed the card with IPA 99% and I was amazed that the lacquer had been removed completely).

NV-FX5800-101.jpg NV-FX5800-102.jpg NV-FX5800-103.jpg

All was okay and I was ready for the main event.

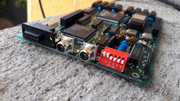
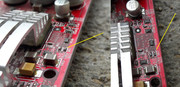
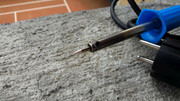
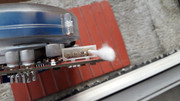
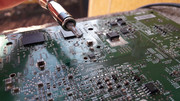
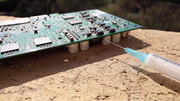
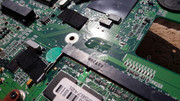
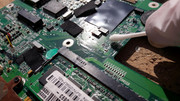
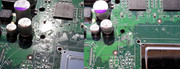
With maximum attention, holding the card with the face down, I injected the lacquer in all the SMD Power Inductors regardless of size and the position in which they were placed.

NV-FX5800-104.jpg

I took great precautions not to get the lacquer on the neighbouring components.

I injected the lacquer in stages, little by little, into each SMD Power Inductor. During the injection process I held the card with the face down and I waited between each injection for the lacquer to harden while the card was still face down on a level surface.

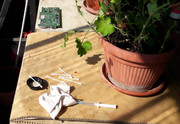
The hot weather accelerated the hardening of the lacquer.

All in all this process was nerve raking and my pulse was high the entire time.

I registered some spillage but it was fixed with IPA 99%.

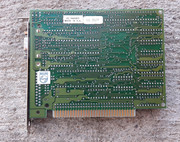
Final results. Did the coil noise diminish? Only time will tell.

NV-FX5800-105.jpg NV-FX5800-106.jpg NV-FX5800-107.jpg

Not a trace. Looking good!

NV-FX5800-108.jpg

While I worked with the lacquer, the idea of using it to tidy up a little the super glue damage, came into my mind. The super glue stuff was there to stay and I had to do something about it.

Said and done.

First on the operating table were the fixing holes. They looked like $hit.

I cut the ends of a cotton stick and I plugged the fixing holes to prevent the infiltration of the lacquer.

NV-FX5800-109.jpg NV-FX5800-110.jpg NV-FX5800-111.jpg NV-FX5800-112.jpg

The results were way beyond my expectations. WIN!

NV-FX5800-113.jpg NV-FX5800-114.jpg NV-FX5800-115.jpg

The cover up with lacquer of the areas damaged with super glue is an imperfect solution but I'm happy with it. The alternatives are few and they pose some risk. Scraping off using a blade could've ended messy.

NV-FX5800-116.jpg

Soon my dear you will be complete. Just wait a little longer ...

NV-FX5800-117.jpg NV-FX5800-118.jpg NV-FX5800-119.jpg NV-FX5800-120.jpg NV-FX5800-121.jpg NV-FX5800-122.jpg

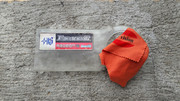
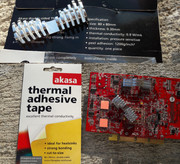
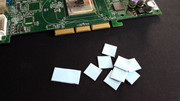
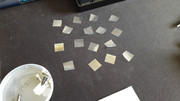
I had to place and order for 0.5 mm Arctic thermal pads ACTPD00004A / ACTPD00012A as the old ones couldn't be saved.

NV-FX5800-123.jpg NV-FX5800-124.jpg

I took care to cut the thermal pads to the correct size as I don't like them hanging on the sides. I also made some economy.
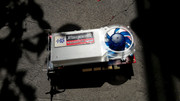
NV-FX5800-125.jpg NV-FX5800-126.jpg NV-FX5800-127.jpg

Looking good!

NV-FX5800-128.jpg NV-FX5800-129.jpg NV-FX5800-130.jpg

I absolutely love the final stages of the restoration process when I put back all "the brightwork". I already knew how it would look in the end.

NV-FX5800-131.jpg NV-FX5800-132.jpg NV-FX5800-133.jpg NV-FX5800-134.jpg

Always check your work! I think that I did a good job as after I placed the thermal pads I was left with 16 pieces of wrap. Don't you think?

NV-FX5800-135.jpg

Arctic MX-4 thermal paste FTW! I love this stuff.

NV-FX5800-136.jpg

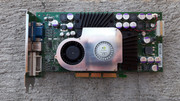
My latest and greatest restoration job was completed!

NV-FX5800-137.jpg

Looking back at the problems that I had to face I can safely say that I got the maximum possible from what I had. The only thing that I am not proud of, is the damaged sticker. Well, you can't win them all that's what I say in my late years. 😁

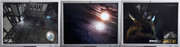
I'm talking about the final results but where are the rest of the pictures?

NV-FX5800-138.jpg NV-FX5800-139.jpg NV-FX5800-140.jpg NV-FX5800-141.jpg NV-FX5800-142.jpg NV-FX5800-143.jpg NV-FX5800-144.jpg NV-FX5800-145.jpg NV-FX5800-146.jpg NV-FX5800-147.jpg NV-FX5800-148.jpg NV-FX5800-149.jpg

Done and Done!

NV-FX5800-150.jpg

Didn't I forget something? That Plastik 70 lacquer stuff, coil noise, yadda yadda?

AAAAaaaaa you're right.

After I was done with the card I put it in a box and I forgot about it. A few days later I powered it up again.

I got something in the end after all this effort ?

NV-FX5800-151.jpg NV-FX5800-152.jpg NV-FX5800-153.jpg NV-FX5800-154.jpg

In idle the coil noise was reduced by 5-10%. It depends of the situation.

In load I got the greatest reduction of the coil noise. Up to 70% lower. This might seem counter intuitive because the increased voltage supplied to the card in full load usually translates into less coil noise but this was not the case as the card made the same nasty noise in load and idle. So I think that the lacquer did its job. After the lacquer job I wanted to have the card always in full load as I couldn't stand it in idle. 😁

You should consider the lacquer job as an experiment. It is not a general solution. In my case it worked, to some extent. What it is certain, is the fact that a 70% reduction of an already annoying sound, coupled with a noise that rivals the Dustbuster design, don't make this card a silent one. NO SIR! This puppy is loud, and the cooler has nothing in common with the one present on my FX 3000 even is they look alike. If the FX 3000 has for me a pleasant whooosh, the FX 5800 howls my brother. Reeeeeeeee!

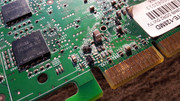
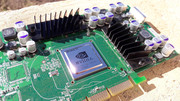
After all the work put in I had other reasons for joy. This card is considered to be quite hot but in my case I was pleasantly surprised. The DDR 2 memory chips get quite hot but the NV30 chip never got above 47C no matter what I did with it . The tests were conducted with an open case but for a card that is considered hot this is something worth noting.

NV-FX5800-155.jpg NV-FX5800-156.jpg NV-FX5800-157.jpg NV-FX5800-158.jpg

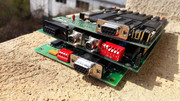
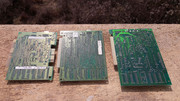
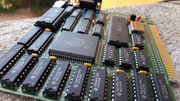
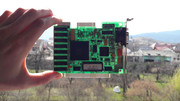
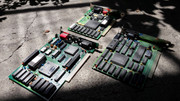
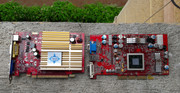
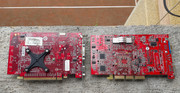
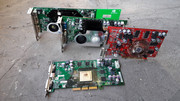
The end of this story was getting close so I took out from storage a few FX cards and I did some group pictures. FX 3000, FX 1000 (dead), FX 5700 and the mighty FX 5800.

NV-FX5800-159.jpg NV-FX5800-160.jpg NV-FX5800-161.jpg NV-FX5800-162.jpg NV-FX5800-163.jpg

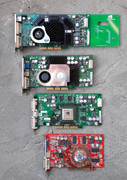
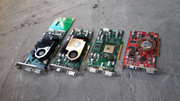
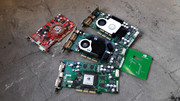
After I took the shots above I found two more FX cards. The Leadtek FX 5900 XT that has already received its episode and a MSI FX 5900 which needs restoring. The state of the last one it is still unknown. I soldered two missing ceramic caps but I didn't power it up. Most certainly I will restore the beast and then I'll test it.

I got my FX 5800 and you can bet that they will get rarer than hen's' teeth in the coming years.

Cya later with more awesome stories. 😁

gallery: https://postimg.cc/gallery/wBMbgzN

Reply 585 of 844, by Tetrium

User metadata
Rank l33t++
Rank
l33t++

I'm definitely gonna use your guide when I get around to do some maintenance on my own FX5900 cards, excellent writings here! And great pics as well! 😁

Whats missing in your collections?
My retro rigs (old topic)
Interesting Vogons threads (links to Vogonswiki)
Report spammers here!

Reply 586 of 844, by Robert B

User metadata
Rank Oldbie
Rank
Oldbie

Thanks guys! 😁

I try to do my best and also share my adventures. 😀

The thing is that I really liked this card and I really wanted to do it right. After 5 years of restoring stuff I can say that I have a big bag of tricks when it comes to difficult cases. 😀

Reply 587 of 844, by slivercr

User metadata
Rank Member
Rank
Member

Nice restoration of the 5800!
I noticed from your pictures that your ram is GC22, its max rated frequency is 450 MHz. You should be able to get that frequency without risking damage to the card.
Its not quite Ultra speeds of 500 MHz, but it will still be a nice boost 😀

Outrigger: an ongoing adventure with the OR840
QuForce FX 5800: turn your Quadro into a GeForce

Reply 588 of 844, by Robert B

User metadata
Rank Oldbie
Rank
Oldbie

Thanks for the info. 😀 I'll keep that in my mind. 😀 I dont' plan to use or OC the card but who knows maybe I'll need more juice out of it at some point.

I always check you threads too. They have a wealth of details. I learned many things from your posts. 😀 The power of Internet. 😁

Who knows maybe I'll find that illusive Ultra someday. Anyway having this card already is something in my book so I already put to rest a few of the demons that haunt me. 😁 Now I'm on the lookout for the next BIG thing.

The MSI FX 5900, if it is working will be a stunner too when I'll be done with it. 😀 We'll see. Regardless if it is still alive or not I'll put the same effort into the restoration project.

Reply 589 of 844, by slivercr

User metadata
Rank Member
Rank
Member
Robert B wrote on 2020-06-21, 14:25:

Thanks for the info. 😀 I'll keep that in my mind. 😀 I dont' plan to use or OC the card but who knows maybe I'll need more juice out of it at some point.

I always check you threads too. They have a wealth of details. I learned many things from your posts. 😀 The power of Internet. 😁
...

Thanks for the compliment, appreciate it!

Robert B wrote on 2020-06-21, 14:25:

...
Who knows maybe I'll find that illusive Ultra someday. Anyway having this card already is something in my book so I already put to rest a few of the demons that haunt me. 😁 Now I'm on the lookout for the next BIG thing.

The MSI FX 5900, if it is working will be a stunner too when I'll be done with it. 😀 We'll see. Regardless if it is still alive or not I'll put the same effort into the restoration project.

I'm also on the lookout for a 5800 Ultra, even non-working, because I want the dustbuster heatsink—I want the whole NV30 experience! 😁
I'll be waiting for the next post, always enjoy reading about the restoration process (and ogling at the pictures).

Outrigger: an ongoing adventure with the OR840
QuForce FX 5800: turn your Quadro into a GeForce

Reply 590 of 844, by Robert B

User metadata
Rank Oldbie
Rank
Oldbie

Biscuits

On 25.01.2020 I was, where else, at the flea market in my home town. A new year usually means new challenges and new parts that enter my collection.

It was a sunny but very cold day. I remember the cold piercing through my clothes and biting my hands while I searched through a pile of miscellaneous components.

As soon as I entered the flea market I saw a new seller that had a pile of stuff laid on a bed sheet. MFM controllers, 8bit ISA video cards, telecommunication components, all kinds of PCBs in various states of decay.

All were dirt cheap.

When I'm faced with a huge pile of old parts my "sanity instinct" kicks in, I switch to a very rigorous selection mode and I pick only the stuff that I consider at that time to be a must have. So I decided to only buy three 8bit ISA video cards.

1. Paradise Systems PVGA1A-JK - WDC '89 62-003139-130 - WDC 1989 61-603235 - mnf 1990 week 30 FCC ID : DBM603235P - ISA 8 bit - http://www.vgamuseum.info/index.php/cpu/item/ … stems-pvga1a-jk
2. ATI Graphics Solution Plus Rev. 1 - mnf 1987 week 40 - ISA 8 bit - P/N 168248 - http://www.vgamuseum.info/index.php/cpu/item/ … s-solution-plus
3. Chips & Technologies P82C435 - P82A436 - ISA 8 bit - http://www.vgamuseum.info/index.php/cpu/item/ … ologies-p82c435

8-Bit-BSCT-01.jpg 8-Bit-BSCT-02.jpg 8-Bit-BSCT-03.jpg

The only card that looked to have some problems was the Chips & Technologies P82C435 - P82A436 which had a missing label on the BIOS chip. As this chip was an UV erasable EPROM I thought that it lost the information that was stored on it. Good luck finding a video BIOS for an ancient video card! As soon as I bought it I placed a piece of black tape over the exposed core. Some time after this I removed the BIOS chip, I placed it inside my MiniPro TL866A programmer and to my surprise I was able to recover a full BIOS image. The SGS 88745S M27256-2FI BIOS chip was very cooperative. Go figure. Outstanding!

After I bought these three video cards I was faced with a problem. Of the three cards, only the Paradise Systems PVGA1A-JK has a VGA 15 pin DE-15 connector, the other two have a 9 pini DE-9 connector. I have no idea if the 9 pins DE-9 cards are EGA/CGA/MGA/VGA compatible?! To test them out I would need an converter/adapter or a suitable monitor. Regardless, these cards are for me just a curiosity from a time that I did not experience. For me it is an area marked on the map with: "here be dragons!". These cards will remain untested but I can bet that they are still alive and kicking. A tantalum cap here and there might blow up but that can be fixed if it happens. 😁

http://www.nullmodem.com/DB-9.htm
http://www.nullmodem.com/HD-DB-15.htm

Some time after I bought these video cards I found my first ever MFM HDD - NEC D3142 and I was a little sad that I didn't buy the MFM controllers. Well, I won't lose any sleep over this that's for sure.

The Chips & Technologies P82C435 - P82A436 card was missing the metal shroud from the video connector so my first task was to address this shortcoming. A damaged graphic card was selected as an organ donor and even if the part wasn't an exact replacement it was as good as it was going to get.

8-Bit-BSCT-04.jpg 8-Bit-BSCT-05.jpg 8-Bit-BSCT-06.jpg 8-Bit-BSCT-07.jpg 8-Bit-BSCT-08.jpg 8-Bit-BSCT-09.jpg

Let's greet the new victims that have entered my dungeon of torture cleaning and restoring! 😁

Paradise Systems PVGA1A-JK

8-Bit-BSCT-10.jpg 8-Bit-BSCT-11.jpg 8-Bit-BSCT-12.jpg 8-Bit-BSCT-13.jpg

ATI Graphics Solution Plus Rev. 1

8-Bit-BSCT-14.jpg 8-Bit-BSCT-15.jpg 8-Bit-BSCT-16.jpg 8-Bit-BSCT-17.jpg

Chips & Technologies P82C435 - P82A436

8-Bit-BSCT-18.jpg 8-Bit-BSCT-19.jpg 8-Bit-BSCT-20.jpg 8-Bit-BSCT-21.jpg 8-Bit-BSCT-22.jpg

Rust issues galore!

8-Bit-BSCT-23.jpg

The brackets were the first ones to go on the operating table.

I used a rust removal solution, needles, bamboo sticks, cotton sticks, polishing paste, a felt wheel and lots of patience. Even so, in the end I was left with some pitting and small imperfections but the good news was that I was able to recover all the brackets.

8-Bit-BSCT-24.jpg 8-Bit-BSCT-25.jpg 8-Bit-BSCT-26.jpg 8-Bit-BSCT-27.jpg 8-Bit-BSCT-28.jpg 8-Bit-BSCT-29.jpg 8-Bit-BSCT-30.jpg

Final results.

8-Bit-BSCT-31.jpg 8-Bit-BSCT-32.jpg

The fixing screws that looked like hell weren't tossed away even if I had replacements. The original parts must be saved no matter what.

After an hour in the rust removal solution and some hand polishing they came out looking mint.

8-Bit-BSCT-33.jpg 8-Bit-BSCT-34.jpg 8-Bit-BSCT-35.jpg 8-Bit-BSCT-36.jpg

All of the video card connectors have been cleaned of rust and all kinds of blemishes. Like in the case of the brackets I was also left with some imperfections big or small but all in all I was pleased with the end results.

Inital results. I repeated the restoring procedures two times until I came to the conclusion that these were the best results I could get with what I have available at this time.

8-Bit-BSCT-37.jpg 8-Bit-BSCT-38.jpg

I washed the video cards with hot water and Fairy Lemon dish soap and only in the final cleaning stage they were baptized with IPA 99%. After I saw the rust that covered them I had no remorse using water. Also my IPA 99% levels were extremely low and I wasn't able to buy more at a reasonable price.

8-Bit-BSCT-39.jpg 8-Bit-BSCT-40.jpg

The results were proportional with the work put in. Don't get fooled by the small size of the cards. I had to work harder than in the case of some bigger parts. All the scratched ICs have been carefully polished with polishing paste and cotton sticks. Each component was thoroughly cleaned. The whole nine yards. Some scars are still present on the back but they aren't something to take into consideration. I've seen a lot worse.

These relics from times gone by are looking awesome!

Paradise Systems PVGA1A-JK

8-Bit-BSCT-41.jpg 8-Bit-BSCT-42.jpg 8-Bit-BSCT-43.jpg 8-Bit-BSCT-44.jpg 8-Bit-BSCT-45.jpg 8-Bit-BSCT-46.jpg 8-Bit-BSCT-47.jpg

ATI Graphics Solution Plus Rev. 1

8-Bit-BSCT-48.jpg 8-Bit-BSCT-49.jpg 8-Bit-BSCT-50.jpg 8-Bit-BSCT-51.jpg 8-Bit-BSCT-52.jpg 8-Bit-BSCT-53.jpg8-Bit-BSCT-54.jpg

Chips & Technologies P82C435 - P82A436

8-Bit-BSCT-55.jpg 8-Bit-BSCT-56.jpg 8-Bit-BSCT-57.jpg 8-Bit-BSCT-58.jpg 8-Bit-BSCT-59.jpg 8-Bit-BSCT-60.jpg

I waited anxiously for the moment when I was about to mount the brackets. I knew that after I'll attach them the cards would be transformed.

Paradise Systems PVGA1A-JK

8-Bit-BSCT-61.jpg 8-Bit-BSCT-62.jpg 8-Bit-BSCT-63.jpg 8-Bit-BSCT-64.jpg 8-Bit-BSCT-65.jpg

ATI Graphics Solution Plus Rev. 1

8-Bit-BSCT-70.jpg 8-Bit-BSCT-71.jpg 8-Bit-BSCT-72.jpg 8-Bit-BSCT-73.jpg 8-Bit-BSCT-74.jpg

Chips & Technologies P82C435 - P82A436

8-Bit-BSCT-66.jpg 8-Bit-BSCT-67.jpg 8-Bit-BSCT-68.jpg 8-Bit-BSCT-69.jpg

Before

8-Bit-BSCT-23.jpg

After

8-Bit-BSCT-75.jpg 8-Bit-BSCT-76.jpg 8-Bit-BSCT-77.jpg

X-Ray pictures.

8-Bit-BSCT-78.jpg 8-Bit-BSCT-79.jpg 8-Bit-BSCT-80.jpg

Saved from the crusher.

8-Bit-BSCT-81.jpg 8-Bit-BSCT-82.jpg

We've come a long way don't you think? It's easy to forget from where you've come but it's also easy to know where you go. Forward. Whatever forward means. 😁

The oldest and the newest ATI card in my collection.

ATI Graphics Solution Plus Rev. 1 ('86/87) vs ATI 3870x2 ('08)

8-Bit-BSCT-83.jpg

Why BISCUITS? Well, while I was working with these cards only one thing kept popping in my mind. BISCUITS! Their rectangular shape and small size have made me think only of biscuits. 😁 Where's my cup of black tea and a big slice of lemon? Let's not forget some honey too! Nice!

8-Bit-BSCT-84.jpg

gallery: https://postimg.cc/gallery/0ST8v6R

More later.

Reply 593 of 844, by gex85

User metadata
Rank Member
Rank
Member

Your dedication and attention to detail are really outstanding. Keep up the good work! I am always looking forward to new posts in this thread.

The flea market in your town seems to be some sort of goldmine... Here in Germany I have never found a single interesting part on a flea market.

My retro computers

Reply 594 of 844, by Robert B

User metadata
Rank Oldbie
Rank
Oldbie

I try to do my best. 😀 Thanks for the kind words.

Before the pandemic we used to get stuff from Italy and Germany on a regular basis. So much that I was very selective with I bought. Stuff from 20-25 years ago. Another source was UK. You would find warranty stickers and data on HDDs so you knew from where they've come from. Sometimes the seller would say their origin. Now I wish that I bought them all as lately the supply kind of ran dry. Maybe by the end of the year we will start getting stuff as usual. 😁

Now that you said it I agree with you. The local flea market is in Brasov-Romania is a goldmine and surprisingly it isn't that big. Looking back I found a lot of stuff over the years, including the case of my first PC, slot A, slot 1, Sk7, 3dfx, Creative, GUS Ace and you name it. 😁 I wish I started going there 10-15 years ago. An acquaintance of mine from another town has gathered hundreds of various 3dfx cards just by going to the flea market from his town. It is mind blowing stuff!

Many of the parts presented on the thread also came from my best HW supplier called Mr. X and believe it or not we never spoke over the phone but we've been conversating on WhatsApp on a weekly basis for the last 4 years or so. 😁 He keeps tempting me with awesome parts and in more cases than not I pay the asking price and I make them MINE! 😁 He always has stuff to sell.

Over the last years I made a habit of going each week at the local flea market and usually I don't go home empty handed. For example last Saturday I found this puppy. Though it is untested and missing a heatsink from the video memory. As usual I started restoring it and I didn't power it yet. I sure hope it is still alive and kicking. The full restoration process will be posted here on vogons. 😁

HIS EXCALIBUR Radeon 9800 PRO IceQ Platinum 128MB AGP 8x. (Samsung K4D263238E-GC2A) https://pdf1.alldatasheet.com/datasheet-pdf/v … 3238E-GC2A.html

PRW-FM20-179.jpg PRW-FM20-180.jpg PRW-FM20-181.jpg PRW-FM20-182.jpg PRW-FM20-183.jpg

Reply 595 of 844, by devius

User metadata
Rank Oldbie
Rank
Oldbie
Robert B wrote on 2020-08-18, 20:04:

The local flea market is in Brasov-Romania is a goldmine and surprisingly it isn't that big.

Lucky! Along with everyone else I also don't have any luck with the nearest flea market. The best deal I got was a brand new Iomega Zip 750MB drive for 2€. I have no disks for it though 😆

Looks like I know exactly where to go when I go to visit Romania!

Reply 596 of 844, by Robert B

User metadata
Rank Oldbie
Rank
Oldbie

No problem 😀. Actually There are two flea markets in Brasov. One run by a private owner with an entry fee of 0.5 EUR and one ran by the local authorities with a free entry. The sellers are there usually between 08.00-14.00 each Saturday and Sunday. 😁

I don't guarantee any loot drops though! 😁

The OLX is sometimes a goldmine too. I found quite a few gems there. I never bought something from outside Romania or from the bay.

The rings of Saturn. 😁

PRW-FM20-185.jpg

More later.

Reply 597 of 844, by Robert B

User metadata
Rank Oldbie
Rank
Oldbie

His EXCALIBUR ATI 9800PRO 128MB AGP IceQ

I was going to start this episode on an entire different tone but I told myself what the heck? With all these components and parts all I get in return is PARTY NON STOP! 😁 (Pirupa ‘Party Non Stop’ - Official Video)

Pirupa ‘Party Non Stop’ - Official Video

PARTY ON MY BROTHER!!!

Ahem, let's start spilling the beans as there isn't any other way to do it. 😁

Me and ATI does not equal LOVE. How have I come to this conclusion? Well, firstly, I rarely find ATI cards at my retro HW suppliers and secondly, I only find them at the flea market, in exceptional circumstances, when all the planets align. To make matters worse, the wide majority of the few cards that I find at the flea market are long gone into the great void beyond. This certainly means no fun for me and it makes me think twice before I buy an ATI card that has an uncertain status. There is also a third aspect that has to be mentioned, a minor one, ahem, I'm an nVIDIOT through and through and in most cases than not, I prefer the green cards. This doesn't mean that I do not recognize the merits of the red cards is just that given a choice I tend to lean towards the green side. 😁

Will the card featured in today's episode be alive and kicking or has it already kicked the bucket?

Let's find out!

On 16.08.2020 I went to the local flea market and BEHOLD! On top of a pile of dismembered PCBs I saw a mighty ATI Radeon AGP beauty.

Needless to say that I reached for it in the blink of an eye. MINE ALL MINE! The card is exotic and has a wicked Arctic Cooling VGA Silencer Rev. 3 cooler that also has a two step fan speed control via an old school switch. Low (silent) and High (performance). https://www.techpowerup.com/review/arct ... er-rev-3/ . The card itself is a bone stock ATI Radeon 9800 PRO 128MB AGP PN 109-A07500-00 but the cooler makes it special.

The exact model name of the card I found is His EXCALIBUR ATI 9800PRO 128MB AGP IceQ and is a part of the IceQ line of cards from His aka Hightech Information Systems manufacturer.

HIS-EXLBR-ATI-9800-001.jpg HIS-EXLBR-ATI-9800-002.jpg

The card had a bent bracket, featured some dirt and grime, a little bit of rust to spice thing up and a missing heatsink from the video memory. All in all not a bad start.

The video memory chips are Samsung K4D263238E-GC2A.

HIS-EXLBR-ATI-9800-003.jpg HIS-EXLBR-ATI-9800-004.jpg

I started the restoration procedures soon after I got the card. I didn't test the card first as I deemed this to be a little too risky. I didn't know anything about the way it was stored or in what environment was kept. I really don't like the little indian smoke signal fire that might come from a card that I know for sure that is not @ 100%.

HIS-EXLBR-ATI-9800-005.jpg HIS-EXLBR-ATI-9800-006.jpg HIS-EXLBR-ATI-9800-007.jpg HIS-EXLBR-ATI-9800-008.jpg HIS-EXLBR-ATI-9800-009.jpg HIS-EXLBR-ATI-9800-010.jpg

Besides the problems mentioned above, the card also had some nasty scratches on the back where the paper label used to reside. A sharp object was used by an ape that must've relived its long forgotten time in the caves and decided that it was a good time to practice some cave painting figures on a red PCB. What a way to remove a paper label. I DID THIS! What the ...

The scratches looked kind of bad but I didn't saw a cut trace and I already had a backup plan on how to cover that area. This sort of stuff comes with the territory and there's no escaping it. No soft pillows and silk gloves treatment for the stuff coming from the dump. Harsh but true.

HIS-EXLBR-ATI-9800-011.jpg

A regular day at the office.

HIS-EXLBR-ATI-9800-012.jpg HIS-EXLBR-ATI-9800-013.jpg HIS-EXLBR-ATI-9800-014.jpg HIS-EXLBR-ATI-9800-015.jpg

The first part that received a 7* SPA treatment was the cooling system. I knew from the start that in the end I would have something awesome in my hands.

HIS-EXLBR-ATI-9800-016.jpg HIS-EXLBR-ATI-9800-017.jpg HIS-EXLBR-ATI-9800-018.jpg

Big lump of Al aka Aluminium aka Aluminum.

HIS-EXLBR-ATI-9800-019.jpg HIS-EXLBR-ATI-9800-020.jpg HIS-EXLBR-ATI-9800-021.jpg

The plastic shroud of the Arctic Cooling cooler was covered by a fine dust and the fan surely has seen better days.

HIS-EXLBR-ATI-9800-022.jpg HIS-EXLBR-ATI-9800-023.jpg HIS-EXLBR-ATI-9800-024.jpg HIS-EXLBR-ATI-9800-025.jpg

To avoid the scratching of the plastic surface of the shroud I used a microfiber cloth, Fairy Lemon dish soap and tap water. I cleaned gently all the surfaces. I only used brushes on the sides or in the hard to reach areas. On the open parts I used the microfiber cloth exclusively. I took great precautions not to damage the sticker that was applied.

I washed well the heatsink using a brush, Fairy Lemon dish soap and tap water. Water under pressure via a hose was used to get rid of the last remaining traces of dust and dirt.

HIS-EXLBR-ATI-9800-026.jpg HIS-EXLBR-ATI-9800-027.jpg

After I used a soft brush made from animal hairs, to remove much of the dust that was present on the PCB, I conducted a thorough inspection that gave me some not so good news.

HIS-EXLBR-ATI-9800-028.jpg HIS-EXLBR-ATI-9800-029.jpg HIS-EXLBR-ATI-9800-030.jpg HIS-EXLBR-ATI-9800-031.jpg HIS-EXLBR-ATI-9800-032.jpg HIS-EXLBR-ATI-9800-033.jpg HIS-EXLBR-ATI-9800-034.jpg

The rings of Saturn. Initially I thought that this is how the die is supposed to look but I guess that the pattern is a result of the transfer due to the pressure exerted by the mounting system of the cooler. I really like how they look.

HIS-EXLBR-ATI-9800-035.jpg

After the PCB inspection I found two missing parts. A resistor @ R882 and a ceramic capacitor @ C149. Easy fixes. Good thing that I didn't power up the card like that. Sure that the risk of something going wrong was slim but I always say better safe than sorry.

HIS-EXLBR-ATI-9800-036.jpg

The scratched ICs were polished with a cotton stick and polishing paste. Good as new.

HIS-EXLBR-ATI-9800-037.jpg

After I finished the initial procedures of the restoration process I tackled the bracket and the stainless plate. I used bits of thick cardboard and a piece of thin textolite, a flat granite slab and a suitable hammer. The word of the day was: GENTLE! A vice helped me where the hammer wasn't able to. The results were quick to follow.

HIS-EXLBR-ATI-9800-038.jpg HIS-EXLBR-ATI-9800-039.jpg HIS-EXLBR-ATI-9800-040.jpg HIS-EXLBR-ATI-9800-041.jpg HIS-EXLBR-ATI-9800-042.jpg HIS-EXLBR-ATI-9800-043.jpg HIS-EXLBR-ATI-9800-044.jpg

Here's Al again. Shiny and looking like new. Some detailing was needed even after a thorough wash. Someone before me has changed the TIM as there are some fine scratches around the fixing hole made by the screw used to keep in place the heatsink. I don't think that this is from factory but I also don't rule this out. A fine scratch was also present on the PCB. Nothing serious.

HIS-EXLBR-ATI-9800-045.jpg

HIS-EXLBR-ATI-9800-046.jpg HIS-EXLBR-ATI-9800-047.jpg HIS-EXLBR-ATI-9800-048.jpg HIS-EXLBR-ATI-9800-049.jpg HIS-EXLBR-ATI-9800-050.jpg

Another PCB inspection brought me more bad news. How I missed these details I really don't know. I must've been high or something. 😁 An Inductance Coil / SMD Power Inductor 3R3 had a smashed head and another ceramic capacitor was missing @ C198. Well ... better sort this out quick!

HIS-EXLBR-ATI-9800-051.jpg HIS-EXLBR-ATI-9800-052.jpg

I soldered the missing ceramic capacitors and the missing resistor.

HIS-EXLBR-ATI-9800-053.jpg HIS-EXLBR-ATI-9800-054.jpg HIS-EXLBR-ATI-9800-055.jpg

The parts came form a dead MSI nVIDIA 7300GT PCI-E. I used a 15W soldering iron which had a grinded/sharpened tip so that I could solder small parts. I know that you are not supposed to sharpen the tip of the soldering iron but I do this quite often. I still don't have a suitable soldering station. One day ... 😁

The ATI Radeon 9800 PRO was first washed with tap water and Fairy Lemon dish soap. I didn't bat an eye when I used water as I knew the place from where it came from. The water wash was followed by many IPA 99% washes and lots of detailing work.

HIS-EXLBR-ATI-9800-056.jpg HIS-EXLBR-ATI-9800-057.jpg HIS-EXLBR-ATI-9800-058.jpg HIS-EXLBR-ATI-9800-059.jpg HIS-EXLBR-ATI-9800-060.jpg HIS-EXLBR-ATI-9800-061.jpg HIS-EXLBR-ATI-9800-062.jpg HIS-EXLBR-ATI-9800-063.jpg HIS-EXLBR-ATI-9800-064.jpg HIS-EXLBR-ATI-9800-065.jpg HIS-EXLBR-ATI-9800-066.jpg HIS-EXLBR-ATI-9800-067.jpg

Attention to detail. I knew that after a lot of work I would have something special in my hands. This puppy will look awesome by the time I'm done with it. Upwards and onwards!

HIS-EXLBR-ATI-9800-068.jpg HIS-EXLBR-ATI-9800-069.jpg

Polish it baby!

HIS-EXLBR-ATI-9800-070.jpg HIS-EXLBR-ATI-9800-071.jpg

As the Inductance Coil / SMD Power Inductor 3R3 with a smashed head looked otherwise okay I decided to make it "a new hat" with a bit of Bison Epoxy Metal.

HIS-EXLBR-ATI-9800-072.jpg

When I cleaned the plastic parts of the shroud I tried to clean the fan without taking it apart. Needless to say that the results were less than stellar so I did the right thing and I dismantled everything. The propeller was washed with tap water and Fairy Lemon dish soap and the motor with IPA 99%.

HIS-EXLBR-ATI-9800-073.jpg HIS-EXLBR-ATI-9800-074.jpg HIS-EXLBR-ATI-9800-075.jpg HIS-EXLBR-ATI-9800-076.jpg HIS-EXLBR-ATI-9800-077.jpg HIS-EXLBR-ATI-9800-078.jpg

While the propeller dried I eliminated the rust from a nut an washer using a rag and some polishing paste.

HIS-EXLBR-ATI-9800-079.jpg

Excellent results.

HIS-EXLBR-ATI-9800-080.jpg HIS-EXLBR-ATI-9800-081.jpg

A tiny drop of 10W40 motor oil and a bit of Mobil blue grease. Spinning nicely and quietly. Refurbished sticker with some 0.2mm TESA double sided tape. Good as new.

HIS-EXLBR-ATI-9800-082.jpg HIS-EXLBR-ATI-9800-083.jpg HIS-EXLBR-ATI-9800-084.jpg HIS-EXLBR-ATI-9800-085.jpg

While I worked with the card one thing kept creeping constantly. How was I going to solve the problem of the missing heatsink from the video memory. For some weeks I kept visiting the flea market hoping that I would find that tiny silver heatsink in the pile I found the card. Unfortunately I didn't find it and as the moment of powering up the card was fast approaching I was forced to find another solution.

I wanted to buy something aftermarket but I didn't find something to satisfy me. They were too small or too big, black or golden. Nope. It won't do.

Enter a humble GF3 Ti 200 heatsink.

HIS-EXLBR-ATI-9800-086.jpg

I used a hacksaw and I cut a piece from it. After two hours of grinding, polishing with a buffing wheel, tuning with fine files, cursing, I ended up with something usable.

HIS-EXLBR-ATI-9800-087.jpg HIS-EXLBR-ATI-9800-088.jpg

I already saw the FINISH LINE. Cooling system COMPLETED!

HIS-EXLBR-ATI-9800-089.jpg HIS-EXLBR-ATI-9800-090.jpg HIS-EXLBR-ATI-9800-091.jpg HIS-EXLBR-ATI-9800-092.jpg HIS-EXLBR-ATI-9800-093.jpg HIS-EXLBR-ATI-9800-094.jpg

Bits and pieces DONE!

HIS-EXLBR-ATI-9800-095.jpg

I used Akasa Thermal Adhesive Tape to attach the heatsink to the memory chips. The original heatsink was also held with some kind of tape or soft glue that was easily removed with IPA 99%.

HIS-EXLBR-ATI-9800-096.jpg

Shining like a diamond.

HIS-EXLBR-ATI-9800-097.jpg HIS-EXLBR-ATI-9800-098.jpg HIS-EXLBR-ATI-9800-099.jpg HIS-EXLBR-ATI-9800-100.jpg HIS-EXLBR-ATI-9800-101.jpg HIS-EXLBR-ATI-9800-102.jpg HIS-EXLBR-ATI-9800-103.jpg HIS-EXLBR-ATI-9800-104.jpg HIS-EXLBR-ATI-9800-105.jpg

After the cleanup, the scratches on the back became extremely visible. The picture is made up close an in reality they look a little better but there is no hiding those nasty scars.

HIS-EXLBR-ATI-9800-106.jpg

Another fact that I forgot to mention is that someone has used some kind of epoxy to fix a heatsink that also fell from the video memory. You can see the overflow on the sides and I'm pretty sure this is not up to factory spec.

HIS-EXLBR-ATI-9800-107.jpg HIS-EXLBR-ATI-9800-108.jpg

Almost there.

HIS-EXLBR-ATI-9800-109.jpg HIS-EXLBR-ATI-9800-110.jpg

Done and done. The scratches on the back have been covered with a sticker that I found in a box of bike parts. I think that it totally fits the card.

HIS-EXLBR-ATI-9800-111.jpg HIS-EXLBR-ATI-9800-112.jpg HIS-EXLBR-ATI-9800-113.jpg HIS-EXLBR-ATI-9800-114.jpg HIS-EXLBR-ATI-9800-115.jpg HIS-EXLBR-ATI-9800-116.jpg HIS-EXLBR-ATI-9800-117.jpg HIS-EXLBR-ATI-9800-118.jpg HIS-EXLBR-ATI-9800-119.jpg HIS-EXLBR-ATI-9800-120.jpg

My latest and greatest project comple ... nah ... completed my arse ...

The only area that I didn't check was the MOLEX connector. When the card was done, all cleaned and assembled, looking better than new, I saw a discolored pin and some rust pigmentation inside the MOLEX socket. ^$@&^^$#&*^$&*!!!!! I didn't saw any burn marks and I'm sure that all of this was the result of the contact with water or another liquid.

I tried to clean the pin using a cut cotton stick and some polishing paste but this didn't work. I tried to use a little bit of rust remover solution but that didn't change anything and it only made matters worse as it has discolored the adjacent pin. Also, bits of plastic fell from the MOLEX connector so I decided to replace it.

Sure that I could've powered the card like this but I didn't. 100% or bust!

HIS-EXLBR-ATI-9800-121.jpg HIS-EXLBR-ATI-9800-122.jpg HIS-EXLBR-ATI-9800-123.jpg HIS-EXLBR-ATI-9800-124.jpg HIS-EXLBR-ATI-9800-125.jpg HIS-EXLBR-ATI-9800-126.jpg

Finding a suitable MOLEX connector proved tougher that I thought. I wasn't able to find one at the electronic shops in town and I was already thinking to solder the wires from a regular molex cable and leave it longer.

In the end I found at the flea market a FireWire PCI card and I transplanted what I needed.

That meant taking apart a finished card and start again.

HIS-EXLBR-ATI-9800-127.jpg HIS-EXLBR-ATI-9800-128.jpg HIS-EXLBR-ATI-9800-129.jpg

Finally I get to power up this card! I sure hope that it is still alive and kicking!

HIS-EXLBR-ATI-9800-130.jpg HIS-EXLBR-ATI-9800-131.jpg HIS-EXLBR-ATI-9800-132.jpg

Final results.

HIS-EXLBR-ATI-9800-133.jpg HIS-EXLBR-ATI-9800-134.jpg

Testing time! I put together a test bed and I pressed the POWER button or should I say I used the screwdriver on the PWR pins. 😁

HIS-EXLBR-ATI-9800-135.jpg
HIS-EXLBR-ATI-9800-136.jpg HIS-EXLBR-ATI-9800-137.jpg

And ... it's dead. No signal. No POST. No Beeps. NOTHING!!!

Nooooooooooooooooooo! 2 stupid dogs No kind of sound. Noooooooooooooooooooooooooo!!! 😁 2 stupid dogs - little dog shouting 'NO!'

What did you expect? ATI and me just don't mix or I look for ATI cards in the wrong place.

I tried another PSU thinking that maybe the 465W Enermax wasn't enough but to no avail.

Of course that "the junk" ATI 9250 worked flawlessly. A clear confirmation that the His EXCALIBUR ATI 9800PRO 128MB AGP IceQ is KAPUT. Dead.

HIS-EXLBR-ATI-9800-138.jpg

In a gesture of supreme frustration I plugged the card in my PIII AGP 2x 3.3V PC an still nothing. Not even a squeak.

HIS-EXLBR-ATI-9800-139.jpg HIS-EXLBR-ATI-9800-140.jpg

Even faced with such overwhelming proof I was still reluctant to throw in the towel so I put the card in a box and I took a break.

While I cleaned the card I saw that someone has tampered with the SW1 dip switch, so I took the card apart again and I put the switch No 1 in the same position as the switch No 2, as they are on other ATI Radeon 9800 PRO cards. This was a long shot and of course that it didn't work.

HIS-EXLBR-ATI-9800-141.jpg HIS-EXLBR-ATI-9800-142.jpg HIS-EXLBR-ATI-9800-143.jpg HIS-EXLBR-ATI-9800-144.jpg

In the end I also did a continuity check of the scratched traces and as expected I didn't find anything wrong.

HIS-EXLBR-ATI-9800-145.jpg

Dead! RIP!

What can I say? There's nothing more to be said.

I wasn't able to pull the sword from the rock it sits but I can tell you that on the first occasion I find a working ATI 9800 PRO I will perform a cooling system transplant and I will have my His EXCALIBUR ATI 9800PRO 128MB AGP IceQ @ 100%. In the mean time this card is nothing more than a show piece, a friggin' brick, a useless prespapier, etc.

ATI, ATI why you ATI me so much ... 😁

gallery: https://postimg.cc/gallery/kbsFtZk

Cya with more episodes in a forum near you.

More later.