Beastie Boys - Hold It Now, Hit It
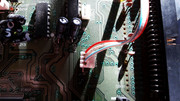
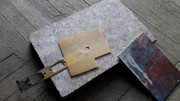
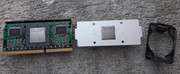
Slot 1 "trash" fresh from the gutter
The slotted CPUs hold a special place in my "little" collection. Over the years my "taste" has formed and in my book A comes in front of 1 if you ask what I prefer but they are also way harder to come by. I don't have to mention the 1GHz slotted beasts as they are rarer than hen's teeth no matter if we are referring to the A or the 1.
In todays episode we will focus on 4 Slot 1 intel CPUs. Two in great shape and two which were subjected to a bad treatment. When I say bad treatment I mean they were butchered and prepared to be scrapped kind of treatment.
All of the four CPUs came straight from the flea market. No mystery here. They were as cheap as they come.
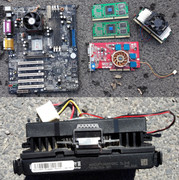
Let's meet "the victims":
1. Intel Pentium II 266MHz 266/512/66 SL2HE
2. Intel Pentium II 350MHz 350/512/100 SL356
3. Mystery Intel Pentium Slot 1 CPU 1
4. Mystery Intel Pentium Slot 1 CPU 2

The four CPUs have been obtained from three separate visits I made to the flea market from my home town. As I didn't want to make a small episode for each of them I waited for the moment that could make matters more interesting. This moment took the shape of the two Mystery Intel Slot 1 CPUs.
A few years ago I wouldn't've looked twice at those two busted CPUs but as time passed and my skills have increased, nothing "scares" me now and I'm willing to do whatever it needs to be done to recover any component no matter the stage of electronic putrefaction in which I might find it. What I can't fix now is stored for a later date when I get to the next level of my skills. 😁 I never quit and I take my sweet time when I have to. These relics of times gone by are very resilient and they don't give up so easily so why should I?
Let's get on with the show.
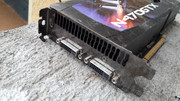
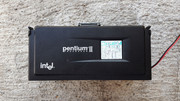
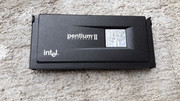
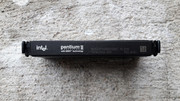
Intel Pentium II 266MHz 266/512/66 SL2HE
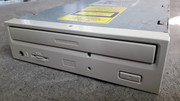
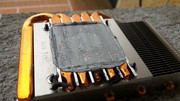
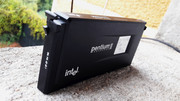
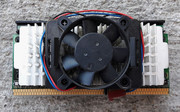
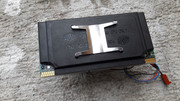
One of the early Pentium II CPUs with a 66MHz bus. As soon as I laid my eyes on this chunk of black plastic I knew what it was and I made a beeline for it. A complete slotted CPU doesn't pop up so often at the flea market anymore. If we take into account the exotic cooler this makes it a lot more special.
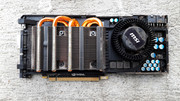
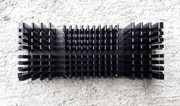
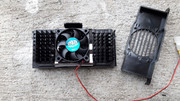
Cooler Master - The Ultimate Thermal Solution

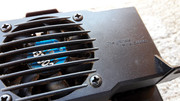
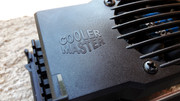

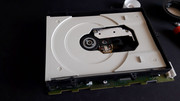
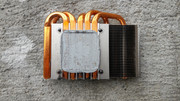
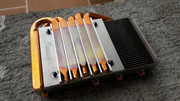
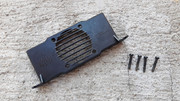
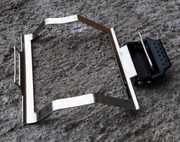
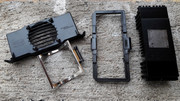
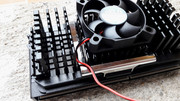
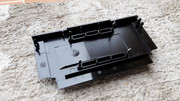
The Cooler Master present on this Pentium II CPU is a joy to work with. An absolute unit! A few screws, a metal clip and presto naked slot 1 CPU.

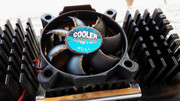
The CPU wasn't very dirty and the simplicity of the cooling system made things even easier. It almost felt like playing with LEGO.


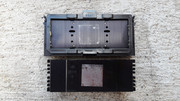

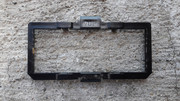


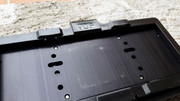
In general, the heatsinks used to cool slotted CPUs, are held with two metal clips that have tiny hooks that are fixed into holes present on the CPU heatplate. These are very effective but the Cooler Master solution is way more elegant. A sturdy plastic frame with four tiny hooks is fixed on the heatplate, then you just drop in the heatsink and you tension the whole thing with the small lever present on the square metal clip. Child's play. I LIKE IT!
In the case of this CPU I decided to not go overboard and I didn't change the TIM. Over the years I opened up quite a few of these CPUs only to find out that the TIM was still soft. This CPU is close to perfect so I let him be even if to this date I opened all of my other CPUs. All have their TIM changed with cu AC MX-4. The good stuff.
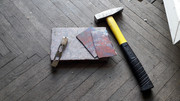
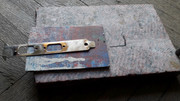
If in the past I employed more invasive procedures to open slotted CPUs but now I just use a small screwdriver to detach the top part of the plastic casing, my hands and patience. A little bit of patience goes a long way. You hear the plastic "cry" and you know when you are doing the right thing. Almost each and every attempt to open slotted CPUs will halt with the case stuck in one or two points. This is where you have to pay attention. One will submit to gentle persuasion but the last one will hang for dear life. Here you need patience and some twisting action until it will give up. That's where your hands come in. If you don't care how the CPU will look after you crack it open use whatever means necessary to achieve your goal. 😁
Over the years I presented how I open slotted CPUs so feel free to browse the thread.
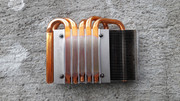
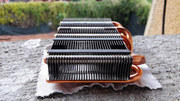
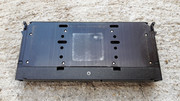
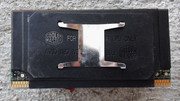
All cleaned now. Looking sharp.


I kept the thermal pad that was present on the heatsink because there wasn't nothing wrong with it.
In the past I replaced the thermal pad with AC MX-4 but in this instance I didn't want to experiment only to find out that maybe I really needed the thermal pad because the gap between the heatsink and the heatplate was too big.
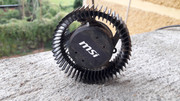
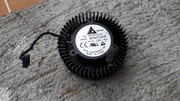
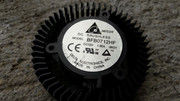
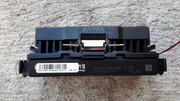
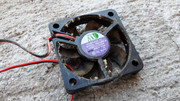
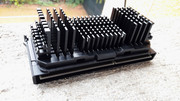
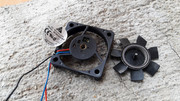
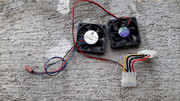
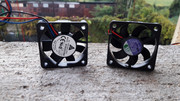
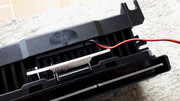
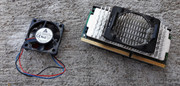
The cooling fans of the 266 MHz and 350 MHz CPUs were cleaned together.
In the case of the Delta AFB0512 MA mounted on the 350 MHz CPU, I found a small spring that tensions the propeller. Due to my lack of attention I lost the spring. ^$&@#&^*$#*&$$!@!#!!!! Lucky me! I had to make another one and that was no easy task. In the end I managed to solve "the problem". I could've replaced the fan but I like to keep things as close to original as possible.


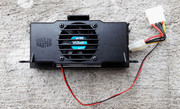
Almost there.

When I had to put back the plastic cover of the cooler I consulted the pictures I took prior to disassembly. The cable from the cooling fan seemed to be in the wrong position. Even if you have or don't have pictures of the component you disassembled you must always read all the signs of something being out of place. A cable that stood for years in a position and now it doesn't fit right means that something is wrong and you need to investigate the matter. This is true for each and every other situation that implies assembling a part that has been taken apart even if we are talking about screws, clips, cables, parts that don't sit flush, etc.
Done!

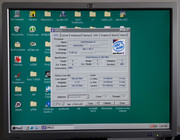
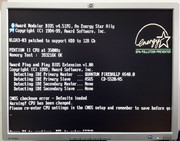
The moment of truth soon came. I was certain that this CPU is still alive and kicking.
I managed to clock this CPU at 133, 166, 200, 233 and 266 MHz just by selecting the multiplier from BIOS. It doesn't come easier than this folks.


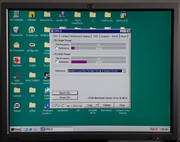
I must say that the cooling fan was fully recovered and it still works well. Originality is intact. Nice. The P266 lived to tell its tale.
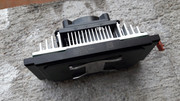
Intel Pentium II 350MHz 350/512/100 SL356
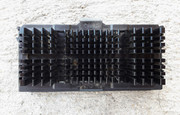
The 350 MHz CPU also had a cooling system from Cooler Master. Even if it isn't so elegant like the one present on the 266 MHz CPU it doesn't mean it is inferior. Still, I must mention that you can fell the cost cuts everywhere. The metal clip is thin and it feels like it can cut you, the heatsink is smaller, it just feels cheaper.
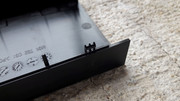
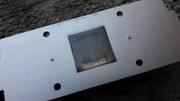
Ever since I bought the CPU I noticed the black plastic shim present on the back that seemed a little suspect. On the shim it is written: H-PPGA(OLGA) CPU ONLY.
The metal clip was a pain to remove. The mounting pressure is the biggest one I registered since I work with these CPUs. Something's afoot here let me tell you.
To free the heatsink I had to use a sturdy flat screwdriver and disengage the clip . Over the years the clip bit the soft meat of the aluminum heatsink leaving tiny nasty cuts.
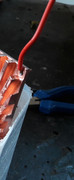
Ready for IPA 99%.

Cleaning in progress ...


As the thermal pad was in great shape I decided to keep in place.
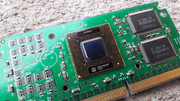
Whenever possible when I open slotted CPUs I also apply thermal pads to cool the CACHE chips. This is not necessary every time but I just do it for peace of mind.
In this instance the gap between the CACHE chips and the heatsink was so great that some very thick thermal pads were required.
As it happened I had the right solution for this. I used a couple of thermal pads from a busted AC Accelero Xtreme 9800 cooler. They were thick and squishy.
Done!

Still alive and kicking. As expected I must say. I must mention that the Delta fan is past its prime. It needs to be replaced at some point. I could service the bearings with some fresh grease but I won't do it too soon or I could change the bearings entirely ... hmmm ... nah not right now.

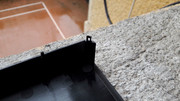
While I used this CPU I was met with an interesting situation. When I inserted the CPU in the slot I saw that it wasn't sitting quite right. I looked closer and behold the plastic shim was bumping into a few capacitors.

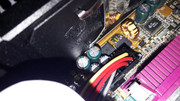
I know that my Luckystar motherboard isn't high end but bad design choices aside this never happened to me before.
I searched the internet for stuff on the OLGA matter and Anandtech came to the rescue. https://www.anandtech.com/show/254/3 As I thought initially, this plastic shim wasn't meant to be installed on this CPU. This is why you have to RTFM!
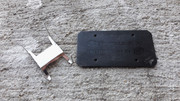
You can clearly see that the shim was destined for OLGA CPUs which are "thinner" than the PLGA CPUs. The difference in width is clearly visible.


I had to open the CPU again and remove the shim. Without the shim the CPU entered in the slot better even if some capacitors were offended by the lack of vital space.

Done and done!
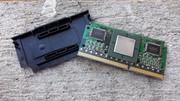
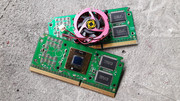
After the two easy to restore CPUs it was the time to tackle the two Mystery CPUs.
No matter how hard I searched for clues I couldn't find something certain. Was it so hard to mention on the PCB the frequency at which they work?
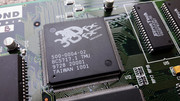
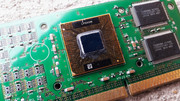
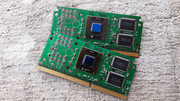
The only clues that made it possible to narrow down the possibilities were the strings present on the CPU, manufacturing year, PB number, the SL2WF TagRAM and the CACHE chips. Even with all this information I still wasn't able to find for sure the frequency at which they ran.
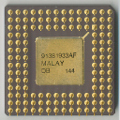
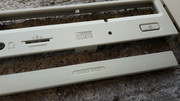
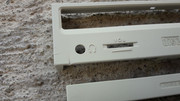
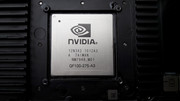
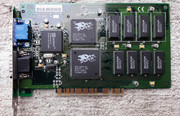
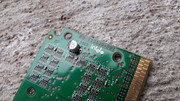
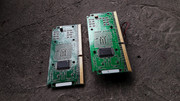
Mistery Intel Pentium Slot 1 CPU 1 - L838A041 / 21831004BF 7337 / SEC KOREA 840 KM736V604YMT-44 SBH104JE / PB 713539-001 / Compeq 9833
Mistery Intel Pentium Slot 1 CPU 2 - L912A340 / TOSHIBA B23983 TC55V2377AFF-225 JAPAN 9910 MBD / PB 713539-001 / NM4 9909
After hours of searching the internet for clues I was able to narrow down the possibilities to 350MHz. Not bad but the only moment that could clear all the doubts was the moment when I would power them up. I still had a ways to go though ...
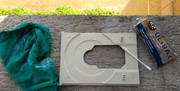
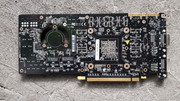
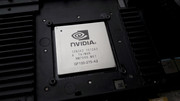
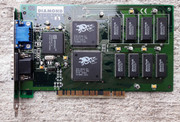
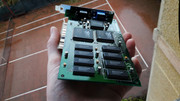
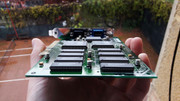
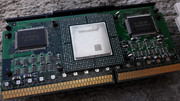
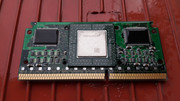
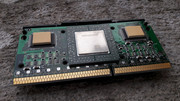
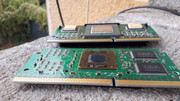
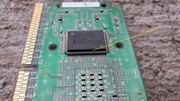
Mistery Intel Pentium Slot 1 CPU 1
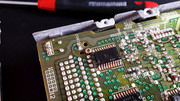
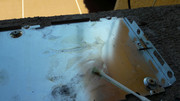
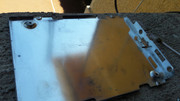
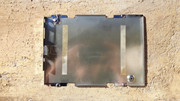
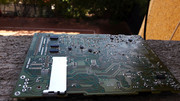
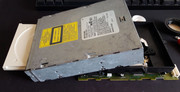
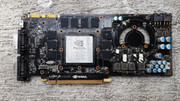
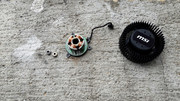
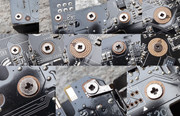
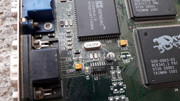
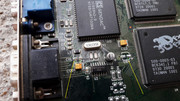
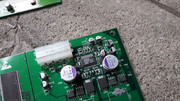
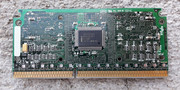
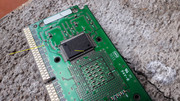
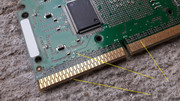
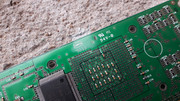
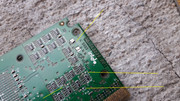
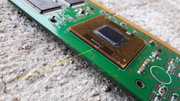
This vandalized CPU looked better that its brother. Ceramic capacitors missing at C11 and C79, bent pins on the SL2WF TagRAM chip, deep scratches that didn't look terminal . The PCB was slightly deformed near the holes where the heatplate once stood. The CPU die was slightly chipped.
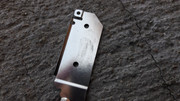
I didn't take long and I started operating. I soldered new ceramic capacitors and I arranged the pins on the SL2WF TagRAM chip. One pin required soldering.


When I counted the missing ceramic capacitors on the two CPU I just couldn't help but notice how many were MIA.
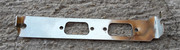
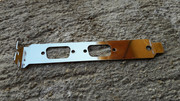
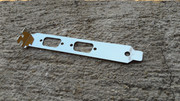
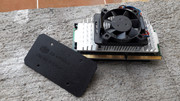
Damage aside I still had to address the matter of missing coolers.
I searched for solutions and the first one that came into my mind was to use a Zalman ZM-80 cooler. https://pc.zoznam.sk/cpu-intel-pentium-2-400- … man-om-zm80c-hp I have three of these coolers but as they sit well where they are I might remove them from the package only for a setup that has dual slotted CPUs and some RDRAM lovin' 😁 so I had to search some more.
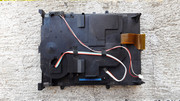
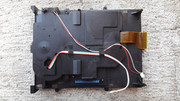
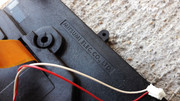
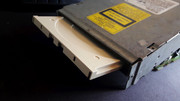
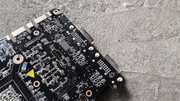
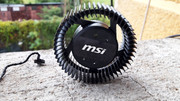
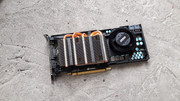
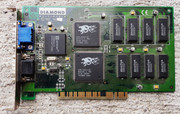
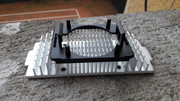
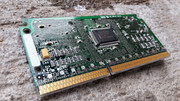
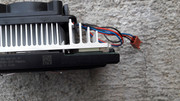
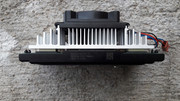
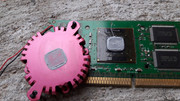
The final solution came in the shape of a chipset cooler from Revoltec. It was perfect and I didn't have to perform any modifications. Of course this isn't enough for long term use but for my needs it was the right tool for the job.
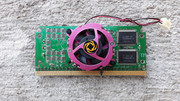
Scavenged from willing donors.

In regard to the ceramic capacitors I must mention that I didn't have ones that have the same color as the originals. Also even if I removed a capacitor from the board I don't have a tool to read the specs so I judged by eye what was needed. This was as good as it was going to get.
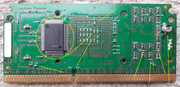
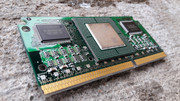
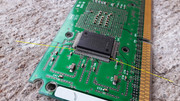
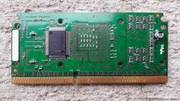
Mystery Intel Pentium Slot 1 CPU 1 fixed!


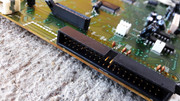
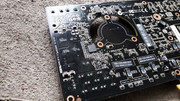
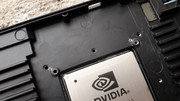
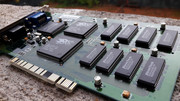
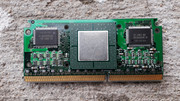
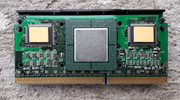
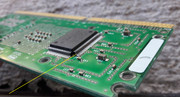
Mystery Intel Pentium Slot 1 CPU 2
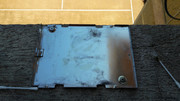
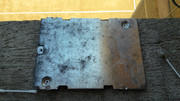
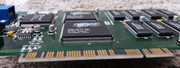
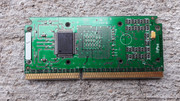
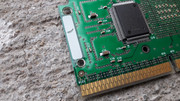
This CPU was in the worse shape from the lot. Missing ceramic capacitor at C10, C11, C28, C71, C72, C77, C79 plus 4 pieces on the back. SMD tantalum capacitor missing at C51. Bent pin on the SL2WF TagRAM chip and a blow to the head that deformed the textolite on the CPU. CPU die slightly chipped. YAY! Nice! Some HARD lovin' here folks!
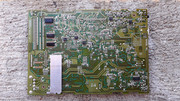
The 22uf 6V / KEMET 226 6K SMD tantalum capacitor missing at C51 was replaced with a SMD Panasonic EEEFP1V220AR 22uf 35V. The Panasonic is taller that the original but I don't think that this is a problem as this CPU will never have a plastic casing.


Cypress Hill - Insane In The Brain *** I might be insane in the brain but I treat myself with some HW hoping that I might also fix myself. 😁
IPA 99%!

The moment of truth for the two mystery CPUs soon came. Even if they required some serious work I was sure that they won't disappoint.
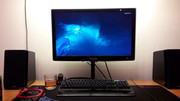
Mystery Intel Pentium Slot 1 CPU 1
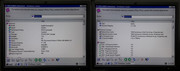
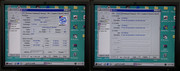
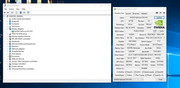
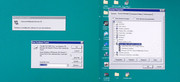
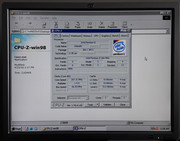
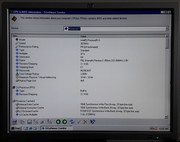
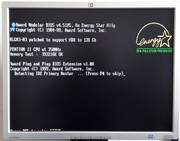
No mystery here. 350 MHz as expected. Working flawlessly.
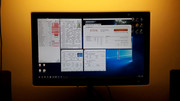
Mystery Intel Pentium Slot 1 CPU 2


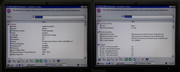

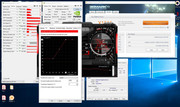
A real surprise. This is a 400 MHz CPU. NICE! Again working flawlessly.
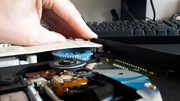
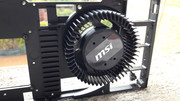
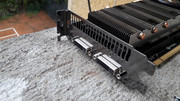
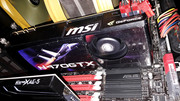
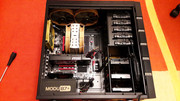
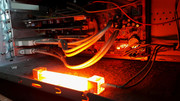
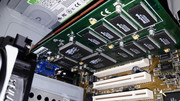
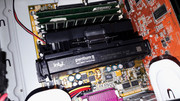
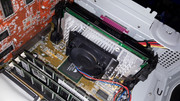
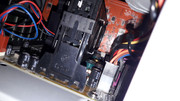
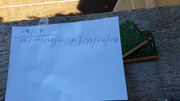
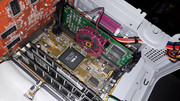
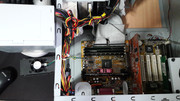
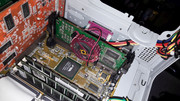
The test system was improvised. I used a roll of toilet paper to hold the PSU and I left the fan from the 800 MHz CPU connected to the motherboard as I feared that it would otherwise freak out when it didn't detect the RPMs. I did this as the Revoltec fan only has two wires.
Later I found out that the motherboard being from the stone age couldn't care less if the cooling fan was spinning or not. Well, better safe than beep beep beep. 😁
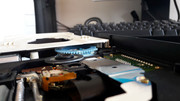
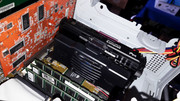
As a precaution, before I powered up the CPUs I used two pieces of cardboard to protect the neighbouring components. You never know when sparks might fly. I also kept a safe distance from the PC when I powered the whole thing UP. 😁
Of course that something could've gone wrong but all was a calculated risk. The odds of me damaging the motherboard were small and I said let's go for it.
It seems that in the end I didn't need this roll of toilet paper made from recycled paper. 😁

For those wondering about the contact between the push pins cooler and the CPU. After you apply the TIM if you gently push and twist the cooler you can achieve a good contact with the die. During testing the CPUs didn't get very hot sign that the small Revoltec can be used for short stints. I don't recommend using it in a closed case.
If needed I already have thought about other options to cool these CPUs.
In the end I got a perfect score. 100%. Who would've thought? 😁 There's nothing that I can't fix as I can do it in the MIX!!!
Saved to fight another day. DMX - Party Up (Up In Here)

gallery: https://postimg.cc/gallery/zN4LB8j
More later.