VOGONS


First post, by mpe

User metadata
Rank Oldbie
Rank
Oldbie

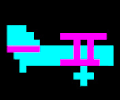
I attempted to remove my first ever dead Dallas chip from a Pentium motherboard.

The new chip is in the post so I'll see in a few days if there is a success story or not.

I have never done this before and it looks like messy on some pins when magnified. However, solder pads / traces apparently survived

What do you think. Did I butcher it? Do you have any tips how to do this in a more clean way?

caBaZvc.jpg
u64yO5Z.jpg

Blog|NexGen 586|S4

Reply 1 of 21, by dionb

User metadata
Rank l33t++
Rank
l33t++

That trace above the fifth hole from left on the second photo looks damaged with possibly two more on the top pic (leftmost and rightmost 'dangling' trace on the upper row). Wouldn't be too optimistic about this one without some repair...

In any event you need to suck the holes with solder still in them (not the NC ones of course) clean before you install the new module. Also, use a socket, particularly as I wouldn't be confident this board has survived the abuse, and even if it has you never want to expose a board to this more than once.

I'm no old hand when it comes to soldering, but I succesfully managed my first RTC by this technique:
- slather the area in flux
- put a little drop of new solder on every pin
- heat well to melt new into old,
- when it's all hot & runny, suck it out with a solder sucker
- rinse & repeat for all the holes

If (as inevitably happens) some holes aren't clean, new blob of new solder, heat it all and suck again.

No violence! Otherwise stuff breaks...

Reply 2 of 21, by maxtherabbit

User metadata
Rank l33t
Rank
l33t

The trace above the fifth hole on the left top seems undamaged to my eye. The solder resist is abraded but the trace itself should be perfectly fine. Overall it's not a super clean job but I think you did adequate for a first try and I absolutely believe it will function 100%. I don't see any damage to trace copper anywhere, just roughed up solder mask

Reply 3 of 21, by Tiido

User metadata
Rank l33t
Rank
l33t

Lack of flux was the main problem, with it you probably wouldn't dave got any of the abrasions seen. But overall it looks like everything is still intact, but the traces with abrasions on them should be double checked with a multimeter to make sure they conduct, it will be much harder to repair them later if it turns out any actually is broken.

T-04YBSC, a new YMF71x based sound card & Official VOGONS thread about it
Newly made 4MB 60ns 30pin SIMMs ~
mida sa loed ? nagunii aru ei saa 😜

Reply 4 of 21, by mpe

User metadata
Rank Oldbie
Rank
Oldbie

Thanks for hints. Will definitely use a socket and a plenty of flux. I can still measure continuity on those traces, so hope they survived. Also several pins on the Dallas aren't used or aren't that important (CMOS reset).

This is almost a disposable board for me. I just wanted to check if this can be done.

Blog|NexGen 586|S4

Reply 5 of 21, by HanJammer

User metadata
Rank Oldbie
Rank
Oldbie
maxtherabbit wrote:

The trace above the fifth hole on the left top seems undamaged to my eye. The solder resist is abraded but the trace itself should be perfectly fine. Overall it's not a super clean job but I think you did adequate for a first try and I absolutely believe it will function 100%. I don't see any damage to trace copper anywhere, just roughed up solder mask

I don't think it's dammaged as well. Pretty good job for a first-timer.

mpe wrote:

Thanks for hints. Will definitely use a socket and a plenty of flux. I can still measure continuity on those traces, so hope they survived. Also several pins on the Dallas aren't used or aren't that important (CMOS reset).

This is almost a disposable board for me. I just wanted to check if this can be done.

Don't use 'plenty of flux' - use 'just enough' especially if your solder wire has flux core.

New items (October/November 2022) -> My Items for Sale
I8v8PGb.jpg

Reply 6 of 21, by treeman

User metadata
Rank Oldbie
Rank
Oldbie

I think you did pretty good, luck can swing 1 way or another looks like in was in your favour, you didn't rip out any vias or traces but it looks like you came close.

My first dallas job I broke it then took days/weeks learning and fixing

20 year old solder can be very stubborn lots of flux new solder to mix, a desolder gun and alot of repetition will get you clean results

Reply 8 of 21, by treeman

User metadata
Rank Oldbie
Rank
Oldbie

what did you use a hand pump/sucker? or proper desolder gun?

even if 1 or 2 of traces are not conducting it won't be a hard fix looks in decent condition

Reply 10 of 21, by maxtherabbit

User metadata
Rank l33t
Rank
l33t
konc wrote:
dionb wrote:

- put a little drop of new solder on every pin

I can't stress this enough.

yes - this video explains why/how

he's doing a NES, but it's the same process on a large DIP
https://www.youtube.com/watch?v=-MuwkiV4aPs

Reply 11 of 21, by DNSDies

User metadata
Rank Member
Rank
Member

Get a Hakko 808 or whatever the modern equivalent is. It's the best $200 you'll ever spend if you want to desolder things regularly.

Also, apply new solder to anything you want to desolder and try to pre-heat the entire board if it has a large ground plane, or is just a large board in general.
The fresh solder will make things much easier, and the pre-heating of the board will make troublesome ground pins much easier to deal with, and reduce the time you need to apply high heat to the board. This will hopefully prevent lifted pads or traces.

Flux is also pretty important, especially if you're using a braid.

If you don't need to save the part being removed, use flush-cutters to remove it.

Reply 12 of 21, by twilliamc

User metadata
Rank Newbie
Rank
Newbie

I did far worse on my first one and it lived. Next time I plan to use hot air.

Unnamed: 486DX4 @ 120MHz, 16MB, 2GB, 2MB VGA, SBPro 2.0, DOS/W3.11, W95
PC-65:P3 @ 800MHz x2, 512MB, 128GB SSD, Voodoo3, SB Live!, Win98SE

Reply 13 of 21, by kaputnik

User metadata
Rank Oldbie
Rank
Oldbie

Preheat the board with a hot air gun before desoldering. Heat it from the underside, and go slowly. If you want to play it safe, just aim at whatever temp the electrolytic caps on the board are rated for, usually 85 deg C. Those and any plastic fittings are the most heat sensitive components. Preheating will make the desoldering job itself so much easier.

Personally I'm usually aiming at 130-150 deg C, trying to heat the board up as locally as possible, avoiding any sensitive components.

Reply 14 of 21, by mpe

User metadata
Rank Oldbie
Rank
Oldbie

Happy to report that I successfully soldered a DIP socket, installed a new Dallas and the board seems to be surviving my abuse. 😊

I only had very little previous soldering skills, just got TS100 soldering iron, sucker + other bits from eBay and watched a couple of YT videos about soldering 101.

I was not sure about the replacement chip as the original was DS12B887 and the one I was able to get is DS12C887+ and reading various document it wasn't conclusive as to whether these two are fully compatible. However, pinout is the same and it works and the board is like new again.

BWH5vTl.jpg

Last edited by mpe on 2019-11-23, 13:20. Edited 1 time in total.

Blog|NexGen 586|S4

Reply 15 of 21, by treeman

User metadata
Rank Oldbie
Rank
Oldbie

good job! if you haven't done so yet clean the flux residue on the reverse side of the board where the dip socket is soldered to. Even no clean flux can become corrosive in long term down the road

Reply 16 of 21, by EduardoHF

User metadata
Rank Newbie
Rank
Newbie

I made one for the first time.
The most important is the flow and ALWAYS apply low melting solder before sucking.
I used the ordinary soldering iron.
I also used thermal tape that I have in the drawer.
I had to cut the socket because it was bigger.

Some holes are closed because they are not used and in the socket I removed these pins.

Now the motherboard is working properly!!!

(* Sorry but I couldn't put the images in the correct sequence)

EB990566-0232-4503-84C9-065659A0486C.jpeg
Filename
EB990566-0232-4503-84C9-065659A0486C.jpeg
File size
1.77 MiB
Views
1051 views
File license
Fair use/fair dealing exception

Attachments

Reply 18 of 21, by BitWrangler

User metadata
Rank l33t++
Rank
l33t++

My little trick for clearing solder out of holes is to get a stainless steel sewing needle (that solder has a hard time sticking to) hold it in pliers, and either heat it with small torch off to the side, or while you do it, with the iron placed on it close to the hole, and work it up and down in the hole, knock/break solder off it, repeat on next.

Unicorn herding operations are proceeding, but all the totes of hens teeth and barrels of rocking horse poop give them plenty of hiding spots.

Reply 19 of 21, by HanJammer

User metadata
Rank Oldbie
Rank
Oldbie
BitWrangler wrote on 2021-05-22, 22:15:

My little trick for clearing solder out of holes is to get a stainless steel sewing needle (that solder has a hard time sticking to) hold it in pliers, and either heat it with small torch off to the side, or while you do it, with the iron placed on it close to the hole, and work it up and down in the hole, knock/break solder off it, repeat on next.

I use injection needle for this purpose. This way I don't need pliers (I hold it by the plastic end) and it's flexible too. I just heat up the solder from one side and push the needle from the other.

Hopefully nobody opens my toolbox/drawer where I hold them because it looks like some accessory kit out of a drug den 🤣.

New items (October/November 2022) -> My Items for Sale
I8v8PGb.jpg