VOGONS


First post, by stamasd

User metadata
Rank l33t
Rank
l33t

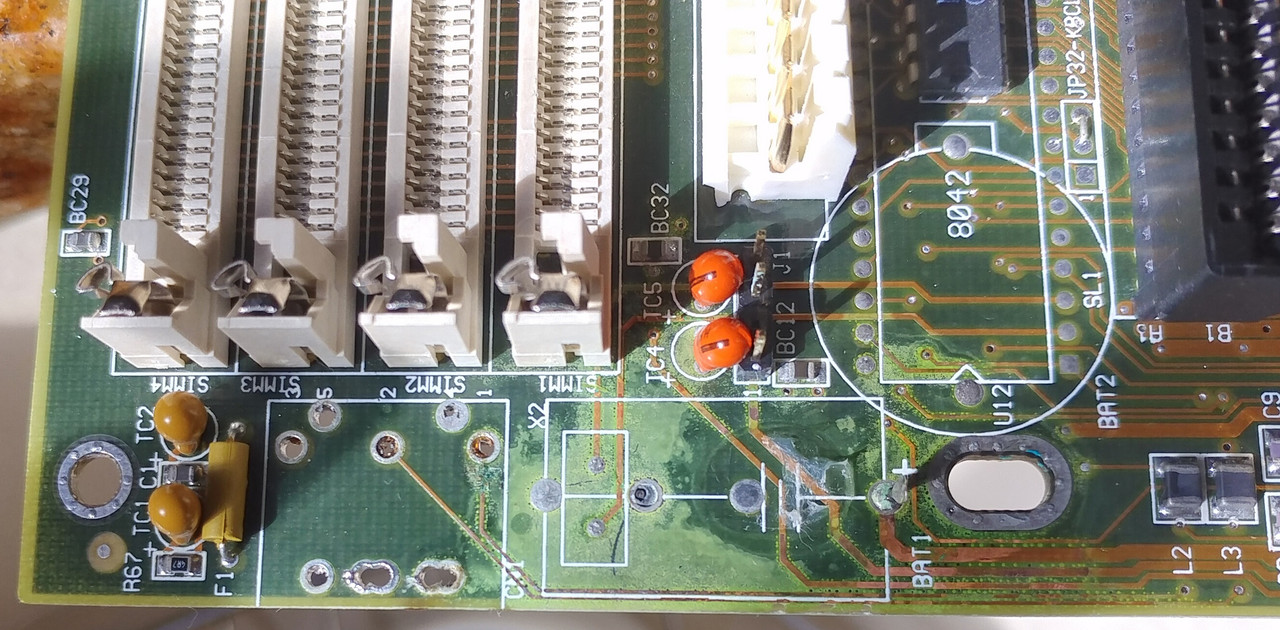
I'm working on restoring a Gigabyte GA-486VS Rev.4 motherboard that was badly damaged by a leaking battery. I have a suspicion that some traces on it may have been completely corroded, and am looking for pictures of the motherboard area around the battery/keyboard connector to compare. I do have another GA-486VS motherboard but it's revision 8, and there are major differences between the revisions in the affected area so I can't use that for reference.

I have done some pretty extensive internet searches and all I can find are pictures of revisions 7 and 8, none of which help me.

If you have an older revision of this motherboard, in particular revision 4, would you kindly take pictures of the area around the battery - keyboard connector - keyboard controller - first SIMM slot and post here? That would help me tremendously. And even if you have other revisions of the motherboard (except rev. 7 and 8, of which I've found enough pictures) those may help too.

Any help much appreciated.

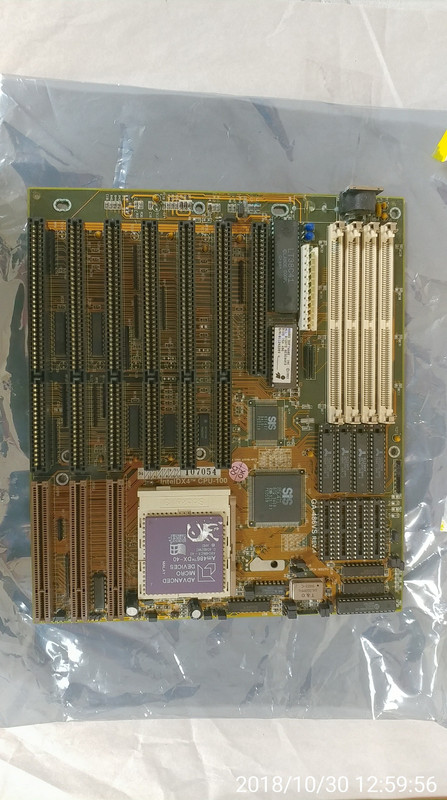
FWIW here are pictures of the motherboard I'm working on.

20181030-125955.jpg

20181030-130022.jpg

20181030-130036.jpg

20181030-133154.jpg

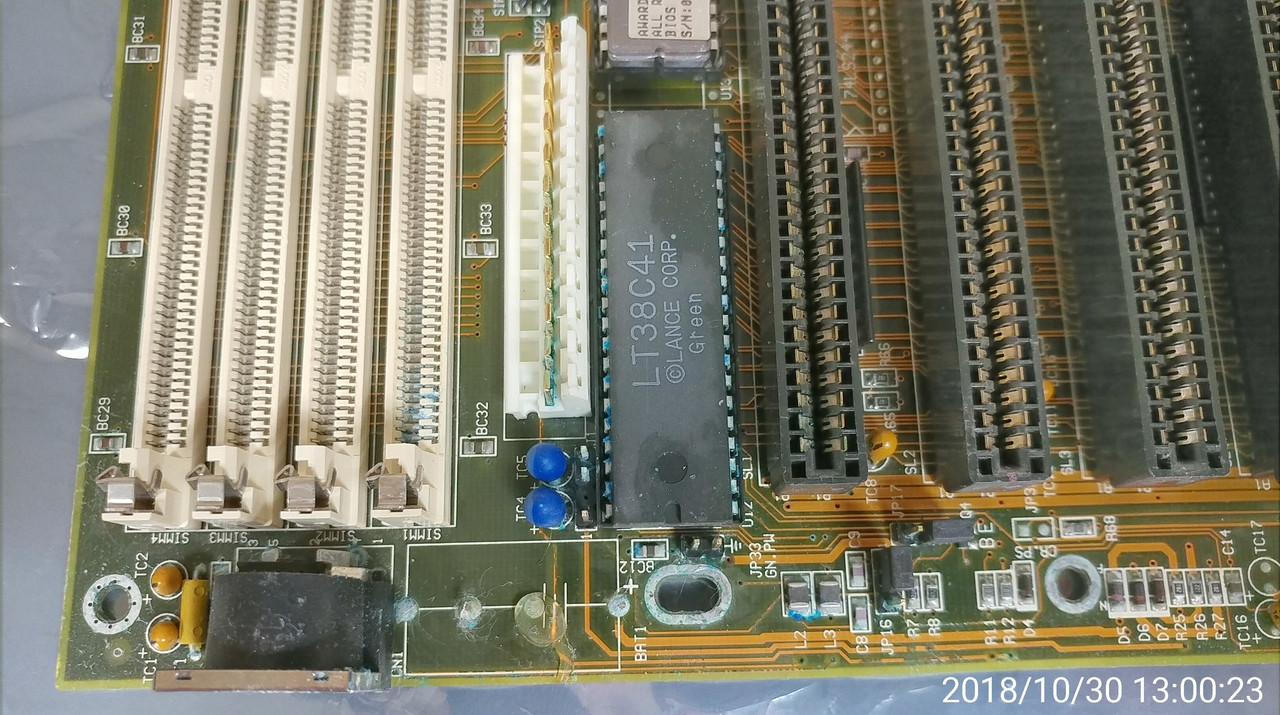
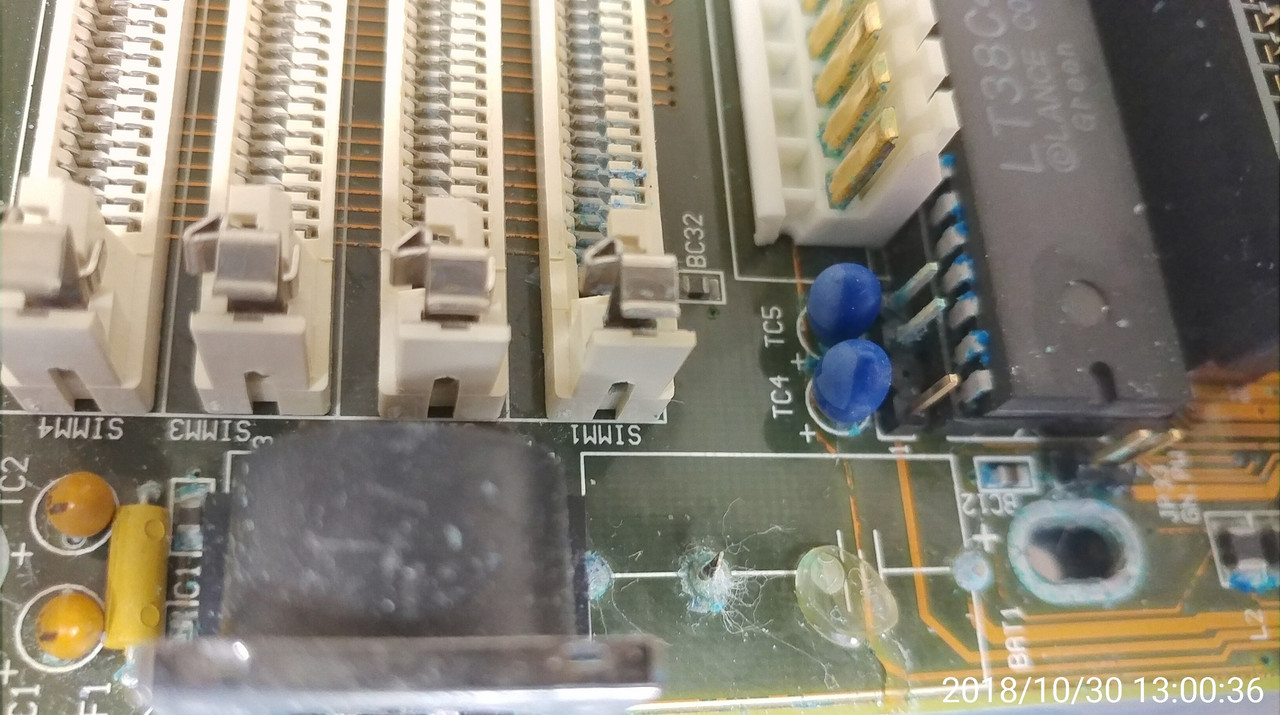
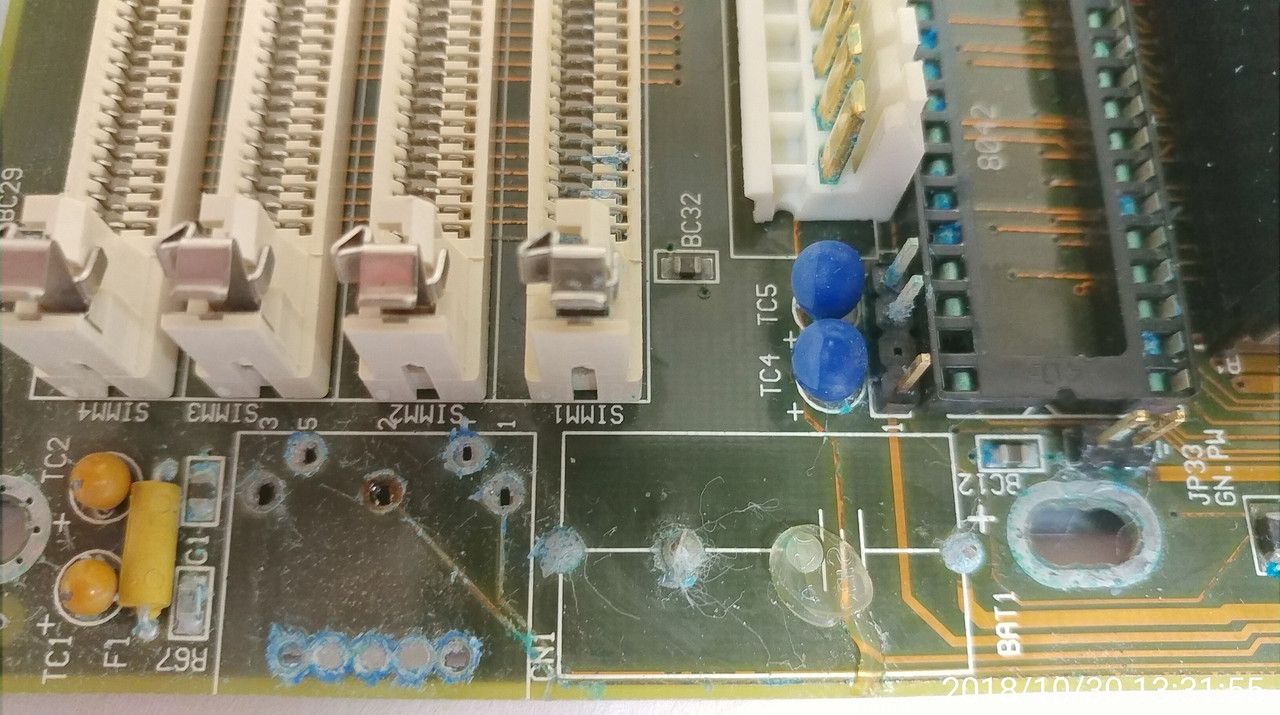
The last picture is after desoldering the keyboard connector and removing the keyboard controller from its socket.

I/O, I/O,
It's off to disk I go,
With a bit and a byte
And a read and a write,
I/O, I/O

Reply 1 of 4, by quicknick

User metadata
Rank Oldbie
Rank
Oldbie

I don't have such a board, but you might not need any photos.
That's actually not too bad, I've seen (and repaired) worse. Clean the mess with vinegar, then remove all the parts that are even slightly affected. Take a photo of the area to know which component goes where 😀 . After that, use medium-fine sandpaper to remove the solder mask and expose the copper - at this stage it will be easy to spot where the traces are broken. Dress them all in solder, use appropriate gauge wire to bridge what's broken.
Looks like you have lots of vias that don't look good at all, especially under the KBC socket. I repair those with pins from (scrap/defective) integrated circuits, bent 90 degrees on both sides of the board then soldered in place.
You will have to remove the power connector, KBC socket, at least the first SIMM slot and maybe the first ISA slot. Replace all the parts with new ones if possible. Also take a look at this. Good luck!

Reply 2 of 4, by stamasd

User metadata
Rank l33t
Rank
l33t

Vinegar treatment done already, as well as rubbing with a brush. Now the board is soaking in distilled water. The KBC socket will need replacing, maybe the power connector except that I don't have a spare for that one. If the first ISA slot is bad I'll leave it alone. The first SIMM may be problematic as the RAM in it is required for the board to boot. If it's bad that may exceed my repair ability.

The main reason I ask for pictures is because I was told by the previous owner that when the battery was removed and a first vinegar treatment was done, a copper trace in that area disappeared completely. But I have no clear indication where that trace was.

I/O, I/O,
It's off to disk I go,
With a bit and a byte
And a read and a write,
I/O, I/O

Reply 3 of 4, by quicknick

User metadata
Rank Oldbie
Rank
Oldbie

I've seen that before - traces that were so corroded that disappeared completely. Eaten by the spill I think, not by the vinegar. But you can clearly see where a trace was, it's very obvious (different colour, texture), especially after cleaning the area.
The reason I said you need to remove those SIMM and ISA slots is because the damage has clearly spread under them and beyond. Of course after cleaning and repairing the damage you have to put back at least the SIMM slot. It will be time consuming and you'll risk doing some more damage without a desoldering station.

Reply 4 of 4, by stamasd

User metadata
Rank l33t
Rank
l33t

Yeah I understand that. I only have a certain amount of skill and tools, and I think removing cleanly a SIMM slot and an ISA slot is beyond me.

FWIW here is a picture of the same area on the rev.8 motherboard that had a similar spill, partially cleaned and before I repaired it. The repair was successful. Only 1 trace was completely broken.

rep1.jpg

I/O, I/O,
It's off to disk I go,
With a bit and a byte
And a read and a write,
I/O, I/O