So I did indeed get the T1900C laptop and I'm happy to report it had the same fault you're seeing! It would give the DC fault where the DC light would extinguish and begin to flash as soon as the power button was pushed.
After initial capacitor replacement of the big electrolytics, the fault persisted and the laptop would only power after heating with a hair dryer for a few seconds.
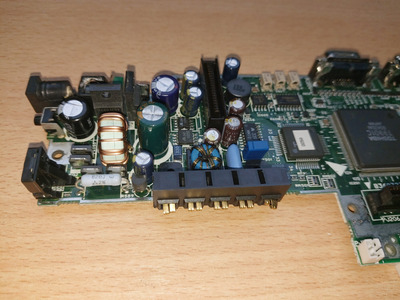
First of all my recommendation is to swap out every one of the 'Elna' brand brown caps since they had all started to leak. You can detect caps that have leaked if you heat the legs of the cap before the board is washed. Sizzling = electrolyte on the PCB, it may also stink of fish.
The ones I had to replace because there leaking were
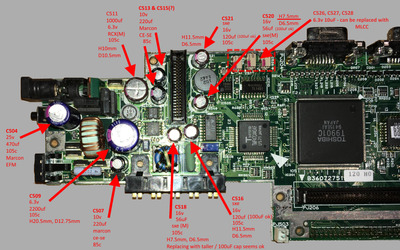
C511 - 1000uF 6.3v 105c. Height: H10mm & Diameter D10.5mm. Replaced with 10v 1000uF of same size
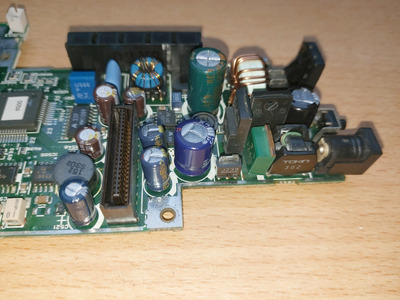
C521 & C518 & C516 (next to C518) - 120uF 16v 105c H11.5mm D6.5mm. C518 was 56uF but I replaced it all 3 of these with 16v 100uF Rubycon caps w/ H11.5mm D6.5mm
C520 (next to R548) - 56uF 16v 105c H7.5mm D6.5mm. Must be replaced with a cap of same height or less. I replaced with 16v 100uF of same size
C509 - 2200uF 6.3v H20.5mm D12.75mm.
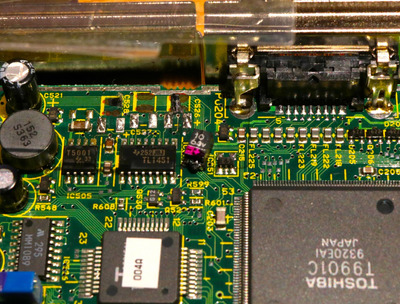
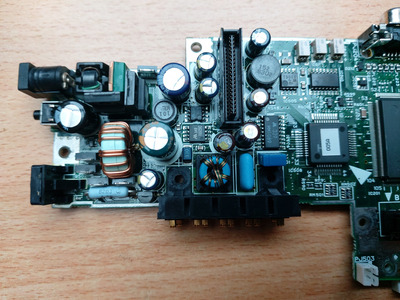
After doing all that, the board would not power up unless heated. So I checked it close up with a torch to look into the board sandwich where that board to board connector is - I spotted some green on the legs of capacitor C63 (33uF 6.3v) on the upper board:
It stunk up the whole room removing that thing. To get these sideways mounted small electrolytic caps off, I found that heating both legs at the same time works best. It's fine to melt the cap body in the process, then using some needle noise pliers twist the body of the cap sideways and it should pop off, taking most of the epoxy with it. Doing it cold results in the cap's plastic body coming off in multiple pieces and leaving epoxy behind.
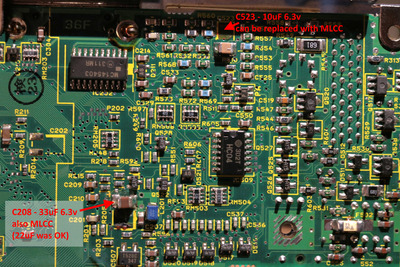
Then the area was cleaned up with fresh solder, cleaned with IPA and rosin flux removed. I'm using MLCC capacitors for these because they're non-polar and shouldn't degrade / leak - the replacement is a 22uF of some voltage above 6.3v.
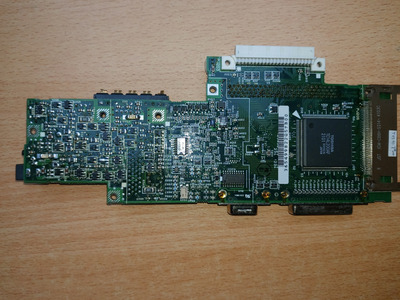
Looking at more of them I found that the 10uF 6.3v C526, C527 & C528 on the the lower board's top-side and C523 on the lower side all needed replacing too, they sizzled when removed so they've also leaked, again 10uF MLCC capacitors were put in their place. Lastly C208 (? I got the names from the maintenance manual, it's low-res) on the underside which was 33uF at 6.3v was replaced just to get them all.
After that the laptop has turned on without issue, hopefully your problem is something similar - looking really closely at your pictures, C528 on your board looks just as crusty as these small bad caps on mine did.

![20240211_103245[1].jpg](./thumbs/46936_516a639547cffc1fdb0b4a778c53f037/20240211_103245%5B1%5D.jpg)
![20240211_103258[1].jpg](./thumbs/46936_93c841d9b25b6d37ff89af1380d63962/20240211_103258%5B1%5D.jpg)
![20240211_103321[1].jpg](./thumbs/46936_2f759bf27fc977096369c06ffaef7e12/20240211_103321%5B1%5D.jpg)
![20240211_103341(0)[1].jpg](./thumbs/46936_cf02e1e4df76099d42616fc923f915d6/20240211_103341%280%29%5B1%5D.jpg)