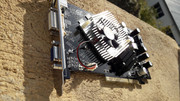
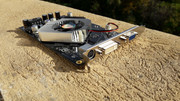
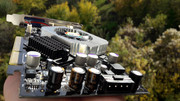
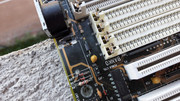
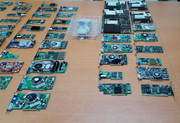
VOGONS


Reply 220 of 844, by Robert B

User metadata
Rank Oldbie
Rank
Oldbie

In other words, THE DIAMONDS are waiting paciently for me to tell you their story. This time the episode will have a GOOD ENDING! 😀

As a note: I never write my stories ahead of time. Usually I have the idea of the title and the way I want to tell the story, and when I rest my hands on the keyboard, it all comes naturally 😁 The stories with the most details are the ones that I present right after I complete my work. Sometimes this is not possible as I might have too many projects ongoing at a time but fear not as I can recall all the details of my work. From time to time I browse this thread to keep the integrity of the memory bank 😁. I never posted a fact that has happened more than a month or at maximum two months ago as I want to keep all the information fresh. If later I find something wrong I correct it swiftly or I add something that I missed.

Last edited by Robert B on 2017-10-26, 20:26. Edited 6 times in total.

Reply 221 of 844, by bjwil1991

User metadata
Rank l33t
Rank
l33t

Speaking of Diamonds, I have a Diamond Multimedia Sound Impact S70 that uses the ESS Maestro-2 ES1968S chipset that is backwards compatible with Sound Blaster Pro (YAY!!!), but sadly, isn't working too well. The MPU-401 and Joystick port get disabled for no reason whatsoever. I had a Diamond Stealth S60 Radeon 7000 clone AGP card back in the day as well until 2005, and the card's been long gone since then (I might have the manual somewhere for it since it has the model number of the card).

Discord: https://discord.gg/U5dJw7x
Systems from the Compaq Portable 1 to Ryzen 9 5950X
Twitch: https://twitch.tv/retropcuser

Reply 222 of 844, by Robert B

User metadata
Rank Oldbie
Rank
Oldbie

THE TWO ROUGH CUT DIAMONDS which needed a polishing (True story 😮)

This story is about DIAMONDS. What kind of DIAMONDS? Graphic cards OF COURSE! I hope you werent thinking about precious stones 😁

Let's meet the DIAMONDS:

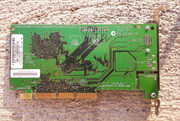
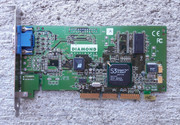
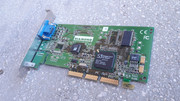
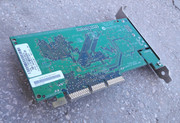
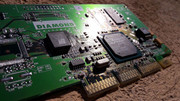
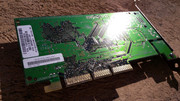
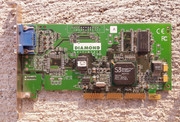
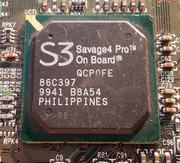
1. Diamond S3 Savage4 Pro - Rev. A - AGP 8MB - Diamond STL III S520 ATX AGP 8MB
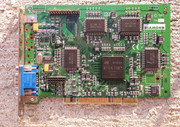
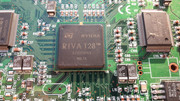
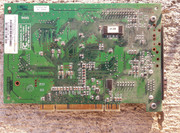
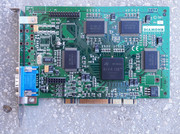
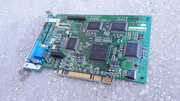
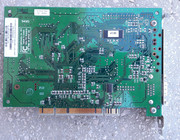
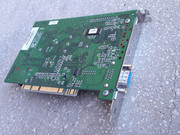
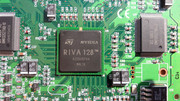
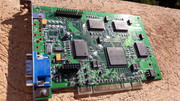
2. Diamond nVIDIA Riva 128 - Rev. D - VIPER V330 PCI 4MB

Both of them came from a seller which I met by accident at the flea market. Together with the ASUS VL/I-486SV2GX4 REV. 2.0 motherboard I also bought the two Diamond cards. For each of them I paid less than 2 EUROs. That's some expensive $$IT! 😁 Yep!

The RIVA 128 was the first that caught my eye and then I saw the Savage 4/Savage4 card. They had the DIAMOND Multimedia logo, so it was a NO BRAINER to buy them both.

Said and done! If I went sooner at the flea market I might've left with my trunk full of other goodies sadly it wasnt the case..... The prices were so low I couldnt belive it.

Diamond S3 Savage4 Pro - Rev. A - AGP 8MB - Diamond STL III S520 ATX AGP 8MB

S4_PRO-001.jpgS4_PRO-002.jpgS4_PRO-003.jpg

This card is in a slightly worse shape than her sister, the beautiful RIVA 128, even so, I managed to make her shine 😀

It was very easy to clean, no heatsinks, no fans, just smooth sailing all the way.

S4_PRO-004.jpgS4_PRO-005.jpgS4_PRO-006.jpgS4_PRO-007.jpgS4_PRO-008.jpgS4_PRO-009.jpg

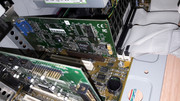
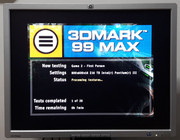
When I finished my work, the Savage 4/Savage4 card still remained with a lot of scars. It prooved to be a survivor and I was very pleased when I was greeted by a clear image on the screen and the 3Dmark 99 run revealed that it was in good working condition.

S4_PRO-010.jpgS4_PRO-011.jpgS4_PRO-012.jpgS4_PRO-013.jpgS4_PRO-015.jpgS4_PRO-014.jpg

I think the performance of the card is nothing to brag about. It is a budget card and I dont think I'll use it in a build in the near future. For now, I'll treat her just as a curiosity, despite its SAVAGE moniker 😁

gallery: https://postimg.cc/gallery/303d2bdt8/

*************************

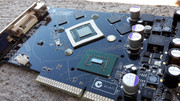
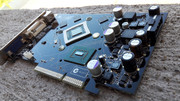
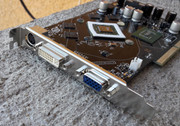
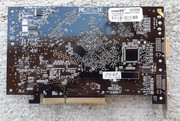
Diamond nVIDIA Riva 128 - Rev. D - VIPER V330 PCI 4MB

It was an absolute pleasure to give back the shine to THIS BEAUTY!

It is compact and nicely built. It made me think of a square piece from a fine chocolate. I almost wanted to eat her 😁 After I cleaned the bracket the card was shining so bright that I could stare a the sun instead of staring at the card 😁

RIVA128-009.jpg

I was right dont you think? Shine my precious relic of times past by! 😁

The card wasnt so dirty but like her sister from above, has some scars on the PCB and some of its chips. Thankfully these are fewer and dont pose any problems.

RIVA128-001.jpgRIVA128-002.jpgRIVA128-003.jpg

I think I dont have to give details regarding the cleaning process. You know the drill 😁 Again smooth sailing. Funny as the simple things are sometimes more rewarding.

Feast your eyes on this!

RIVA128-004.jpgRIVA128-005.jpgRIVA128-006.jpgRIVA128-007.jpgRIVA128-008.jpgRIVA128-010.jpgRIVA128-011.jpgRIVA128-012.jpg

I have a bad habit of first cleaning the cards and then test them. In the end the RIVA 128 was in good working condition. It wasnt able run all the 3Dmark 99 tests because the graphic chip lacked some hardware features but the tests that did ran, revealed a clear image and no artifacts or other problems. SHE'S A WINNER!!!

RIVA128-013.jpgRIVA128-014.jpgRIVA128-015.jpgRIVA128-016.jpgRIVA128-017.jpgRIVA128-018.jpg

gallery: https://postimg.cc/gallery/irnil6ek/

*************************

This story had a happy end. There were no problems out of the ordinary with any of the cards.Even if they came as rough cut DIAMONDS it wasnt long until I made them shine!

More later 😀

Last edited by Robert B on 2018-04-19, 19:43. Edited 1 time in total.

Reply 223 of 844, by Robert B

User metadata
Rank Oldbie
Rank
Oldbie

NEXT WEEK: THE BOX!

InnoVIPWILL 😁

Extra: 7600GS test.

This story will be on the long side and the ending will be....I guess you'll be able to draw a just conclusion 😁

Reply 224 of 844, by Robert B

User metadata
Rank Oldbie
Rank
Oldbie

Itchy trigger finger 😁 Must resist until NEXT WEEK!

The Green Children - Dreamers (Embody Remix)

https://www.youtube.com/watch?v=8Hi4G5nNnQM

I'm hyped even if the results didnt meet my expectations....

I'm giving it my 100% ALL THE TIME!!! 😁

Reply 225 of 844, by PcBytes

User metadata
Rank l33t
Rank
l33t
Robert B wrote:
Itchy trigger finger :D Must resist until NEXT WEEK! […]
Show full quote

Itchy trigger finger 😁 Must resist until NEXT WEEK!

The Green Children - Dreamers (Embody Remix)

https://www.youtube.com/watch?v=8Hi4G5nNnQM

I'm hyped even if the results didnt meet my expectations....

I'm giving it my 100% ALL THE TIME!!! 😁

I'm smelling an Enermax in there.... 😁

That, a 486 build of sorts (Socket 3 and PCI I see) and a 6600GT in the works.

"Enter at your own peril, past the bolted door..."
Main PC: i5 3470, GB B75M-D3H, 16GB RAM, 2x1TB
98SE : P3 650, Soyo SY-6BA+IV, 384MB RAM, 80GB

Reply 226 of 844, by Robert B

User metadata
Rank Oldbie
Rank
Oldbie

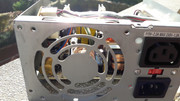
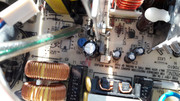
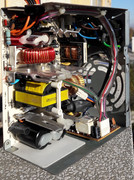
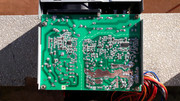
@PcBytes - YEP. She's an ENERMAX alright 😁 THE ONLY BRAND FOR ME! 😁 6600GT - YEP. That motherboard is incomplete...

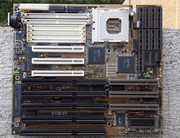
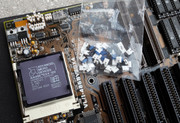
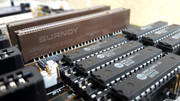
VL/I-486SV2G (GX4) rev 2.0 - BLISS! 😁 - SO DELICIOUS mother(of all)board(s) 😁

Wicked board. I'll save the best for last...a real treat. I still dont know if she's working...

gallery: https://postimg.cc/gallery/3bttyp9kc/

486-_TEASE-000.jpg 486-_TEASE-001.jpg 486-_TEASE-002.jpg 486-_TEASE-003.jpg 486-_TEASE-004.jpg 486-_TEASE-005.jpg 486-_TEASE-006.jpg 486-_TEASE-007.jpg 486-_TEASE-008.jpg

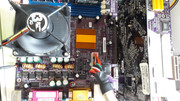
L.E. - it seems the VL/I-486SV2G (GX4) rev 2.0 doesnt play nice with 3V CPUs I dont see the jumper settings for 3V. On the motherboard I can only find the JP32. The JP33 is nowhere to be seen.For testing I'll have to use another CPU to check the BIOS version and if it is the good one I'll put an AMD 586-133MHz.

http://www.elhvb.com/mobokive/Archive/Asus/48 … 4/sv2g-cpu.html
Asus VL/I-486SV2GX4 rev. 2.0. - Voltage selection

The lowest I cand go with the JP32 is 3.45V - not good.

Can I run the AMD A80486DX4-100NV8T at 3.45V? On the CPU it says 3V but on the internet I see that it is a 3.3V CPU ?!?!?

http://www.cpu-world.com/CPUs/80486/AMD-A8048 … DX4-100V8T.html - Vcore 3.3V +/- 0.3V - I'm safe?

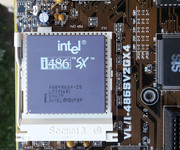
I dont have a socket 3 CPU that runs on 3.45V besides the AMD 586-133MHz....damn...I guess I'll use an Intel 486SX-25MHz - 5V -SX679. YUCK - how slow can you go? I'm RUNNING AS FAST AS I CAN! 😁

Re: Hello, World! :D - Robert B's PC builds - oogle away freely :)

Last edited by Robert B on 2018-04-20, 05:47. Edited 2 times in total.

Reply 227 of 844, by PcBytes

User metadata
Rank l33t
Rank
l33t
Robert B wrote:
Can I run the AMD A80486DX4-100NV8T at 3.45V? On the CPU it says 3V but on the internet I see that it is a 3.3V CPU ?!?!? […]
Show full quote

Can I run the AMD A80486DX4-100NV8T at 3.45V? On the CPU it says 3V but on the internet I see that it is a 3.3V CPU ?!?!?

http://www.cpu-world.com/CPUs/80486/AMD-A8048 … DX4-100V8T.html - Vcore 3.3V +/- 0.3V - I'm safe?

I dont have a socket 3 CPU that runs on 3.45V besides the AMD 586-133MHz....damn...I guess I'll use an Intel 486SX-25MHz - 5V -SX679. YUCK - how slow can you go? I'm RUNNING AS FAST AS I CAN! 😁

Re: Hello, World! :D - Robert B's PC builds - oogle away freely :)

Shouldn't be a problem to run a 3v CPU on 3.45v.

You could also check this PDF from an ECS motherboard. It's got some info about the CPU numbering, along with the NV8T code.

http://www.elhvb.com/mobokive/Archive/Ecs%20- … nual/up8812.pdf

"Enter at your own peril, past the bolted door..."
Main PC: i5 3470, GB B75M-D3H, 16GB RAM, 2x1TB
98SE : P3 650, Soyo SY-6BA+IV, 384MB RAM, 80GB

Reply 228 of 844, by Robert B

User metadata
Rank Oldbie
Rank
Oldbie

THE BOX

This episode will be about the contents of a box I received from a hardware collector from my country.

Several months ago, I received a message from a big 3dfx collector, telling me that he wants te send me a package with some parts. Knowing who he was I said: HELL YEAH! I asked him what would be the content of the package but he told me that he didnt know yet. He said it will contain useful stuff and that I should treat the package as a kinder surprise. Hmmmm...ok.

Months have passed since we have spoken and in the end I received the package. The shipping cost was covered by him even if I told him that I can take care of it.

Who knows, maybe he stumbled from a 3dfx VooDoo 5 5500 and he decided to put it in the box 😁 (just kidding).

I took the package from the local Post Office and surprisingly, I resisted the urge to open it right away and I opened it the next day.

BOX.jpg

The parts were very well packed and after I made a headcount, on the table in front of me I had the following:

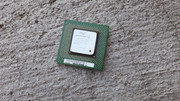
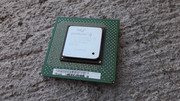
1. Intel Pentium 4 1.7GHz CPU - Willamette, S423, SL57W
2. Inno3D 6600GT - 128MB AGP
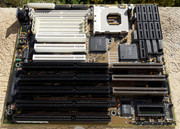
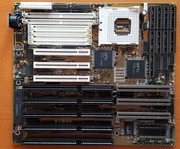
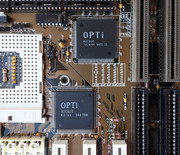
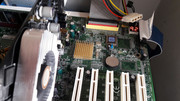
3. A socket 3 VIP REV:A - 3 PCI / 3 VLB / 2 ISA - SIMM 30 PIN /SIMM 72 PIN, chipset OPTi 82C822/82C895 motherboard

Hmmmmm..................ok?

BOX001.jpgBOX002.jpgBOX003.jpgBOX011.jpgBOX012.jpg

gallery: https://postimg.cc/gallery/34k2q1rek/

Intel Pentium 4 1.7GHz CPU - Willamette, S423, SL57W

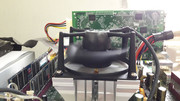
When I opened the box, the first thing I saw was a CPU that was stuck on a heatsink. WHAT THE ….?!?

I never saw a P4 Willamette CPU in the flesh, so I wondered what it could be? It was obvious it was a CPU.

After a quick inspection I found a sticker with some numbers and letters. I googled the string of numbers and letters and it said it was a P4 Willamette CPU . At that time I didnt knew the model. The search only returned a part from DELL computer.

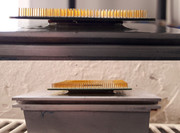
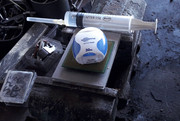
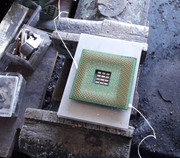
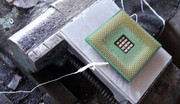
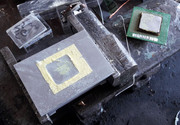
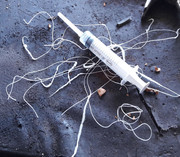
The CPU was so stuck on the heatsink that I just couldnt move it even a fraction of a fraction of an inch. Holy COW! At first I tried to use a hair dryer to heat up the heatsink but this got me nowhere. After this, I tried to use isopropyl alcohol 99% and I soaked the heatspreader and the surrounding area using a syringe. I did this for about 30 minutes and I added more alcohol after it evaporated. The thermal compound started to soften but the CPU didnt budge at all. In the end I used dental floss (a lot) and I secured the heatsink in a vice to hold it well. This proved the winning combination and I separated the parts. The leftover paste on the CPU was so hard to remove with isopropyl alcohol 99% that in the end I used a cotton stick and a small quantity of acetone to clean it. The paste from the hole in the heatsink was cleaned with a needle, a bamboo stick and a lot of paticence. I took great care not to get the acetone in that hole. In any case, the acetone used was in minute quantities and it evaporated quickly. The acetone is quite potent and you should be careful when and how you use it. After this, I used a little bit of metal polish paste and a rag, to get back the shine from the CPU heatspreader.
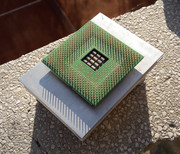
P4-1.7-001.jpg P4-1.7-002.jpg P4-1.7-003.jpg P4-1.7-004.jpg P4-1.7-005.jpg P4-1.7-006.jpg P4-1.7-007.jpg P4-1.7-008.jpg P4-1.7-009.jpg P4-1.7-010.jpg P4-1.7-011.jpg P4-1.7-012.jpg P4-1.7-013.jpg

gallery: https://postimg.cc/gallery/2exwymulo/

This was a first for me. Separating a CPU from a heatsink. In the end I was left with a part that I cant use as I dont have a P4 S423 motheboard or any P4 motherboard to be more precise. Maybe in the future I might need it. The aluminun heatsink with a proprietary retaining system which I dont have, went into the trash bin.

Inno3D 6600GT – 6600GT-AGP W/128MB DVI TV DDR3 – I-A 6600GT F5F3

I loved this card as soon as I laid my eyes on it. The black PCB made me want to buy the finest swiss milk chocolate and eat it all, in a heartbeat! 😁

I inspected the card thoroughly. Soon, I saw some problems but at that moment they didnt bother me.

Inno3_D-6600_GT-001.jpg

Quickly I took the card apart.

The bracket was cleaned and polished by hand.

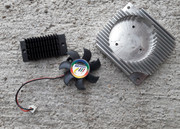
Next came the cleaning of the heatsinks and of the fan. Both of the heatsinks were so stuck that I had to use the hair dryer to heat them up and separate them. That PINK STUFF IS NASTY!!!

The fan was easily cleaned. Regular design in need of OIL. No problems.

Inno3_D-6600_GT-016.jpgInno3_D-6600_GT-017.jpgInno3_D-6600_GT-018.jpgInno3_D-6600_GT-019.jpg

The leftover paste on the heatsinks was cleaned using acetone, isopropyl alcohol 99% followed by a wash with hot water and detergent.

Both came out sparkling. 😁
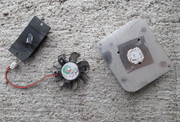
Inno3_D-6600_GT-002.jpgInno3_D-6600_GT-003.jpgInno3_D-6600_GT-004.jpgInno3_D-6600_GT-005.jpgInno3_D-6600_GT-020.jpg

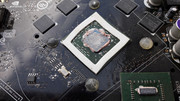
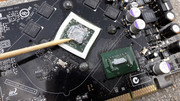
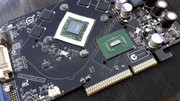
Cleaning the thermal paste from the graphic chip and the AGP bridge chip was another story. I needed 45 minutes and a lot of patience to get the results I wanted. I had to soak them several times in isopropyl alcohol 99% and then use a bamboo stick to remove that solidified S..T!!!

In the final round I took a fine needle and I cleaned a small ceramic capacitor that was covered in pink stuff. It was nerve-racking but it was worth it. After this, all the parts were as good as new.
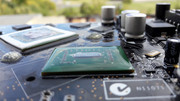
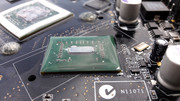
Inno3_D-6600_GT-007.jpgInno3_D-6600_GT-008.jpgInno3_D-6600_GT-009.jpg

Stage 1

Inno3_D-6600_GT-006.jpg

Stage 2

Inno3_D-6600_GT-010.jpgInno3_D-6600_GT-011.jpg

Stage 3

Inno3_D-6600_GT-012.jpg

Stage 4

Inno3_D-6600_GT-013.jpgInno3_D-6600_GT-014.jpg

Next came the cleaning of the PCB. In this phase I looked closely at the“ problems” that the card had. A massive hit on the back and a missing ceramic capacitor near the AGP connector. A second ceramic capacitor was hanging for dear life.

The area on the back of the card that took a massive hit had to cleand with a pointed awl because the three solder pads that were affected looked as if they were in contact and I was afraid they might short out. In the end I was pleased with the results of my work.

I replaced the missing ceramic capacitor from a donor card. I'm was not so pleased with the results and I really need to buy a Soldering Iron Hot Air Gun Rework Station.
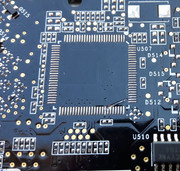
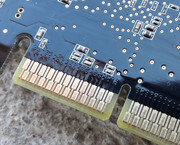
Inno3_D-6600_GT-022.jpgInno3_D-6600_GT-021.jpgInno3_D-6600_GT-015.jpg

I checked again the PCB for other signs of damage. I received more bad news. I knew that the card was a little deformed. Some sagging from usage is normal, but I didnt expect that the card would be twisted. I say twisted in the loose sense of the word. It suffers from sagging due to normal use and a deformation in the opposite direction due to the massive hit on the back...

Inno3_D-6600_GT-023.jpg

Clean as a whistle.

Inno3_D-6600_GT-024.jpgInno3_D-6600_GT-025.jpgInno3_D-6600_GT-026.jpgInno3_D-6600_GT-027.jpgInno3_D-6600_GT-028.jpgInno3_D-6600_GT-029.jpgInno3_D-6600_GT-030.jpgInno3_D-6600_GT-031.jpgInno3_D-6600_GT-032.jpgInno3_D-6600_GT-034.jpg

This card was cleaned after the PNY 4600Ti from before and my gut feeling was telling me that this one is also DEAD! The PCB of the 4600Ti also had a strange shape. I still hoped I might me wrong…

I used ARTIC MX-4 to put back the heatsinks and I took the mandatory glamour shots.
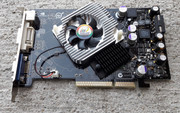
Inno3_D-6600_GT-035.jpgInno3_D-6600_GT-036.jpgInno3_D-6600_GT-037.jpgInno3_D-6600_GT-038.jpgInno3_D-6600_GT-039.jpgInno3_D-6600_GT-040.jpgInno3_D-6600_GT-041.jpgInno3_D-6600_GT-042.jpgInno3_D-6600_GT-043.jpg

SO NICE.

All this time the voice inside was telling me: “she’s DEAD you can’t do nothing about it!”...

THE MOMENT OF THE TEST CAME SOON.

… …. ….. ……………… ………………………!

Which test? NO IMAGE TEST! Yep DEAD! Oh well…lets move on to better things. I guess. At the very least she’s a stunner. The card returned no image no matter what I tried.

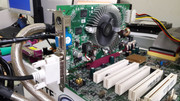
I tested the card on a AGP 8X EPOX EP-8RDA3i + Athlon XP 2500+ platform and because this one showed some problems regarding RAM detection and other errors I took out my trusty work horse: AGP 4X ECS K7VTA3 3.1 + Athlon XP 1900+, but to no avail. NO IMAGE means NO IMAGE! Period.

GONE with the WIND.

gallery: https://postimg.cc/gallery/2kpk7rip8/

UNKNOWN socket 3 VIP REV:A - 3 PCI / 3 VLB / 2 ISA - SIMM 30 PIN /SIMM 72 PIN, chipset OPTi 82C822/82C895 motherboard

On the bottom of the box I received I also found a motherboard. I say A motherboard because I was unable to determince the exact model. The only thing I could find was a cryptic VIP REV:A. What's up with that? Are you a clone of a clone or something? 😁

Someone suggested that the manufacturer might be FIC as he also had a FIC motherboard with the VIP designation. I couldnt verify this.

The motherboard is missing the BIOS chip. The only part that could've help me identify the motherboard.F..K! NO model NO BIOS Nothing to do…

I found small traces of corrosion from the battery. I used vinegar to remove most of them.

The lack of jumpers and CACHE chips is no big deal

The capacitor near the CPU socket was loose and I had to resolder it.

The motherboard has a desirable layout. The CPU socket is at the top, out of the reach of extension cards. The POWER connector is well placed. It has PCI/ISA/VLB slots. 72 and 30 pin memory slots.

I cleaned it well and I took the decision to not lose any more time with it.
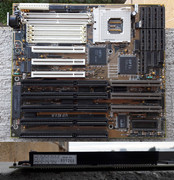
UNKNOWN-_MB-001.jpg UNKNOWN-_MB-002.jpg UNKNOWN-_MB-003.jpg UNKNOWN-_MB-004.jpg UNKNOWN-_MB-005.jpg UNKNOWN-_MB-006.jpg UNKNOWN-_MB-007.jpg UNKNOWN-_MB-008.jpg UNKNOWN-_MB-009.jpg

gallery: https://postimg.cc/gallery/zxt73xbg/

I wanted to post a more positive story but in the end this is what it is. I must present the facts as they happened. I didnt sugar coat the story but I had to show a little bit of restrain when I present it to you.The reasons are obvious.

I had something to do that kept my HW demons in check and you had something to read 😁 At least from this perspective this story is a WIN.

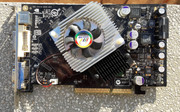
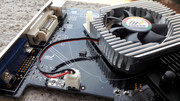
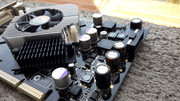
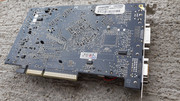
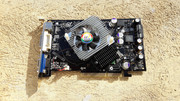
EXTRA: Leadtek WinFast A7600 GS TDH 256MB 128bit AGP TEST

Re: Hello, World! :D - Robert B's PC builds - oogle away freely :)

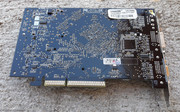
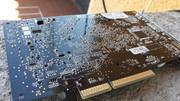
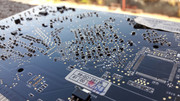
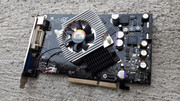
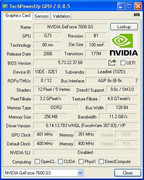
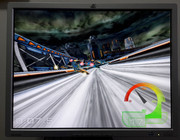
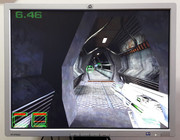
The Leadtek 7600GS was bought a few months ago from the flea market for the low low sum of 2.17 EURO. It was cleaned and then put in the box. Only now I got to test her and THANK GOD it didnt dissapoint me. She’s firing on all its cylinders! WIN! WIN! WIN!

Testing session over the course of 7 hours.

1.EPOX EP-8RDA3I / ATHLON XP 2500+ / 2x1 GB DDR 400 KINGMAX / WDC 800 JB / ENERMAX EG365AX-VE(G) 353W / DVD-RW LG GSA-4163B
2.ECS K7VTA3 3.1 / ATHLON XP 1900+ / 2x1 GB DDR 400 KINGMAX / WDC 800 JB / ENERMAX EG365AX-VE(G) 353W / DVD-RW LG GSA-4163B

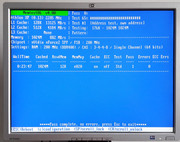
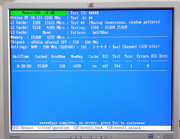
On this occasion I also tested the KingMax DDR400 3x512MB si 2x1GB RAM sticks that I bought this year. Again I received good news as I registered ZERO errors in MEMTEST. Even the 1GB DDR400 that was missing a pad on its connector was OK. Unbelievable...

Re: Hello, World! :D - Robert B's PC builds - oogle away freely :)

Leadtek 7600GS

TST-001.jpg TST-002.jpg TST-003.jpg TST-004.jpg TST-005.jpg TST-006.jpg TST-007.jpg TST-008.jpg TST-009.jpg TST-010.jpg TST-011.jpgTST-017.jpg TST-018.jpgTST-19.jpg

Inno3D 6600GT

TST-012.jpg TST-013.jpg TST-014.jpg TST-015.jpg TST-016.jpg

gallery: https://postimg.cc/gallery/1x6ksdy0c/

More to come:

1.A Pentium II CPU rises from its ashes
2.Housekeeping aka heastinks, RAM and some FUN
3.Minebea to the rescue!
4.Almost, VLB Heaven…
Last edited by Robert B on 2018-04-20, 05:48. Edited 3 times in total.

Reply 229 of 844, by Robert B

User metadata
Rank Oldbie
Rank
Oldbie

Sneak peek from the: Almost, VLB heaven... story 😁

REMEMBER_ME.jpg

Last edited by Robert B on 2018-04-19, 19:45. Edited 1 time in total.

Reply 230 of 844, by amadeus777999

User metadata
Rank Oldbie
Rank
Oldbie

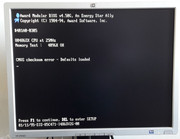
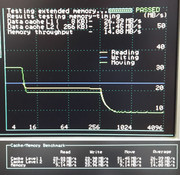
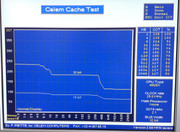
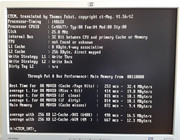
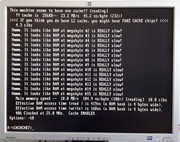
I like the 486 stuff - it would be nice if you could post some bench scores(speedsys + cachchk) regarding the VL/I-486 SV2GV4!

Reply 231 of 844, by Robert B

User metadata
Rank Oldbie
Rank
Oldbie

I ran a few benchmarks but since I dont have a more powerful CPU that can run at 3.45V, 3.6V, 4.0V or 5V I had to use the crappy Intel 486-SX 25MHz 5V for the testing session. The BIOS version 0401 doesnt support my AMD 5x86 133MHz and I didnt want to use an AMD 486DX2-66MHz or an AMD 486DX4-100MHz at a voltage of 3.45V as they are rated at 3V. For this reason and a few more, the story that will cover the VL/I-486 SV2GV4(GX4) is named: Almost, VLB Heaven... 😀

I had damaged CACHE chips which had to be replaced. I tried combinations of different types 32 pins and 28 pins. The whole story will be posted later this month. Some results must be taken with a grain of salt as I'm pretty sure the slow Intel SX CPU is to be blamed.

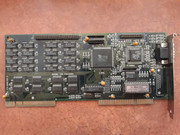
I had to use an ancient Trident TVGA9000C ISA video card with only 512KB video memory. This is the slowest video card I have ever used 😁 I dont have a VLB video card ATM.

Also, the Asus motherboard was very picky about RAM capacity, type, manufacturer, SS,DS and the way you populate the slots. The manual posted by Phil on his site was very helpful 😀

https://www.philscomputerlab.com/asus-vli-486sv2gx4.html

Once you figure out the way you have to work with the VL/I-486 SV2GV4(GX4) it's rock solid. I love this board. As this was the first VLB system I have ever used I was thinking it would be much harder to work with. Luckily it wasnt so and I have another point of interest to look for, when I'm going retro HW hunting 😀

I have this board, a nice VLB controller with 2xHDD, FDD, Printer port, COM 1, COM2, a Creative AWE64 GOLD, a nice IBM 3.3GB HDD, a Minebea PSU but I dont have a good VLB video card and a fast CPU. In any case, the stuff I have can be the begining of something awesome later.

I saw at a contact of mine a great ET4000W32P VLB with 4MB!!! of video memory but I dont think it is for sale. The missing C41 ceramic capacitor was replaced and the card tested OK! L.E. - it has been sold.

IMG-20171030-_WA0000.jpg

VL-_I-_TST-001.jpg VL-_I-_TST-002.jpg VL-_I-_TST-003.jpg VL-_I-_TST-004.jpg VL-_I-_TST-005.jpg VL-_I-_TST-006.jpg VL-_I-_TST-008.jpg

gallery: https://postimg.cc/gallery/2xi5378x8/

Last edited by Robert B on 2018-04-19, 19:46. Edited 1 time in total.

Reply 232 of 844, by amadeus777999

User metadata
Rank Oldbie
Rank
Oldbie

Really dig the older stuff... the SV2G_4 seems to be a top notch, if not, the top notch board.
Any of the cpus you mentioned can be run at 3.45 or 3.6 Volt. I have an AM5x86-133 running at 4 Volt. I'm not aware of a board that just outputs 3V - the HOT433 for example provides 3.3-, 3.45-, 3.6-, 4.0- and 5.0V. most other boards are not that flexible and just give you 3.45- and 5V.

Reply 233 of 844, by Robert B

User metadata
Rank Oldbie
Rank
Oldbie

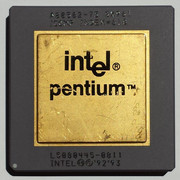
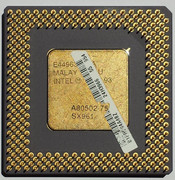
Good to know amadeus777999. I got cold feet and I didnt want to damage my only 486DX2-66 and 486DX-100 CPUs. I have three 5x86 133MHz CPUs but the motherboard needs another BIOS chip/version to recognize them. 3.3V would've been great but that 3.45V seemed too much. I wont pump 4V in a 586 anytime soon 😁 For the performance I would get out of that I have a few Pentiums - 75, 100, 133, 166, 200 ...😁

intel-75-1.jpgintel-75-2.jpg

Next week a little story of a PII 450MHz...😁

I tear up a PII, THE SECOND me sorts it out and THE OTHER ME pats himself on its back for a JOB well DONE.

On that BOMBSHELL...I leave you hanging 😁 (The Grand Tour S2 is less than a month away 😁 )

PII450-037.jpg

Last edited by Robert B on 2018-04-19, 19:46. Edited 1 time in total.

Reply 234 of 844, by Robert B

User metadata
Rank Oldbie
Rank
Oldbie

"...Let's come together
Right now, oh yeah
In sweet harmony..."

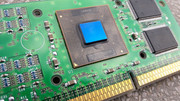
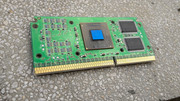
A Pentium II CPU rises from its ashes

While I'm listening to the song above, I'm trying to remember the steps I took a few weeks ago, to make this PII-450MHz the BEST in my "small" collection. A feat easy to accomplish, as this PII-450MHz is the ONLY Pentium II 450MHz that I have 😁. The Winner at the PII-450 category is none other than the PII-450!!! 😁 Talk about a rigged competition ...sshheeessh.....

For some time, I was looking for a PII-450MHz - TOP OF THE LINE for the GooD Ol' Pentium II. I have in my collection a PII-333MHz/66 which I can easily overclock to 500MHz/100, a few PII-350MHz and 400MHz but nothing beats a TRUE PII-450MHz, at least from a bragging rights perspective.

I found my 450 on a sheet of plastic at the GOOD OL' flea market. I bought it together with the PNY GF4 4600Ti and it was really cheap 2.1 EUROs. CHEAP very CHEAP!

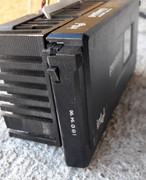
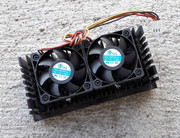
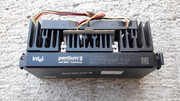
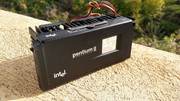
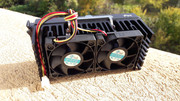
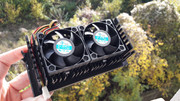
When I first saw it, it was standing with the fans right up and I thought it was an Athlon Slot A CPU but after I took it in my hands I saw that it was a Pentium II. I lifted the chromed retaining latch of the heatsink and I looked at the markings on the cartridge. BAM! The magic number 450 was there !!! SWEET!!! IT'S A KEEPER!!!.

So, I bought the thing but I wasnt going to just put it in a box and forget about it...far from it. (I'm sure you know me well by now....)

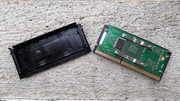
Pentium II 450MHz - SL2U7

Arrival State

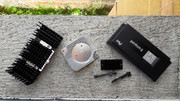
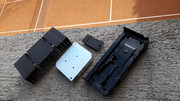
The PII was in an average state of decay. Some dust, some dirt, some scratches but it was complete. One of the ends of the SECC cartridge retaining clips was sheared but that wasnt such a big deal. I searched in my BOX O' PARTS for a replacement retaining clip but the search returned a BIG FAT ZERO so the CPU was left with only one ear, good enough I would say...+1 is better than nothing 😁

gallery: https://postimg.cc/gallery/282uj2s6u/

PII450-000.jpg PII450-001.jpg PII450-002.jpg PII450-003.jpg PII450-004.jpg PII450-005.jpg

Cleaning

The cleaning was a straight forward task. BAM! - teardown. BAM! - hot water and dergent bath for the plastic and metal parts. BAM! - isopropyl alcohol 99%. BAM! - Patience and an eye for details. Easy as 3.14

PII450-006.jpgPII450-008.jpgPII450-009.jpgPII450-011.jpgPII450-012.jpgPII450-013.jpgPII450-014.jpgPII450-015.jpgPII450-016.jpgPII450-017.jpgPII450-018.jpgPII450-019.jpgPII450-020.jpg

The thermal paste was bye bye and I still wonder how someone uses a 20 years old CPU and doesnt take this fact into consideration. YO GUYZ! check my sizzlinng PII with V2 SLI. YEP sizzling alright... Opening a SECC cartridge might be a little nerve-racking but it is not too difficult to do. With practice comes self confidence.

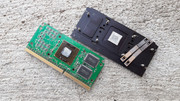
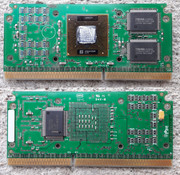
When I first saw the PCB, I thought I was looking at a Pentium III and I might've been wrong if I didnt already know that it was a Pentium II.

All nice and clean. Looking good you SEXY piece of HW pr0n!

The cleaning of the fans was a breeze. Tear-down / Cleaning / Final Assembly. I also cleaned the stickers from the back.I always try to keep the parts I clean as close to original as possible.

Again I was very pleased with the results.

PII450-021.jpgPII450-022.jpgPII450-023.jpgPII450-024.jpgPII450-025.jpgPII450-026.jpgPII450-027.jpgPII450-028.jpgPII450-029.jpgPII450-030.jpgPII450-031.jpg

Nice! Nice!! Nice!!! - Smooth sailing.

gallery: https://postimg.cc/gallery/3fh8unz92/

Small repairs

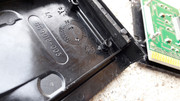
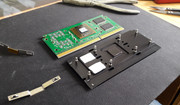
The opening of the SECC cartridge is sometimes accompanied by some light damage.You can't make an omelet without breaking eggs.... Sometimes, the separation of the plastic cover of the SECC cartridge from the CPU heatplate ends with the breakage of a plastic element. When you open a SECC cartridge this part is always the hardest to separate. I'm pretty sure this is an anti-tampering measure and it's something that comes with the territory. It breakes or it is left intact - luck of the draw.

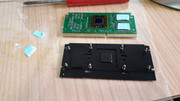
In the case of MY PII-450 the plastic element broke and I glued it back. I also did a test to see how was the fit between the plastic cover and the heatplate before I put back the CPU. I had to use a round file to enlarge the hole in the retaining plastic element for an easier fit and perhaps a future teardown 10 years from now 😁

PII450-007.jpg

The opening of the SECC cartridge was left with some light scratches on the inside of the anodized heatplate even if I took the precaution to wrap my tools in electrical tape...

All in all these minor blemishes are nothing compared to the signs of wear that the CPU already has. The only thing is that I KNOW ABOUT THEM!!! ....😁...

All things considered, I would do this again and again. No question about it.

After I sorted the plastic cover of the SECC cartridge my attention shifted to another classic problem, the one of the contact between the heatplate and the CACHE chips. I always try to establish this contact no matter what.

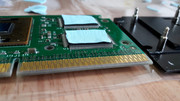
As you can see in the photo bellow the gap between the CACHE chips and the heatplate is quite BIG! GG! Intel.

PII450-010.jpg

I have opened quite a few SECC CPUs - Slot 1 and Slot A, and I saw an impressive variation in size of the space between the CACHE chips and the heatplate. The gap is usually left empty and only in the case of the SLOT A CPUs I saw a small quantity of some kind of thermal paste which was applied quite sloppy. I'm pretty sure that back in the day, no one would've taken the time to have thermal pads of different sizes to fill the gap between the CACHE chips and the heatplate. The variation in the manufacturing process was too great and besides, the CPUs worked great without this additional hustle. What's curious though, is the fact that all the SECC CPUs I opened had a special zone for the contact between the heatplate and the CACHE chips....

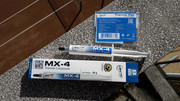
For the task of putting back the PII-450MHz I bought some Arctic MX-4 20g thermal paste and Arctic Thermal Pad de 1 mm.

PII450-032.jpg

I have been using ARCTIC MX-4 for over 10 years. Lately I tried Noctua NT H1 thermal paste but I didnt even like the way it looked not to mention that on the Noctua site it says that it has a durability of 3 years("Recommended usage time (on the CPU) up to 3 years"...). So I returned to my trusty MX-4 which has a life of at least 8 years FTW!!! I know that 20 years from now the MX-4 will also dry out...but in my case the MX-4 fits the bill.I really dont want to rise a discussion about thermal pastes...

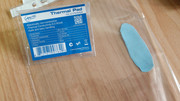
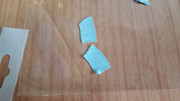
Do you remember the variation between the CACHE chips and the heatplate? The 1mm thernal pad was to thick (to fit in memory 😁 )....if I would've bought 0.5mm thermal pad I'm sure it would've been to thin. The Artic Thermal pad is soft so I did something that I've done before and made some "custom" thermal pads.

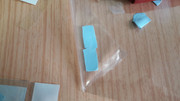
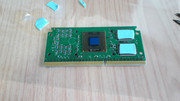
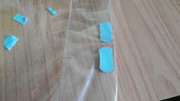
I took a piece of the soft blue Arctic thermal pad and I placed it inside a sheet of plastic. I used a metal cylinder/wood cylinder/the handle of a screwdriver and I flatened the pad. After each pass I also did a contact test to see if the pads werent to thick and I didnt put additional stress on the PCB of the CPU....

A job for an old chinese man...

Stage 1

PII450-033.jpgPII450-034.jpgPII450-035.jpg

Stage 2

PII450-036.jpg

Stage 3

PII450-037.jpgPII450-038.jpg

...Stage X PERFECT!!!

PII450-039.jpgPII450-040.jpgPII450-041.jpgPII450-042.jpgPII450-043.jpg

The contact between the CACHE chips and the heatplte isnt always spot on, in the sense that the zone in the heatplate is sometimes offset or has a smaller size than that of the CACHE chips... variation in the manufacturing process...etc

Another secondary effect of the opening of a SECC cartridge is the enlargement of the holes in the plastic cover so I had to use two small strips of a double sided heat resistant thermal tape to keep the cover from rattling. NO PAIN NO GAIN!!!

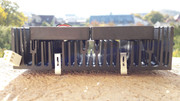
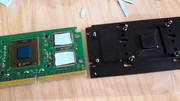
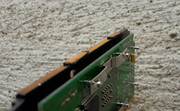
After I have established the contact between the CACHE chips and the heatplate there was another matter to deal with, that of the contact between the heatplate and the heatsink. Unfortunately, the end of the heatsink has a step and that leads to smaller contact zone. In the past I have used thermal grease to transfer the heat but in this case I resorted to small pieces of a soft pad made from silicone. For the area of contact between the heatsink and the CPU die I used ARCTIC MX-4. If the retaining clips of the heatsink would've been stronger it would've been better...

PII450-044.jpgPII450-045.jpg

gallery: https://postimg.cc/gallery/1hcx92vxy/

Why go through all this HELL? : low temps means a happy CPU 😁

Final Results

Almost good as new!

PII450-046.jpg PII450-047.jpg PII450-048.jpg PII450-049.jpg PII450-050.jpg PII450-051.jpg

gallery: https://postimg.cc/gallery/1b648lovq/The SLOT 1 CPUs are bulletproof. I've yet to find a dead one.

I did a quick test and sure enough the PII-450 woke up and ran great.

I'm starting to love Slot 1 CPUs and I dont know if it is a bad thing or not 😁 just another thing to add on my list of possible candidates for my collection....😁

I also tested a PII-350MHz CPU and a Celeron 366A like the one I had back in the day and they worked from the get go. BULLETPROOF!!!

I really like parts before the year 2000, heavy duty!

Enjoy!

Slot1-_TST-001.jpg Slot1-_TST-002.jpg Slot1-_TST-003.jpg Slot1-_TST-004.jpg Slot1-_TST-005.jpg Slot1-_TST-006.jpg Slot1-_TST-007.jpg Slot1-_TST-008.jpg Slot1-_TST-009.jpg Slot1-_TST-010.jpg Slot1-_TST-011.jpg Slot1-_TST-012.jpg Slot1-_TST-013.jpg

P.S. I ran the 3Dmark99 test only on the PII-450MHz.

MORE, NEXT WEEK!!! 😁

Last edited by Robert B on 2018-04-19, 19:47. Edited 1 time in total.

Reply 235 of 844, by Robert B

User metadata
Rank Oldbie
Rank
Oldbie

Beer? CHECK!!! Beer Assistant? Hardware NOT FOUND! 😁 well...Beer is still GOOD!

Let's get on with the next EPISODE.

Housekeeping aka heastinks, RAM and some FUN

After the previous episodes in which I presented a lot of goodies now is the time to take into consideration other vital components which sometimes are left aside. Heatsinks & RAM baby!

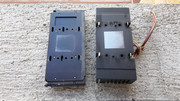
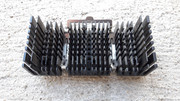
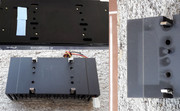
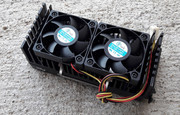
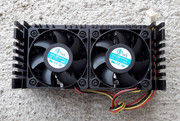
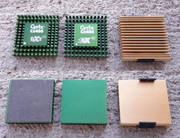
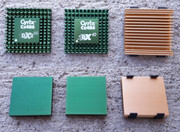
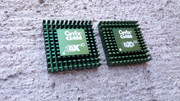
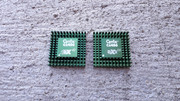
Cyrix HEATSINKS

In one of the visits I took at the flea market this October, I found three interesting pieces.

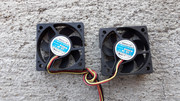
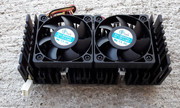
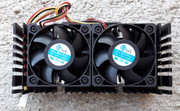
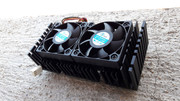
As I was browsing the merchandise, something green caught my eye. I'm talking about the unmistakable green colour of the Cyrix heatsinks. At first, I was put off by the prospect of digging in a big pile of various heatsinks and I turned ready to walk away. I saw the two green Cyrix heatsink form far away and my pulse soon rised as I saw someone else looking at them.

It didnt take long and the thought: WHAT IF THERE IS SOMETHING GOOD IN THAT FRIGGIN PILE? started to haunt me and several seconds later I was digging in the pile! 😁

I started digging and soon I found two green Cyrix 4x86 DX 40MHz si DX-2 66MHz heatsinks. Unfortunately the ceramic processors were long gone as I'm sure they were processed for GOLD RECOVERY! RIP!

As a BONUS I found a Pentium heatsink.

I paid less than 2 EUROs for the lot and I refused the generous offer of almost 4 EUROs for the pile of nondescript heatsinks.

They were cleaned and will be kept in a box. I dont know when or if I'll use them...too bad the CPUs were gone...

gallery: https://postimg.cc/gallery/1mqgn7rcs/

HS-001.jpg HS-002.jpg HS-003.jpg HS-004.jpg

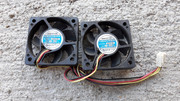
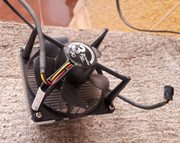
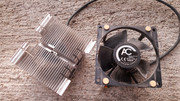
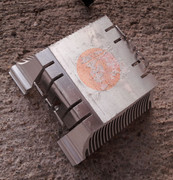
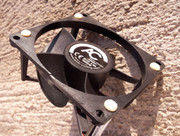
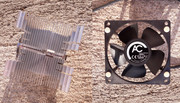
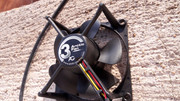
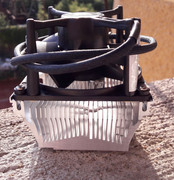
Arctic Cooling Copper Silent 3

This heatsink was the result of antother trip at the flea market. It was bought for less than 2 EUROs and underwent a well deserved SPA treatment.

I was very pleased by the cooling performance, looks and level of noise of the cooler. The FAN is running great.

I had to straighten the retaining bracket as it was a little out of line. A pair of pliers and a good eye were just what the doctor ordered! 😁

I glued back the frame of the fan.

gallery: https://postimg.cc/gallery/1joo0sb3w/

AC3-001.jpg AC3-002.jpg AC3-003.jpg AC3-004.jpg AC3-005.jpg AC3-006.jpg AC3-007.jpg AC3-008.jpg AC3-009.jpg AC3-010.jpg AC3-011.jpg

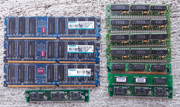
RAM Random Access Memory

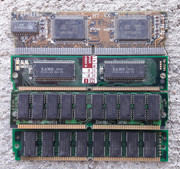
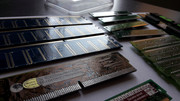
All this RAM was also the result of a few visits I took at the flea market 😁 The 30 and 72 pins SIMMs came as a gift when I bought the Diamond Savage 4 PRO, Diamond RIVA 128 and the ASUS VL/I-486SV2GX4 REV. 2.0 motherboard.The KingMax RAM was found during the visit I bought the PII-450, PNY 4600TI and the Riva M64.

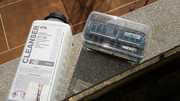
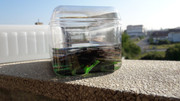
To clean all this RAM quickly, I resorted to a bath in isopropyl alcohol 99%.I dont think I'm going to repeat this operation anytime soon as I used more isopropyl alcohol 99% than it was needed but even so I wasnt sorry for the waste as it was for the GREATER GOOD! 😁

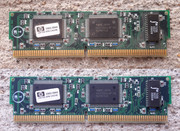
Last year I bought a ACorp 5VX32 motherboard. It came without a C.O.A.S.T - Cache On A STick module and I was on a lookout for such a thing.

I found my first C.O.A.S.T. module on a visit at the flea market - 256KB COAST module Elpina HT-VX Ver. 3.1 It was placed on a shelf near a DURON 750MHz ceramic CPU. It was in bad shape and it was obvious it had a contact with water. Even so, I wanted it. I paid less than 2 EUROs and the seller thought it was a SIMM stick 😁

I also found my second C.O.A.S.T. module at the flea market.It was plugged in a HP motherboard- 256KB SPB CACHE - COAST module - HP 0960-094. It was pretty difficult to get out of the slot and I had to negociate with the seller to pay less for the damn thing. She looked at me and said to herself that I can pay more for it even if she didnt know what it was 😁

I think that the next time I'm going to the flea market I'm going to wear some shabby outfit to keep the prices low 😁

gallery: https://postimg.cc/gallery/dhgadc8s/

MEM-001.jpg MEM-002.jpg MEM-003.jpg MEM-004.jpg MEM-005.jpg MEM-006.jpg MEM-007.jpg MEM-008.jpg MEM-009.jpg MEM-010.jpg MEM-011.jpg

some FUN?

If you wonder where is the FUN part in this episode I think you're missing the point. All of this was a very satisfying activity 😀 I treat each component in an equal manner even if we are talking about a 3dfx VooDoo or a SIMM memory stick...

More later.

Last edited by Robert B on 2018-04-19, 19:48. Edited 1 time in total.

Reply 236 of 844, by amadeus777999

User metadata
Rank Oldbie
Rank
Oldbie

Nice - the 486 heatsinks look great!

Reply 237 of 844, by Robert B

User metadata
Rank Oldbie
Rank
Oldbie

Minebea to the rescue!

Minebea? MINEBEA! Mi-ne-be-A? Yeah man! A++

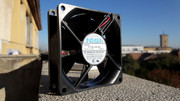
We all know that a PSU is an important part of any PC build. Without it, we wouldn't be able to do anything with our computers aka A BIG FAT Z-E-R-O and here I'm not talking about the Mitsubishi A6M3 Zero Model 22 (NX712Z) 😁

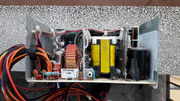
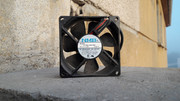
Ever since I was thinking about starting this project, Good Old Days, it became obvious that at some point in time I will also need a few good quality AT PSUs. At that moment I didnt know what I was going to find or what I wanted. In February 2015, when for a modest sum of money I bought lots of nice components, I also received a Minebea 200W AT PSU. I liked it the moment I saw it: good cables, solid, well built, heavy duty case, silent ball bearing fan, THE REAL DEAL. When I opend it up for cleaning I was impressed by the build quality. I'm no guru in regard to PSUs, but I liked what I saw inside. That particular PSU had two sets of AT motherboard power connectors. It might've been used on a dual CPU system. It is the exact PSU from the 5x86 Build and (Re)Build posted on the thread. It was manufactured in 1996 and still has OK voltages. She's sitting pretty powering a 5x86 and it isnt even seriously using all its capacity. Running cool and quiet as it should. In a way she's retired and now takes it easy 😁

Fast forward to October 2017, when at the flea market I found the little sister of the above mentioned PSU. For a very low price it was mine.The case had some spots of light rust but I still bought it, as I knew that it was more important what's on the inside than what I could see on the outside.

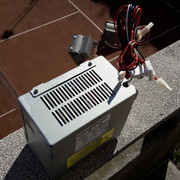
It came without a power switch and from the looks of it, it never had one as the connector that was supposed to to be in contact with the ON/OFF switch might've been connected directly to the motherboard. I looked at the pictures of my other Minebea PSU and from a paper clip, I improvised a bridge between the black and gray wires and I was able to test the PSU with a HDD and use it for testing the system that will be presented in the next episode: Almost, VLB Heaven. I wasnt disappointed and the PSU is still in parameters firing on all its cyclinders.WIN WIN WIN!!!

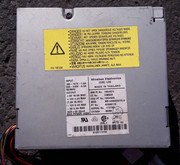
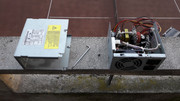
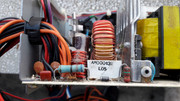
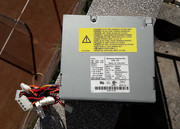
Meet the MINEBEA Electronics 73G4374 145W manufactured in 1995! Nice year, me in highschool still without a PC which came in 1996 😁..... GOOD TIMES!!! It seems soo long ago...

From the model number it might've come from an IBM PC.

Minebea145_W-001.jpg

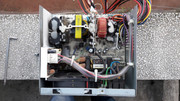
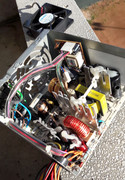
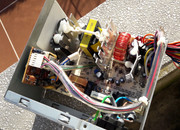
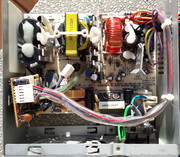
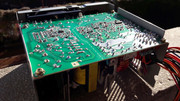
The construction is elegant and after I removed two screws, that were kind of special, I had in front of me the part that interested me the most: THE NAKED TRUTH! 😁

Nice NICE Nice - shake it BABY!!!

Minebea145_W-002.jpgMinebea145_W-003.jpgMinebea145_W-004.jpgMinebea145_W-005.jpg

The interior was a little dusty and to my relief I saw not signs of damaged components. The capacitors were DANDY. I found a shriveled spider inside and it seems that in this case we didnt find a bug in the system but a spidey IN THE HOUSE! 😁

NICE! Less work for me.

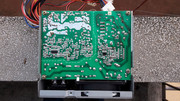
Minebea145_W-005.jpgMinebea145_W-006.jpgMinebea145_W-007.jpgMinebea145_W-008.jpgMinebea145_W-009.jpgMinebea145_W-010.jpg

Some magic: Elbow grease and Isopropyl alcohol 99%.

Minebea145_W-011.jpgMinebea145_W-012.jpgMinebea145_W-013.jpgMinebea145_W-014.jpgMinebea145_W-015.jpgMinebea145_W-016.jpgMinebea145_W-017.jpgMinebea145_W-018.jpgMinebea145_W-019.jpgMinebea145_W-020.jpgMinebea145_W-021.jpgMinebea145_W-022.jpgMinebea145_W-023.jpgMinebea145_W-024.jpgMinebea145_W-025.jpgMinebea145_W-026.jpgMinebea145_W-027.jpg

The rusted areas were cleaned with a rust remover solution and then painted. I didnt want to fully restore the case.

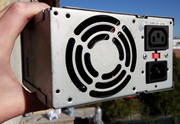
The exhaust grill is easily recognizable and if you see it, check out that PSU. If IBM used them in their PCs there is no reason to pass them.

Why do I want to use and OLD PSU? I know I could use a new ATX PSU with an AT adapter but where's the fun in that? The real deal is always THE REAL DEAL there is no substitute.

Let's talk about voltage.

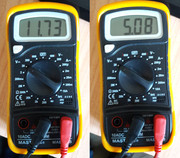
With just a HDD connected I registered 11.63V on the 12V rail and 5.12V on the 5V rail.

Minebea145_W-028.jpg

When I used the PSU to power a motherboard, CPU, RAM, cooler, VLB controller combo, the situation changed but the voltages were still OK: 11.72V on the 12V rail and 5.08V on the 5V rail.

Minebea145_W-029.jpg

After 22 years the PSU is still good and I'm sastisfied with my purchase. The voltages are well within spec. For sure, this PSU will be used in a future build. ALIVE AND KICKING!!!

For now, it will be sitting paciently in a box and not on top of a heap of electronic waste ready to be minced. 😀

gallery: https://postimg.cc/gallery/186fkhdvg/

More later. (I foresee that the next episode will be a monster, at least in regard to the length of it 😁 we'll see later 😁)

512 KB...soooo much memory 😁 of times past 😁

TRIDENT.jpg

Last edited by Robert B on 2018-04-19, 19:48. Edited 1 time in total.

Reply 238 of 844, by Robert B

User metadata
Rank Oldbie
Rank
Oldbie

Special episode 😁 Soon, pictures with my army 😁

ARMY.jpg

Atesh K. - Don't Know What to Do (Original Mix)
https://www.youtube.com/watch?v=LeYA3HrQ2zk

Last edited by Robert B on 2018-04-19, 19:49. Edited 1 time in total.

Reply 239 of 844, by Robert B

User metadata
Rank Oldbie
Rank
Oldbie

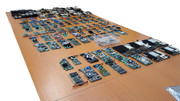
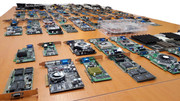
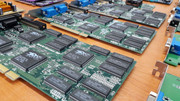
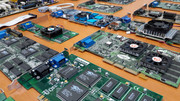
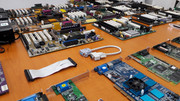
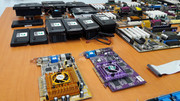
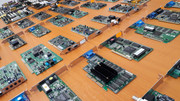
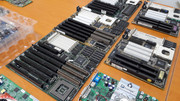
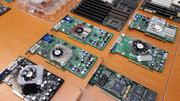
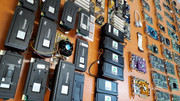
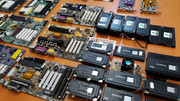
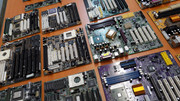
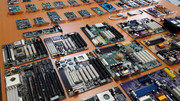
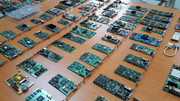
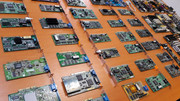
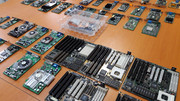
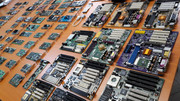
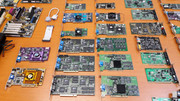
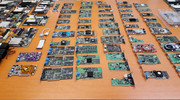
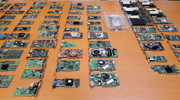
Today is the national day of my country and because I had a few free hours, I decided to do something I was planning for some time. So, a special episode was born 😁

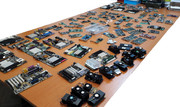
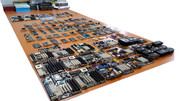
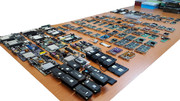
I took out the stars of the episodes I posted until now and I wanted to see how they look together. Let's call it a reunion 😁 All have been cleaned and returned to their original glory. You've seen them and read about them in the pages before.

The entire operation took about two hours and a half. I also took my time, to better sort all the parts and I put all the non-functional items in separate boxes.

The pictures do not contain: the three completed builds, a big box of cables, a big box of fans and heatsinks, a small box of ram, a few CPUs, the HDDs, FDDs and the ODDs, three PSUs, about 40 floppy discs and 100+CDs, plus several miscellaneous items 😁 . I was afraid to take them out as I was sure that it would take me the entire day to take pictures and put them back in their boxes.

If I wanted I could've had at least three times more parts and I must say it feels kind of scary 😁

Bellow are the results of almost three years of "work". I didnt try too hard to find them and I had short periods of intense activity followed by long periods of inactivity.

When I saw them all lined up in front of me I felt a great satisfaction. YEAH BABY!!!

Enjoy!

gallery: https://postimg.cc/gallery/1uo4lc5q4/

Special-001.jpg Special-002.jpg Special-003.jpg Special-004.jpg Special-005.jpg Special-006.jpg Special-007.jpg Special-008.jpg Special-009.jpg Special-010.jpg Special-011.jpg Special-012.jpg Special-013.jpg Special-014.jpg Special-015.jpg Special-016.jpg Special-017.jpg Special-018.jpg Special-019.jpg Special-020.jpg Special-021.jpg Special-022.jpg Special-023.jpg Special-024.jpg Special-025.jpg Special-026.jpg Special-027.jpg Special-028.jpg Special-029.jpg Special-030.jpg Special-031.jpg Special-032.jpg Special-033.jpg Special-035.jpg Special-036.jpg Special-037.jpg Special-038.jpg Special-039.jpg

Last edited by Robert B on 2018-04-19, 19:49. Edited 1 time in total.