Claptone - No Eyes (feat. Jaw)
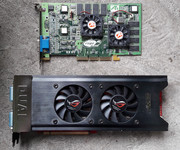
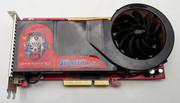
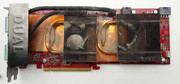
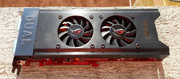
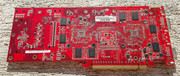
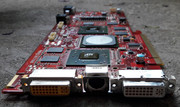
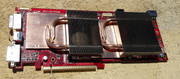
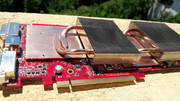
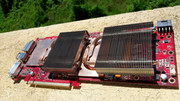
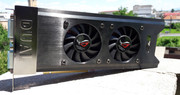
The RED Beast!
As you probably already know, my luck regarding ATI cards is legendary ... bad ... yep. I dont see many ATI cards at the flea market and when I find them I think twice before I make a purchase.
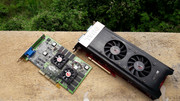
The card featured in this episode is A MONSTER. I saw it briefly and that was enough: I WANT IT! I put my hands on it and I loved the weight of the mammoth. I knew well this feeling as I've experienced it many times since all this retro madness has started. There's always something "new" at the horizon. Something that stirs you up. FRESH! FRESH! Fresh from the dumpster, of course.
I bought the ATI Radeon 3870x2 on a Sunday, in July this year. The price was low. I haggled a bit and I managed to drive the price down. The day was rainy but it cleared up a bit after 12.00 o'clock and that was the window I was waiting for. That day I scored more good stuff besides the ATI card.
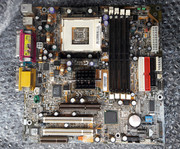
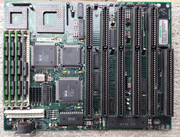
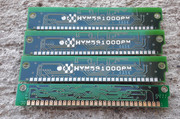
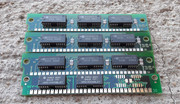
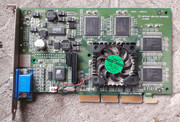
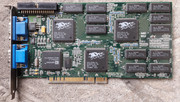
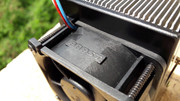
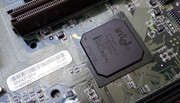
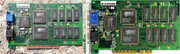
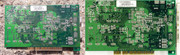
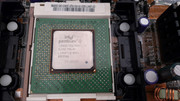
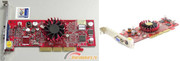
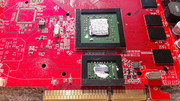
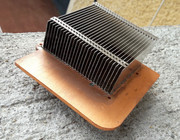
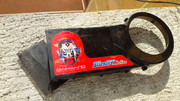
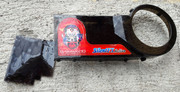
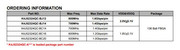
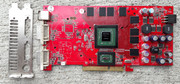
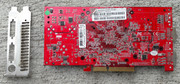
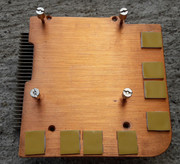
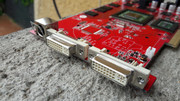
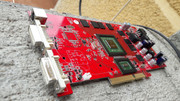
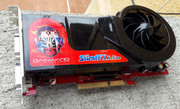
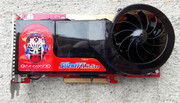
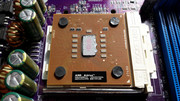
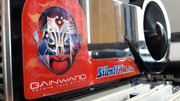
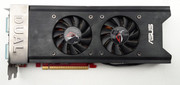
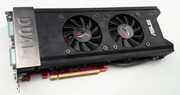
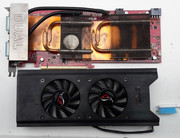
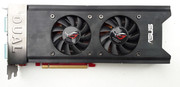
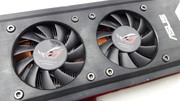
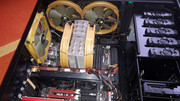
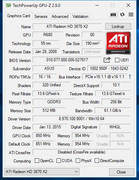
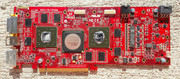
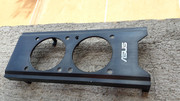
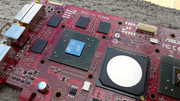
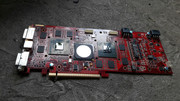
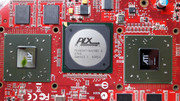
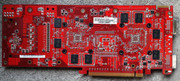
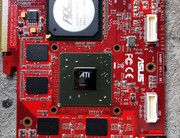
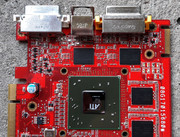
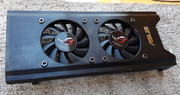
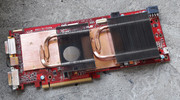
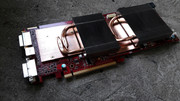
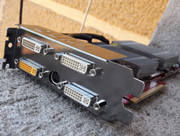
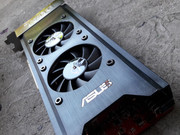
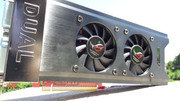
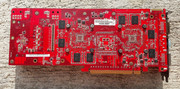
Meet the ASUS ROG HD 3870 X2 TOP (EAH3870X2-TOP/G/3DHTI/1G)
In the past I avoided many times to buy from the flea market, newer cards and especially PCI-E cards. The reasons are obvious: the danger of missing ICs, the difficulty to restore them, the risk of them beeing dead is far greater than in the case of older parts, etc.
The irony is that I broke this "rule" for an ATI card. Never say never ... they say.
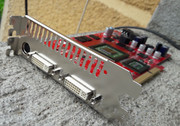
So I was stuck with the little ASUS. 😁
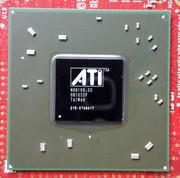
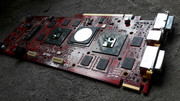
Another fact to consider is that the 3870x2 (2008) is the second ATI dual-GPU card after Rage Fury MAXX (1999). I'm talking about ATI factory cards. If it was working it would've been awesome. Only 10 years have passed since it was introduced and it feels old. Life is in overdrive.
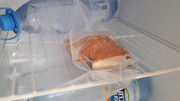
I left the card in the trunk of my car, but soon after that I brought it into the house and I decided to clean it and give it a go to see what's what.
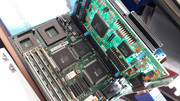
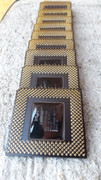
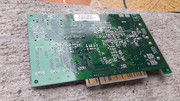
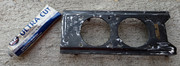
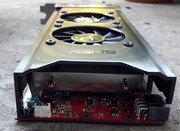
The 3870x2 was full of dust and fingerprints. The fingerprints were very stubborn and werent removed by IPA 99%.
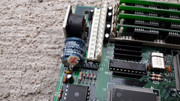
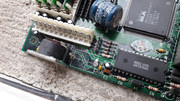
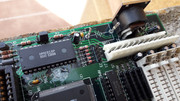
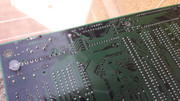
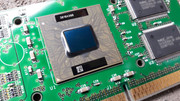
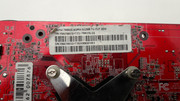
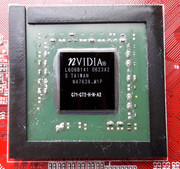
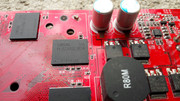
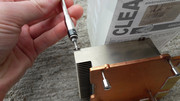
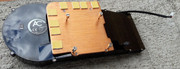
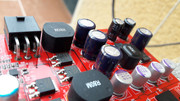
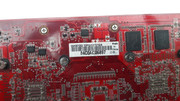
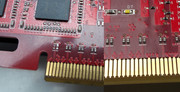
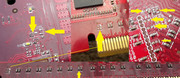
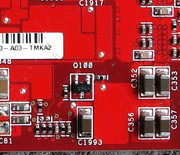
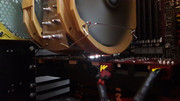
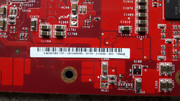
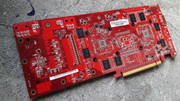
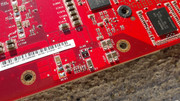
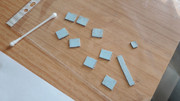
Before I bought it, I looked to see if something was missing on the back. At that time I didnt see anything suspicious. Later while I was cleaning it, I saw that it was missing two ceramic capacitors above the PCI-E connector and a third one was hanging for dear life.
I soldered the third one and I decided to find and solder the other two, the following day.
After this cold shower I felt I bought a wreck. My enthusiasm was going down...
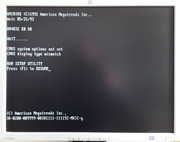
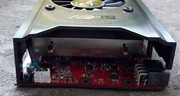
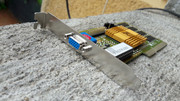
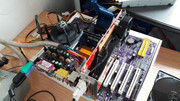
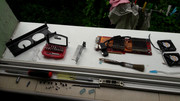
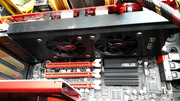
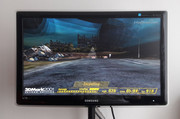
Ready for testing.
IN YOU GO!
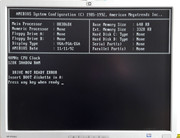
POWER ON! - nothing, black screen - NO SIGNAL!!!
Damn son, I told you not to buy crap form the flea market.
My gut feeling said it was alive. Was I mistaken?!
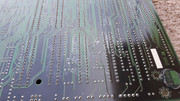
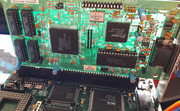
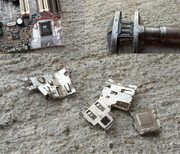
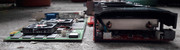
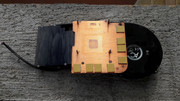
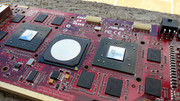
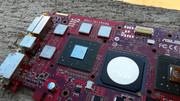
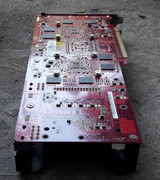
I took out the card from the PC and I conducted a thorough examination. Inch by inch.
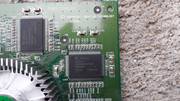
Soon, I recevied more bad news.
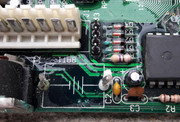
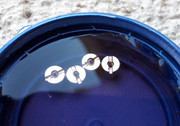
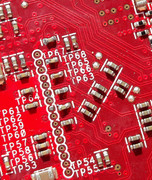
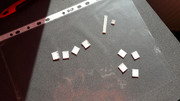
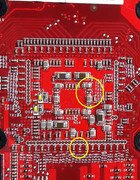
MIA: 1 resitor, 1 transistor with unkown specs, one more ceramic capacitor hanging for dear life, 6 ceramic capacitor missing.
Not a pretty picture.
I didnt gave up and I hatched a rescue plan. I still believed that the card was alive.
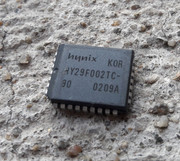
I didnt know the specs of the missing transistor and I couldn't find detailed pictures on the internet. In many instances, articles written 10 years ago werent available. Such a shame.
So I looked for a solution.
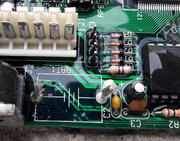
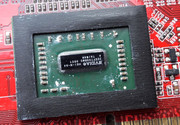
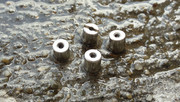
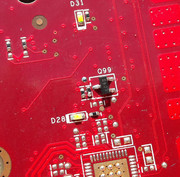
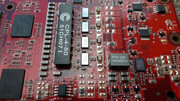
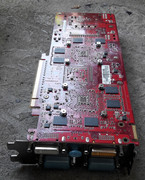
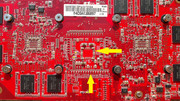
The missing transistor was marked Q99. I searched for Q98 but I didnt find it so I looked for Q100. Luckily at Q100 I found two resistors and one tranzistor.
The similarity between Q99 and Q100 put me on the right path. I decided to transplant at the Q99 location one resistor and one tranzistor with the same specs as those at Q100.
The donor was a Medion ATI X740 XL.
This was the first time when I had to solder this many tiny components. The results arent my best work but I have accumulated experience and now I can do them a lot better.The solder job was verified and it is as strong as it can be.
In the past I used a soldering iron to remove the ceramic capacitors from the PCB and it was tedious.
Lately, I use gentle persuasion and I remove them flea market style. 😁 They come off surprisingly easy. A gentle tap with a set of pliers on the head of a fine screwdriver and they are free. A fact to remember when I decide to buy such complex cards from the flea market.
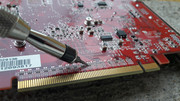
I used NO CLEAN flux when I soldered the missing parts as I wanted to test the card before I cleaned it. Even so, I used cotton sticks dipped in IPA 99% and a soft brush to remove the leftover flux and/or tiny bits of solder.
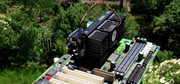
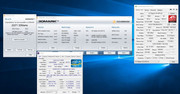
I put the card in the PC.
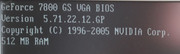
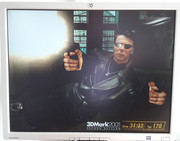
POWER ON!
WIN! WIN! WIN!
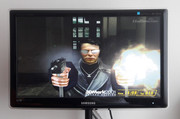


The satisfaction I felt was OFF THE CHARTS!!! A highly addictive drug, believe me.
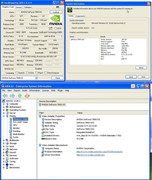
Clean bill of health.

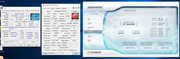
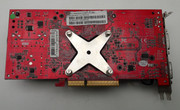
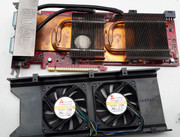
After I found out that the card was A-OK came the moment to clean it properly and restore it to its former glory.
Let's get to work!
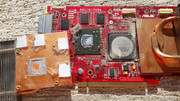
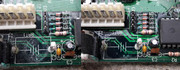
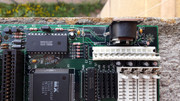
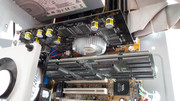
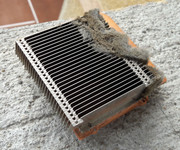
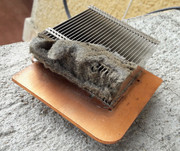
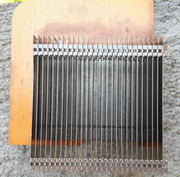
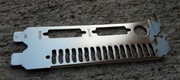
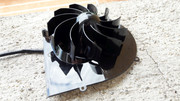
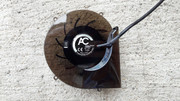
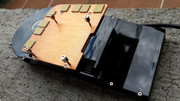
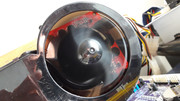
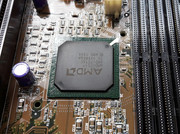
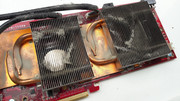
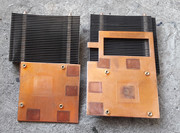
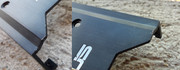
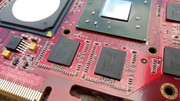
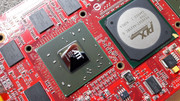
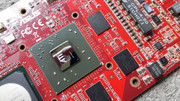
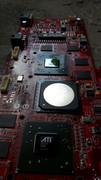
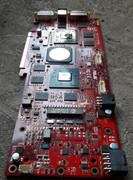
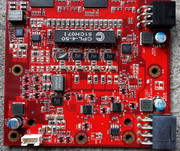
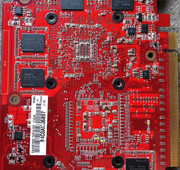
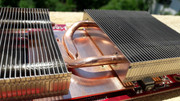
Close-up with the problem areas.

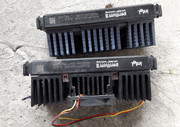
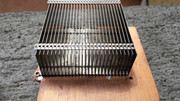
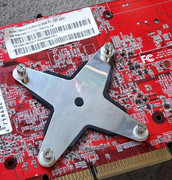
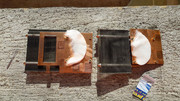
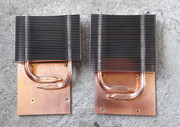
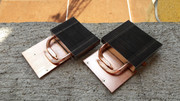
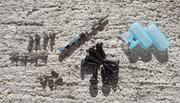
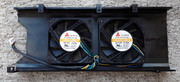
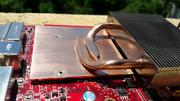
First I tackled the heatsinks. Full of dust, hardened TIM and tired thermal pads. I decided to save the pads as they were softer than what I had available and I didnt know the exact width. I didnt need more problems.
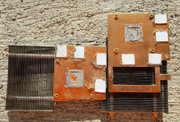
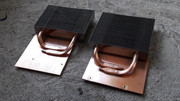
I decided to restore the shine of the copper even if I knew that it will not last. I didnt use vinegar as it might've affected the silver fins.
I used small amounts of metal polishing paste and with patience I got the desired results.
The base of the heatsinks was left as it was.
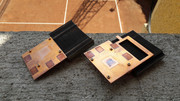
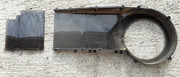
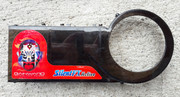
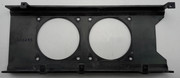
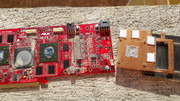
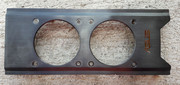
After I finished with the heatsinks I worked on the other metal parts.
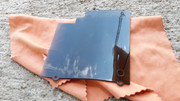
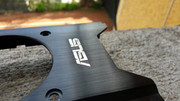
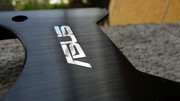
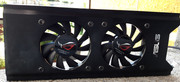
I tried to remove the fingerprints from the anodized aluminium shroud but to no avail. I used IPA 99%, tar remover, brake cleaner, metal polishing paste, paint polishing paste and none worked, so I gave up. The upside was that after all of this, the shroud was squeaky clean.

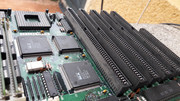
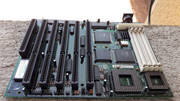
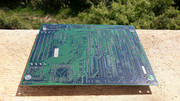
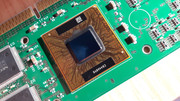
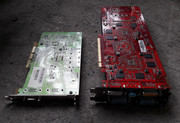
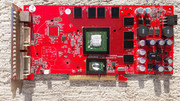
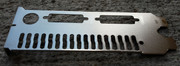
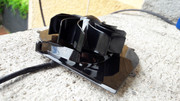
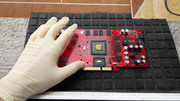
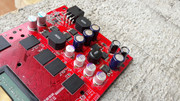
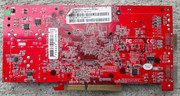
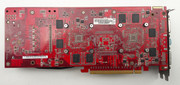
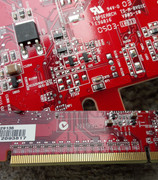
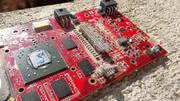
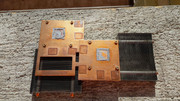
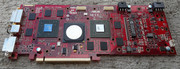
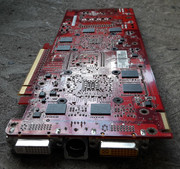
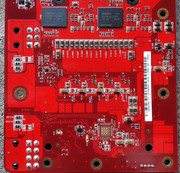
The PCB was cleaned well.
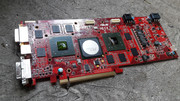

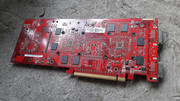

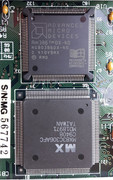
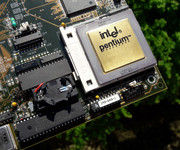
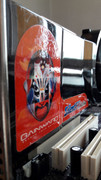
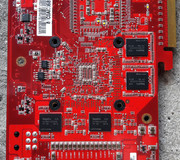
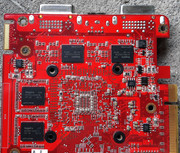
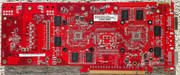
I added a few high res pictures. Maybe someone will find them useful.

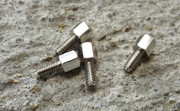
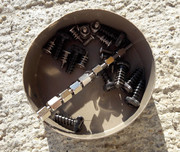
I prepared the screws and other small parts.
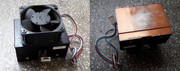
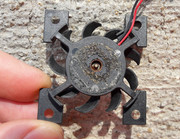
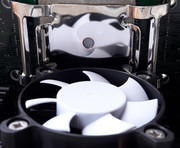
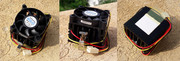
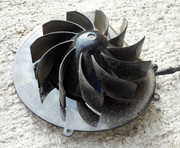
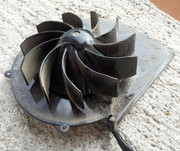
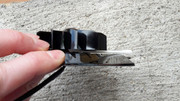
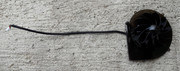
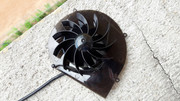
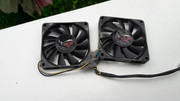
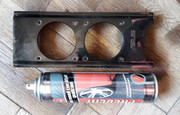
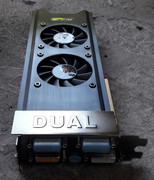
The fans received some SPA TREAMENT.
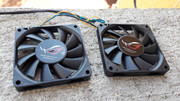
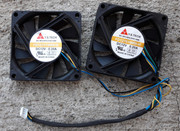
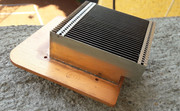
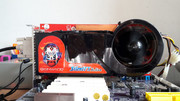
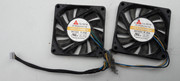
Looking good!
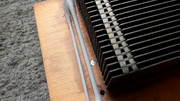
I left the problem of the pads, for last.I cleaned them as much as I could with cotton sticks and IPA 99%. I had to be extra careful as the IPA99% softened up the pads and I didnt want to destroy them. I was very gentle with them, fully aware of the problems I was facing in the event of a disaster.
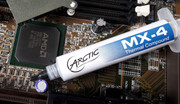
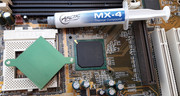
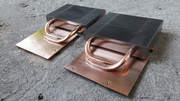
The rest was almost smooth sailing except the fact that I mounted the first heatsink and then the second one. I had to lign up the fixing holes using a source of light without touching the TIM on the GPU or the four pads on the memory. BUMPY RIDE! I used Arctic MX-4 for the GPU's.
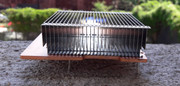
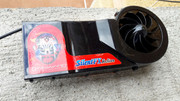
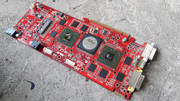
The results? He, he, he, watch for yourselves 😁
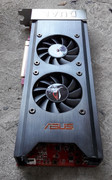

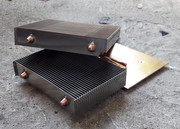
Back from the gutter!!!
Normally this would the happy end of the story but it isnt so. 😁
While I was preparing the pictures for this episode I saw that two more ceramic caps were missing on the back of the card.
I soldered back the missing caps. The card is now at 100% 😁
gallery: https://postimg.cc/gallery/oohsxgy6/
More later. 😁