VOGONS


First post, by sam95

User metadata
Rank Newbie
Rank
Newbie

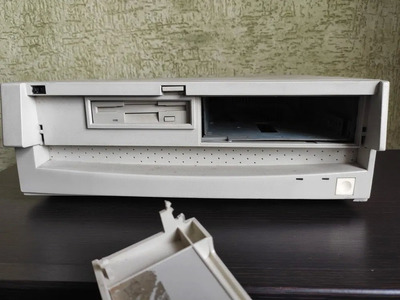
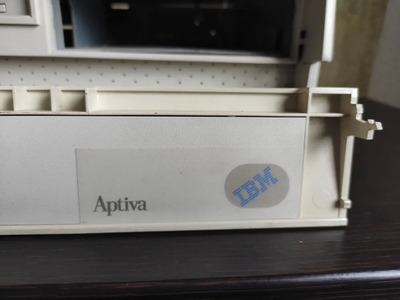
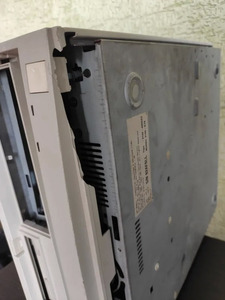
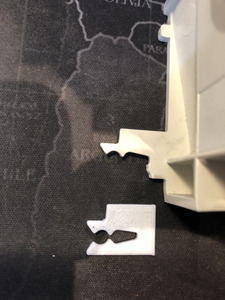
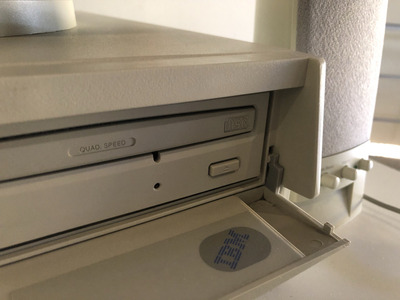
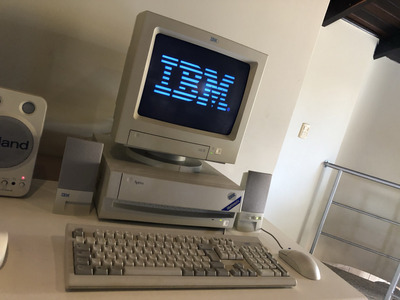
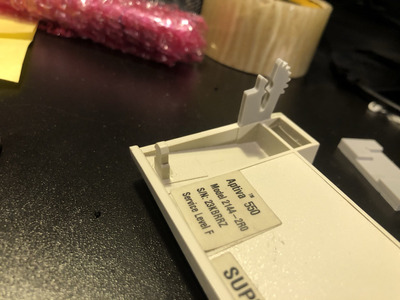
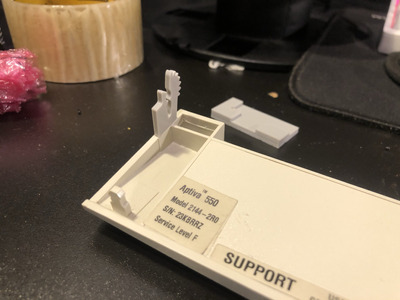
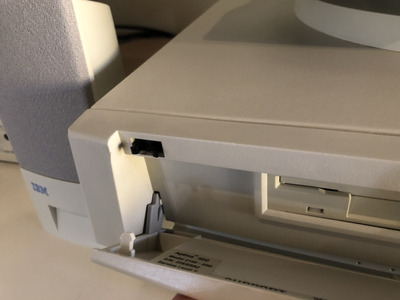
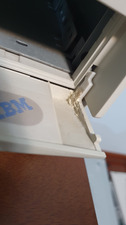
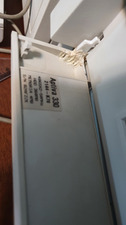
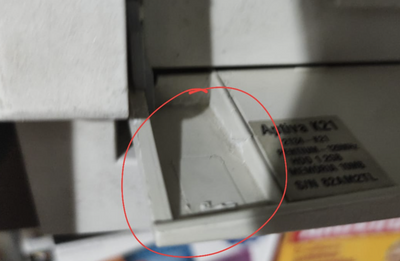
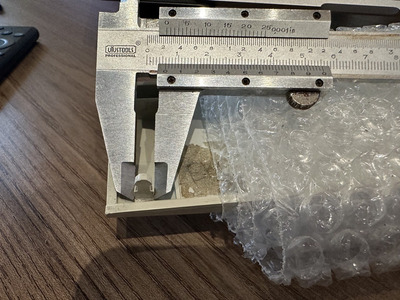
I just bought an Aptiva 2144 that took a tumble and part of the front console and the front panel hinges are broken. I want to restore it to its full glory. My plan is to model the broken sections, 3D print them, and fuse to the original part (also got some metal to unbend).

Front console seems straightforward, as it should be roughly symmetrical and I can copy the other side and mirror.

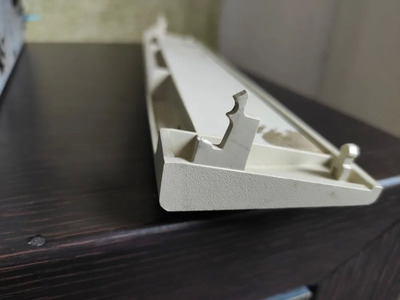
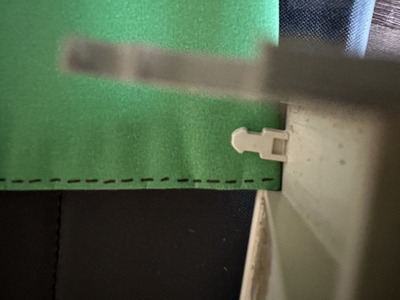
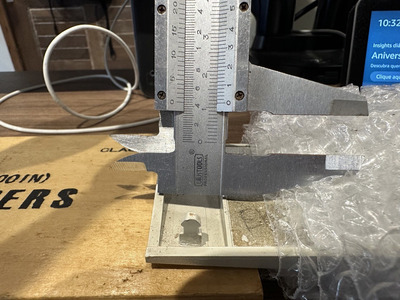
But the hinges, I've never seen them not-broken. So here's the ask: can anyone with a Desktop Aptiva (model 2144) take the front panel out (big ask) and upload some high res images with scale so I can model them?

I imagine this could end up being useful to more people, as I've seen more than a few 2144s with broken hinges.

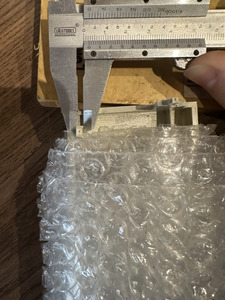
Attached gory details of the busted boi I'm waiting in the mail.

Cheers!

Attachments

Reply 1 of 13, by ildonaldo

User metadata
Rank Member
Rank
Member

That's some refurbishing project you are up to - I don't envy you ...

My best guess would be a straight approach:
a) replace the complete hinges by a 3D print (maybe with some additional support struts) and attach them with superglue
c) cut out the broken part with a dremel and replace it with a 3D print
d) see if you can carefully remove the IBM sticker and spray paint the parts (either with RAL 9002 grey white or RAL 1013 oyster white, both in silk mat)
... if you fit the broken part following the edges, the seams will probably be almost invisible.

I know that's a lot of work ...
Otherwise you can just wait till another broken case turns up that you can strip, but this could take a while and it would be only half the fun 😉

Building my own PCs since 1991 - for my retro builds it's "no CF-disks, no Floppy emulators, no modern cases etc.", only the real and authentic stuff whenever possible.

Reply 2 of 13, by sam95

User metadata
Rank Newbie
Rank
Newbie

Here's what I came up with so far, right hinge (works pretty good),

IMG_6197.jpg
Filename
IMG_6197.jpg
File size
944.46 KiB
Views
1061 views
File license
Public domain

and left hinge, with gear.

IMG_6198.jpg
Filename
IMG_6198.jpg
File size
938.47 KiB
Views
1061 views
File license
Public domain

Left one is how I imagine it should look like, but haven't really got a clue. Still need to tweak the design to make the soft open really work.

Again, if someone has one of these and can share a picture, it would be much appreciated!

Reply 3 of 13, by Intel486dx33

User metadata
Rank l33t
Rank
l33t

Hey, I need some for my IBM PS\1 front cover too.
Anyone know where I can get some ?

Attachments

  • IBM front flap.jpg
    Filename
    IBM front flap.jpg
    File size
    148.75 KiB
    Views
    1053 views
    File license
    Fair use/fair dealing exception

Reply 4 of 13, by sam95

User metadata
Rank Newbie
Rank
Newbie

Right-hand side looks pretty similar to my 2144's.
I'm attaching the STL files and SVG I created them from, if you want to give it a shot.

Attachments

Reply 5 of 13, by sam95

User metadata
Rank Newbie
Rank
Newbie

Progress update, though I still have no idea how the original left hinge looks, I managed to draft one that works.
I'm attaching the latest source files in case they are useful to someone else.

Aptiva 2144 right hinge R2.jpg
Filename
Aptiva 2144 right hinge R2.jpg
File size
8.75 KiB
Views
1000 views
File license
Public domain
Aptiva 2144 left hinge R8.jpg
Filename
Aptiva 2144 left hinge R8.jpg
File size
17.14 KiB
Views
1000 views
File license
Public domain

Attachments

Reply 6 of 13, by alpm

User metadata
Rank Newbie
Rank
Newbie
sam95 wrote on 2021-02-08, 17:15:
Progress update, though I still have no idea how the original left hinge looks, I managed to draft one that works. I'm attaching […]
Show full quote

Progress update, though I still have no idea how the original left hinge looks, I managed to draft one that works.
I'm attaching the latest source files in case they are useful to someone else.

Aptiva 2144 right hinge R2.jpg

Aptiva 2144 left hinge R8.jpg

Hey Sam, can you share which material you used to print? For gluing the parts, what type of glue did you use?
And thank you so much for creating these parts! My Aptiva 330 just had those broken during a cleaning session today.

Reply 7 of 13, by sam95

User metadata
Rank Newbie
Rank
Newbie

Hey, I'm happy to learn that this might be useful for you.
I printed the parts with PLA and used Loctite super glue (the basic stuff, just the version that comes with a brush).

I realized I never uploaded pics of the end result, so here they are (you'll notice I was lazy to not properly color match the new pieces).

By the way, if you still have the part that got broken off, I'd be interested in seeing a picture of it -- it might help me improve the 3D model, having it be based on an actual part rather than something that merely works.

Attachments

  • IMG_6400.JPEG
    Filename
    IMG_6400.JPEG
    File size
    496.92 KiB
    Views
    938 views
    File license
    Public domain
  • IMG_6392.JPEG
    Filename
    IMG_6392.JPEG
    File size
    421.07 KiB
    Views
    938 views
    File license
    Public domain
  • IMG_6383.JPEG
    Filename
    IMG_6383.JPEG
    File size
    467.58 KiB
    Views
    938 views
    File license
    Public domain
  • IMG_6380.JPEG
    Filename
    IMG_6380.JPEG
    File size
    435.91 KiB
    Views
    938 views
    File license
    Public domain
  • IMG_6401.JPEG
    Filename
    IMG_6401.JPEG
    File size
    380.51 KiB
    Views
    938 views
    File license
    Public domain

Reply 8 of 13, by alpm

User metadata
Rank Newbie
Rank
Newbie
sam95 wrote on 2021-05-10, 00:04:
Hey, I'm happy to learn that this might be useful for you. I printed the parts with PLA and used Loctite super glue (the basic s […]
Show full quote

Hey, I'm happy to learn that this might be useful for you.
I printed the parts with PLA and used Loctite super glue (the basic stuff, just the version that comes with a brush).

I realized I never uploaded pics of the end result, so here they are (you'll notice I was lazy to not properly color match the new pieces).

By the way, if you still have the part that got broken off, I'd be interested in seeing a picture of it -- it might help me improve the 3D model, having it be based on an actual part rather than something that merely works.

Hey sam95, sorry for the delay on updating this. Unfortunately I don't have the broken parts anymore. My mistake was to print the part with ABS then, it just wouldn't glue itself and kept cracking with modelling ABS glue.
Will try to re-print with PLA!

Thanks,
A

Reply 9 of 13, by brostenen

User metadata
Rank l33t++
Rank
l33t++
alpm wrote on 2022-01-02, 19:59:
Hey sam95, sorry for the delay on updating this. Unfortunately I don't have the broken parts anymore. My mistake was to print th […]
Show full quote
sam95 wrote on 2021-05-10, 00:04:
Hey, I'm happy to learn that this might be useful for you. I printed the parts with PLA and used Loctite super glue (the basic s […]
Show full quote

Hey, I'm happy to learn that this might be useful for you.
I printed the parts with PLA and used Loctite super glue (the basic stuff, just the version that comes with a brush).

I realized I never uploaded pics of the end result, so here they are (you'll notice I was lazy to not properly color match the new pieces).

By the way, if you still have the part that got broken off, I'd be interested in seeing a picture of it -- it might help me improve the 3D model, having it be based on an actual part rather than something that merely works.

Hey sam95, sorry for the delay on updating this. Unfortunately I don't have the broken parts anymore. My mistake was to print the part with ABS then, it just wouldn't glue itself and kept cracking with modelling ABS glue.
Will try to re-print with PLA!

Thanks,
A

Have you tried the superglue+bakingpowder aproach for gluing together? It is a trick from the plastic model kit world.
Test first on a piece of cardboard, when you start learning this. The second you add super glue to the powder, it becomes hard like concrete.

Don't eat stuff off a 15 year old never cleaned cpu cooler.
Those cakes make you sick....

My blog: http://to9xct.blogspot.dk
My YouTube: https://www.youtube.com/user/brostenen

001100 010010 011110 100001 101101 110011

Reply 10 of 13, by alpm

User metadata
Rank Newbie
Rank
Newbie
brostenen wrote on 2022-01-02, 20:07:
alpm wrote on 2022-01-02, 19:59:
Hey sam95, sorry for the delay on updating this. Unfortunately I don't have the broken parts anymore. My mistake was to print th […]
Show full quote
sam95 wrote on 2021-05-10, 00:04:
Hey, I'm happy to learn that this might be useful for you. I printed the parts with PLA and used Loctite super glue (the basic s […]
Show full quote

Hey, I'm happy to learn that this might be useful for you.
I printed the parts with PLA and used Loctite super glue (the basic stuff, just the version that comes with a brush).

I realized I never uploaded pics of the end result, so here they are (you'll notice I was lazy to not properly color match the new pieces).

By the way, if you still have the part that got broken off, I'd be interested in seeing a picture of it -- it might help me improve the 3D model, having it be based on an actual part rather than something that merely works.

Hey sam95, sorry for the delay on updating this. Unfortunately I don't have the broken parts anymore. My mistake was to print the part with ABS then, it just wouldn't glue itself and kept cracking with modelling ABS glue.
Will try to re-print with PLA!

Thanks,
A

Have you tried the superglue+bakingpowder aproach for gluing together? It is a trick from the plastic model kit world.
Test first on a piece of cardboard, when you start learning this. The second you add super glue to the powder, it becomes hard like concrete.

Hey sam95! I've tried that on my first attempt. However, the hinge got too large to fit (dremeled it down, but it broke). Then I tried ABS-specific glue from a local model shop. It didn't work great too as it was brittle and cracking. At the next attempt I grabbed some random piece of ABS, melted it together with the hinge and front-panel and added some ABS-glue on top. It's not pretty (see attached pictures) though and has some considerable amount of super-glue-baking-soda from my first attempt last year.

Attachments

Reply 11 of 13, by caiot5

User metadata
Rank Newbie
Rank
Newbie
sam95 wrote on 2021-02-08, 17:15:
Progress update, though I still have no idea how the original left hinge looks, I managed to draft one that works. I'm attaching […]
Show full quote

Progress update, though I still have no idea how the original left hinge looks, I managed to draft one that works.
I'm attaching the latest source files in case they are useful to someone else.

Aptiva 2144 right hinge R2.jpg

Aptiva 2144 left hinge R8.jpg

Thank you so much, that hinge works flawlessy!!!

But one of my Aptivas is missing also the little lock on the front panel that keeps the front panel locked to the rest of the case.
Did someone managed to create a stl of that as well? (I've attached an image of where it was supposed to be).

Attachments

Reply 12 of 13, by sam95

User metadata
Rank Newbie
Rank
Newbie

I haven't and I can't do it right now, but here are some pictures that I took of one if you'd like to create one yourself.
Basically what I did was to take the profile of the part in photoshop and make it purely black/white (black part on white background), then import that profile in a 3D software (like TinkerCAD) and extrude it to the thickness.
The outer measures are in the attached pictures, but it's 2.5mm thick, 11.5 mm long and 6mm wide.
Give me a shout if you're stuck and I can try to help when I get the time.

caiot5 wrote on 2023-09-28, 06:00:
Thank you so much, that hinge works flawlessy!!! […]
Show full quote
sam95 wrote on 2021-02-08, 17:15:
Progress update, though I still have no idea how the original left hinge looks, I managed to draft one that works. I'm attaching […]
Show full quote

Progress update, though I still have no idea how the original left hinge looks, I managed to draft one that works.
I'm attaching the latest source files in case they are useful to someone else.

Aptiva 2144 right hinge R2.jpg

Aptiva 2144 left hinge R8.jpg

Thank you so much, that hinge works flawlessy!!!

But one of my Aptivas is missing also the little lock on the front panel that keeps the front panel locked to the rest of the case.
Did someone managed to create a stl of that as well? (I've attached an image of where it was supposed to be).

Attachments

  • IMG_0863 Large.jpeg
    Filename
    IMG_0863 Large.jpeg
    File size
    357.18 KiB
    Views
    427 views
    File license
    Fair use/fair dealing exception
  • IMG_0866 Large.jpeg
    Filename
    IMG_0866 Large.jpeg
    File size
    153 KiB
    Views
    427 views
    File license
    Fair use/fair dealing exception
  • IMG_0865 Large.jpeg
    Filename
    IMG_0865 Large.jpeg
    File size
    307.59 KiB
    Views
    427 views
    File license
    Fair use/fair dealing exception
  • IMG_0867 Large.jpeg
    Filename
    IMG_0867 Large.jpeg
    File size
    148.55 KiB
    Views
    427 views
    File license
    Fair use/fair dealing exception

Reply 13 of 13, by caiot5

User metadata
Rank Newbie
Rank
Newbie
sam95 wrote on 2023-11-20, 13:47:
I haven't and I can't do it right now, but here are some pictures that I took of one if you'd like to create one yourself. Basic […]
Show full quote

I haven't and I can't do it right now, but here are some pictures that I took of one if you'd like to create one yourself.
Basically what I did was to take the profile of the part in photoshop and make it purely black/white (black part on white background), then import that profile in a 3D software (like TinkerCAD) and extrude it to the thickness.
The outer measures are in the attached pictures, but it's 2.5mm thick, 11.5 mm long and 6mm wide.
Give me a shout if you're stuck and I can try to help when I get the time.

Thank you so much, I will check if a friend can help me with modelling, if he does and if he agrees on sharing the project, I will attach it here.