First post, by leonardo

- Rank
- Oldbie
Windows 95 setup guide for the 2020's!
This is a refresh of my Windows 95 setup guide originally posted in late 2013. The goal is to help anyone wanting to run Windows 95 on period hardware achieve a functioning and stable setup with minimal effort. I define period hardware as a systems starting with an Intel 80486 CPU and 8 megabytes of RAM ranging all the way to something with a late Pentium III CPU and up to 256 megabytes of RAM. Generally hardware after the Pentium 3-era will have problems due to lack of driver support and the internal limitations of Windows, and as such I won't focus much on these edge cases. I know there are people who can stretch the limits of hardware support on both ends. These people don't need my help. 😀
Honorable mentions go to Nathan Lineback, Conner McCoy and Rudolph Loew for their great contributions, without which this guide would have to be multiple pages longer.
So why run Windows 95 and not Windows 98SE?
This was a popular question when the thread originally posted. IMO Windows 95 offers Microsoft's purest vision of the titular desktop OS - lean, uncluttered, and not weighed down by the browser wars and subsequent integration of Internet Explorer into everything. There is a simple charm to it. Basically, for a lot of vintage systems and use cases Windows 95 gets the job done just as well as Windows 98SE, but is faster and uses less RAM - that is unless you install Internet Explorer 4 or later. There are also some applications, games, and hardware that genuinely work better with Windows 95 than subsequent versions of Windows.
So why run Windows 98SE or ME and not Windows 95?
Giving the devil his due, Windows 98SE and later will be better supported once you get into the Pentium4 and AthlonXP era hardware. The cut-off point for software support in many cases is Windows 98, so you'll also be able to run newer versions of many applications, and certainly ones that have hard dependencies with Internet Explorer. Besides being able to use larger hard disks and volumes more easily and utilize more RAM, you'll also see improved support for various classes of USB-devices and peripherals too. Oh and the desktop update brings with it the Back- and Forward buttons for Explorer, if you're into that sort of thing.
If you didn't live through the era of Windows 95/98 or are otherwise a bit hazy on what kind of a system Windows 95 will run on, I've provided some very rough guidelines on what will pass for a compatible system. Note that while the "high end" and "ludicrous" build examples are 100% stable/compatible, these kinds of systems would typically not have shipped with Windows 95 any more... I'm also aware that there are plenty of systems that fall between the gaps of these artificial classifications. 😀
Low-end (see example)
Windows 95 will run, albeit slowly.
- 80486 or compatible CPU (33-120 MHz)
- 16 MB RAM
- 120-520MB HDD
- 1-2 MB ISA/VLB video card
Average (see example)
Windows 95 runs comfortably, snappy even.
- Pentium/K6-II ~ Pentium II/K6-III CPU (100-450 MHz)
- 32-64 MB RAM
- 2-8GB HDD
- 2-16 MB PCI video card (*optionally with 3D-accelerator) or 8-32 MB AGP video card
High-end (see example)
The system absolutely flies. Nothing will slow you down!
- Pentium III / Athlon CPU (500-1000 MHz)
- 128-256 MB RAM
- 20GB+ HDD
- 32-64 MB AGP video card (nVidia GeForce 1/2, ATi Rage Fury/Radeon 7xxx, S3 Savage etc.)
Ludicrous (see example)
"Because I can."
- Pentium III / Athlon CPU 1000-1400 MHz)
- 384+ MB RAM
- 32GB+ HDD
- 64-128 MB AGP video card (nVidia GeForce 3/4, ATi Radeon 8500/9xxx-series)
Processor
If you have an AMD CPU, specifically K6-2 or K6-III series that runs at 350 MHz or higher, you may not be able to complete installation without clocking down the CPU or turning off L1/L2 caches until you install Microsoft's official patch, or the Unofficial Service Pack detailed later in this guide). Interestingly, this problem is not tied to clock speed alone and does not affect systems with much faster Intel processors. The original bug description from Microsoft only notes that the patch addresses a "software timing loop sensitive to processor frequency" which sounds... interesting. There is another issue that occurs with all CPUs faster than 2 GHz, but this has also been addressed by Microsoft (via an unrelated update, and by accident!) and thus also by unofficial patches later on.
System memory
Although some compatible motherboard chipsets support 512MB, 768MB, or even 1GB of memory, it's generally a good idea to stick to anywhere between 64 MB and 256 MB. While this is not a hard limit, most games and applications from the Windows 95/98-era would not have required more anyway. Systems shipped with Windows 95 were usually equipped with 16-32 MB of RAM and 64 MB was considered luxury. 128-256MB is an outrageous amount of RAM for a Windows 95-based system, and it is recommended that the base file/cache/buffer settings be modified to make more efficient use of it. See the Essential Utilities-section for tips!
Hard disks and file systems
Windows 95 up to the first OSR (4.00.950 A) supports only FAT12/FAT16 file systems and thus hard disk and volume sizes up to 2 GB (or 4GB with a larger cluster size). OSR 2 (4.00.950-4.00.1212 B) and later releases support FAT32 as well, but the included utilities such as FDISK and Scandisk only support volume sizes up to 32GB instead of FAT32’s theoretical maximum. As a precaution, it is better to use disks and/or format volumes no larger than this.
CD-/DVD-drives
Almost all CD- and DVD-ROM-drives are supported without issue, but Windows 95 has no built-in support for CD-/DVD-burners nor the UDF-filesystem that is required to read DVDs without external patches and/or utilities and drivers. A DVD-drive without the UDF-driver can still be used to read regular CDs, though.
USB-devices and peripherals
It is possible to use USB-thumb drives and hard disks with Windows 95 OSR 2 and later with the eXtended USB Supplement installed, but most other USB devices and peripherals are not supported. Windows 95 also likely only works with USB 1.0 and 1.1 compatible controllers at speeds of 11 Mbit/s (not to be confused with 11 MB/s). USB 2.0 and later are not supported.
Video and sound
The latest version of DirectX supported under Windows 95 is 8.0a. With certain supported video cards (such as GeForce FX and later), you may run into a situation where the most advanced 3D-rendering features are unavailable, because you cannot update to a version of DirectX that enables those features. Realistically, most games that make use of such features probably also require a more powerful computer and also a newer version of Windows itself.
For sound cards, as long as support is explicitly stated everything should be fine. In some cases support may still exist even if not advertised (eg. box says Windows 98, but driver is nevertheless compatible with Windows 95).
Windows 95 had a long life and multiple releases, so which one should you pick? Let's go over these briefly:
- Windows 95 (4.00.950) / RTM
The original retail release of Windows 95. This one was available on floppy disks as well as CD. - Windows 95 (4.00.950 A) / OSR 1
The first OEM Service Release (OSR), same as retail, but includes Microsoft's own Service Pack for Windows 95. - Windows 95 (4.00.950 B) / OSR 2
This release includes all the previous updates, introduces enhanced hardware support (including AGP and USB*), FAT32, and also bundles Internet Explorer 3 without the option to de-select it during setup - Windows 95 (4.00.1111 B) / OSR 2.1
Patched version of OSR2 - Windows 95 (4.03.1214 C) / OSR 2.5
Basically OSR 2.1 but with a few more bundled updates, Internet Explorer 4 and its desktop-update as a third-stage setup "option"
I generally recommend the B-versions of OSR 2.x releases as they have the best hardware support and have been most stable in my testing. OSR 2.5 (version C) comes in as a good second, but is really just OSR 2 with a ton of unnecessary advertising and IE4. It can be used, but you'll jump thru a couple of extra hoops to get a clean installation, and there were some stability issues that I noted during testing that were absent with OSR 2 or 2.1. Version A or the original release only work for hardware at the extreme low end of the hardware requirements and cannot utilize many of the tips and tricks in this guide.
As some posters have pointed out, the later releases of Windows 95 were never available through retail on store shelves, but only to system builders thru computer shops and to system integrators such as HP, Compaq, Dell, etc. The OSR 2 and later releases can be identified by the text 'with USB support' underneath the title on the CD.
Here's a list of things that you need to follow the instructions in this guide:
- Windows 95 OSR2 installation CD and Certificate of Authenticity with serial number
- Windows 95-compatible bootdisk with disk partitioning and formatting tools, and potentially CD-ROM drivers
(necessary, because many old computers cannot boot directly from the CD and because the Windows 95 installation CDs themselves were never originally bootable) - another computer with internet access for downloading required set up assets such as
- Motherboard or chipset support packages that apply to your system:
- Intel® Chipset Software Installation Utility (infinst_enu.zip)
- VIA 4in1 (4in1435v.zip Why v. 4.35? See this thread.)
- ALi / Acer Laboratories (motherboard component drivers)
- SiS / Silicon Integrated Systems (motherboard component drivers), - Drivers for your video-, sound- and network-cards.
A good place to start looking is the VOGONS Vintage Driver Library. - Microsoft's Windows 95 Update for AMD-K6®-2/350 [DL] (optional)
- eXtended USB Supplement / [DL] by Conner McCoy/LoneCrusader
- Unofficial Service Pack 1.05 (Lite) / [DL] by Noel Piring/ERPMan
- DirectX 7.0a + DirectX Media Runtime OR DirectX 8.0a
- a way to transport the setup files to the retro-computer's internal hard disk
(a CD-R / CD-RW will work nicely, as long as your retro-computer is outfitted with a CD-/DVD-drive) - a secondary hard disk or partition for setup files on the target computer is recommended so that you don't have to play the Game of Disks™. If you boot Windows installation from a CD (using a bootdisk to load CD-ROM drivers) you will find that after rebooting Windows will complain it can no longer find the CD for copying setup files (duh).
Foreword - or Why are we removing Internet Explorer?
A web browser being bundled as a necessary program with an operating system is so ubiquitous, that the controversy caused by Microsoft originally bundling Internet Explorer with Windows is mostly lost on computer users today. Casting the browser wars aside, removing Internet Explorer from Windows 95 should be done because the bundled versions are hopelessly out-of-date and worse yet, introduce a lot of unnecessary bloat and bugs. Many of the terrible experiences people associate with Windows 95 were actually the result of Microsoft trying to shoehorn the browser into as many installations as possible in order to compete with Netscape. Fortunately, with Windows 95 the shell-integration had not taken place and the forced installation of IE can be undone with a few simple modifications to the installation files. This results in a nice clean installation without the unnecessary support files and the application.
These instructions are from Nathan Lineback's MAD IE De-integration Lab but I've included them here because the background on Nathan's page can be a little hard on some eyes. 😉
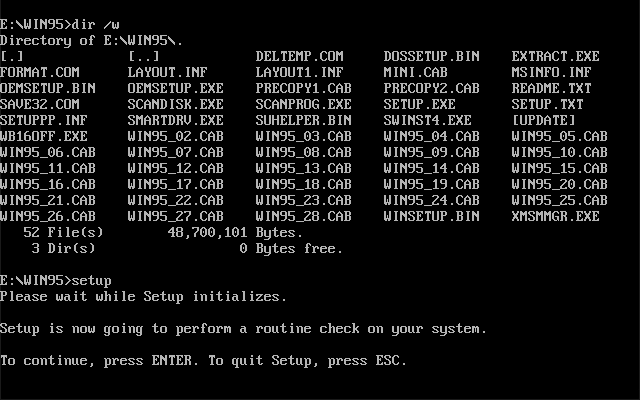
2.2.1) Copy the setup-directory from CD to hard-disk
To skip installing Internet Explorer 3 on OSR 2 or IE3 & 4 on OSR 2.5 during OS installation, you need to copy the Win95-directory from the installation CD to your secondary computer (or directly to the target computer, if possible) for modification. You only need this directory for installing Windows, the rest of the directories and files on the CD are more or less useless today. I'm going to assume you have a separate disk/volume (drive E) available for use during setup. The setup files can be placed on drive C, but I've always found it is safer to keep the setup files and drivers on a separate volume, in case drive C needs to be reformatted later.
2.2.2) Extract SETUPPP.INF, if not already present
After copying the files, we need to extract SETUPPP.INF from the .cab-archive that contains it.
To extract the file, enter the Command Prompt and switch to the directory where the setup files are contained with:
e: [enter]
cd folder_name [enter]
then issue the command:
extract /A precopy_01.cab setuppp.inf [enter]
Note: Windows installation will always prefer a file that is located in the setup folder to one that is included in the archives,
thus to override any particular file during setup, one only needs to include a copy of it in the setup folder.
Note: the /A-commandline switch tells the extract utility to go thru every similarly named .cab-file in sequence,
which is very useful for finding a particular file if you don't remember in which .cab archive it was stored.
2.2.3) Modify SETUPPP.INF to omit unwanted files
Open the SETUPPP.INF in any text-editor and remove references to the following files:
- ohare.inf - installs Internet Explorer
- athena.inf - installs Mail and News
- mos.inf - installs Microsoft Network and online registration
- msinfo.inf - installs Online Services
Save your changes.
2.2.4) Delete unnecessary files
If you're modifying the setup directory in a GUI environment, just ignore the commands and delete the indicated files.
To delete the unnecessary files using the Command Prompt, use:
del CS3KIT.EXE SETUP25I.EXE SETUP32.EXE WOWKIT.EXE [enter]
If you have OSR 2.5, you have many more files to delete:
del CH*.* IE*.* ACTSETUP.CAB AMOV4IE.CAB AOL*.* AXA.CAB ICW*.* JAV*.* MAILNEWS.CAB MOS.INF MSCHAT2.CAB MSINFO.INF MSN251.EXE NM21.CAB NSIE4.CAB OHARE.INF PCVKIT.EXE PRO*.* SWINST4.EXE VDOLIVE.EXE CONTENTS\*.* [enter]
rmdir CONTENTS [enter]
2.2.5) Extract LAYOUT.INF if not already present
Similarly to step 2.2.2, extract LAYOUT.INF
2.2.6) Change LAYOUT.INF to reflect modified SETUPPP.INF
Open the LAYOUT.INF in any text-editor and change the file size entry for SETUPPP.INF so that the size matches (after the changes you made). This is necessary so that setup doesn't assume SETUPPP.INF is corrupted.
2.3.1) Extract driver archives
I recommend extracting any driver-packages you may have downloaded to ease the later phases of setup (a clean Windows install will have no means to extract archives). Take note that some drivers come with installation programs (setup.exe) while others only include setup information files (.inf) together with libraries and support files. The installation method for these types of driver packages differs slightly, but the lack of an installer does not mean you do not possess a complete driver package.
2.3.2) Create an installation media that can be easily managed DOS-mode
You may want to place the modified Windows setup files, device drivers, and downloaded updates all on a CD, or ideally right on the hard disk of the target system. You can also check out section 4 (Essential Utilities) of this guide for some optional files to include. Note that any filenames longer than eight + three characters will be truncated in DOS unless your boot disk and included utilities offer long filename support!
After you've got all your assets and setup directory prepared, it's time to launch setup! Boot your system by using a compatible boot disk and switch to the directory containing the setup files, then simply type setup [enter] to begin. Windows will attempt to run Scandisk to verify file system integrity, but failing to do so does not prevent setup from running.
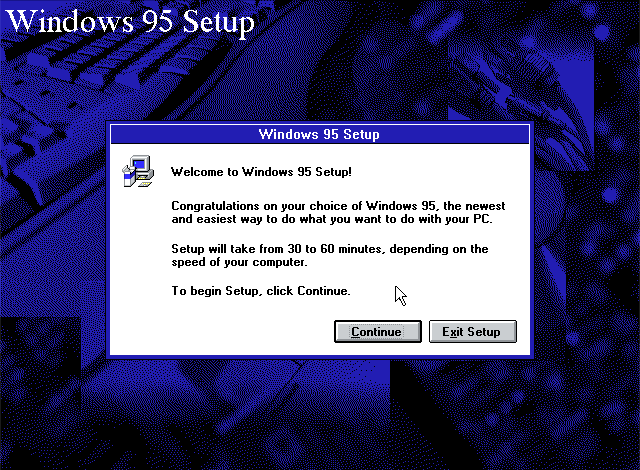
Hooray, only another hour to go and I'll get to use Windows 95! Oh goody.
Nothing to see here. Onward!
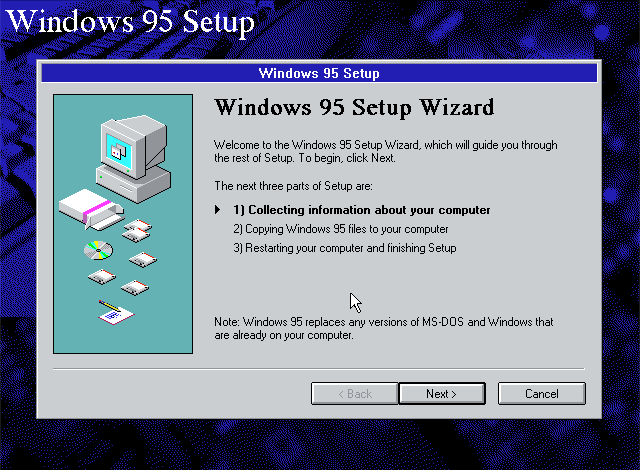
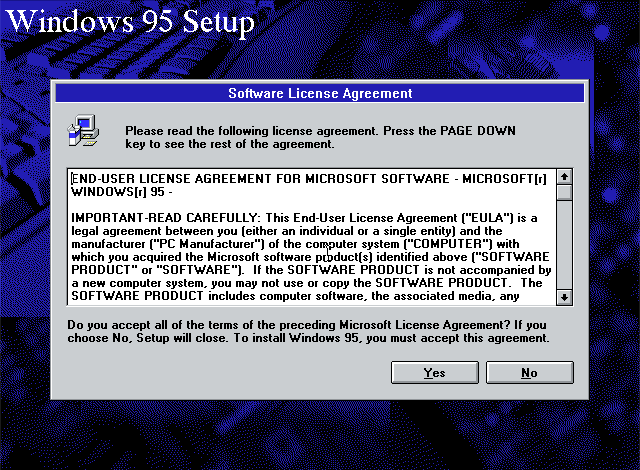
A brief walkthrough of how the setup will progress.
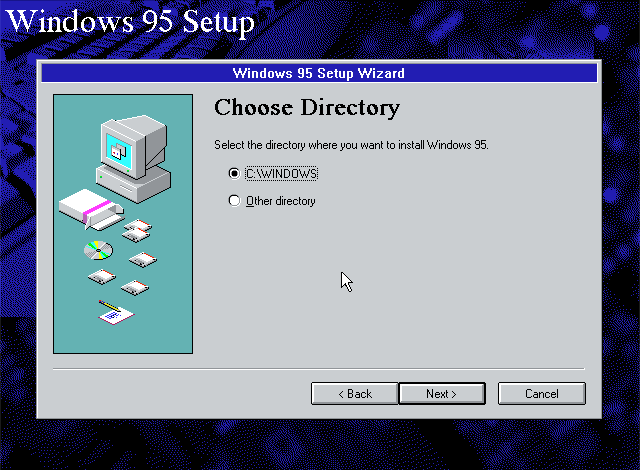
Windows can be installed in places other than C:\Windows, but honestly, with the amount of badly written software out there with the directory hardcoded, you'll be asking for trouble if you change it.

I recommend the 'Custom' option here, so you can choose at least some of the components that get installed. It's not as involved as you might fear, since there really aren't that many options to go thru. Windows 95 has a nice simple charm to it.
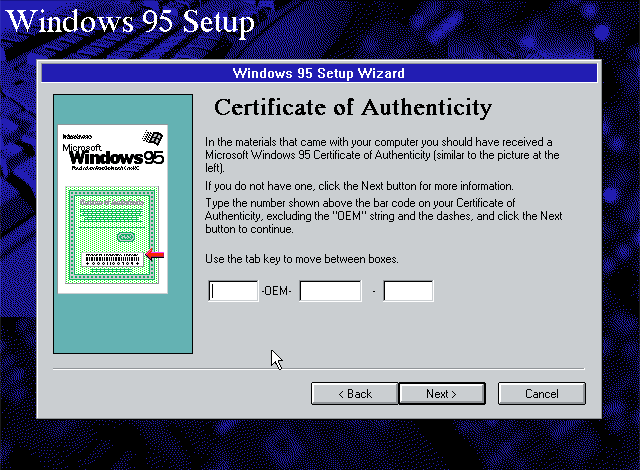
Enter the serial number from your Certificate of Authenticity. On some machines this is a sticker on the side of the computer case.
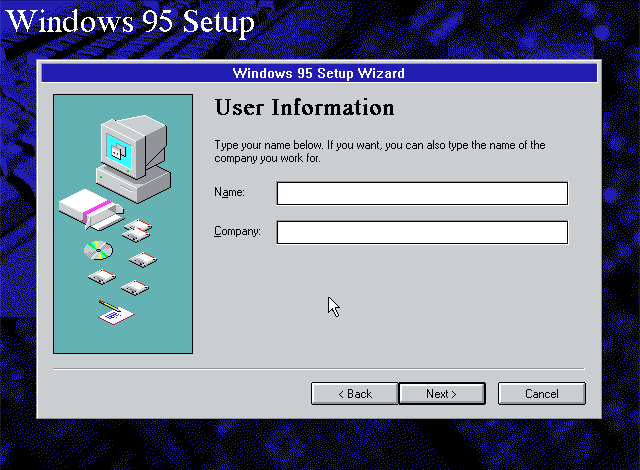
Carter J. Burke, Weyland Yutani
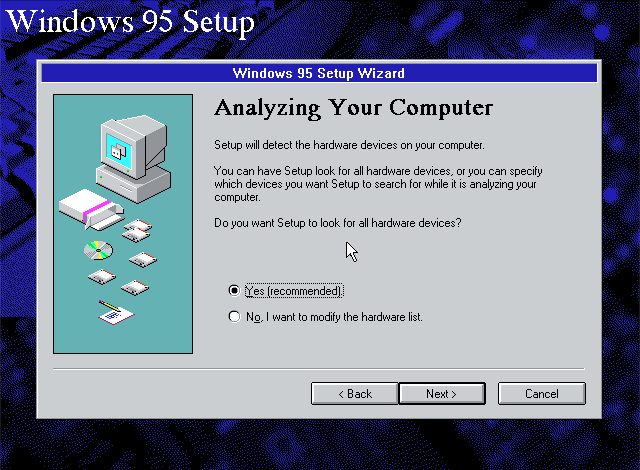
Better let Windows do the auto-detection thing.
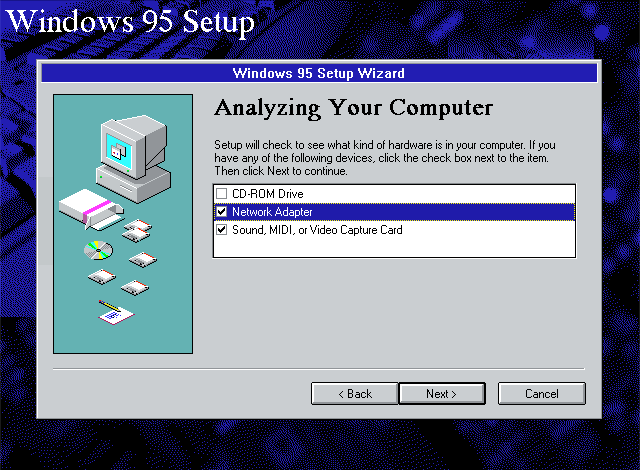
I always choose all device classes offered for detection.
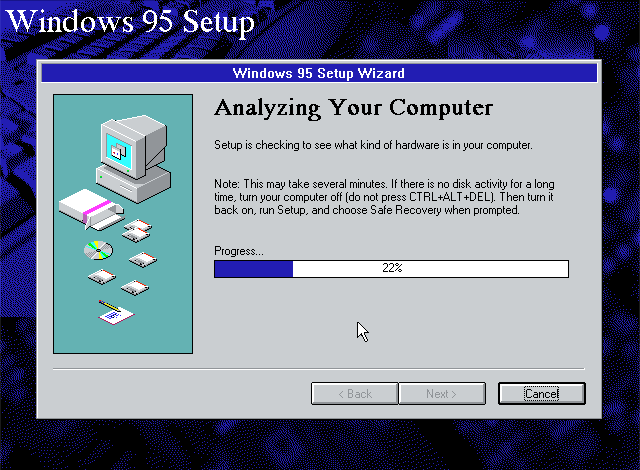
Wait for the detection to complete.
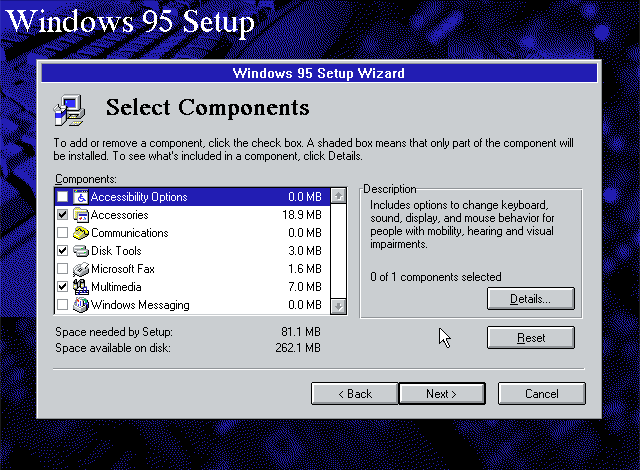
Once hardware analysis is complete, Windows lets you pick the components you wish to install (if you chose the 'Custom'-setup option earlier on). On systems with ethernet or other networking hardware I always deselect the entire Communications-category or at least Dial-Up Networking. Do the opposite if you're actually going to use a modem, a direct-cable connection OR if you don't have an ethernet-controller in your system (confusing, I know). Making the wrong choice here is not a disaster, thankfully you can always install/remove Dial-Up Networking later thru the Add/Remove software-applet in the Control Panel.
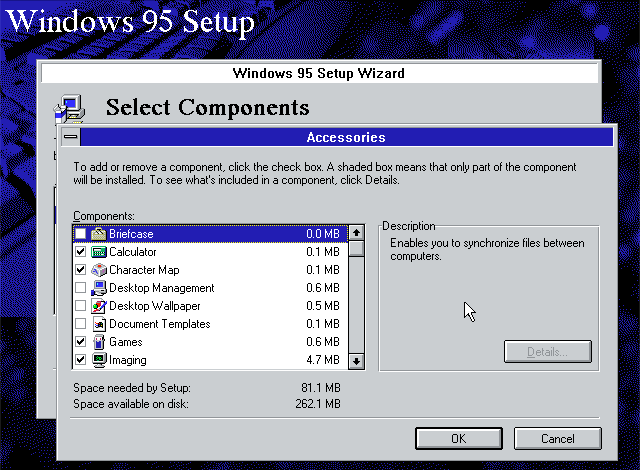
Doubleclicking on a category allows you to select individual components within that category.
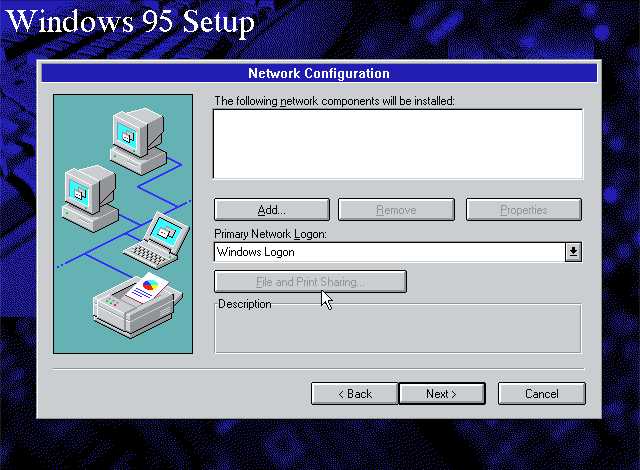
When your network card isn't automatically detected (which is most of the time), you get a blank Network Configuration tab. Don't worry about it, just click on 'Next' to proceed. If by chance you actually have a network card Windows 95 has drivers for (holy heck!) you can jump ahead to section 3.4.2 of the guide where I go over the network setup, then resume following the guide here.
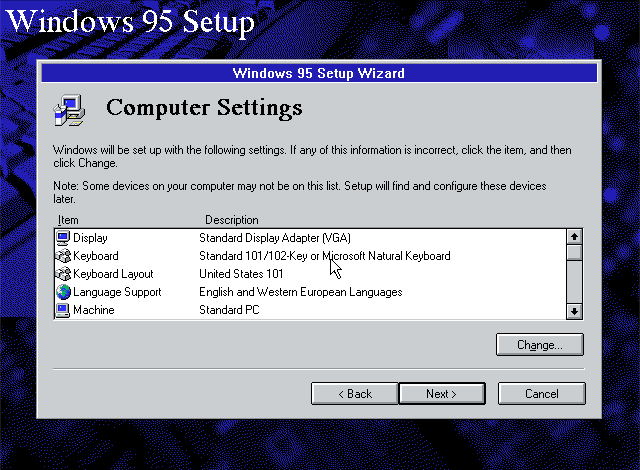
Usually one only has to change some regional settings or keyboard layout during this screen, basically all the hardware related options will be modified later on in Device Manager.
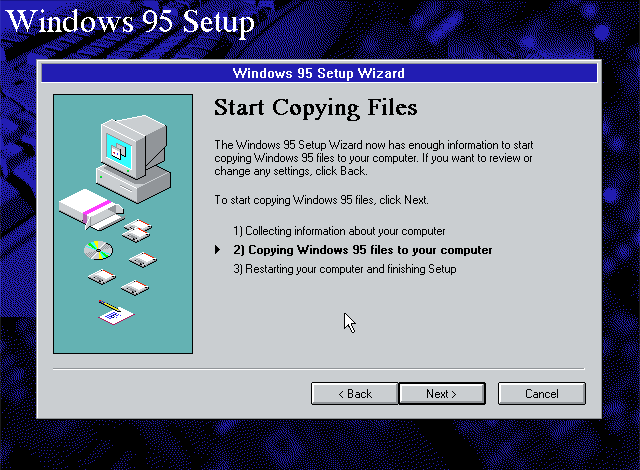
Windows is ready to start copying files! Hold on to your hat!
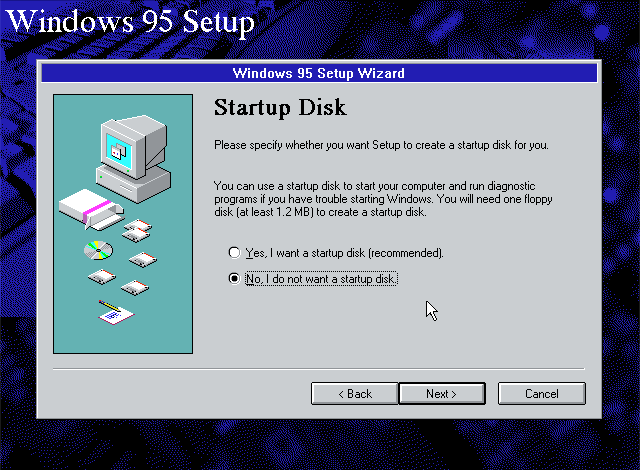
...but just in case, would you like a boot floppy without any useful utilities or cd-rom drivers on it? One that just gives you the classic A:\> and nothing else?
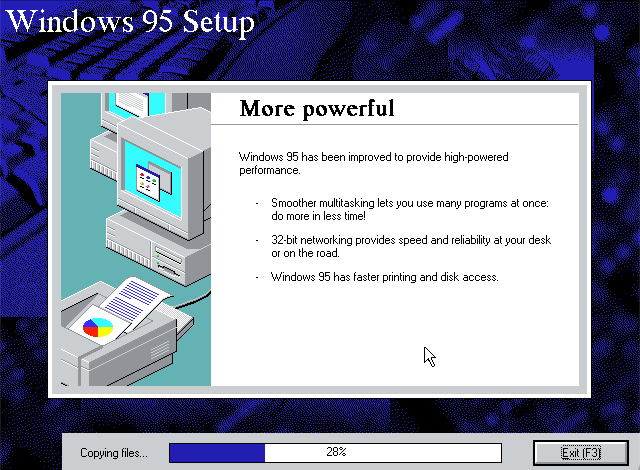
Alright, let's rock and unpack.
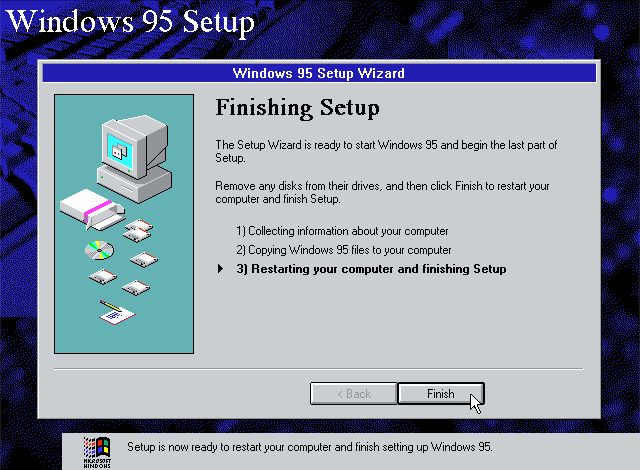
After copying the files, Windows will reboot. This is the stage of the installation where those of you with AMD CPUs with a clock above 300 MHz have to figure out how to lower your CPU clock or alternatively disable L1/L2 cache. There are multiple online references to alternate fixes and work-arounds that can be applied here, DON'T DO ANY OF THESE. For optimum results, I recommend temporarily slowing down the CPU until we're ready to fix the problem from within Windows. Otherwise you risk getting an error after rebooting and setup will not proceed.
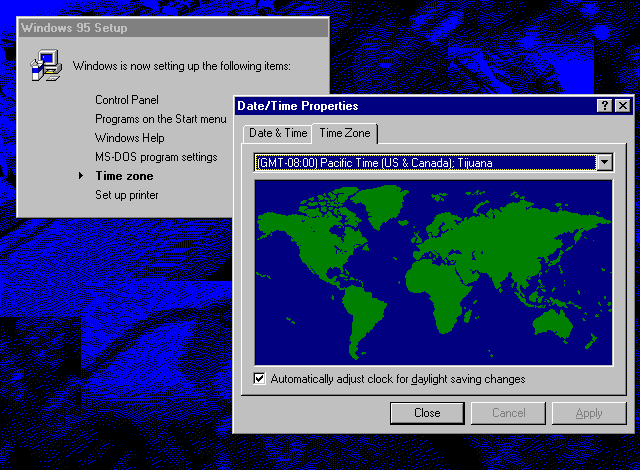
After successfully restarting, Windows will complete the few remaining stages of setup without intervention until it is time to set the system time and confirm your time zone settings.

Unless you've got a compatible printer to set up, simply click 'Cancel'.
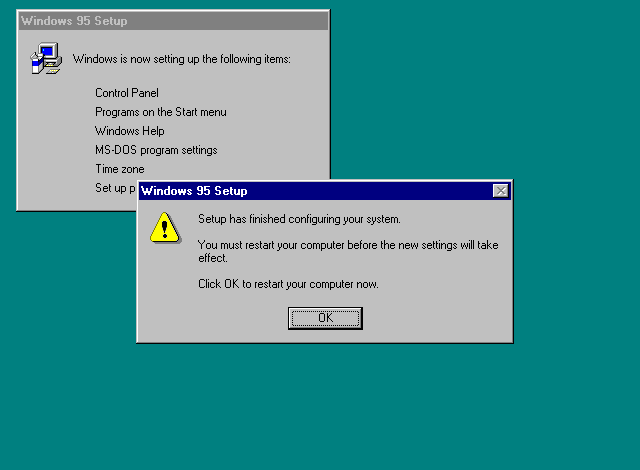
We're ready for the last reboot (yeah right!)
We made it! We've made it to the desktop. Now it's time to start the real installation. 😎
Before installing any other drivers, you must install Microsoft's USB supplement (USBSUPP.EXE) and the following update (USBUPD2.EXE) the eXtended USB Supplement for Windows 95 OSR2 (XUSBSUPP.ZIP). This is recommended even if your system has no USB-ports or you intend not to use them. If you absolutely want to avoid anything USB-related, install Microsoft's original patch for high-speed AMD CPUs (amdk6upd.exe) instead, even if your system uses an Intel processor. This is due to interdependency with other updates later on. Coincidentally, if you do have an affected system, installing the update for AMD CPUs will allow you to proceed full speed from hereon.
After installing either package and rebooting your system, we can proceed to the next step in this guide. You can ignore setting up USB-devices in the Device Manager for now.
3.2.1) Generic chipset support packages
You may have a disk or a CD that came bundled with your motherboard that includes the drivers you need, but I've linked the most common generic drivers directly from chipset makers below. Intel and VIA offer all-in-one packages. For boards with chipsets from SiS and ALi you'll have to verify which component support packages you need to install, as they are distinct.
- Intel® Chipset Software Installation Utility (infinst_enu.zip)
- VIA 4in1 (4in1435v.zip) Why v. 4.35? See this thread.
- ALi / Acer Laboratories (various motherboard component drivers)
- SiS / Silicon Integrated Systems (various motherboard component drivers)
3.2.2) Installation
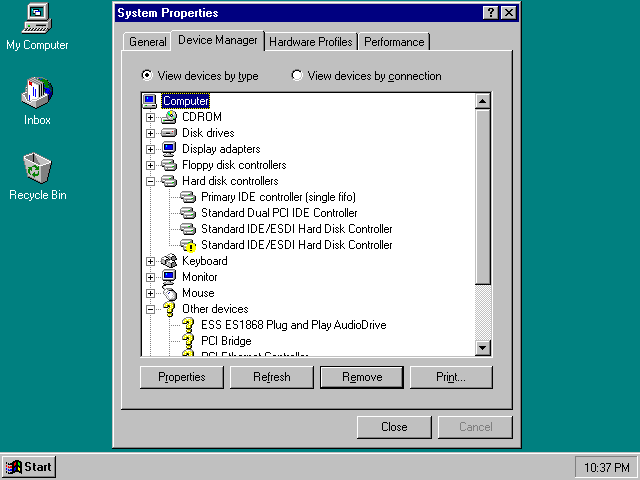
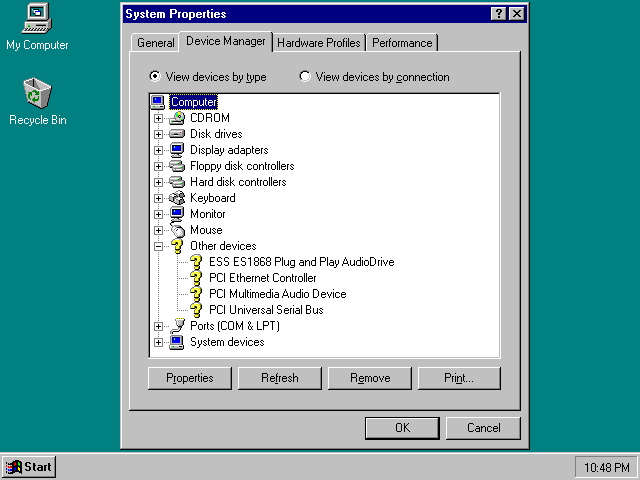
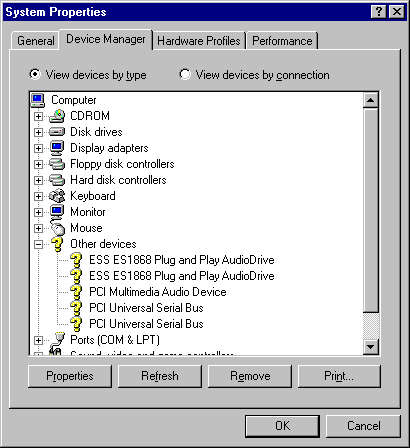
Motherboard/chipset drivers are useful starting with first generation Pentium-hardware, possibly even earlier, so don't be fooled just because your Device Manager appears clean. In most cases it will resemble the screenshot above, with multiple unknown devices populating the listing and some device entries having exclamation-marks on them because they're improperly configured or not fully functioning. This is perfectly normal.
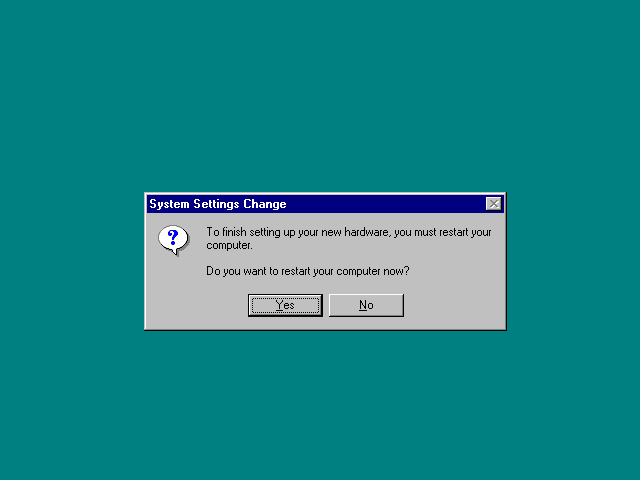
After installing the appropriate driver package(s), you'll be asked to reboot.
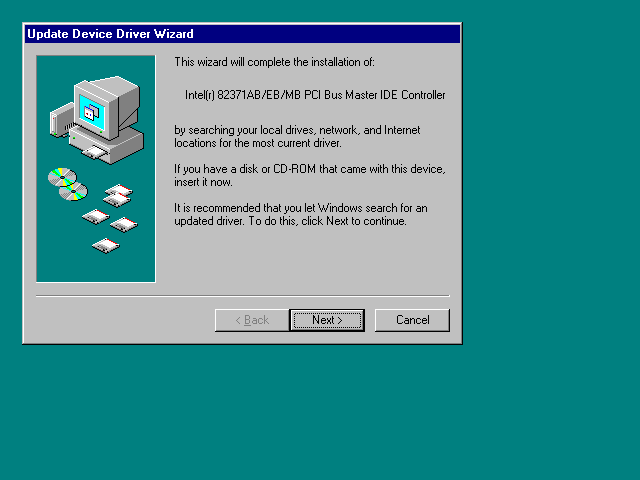
After rebooting, Windows will likely discover many new devices, occasionally stopping with this kind of a dialog to confirm you want to use the suggested drivers. Simply click on 'Next' to proceed.
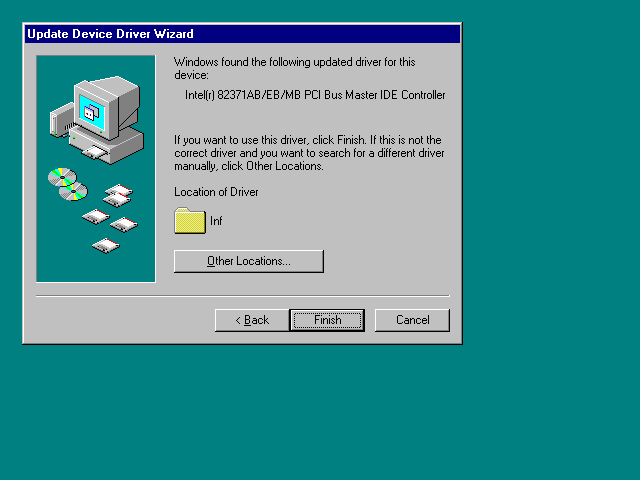
Click on 'Finish' to complete the installation.
Windows might ask you to reboot mid-installation. Do this every time. There will likely be many reboots.
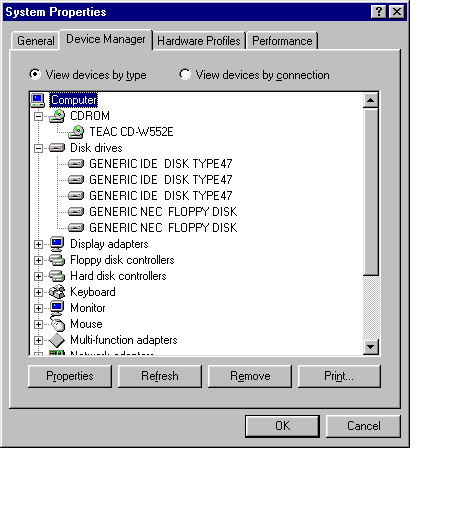
After Windows has finished the reboot-rally, you should have fewer unknown or malfunctioning devices left in Device Manager. As long as none of those are your primary or secondary IDE- or other hard disk controllers, it's time to move on to the next step...
After you have installed the motherboard/chipset drivers or possibly a separate set of IDE-controller drivers, go into the Device Manager and enable DMA or Direct Memory Access mode for hard-drives and CD-drives that support it. This is an easy step to miss, but not having DMA enabled will enormously slow down Pentium- and Pentium II-era hardware! Enabling DMA will reduce waiting times considerably, because the devices will be able to transfer data into RAM without the CPU having to act as a middle-man.
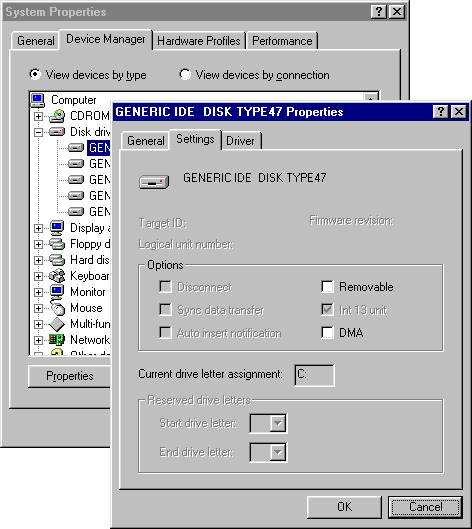
Once you have toggled the DMA-checkbox for all devices that apply, click on 'OK' at the bottom corner of Device Manager and reboot the system when asked.
Installing network components is a pre-requisite to installing the Unofficial Service Pack, as many networking components will be updated during its installation. To begin, we must first install the drivers for your network controller. If Windows recognized your hardware during setup, you can skip ahead to 3.4.2.
3.4.1) Install drivers
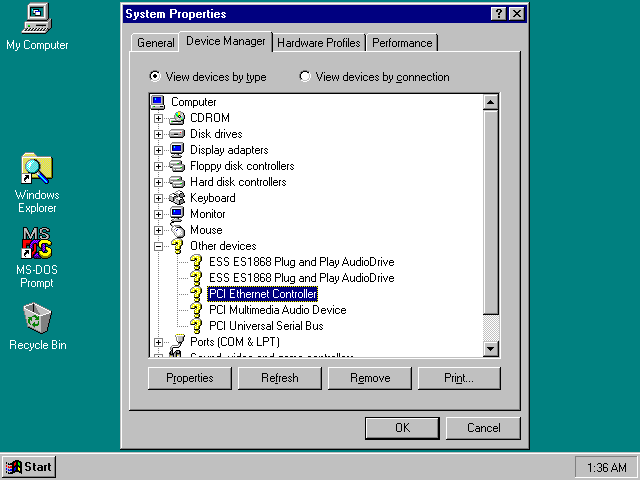
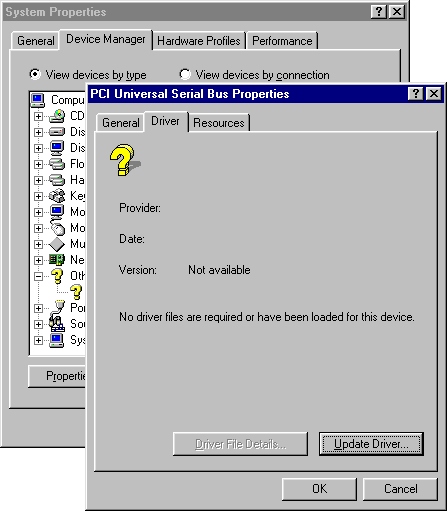
Open Device Manager and locate your network controller from the list of unknown devices. Double-click on the device.
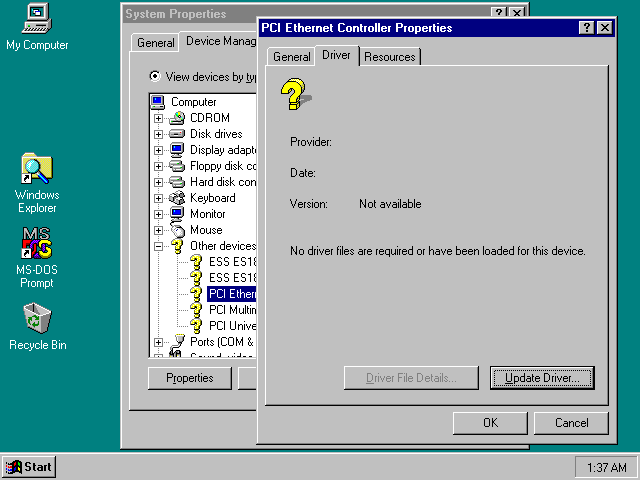
From the device properties, select the Driver-tab and click on the 'Update driver...'-button.
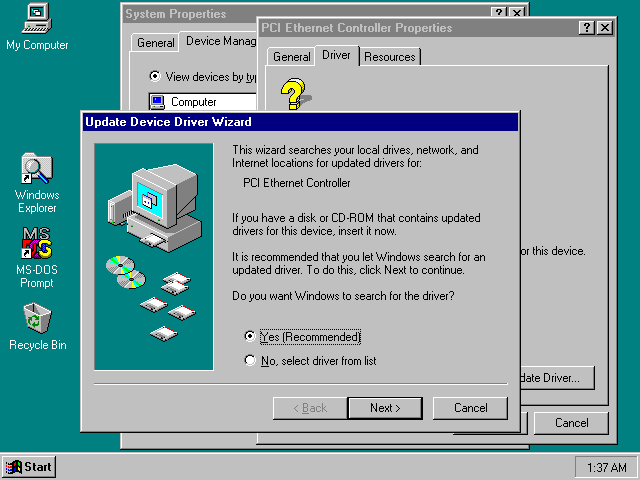
Allow Windows to look for the drivers and click on 'Next' to proceed. If you actually have a disk with drivers, you should insert it now.
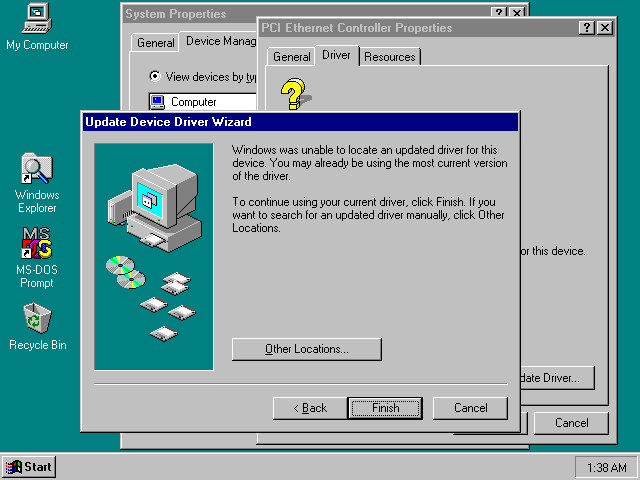
Windows will most likely fail the driver search, even if you have a valid driver disk inserted. You must click on the button labeled 'Other locations...' and either type in the directory path to the designated field or browse to the folder containing the driver for you device.
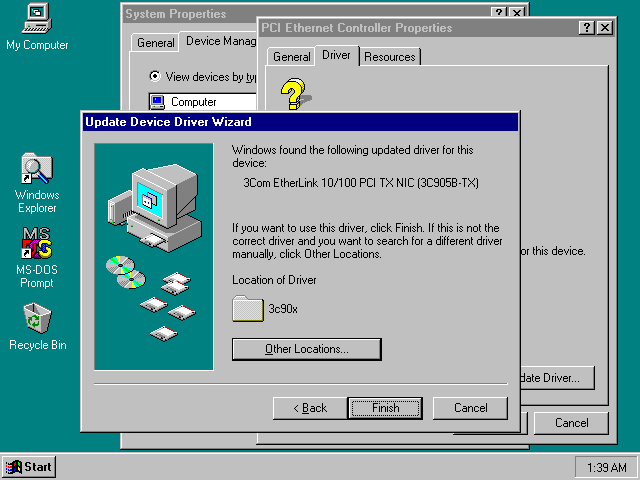
You'll know you succeeded if in the next step Windows names the device. Just click on 'Finish' to actually install the drivers.
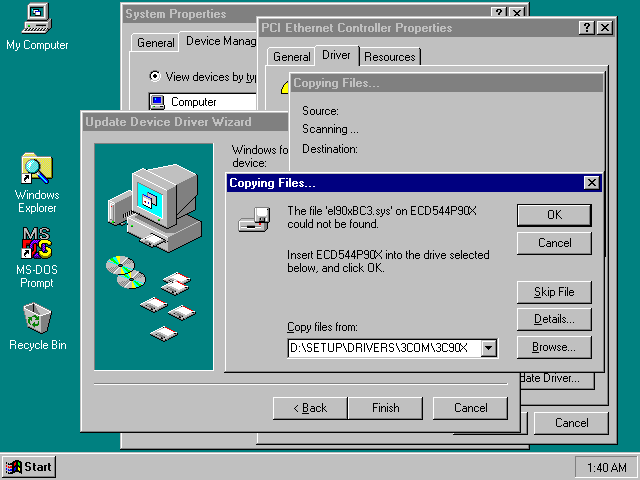
Very likely, Windows will interrupt the installation telling you it cannot find the necessary driver files. Don't panic. Windows has a tendency to not look for driver files in the directory you just provided in the previous step. 🙄 Simply re-type the same directory path or browse again to the exact directory as in the previous step and click 'OK' to let Windows resume copying the files. Windows may also ask you to locate your Windows 95-installation CD for copying some files. Use the same method as above to point the setup to the Windows-setup folder.
3.4.2) Network settings
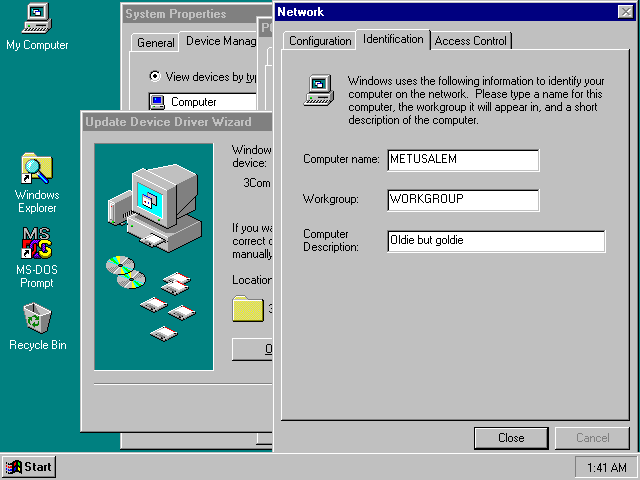
After the driver installation completes, you'll have to supply a network name and workgroup for your computer. A network name should simply be unique, but if you have more than one system running Windows 95 or Windows 98, you'll want them to use the same workgroup to make file or printer sharing easier.
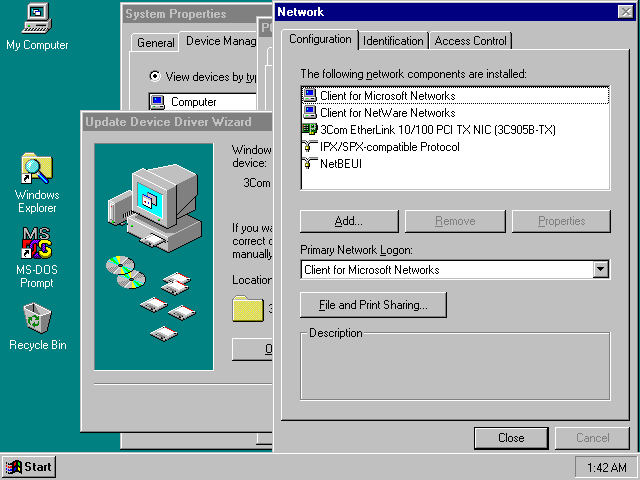
Windows 95 is old enough to not even install the TCP/IP stack by default (Hint: everyone and their moms use it now.), so we must add it manually. Click on the 'Add'-button and...
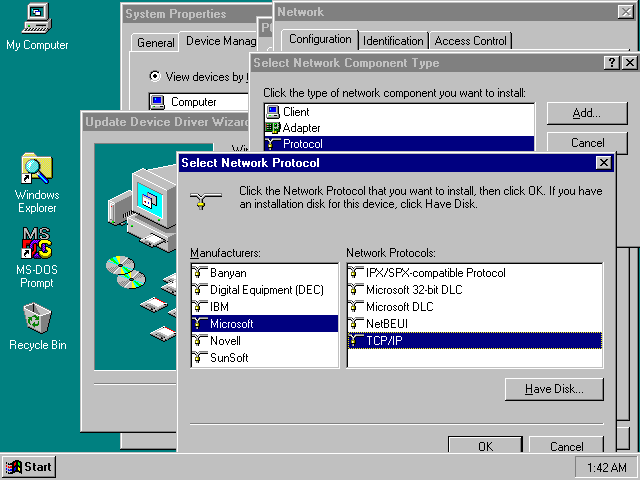
...from the list of things to add choose 'Protocol', and from the list of protocols, navigate to and select Microsoft's TCP/IP. Finish by clicking 'OK'. After adding TCP/IP, you can remove the NetBEUI-protocol and 'Client for NetWare Networks' options from the list. I recommend leaving the IPX protocol, as many older games use it for LAN play.
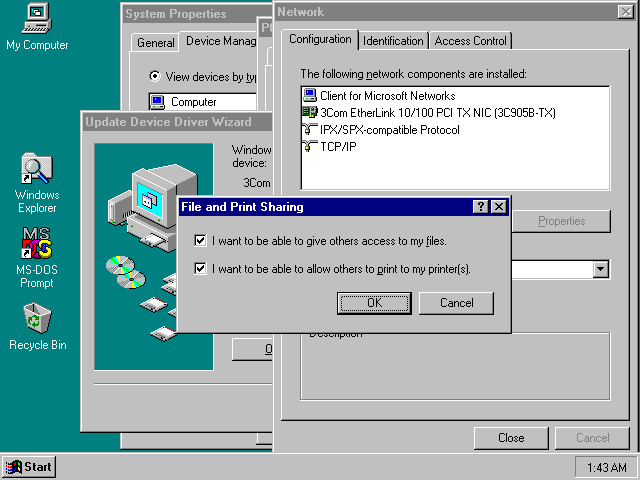
If you want to, enable file and printer sharing with other similarly aged boxes by clicking on 'File and Print Sharing' and toggling the necessary options.
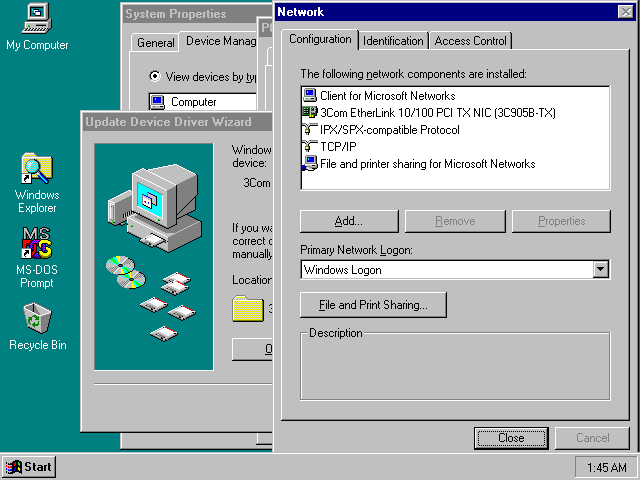
Choose 'Windows Logon' as the Primary Network Logon-option (this will allow you to avoid an unnecessary login-screen during startup) and click on the 'Close'-button.
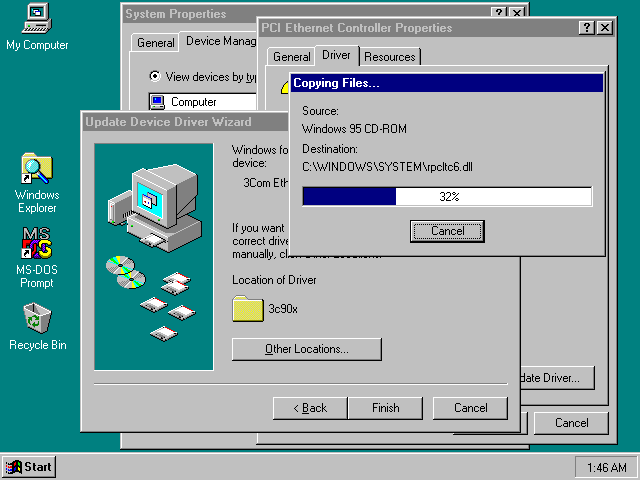
Windows will copy the necessary files.

After installation completes, Windows will want to reboot yet again. Let's do that.
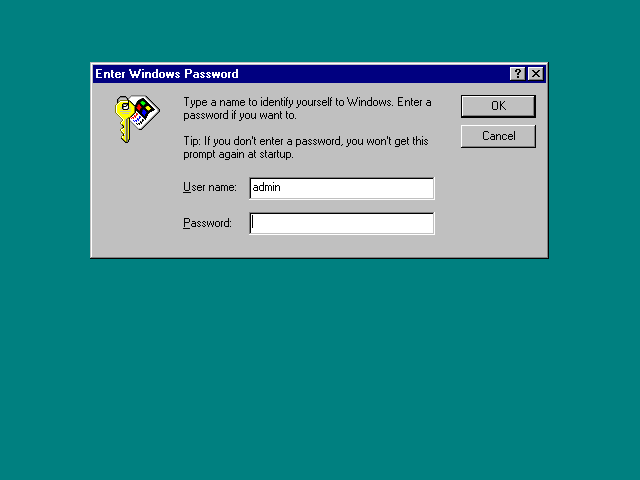
After the reboot, you'll be presented with a login dialog with username and password options. With absolutely zero-effect on security and with no true multiuser environment, I recommend disabling this feature for good. To do this, just type in a user name but leave the password field empty and click on 'OK'. When Windows asks you to re-type your password, leave both fields blank. After this, Windows won't show you this dialog again and will simply start and log in as the user you indicated here automatically.
The Unofficial Service Pack for Windows 95 OSR2 is a roll-up that contains all the important updates and fixes that Microsoft ever released, along with some optional add-ons, utilities, drivers and tweaks. I know many people have reservations towards third party tools, but this one is actually really well put together. It consists for the most part of official updates only, avoiding invasive hacks and modifications as seen with some of the service packs released by the community for Windows 98 or XP. I've been testing it for years now, and have yet to run into an issue that would deter me from recommending it wholeheartedly. I have changed my preference since this guide was originally posted in 2013, and now recommend the Lite-version of the service pack (mostly, because the full version has some Internet Explorer-related dependencies).
When you run the installer, you'll be presented with a window that allows you to simply select the components you wish to install. My preferences can be seen in the screenshot below:
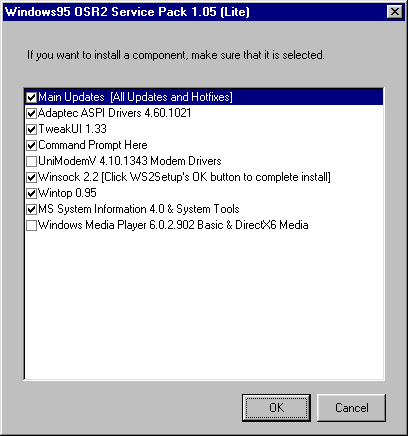
- Main Updates [definitely install]
- Adaptec ASPI Drivers [recommended] (required by many utilities that deal with the CD-drive/CD-recording)
- TweakUI [optional] (Microsoft's own user interface tweaker)
- Command Prompt Here [optional] (Microsoft's own powertoy, right-click to open a Command Prompt in any folder from within Explorer!)
- UniModemV Modem Drivers [optional] (maybe useful if you're still using a modem?)
- WinSock 2.2 [definitely install] (updated networking, required by many applications)
- WinTop 0.95 [optional] (light-weight process viewer/activity monitor)
- MS System Information & System Tools [strongly recommend] (additional utilities)
- Windows Media Player and DirectX Media 6 [skip until later or altogether]
We're skipping Windows Media Player and DirectX Media because those components require DirectX 6 or later, and we haven't installed any version of DirectX yet. After installation has completed, you'll be asked to reboot the system once.
Note: If you're running a system with an AMD processor and had to slow it down earlier, you can restore full clock speed and/or enable L1/L2 cache after installing the service pack, as it contains the patch for the CPU speed bug!
This section will contain a reference to the individual updates from official sources only. For the purists or people that really hate themselves. ETA... some time in the future. 😮
3.6.1) Installation packages
3.6.2) FAQ
Does it matter when DirectX is installed?
While DirectX 7.0a and older can be installed prior to installing the Unofficial Service Pack, DirectX 8 requires DCOM which isn't present before installation of the service pack has taken place.
DirectX itself must be installed before installing sound- or video card drivers as some drivers also fail installation if DirectX isn’t already present.
Why install anything but the latest DirectX?
A newer version of DirectX is usually preferable to an older version. That said, much of the hardware from the Windows 95-era, while compatible with the latest version of DirectX, may not have been optimized for it. Going from DirectX 7.0a to 8.0a could in some cases result in glitchy sound or lower framerates during gameplay depending on the sound- or video card and drivers. I've generally had a better experience with DirectX 7.0a, but especially games and video cards from 2001 onward will likely require and work better with DirectX 8.0.
Do I need to install DirectX Media?
Some games require it and will usually state so explicitly, but most of the time you will not miss it. DirectX 8.0 incorporates the media components, so you only ever need to separately install DirectX Media if you are using DirectX 7.0a or older.
3.7.1) Install drivers for your graphics card and sound card
If you followed this guide faithfully you should be at a point where what's missing are device drivers for your video card, sound card, and maybe the USB-controller.
Installing device drivers for any hardware does not substantially differ from installing the network card drivers in section 3.4.2. Simply open device properties for each card in Device Manager, navigate to the Driver-tab and point Windows to the driver files you have prepared for setup earlier on. The setup for a video card will differ slightly in that it will likely not appear as an unrecognized device, but a Standard VGA Adapter under the Display adapters-section of the device tree. Some drivers come bundled with a setup wizard (often setup.exe or install.exe) which, in addition to configuring the device, will also install tools or applications bundled with your device. Sometimes these are necessary, sometimes they're completely optional.
3.7.2) Finish installing the USB controller and related
For the USB-devices, you can simply remove them (as stated in the instructions from the XUSBSUPP author). This will cause Windows to automatically install drivers for them, as they're rediscovered upon Windows startup. I found that simply clicking on the 'Update Driver...'-button on the Driver-tab for the USB-devices accomplishes the same thing, though.
You'll know that the installation succeeded if inserting a USB thumb-drive into one of your USB-ports triggers the new device installation wizard. You don't need a separate driver file for the media, as mass storage drivers are included in the XUSBSUPP package. Simply click thru the setup wizard and Windows will find the drivers automatically. After the installation finishes the thumb drive should appear as a new drive with its own assigned letter under My Computer, and a small tray icon should appear in the bottom right corner of the screen. Right-clicking on the tray icon will display a menu through which you can safely stop the device before removing it.
As a sidenote, the background process for the tray utility (hotplug.exe) does consume some resources and clock cycles, so if you're not using your USB-ports daily (I mostly don't) you can disable it temporarily from within System Configuration Utility:

To do this, choose the 'Run...' item from the Start-menu, type msconfig into the path-field and press [enter]. Choose the Startup-tab in the System Configuration Utility and deselect hotplug.exe on the list of items to start. To finish, click 'OK'. To restore for easier use of USB memory sticks, simply reverse the last step.
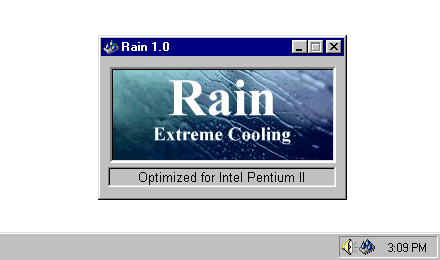
Rain 1.0 by Leading WinTech
[homepage/archive link]
[direct DL/mirror]
DOS and Windows 95 don't have the ability to tell the CPU to halt when it's not being used. As a result the CPU is continually on full throttle. Rain fixes that. It runs in the background and helps cool off your precious rare CPU. Reduces heat and power draw. I have not noticed any negative effect on performance. Multiple CPU optimization presets available.
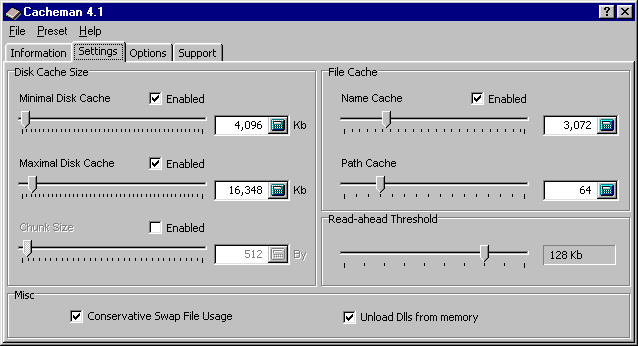
Cacheman 4.1 by Outer Technologies
[homepage/archive link]
[direct DL/mirror]
This wonderful utility makes the system memory management much better by modifying a combination of system settings scattered inside different .ini files and the registry. It has optimized presets for Win95 and -98 as well as different use cases, but also allows you to customize the settings to your liking. It doesn't have to remain resident in memory. Just save settings, reboot Windows, and enjoy improved performance. Cacheman is truly a gem because unlike so many other "memory booster" utilities that were trendy back in the day, it improves memory handling in a way that removes the need to manually free RAM all the time.
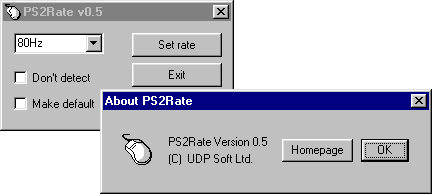
PS2Rate 0.5 by UDP Soft Ltd.
[homepage/archive link]
[direct DL/mirror]
This app sets the poll rate of you PS/2 mouse higher so that cursor movement becomes smoother. Especially great for 3D games! Every old POS Logitech mouse I've tried works fine at 80Hz.
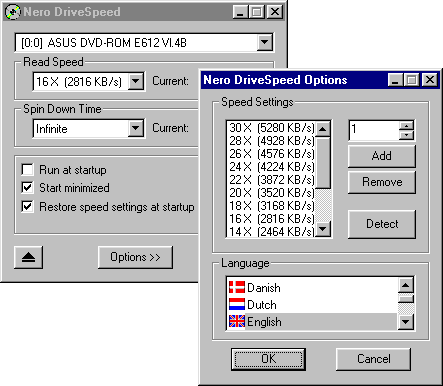
Nero DriveSpeed 1.60 by Erik Deppe
[homepage/archive link]
[direct DL/mirror]
If you have a newer CD-drive with a spindle speed of 24x or greater, you'll have noticed these produce quite a bit of noise and vibration when reading discs. There are still a couple of games that can't be patched to run without the CD in the drive. Fortunately, most Win9x era games only require 4-8x spindle and most drives will happily read CDs at that rate when told to do so.
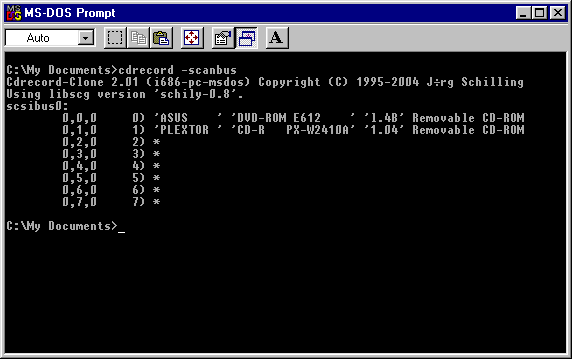
cdrtools 2.01 by Joerg Schilling
[homepage/archive link]
[direct DL/mirror]
Command line utilities for creating ISO files and burning CDs that work in Windows 95 dosbox. Great if you have a CD-burner.
To make cdrtools available in any directory, it must be added to your PATH-variable by appending the following line to your autoexec.bat:
set PATH=C:\PATH\TO\CDRTOOLS;%PATH%
To create an ISO image for burning use the following command (in this example, the contents of the directory BURN will form the root directory of your CD):
mkisofs -udf -rJ -iso-level 2 -V DISKNAME -o CD2B.ISO C:\FOLDER\TO\BURN
To burn a disc, first find out the device-address of your CD-writer by using
cdrecord -scanbus
After this, burn the disc image by using the following command (x,x,x is the device address from the previous command, y is the speed at which you wish the disc to be recorded):
cdrecord -v dev=x,x,x speed=y CD2B.ISO
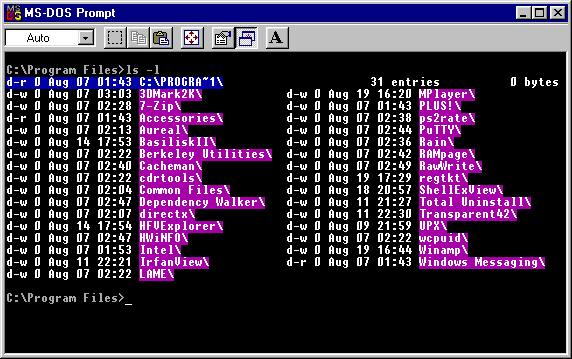
Berkeley Utilities 2.0 by Jean-Claude Chetrit
[homepage/archive link]
[direct DL/mirror]
Berkeley utilities are ports of the Unix/Linux commands for DOS. Together with Enhanced DOSKEY it almost feels like you're using a real OS whenever you need to go into the Command Prompt. 😉
Unpack the archive to a directory of your choosing, and add it to your PATH-variable by appending the following line to your autoexec.bat (in this example, C:\Program Files\Berkeley Utilities):
set PATH=C:\PROGRA~1\BERKEL~1;%PATH%
There is a PDF-manual included, but for the most part the commands function identically to their Linux counterparts.
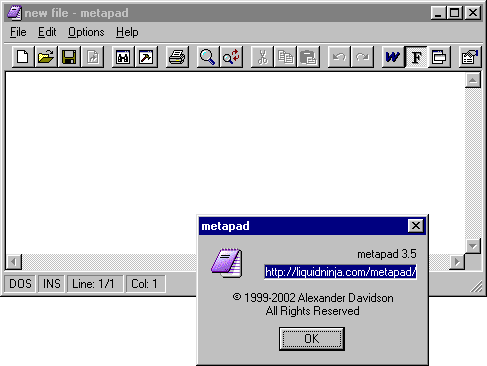
metapad 3.5 by LiquidNinja
[homepage/archive link]
[direct DL/mirror]
A more capable Notepad replacement for editing text files of all sorts.
To use metapad instead of Notepad, first unzip metapad.exe to C:\Windows,
then rename the original notepad.exe to something else, and rename metapad.exe to notepad.exe
Note: You can't make the switcharoo with Windows Explorer, you must use command line utilities.
If you installed the Berkeley Utilities, you can simply do a
mv notepad.exe notepad.bak [enter]
mv metapad.exe notepad.exe [enter]
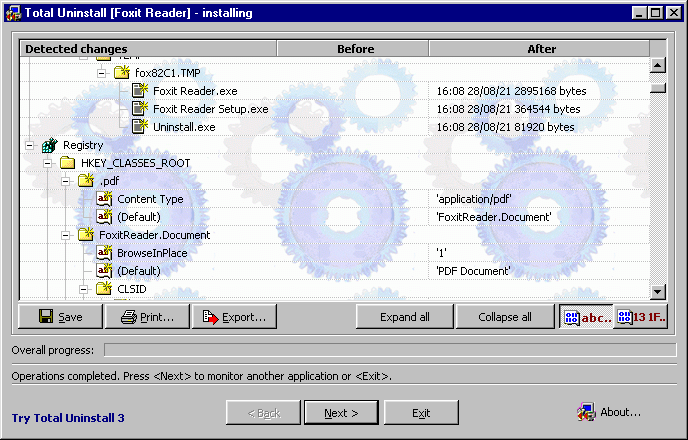
Total Uninstall 2.34 by Gavrila Martau
[homepage/archive link]
[direct DL/mirror]
You know this situation. Something breaks after you install the wrong app, and uninstalling it won't help. The only way to fix things is to completely reinstall Windows. Total Uninstall is a godsend for avoiding situations like that. It monitors your system during installations on-demand and allows you to completely undo changes by rolling back to a working snapshot of your filesystem and registry. It's a great tool, even if all you want to do is avoid cluttering up your system with remnants of software you want to try, but decide not to keep.
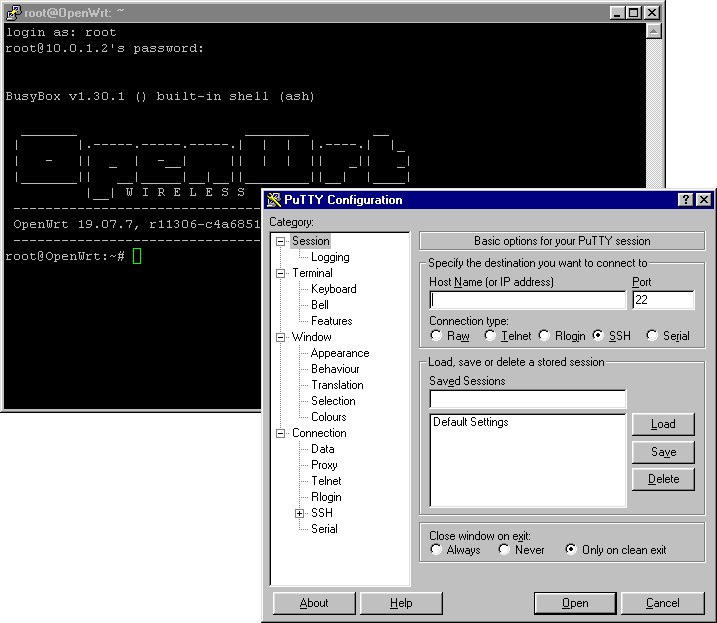
PuTTY 0.81 by Simon Tatham
[homepage/archive link]
[direct DL/mirror]
In a time when internet access on old computers is becoming more and more difficult to maintain directly, PuTTY and a handful of included utilities offer a nice gateway to newer internet-capable systems on your home network. Maybe you have a router with OpenWRT running irssi or other handy apps that you want to use remotely from your Win9x box.
Having to transfer files over floppy disks, CDs, or even USB-thumbdrives can also be a chore compared to the simplicity of transferring files over the network. The bundled pscp command line utility comes in handy for that.
To use the included pscp-utility to transfer files from another system on your LAN running SSH, simply open a Command Prompt and use the following command:
pscp username@xxx.xxx.xxx.xxx:/Users/username/Downloads/file_you_just_downloaded.zip . [enter]
The above copies file_you_just_downloaded.zip into the directory from which you're running the command. The username is your login-username from the computer on your network, followed by the IP-address of the system, followed by the directory path to the file you want. You can also use wildcards in filenames, or even the -r switch to copy a directory instead of a single file.
To copy a file the other way (from your Windows 95 setup to your more modern system running SSH/SFTP), you have to place the name of the file or folder to be transferred ahead of the directory on the target system:
pscp somecooldoodle.bmp username@xxx.xxx.xxx.xxx:/Users/username/Desktop [enter]
The above copies somecooldoodle.bmp into the Desktop-directory, in the remote system user's home directory.
If you have a Mac as the system to connect to, enabling the above only requires that you toggle 'Remote login' under Sharing in the System Preferences. ☝️
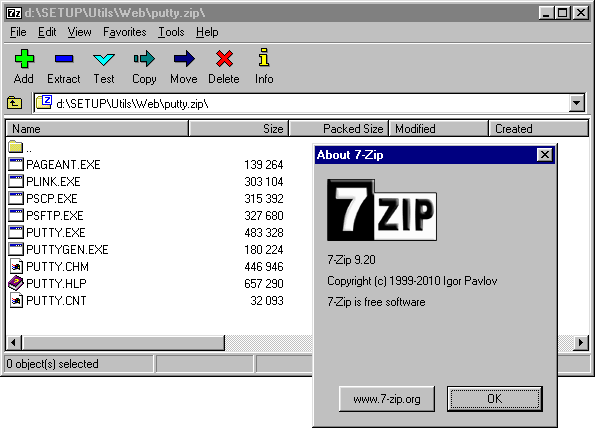
7-Zip 9.20 by Igor Pavlov
[homepage/archive link]
[direct DL/mirror]
7-Zip is a great tool for handling all sorts of archive formats from the commonly used ZIP, to some of the more esoteric ones. The app includes both command line-, as well as GUI versions and can integrate with Explorer for more seamless operation. While the GUI is not quite as polished as the ever-popular WinZip or its many clones, it gets the job done and is pretty light on the resources, with more versatile compression and decompression-support.

IrfanView 3.97 by irfan skiljan
[homepage/archive link]
[direct DL/mirror]
It's easy to forget that nearly every external format required its own viewer or application, having gotten used to built-in features provided in more modern operating systems. IrfanView is a great utility that not only allows you to view (and pre-view) a whole host of different image-files, it even includes some of the most common modification options such as resizing, bit-depth alteration, rotation, and much more. The bundled IrfanView Thumbnails is a great app for when you want to get an idea of the contents of a folder without having to go over every single image individually, though depending on the speed of your system generating the thumbnails can take some time.
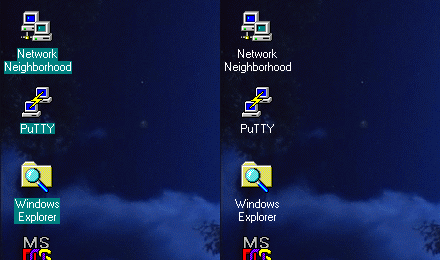
Transparent 4.2 by Jay Guerette
[homepage/archive link]
[direct DL/mirror]
A slightly petty issue, but I dislike the solid-color background that appears below the icons on my desktop when I'm using a wallpaper! This is one of those things that was fixed in later versions of Windows. Many utilities were written to address this need for users of Windows 95/98. I settled on Transparent. It seems innocuous, light weight, and does what it says.
Foxit Reader 1.3 by Foxit Software
[homepage/archive link]
[direct DL/mirror]
I used to install Adobe's own Acrobat Reader 4.0 on older computers whenever a PDF viewer was needed and didn't much bother with third party alternatives. After testing it I have to admit Foxit's PDF-reader is both faster and more robust in features. Great for viewing that odd PDF-manual.
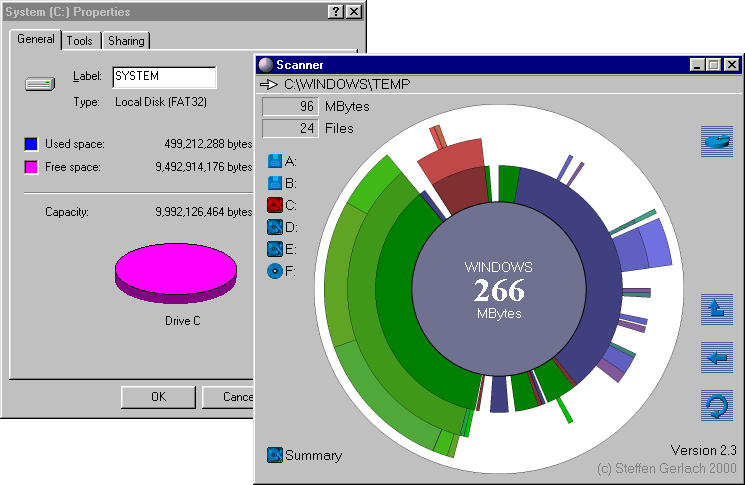
Scanner 2.3 by Steffen Gerlach
[homepage/archive link]
[direct DL/mirror]
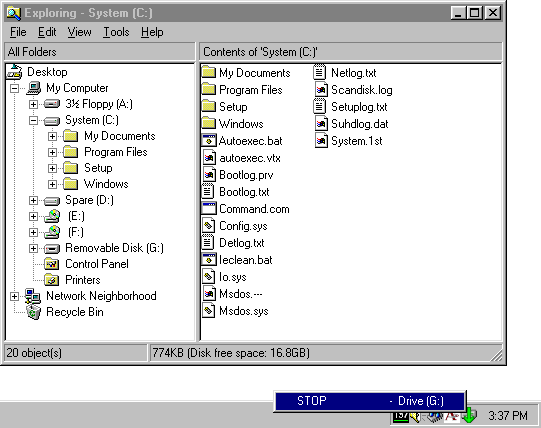
In typical Microsoft fashion, the built-in features such as the hard disk analysis pie chart are built to the lowest passable standard, so if your disk is over 2 GB in size the chart no longer functions as intended. Scanner is a great alternative that offers way more useful features than Explorer ever did, allowing you not only to view the amount of free space vs. used, but also allowing you to determine which files and directories eat up used space by assessing the visual representation. Click on a portion of the chart to get a further analysis of a particular subdirectory, or right-click to get actionable options - including view folder contents in Explorer. Very handy!
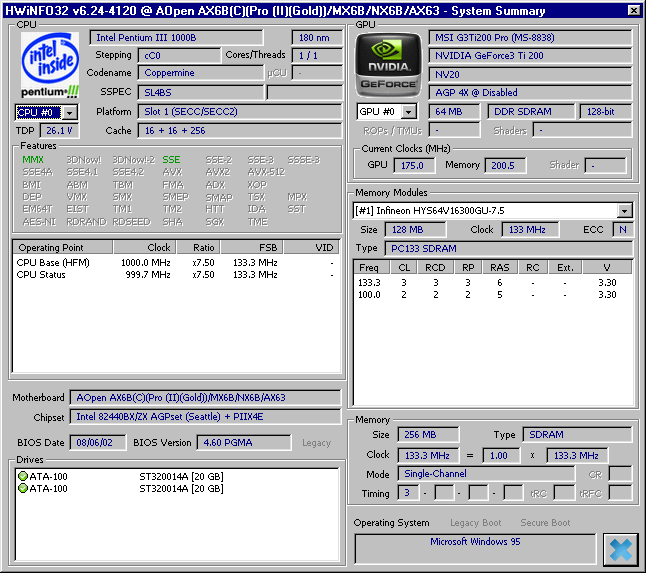
HWiNFO 7.20 by Martin Malík
[homepage/archive link]
[direct DL/mirror]
HWiNFO is a useful tool for gathering information about your hardware and sensors. Its support for old stuff can be a bit spotty in places, but the author has expressed an interest in maintaining compatibility for older hardware and operating systems.
Some users of older systems way wish to prevent Windows from starting automatically, or load a certain set of device drivers or utilities when they run DOS-applications and games in a pure environment.
5.1.1 How to start in command-line mode instead of GUI:
Edit the BOOTGUI line in msdos.sys to read BOOTGUI=0. That way your system will alway boot to DOS. Starting Windows will require entering the command 'win'.
[Source] https://www.computing.net/answers/dos/msdos-7 … -gui/17990.html
5.1.2 How to create startup-menus using config.sys and autoexec.bat
To create a menu that results in different things happening based on your selection, you must edit both config.sys and autoexec.bat.
The [COMMON]-section defines items that are run regardless of menu selection, [menu]-section defines your choices and menu presentation. Each menu item must also have a corresponding section, under which the desired drivers etc. are placed. Here is a sample config.sys:
[COMMON]files=40buffers=20lastdrive=x[menu]menuitem=TSRS, Load mouse, CD-ROM and audio drivers for DOSmenuitem=NoTSRS, Don’t load DOS drivers (run Windows)menucolor=15,1menudefault=NoTSRS,10[TSRS]DEVICE=C:\WINDOWS\COMMAND\HIMEM.SYS /TESTMEM:OFFDEVICE=C:\WINDOWS\COMMAND\EMM386.EXE RAMDEVICE=C:\WINDOWS\COMMAND\OAKCDROM.SYS /D:DVD[NoTSRS]
Note that the choices defined in config.sys persist in autoexec.bat as well, but the sections are distinguished with a colon, like :SELECTION-NAME , instead of brackets, or [SELECTION-NAME]. In autoexec.bat one must also take care to direct the execution of the commands from the desired selection to the end of the batch-file with GOTO, otherwise you'll end up running all the commands below the chosen section top-down regardless of what choice the user made in their menu.
Here is the matching autoexec.bat sample file:
goto %config%:TSRSSMARTDRV.EXE /X /VLH MOUSE.EXELH MSCDEX.EXE /D:DVD /D:CDRW /E /V /L:EC:\ESSAUDIO\ESSCFG.EXE /A:220 /I:7 /D:1 /B:330 /J:EC:\ESSAUDIO\ESSVOL.EXE /V:8 /L:0 /W:8 /M:0 /C:8 /S:8 /A:0rem /A:0 is the wavetable header volume!goto end:NoTSRS@echo Type ‘win’ to start Windows.:end
[Source] http://www.uncreativelabs.net/textfiles/dos/6-2MENU.TXT
[Source] http://www.easydos.com/mscdex.html
[Source] https://www.philscomputerlab.com/cd-rom-mouse … t-up-files.html
[Install Win95 like you were born in 1985!] on systems like this or this.