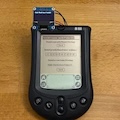
VOGONS


Reply 20 of 33, by Thermalwrong

User metadata
Rank Oldbie
Rank
Oldbie

You're jumping the gun a bit. Don't replace the RAM chips and the fact that the laptop won't boot with no expansion RAM fitted is very significant.
Possibly it's indicative that there's some fault with the memory addressing lines for the on-board chips. Not the chips themselves, those brown marks that the red arrows point to in your picture is rosin flux from when the laptop was originally assembled, big parts got hand soldered with rosin flux and that stays on the board doing no harm.

The addressing lines for the on-board memory are separate from the expansion memory and if it's only working when expansion memory is fitted then maybe perhaps it's jumpering across some damaged traces to allow the on-board memory to function again. I need to put together a better picture for this but here's what I mean:

460cdt-testpad-traces.jpg
Filename
460cdt-testpad-traces.jpg
File size
505.1 KiB
Views
477 views
File license
CC-BY-4.0

There are some traces that connect between the memory address / ras / cas lines which go through some traces with gold test pads. Those corrode off quicker than all the other traces when battery acid gets to them because they have no solder mask and a big surface area. In the above picture I've had to run replacement traces over those test pads to reconnect those lines.
Next time you have it apart, try scratching the solder mask back a bit on each side of a test pad and put some flux and fresh solder on them to see if they take solder and are intact. I've done some rather extensive work mapping out what traces goes where and does what, which I'll try to share soon.

Reply 21 of 33, by User5518

User metadata
Rank Newbie
Rank
Newbie

Finally managed to take apart the notebook again this evening. Unfortunately, I didn't get very far:

Vss_to_Ground.jpeg
Filename
Vss_to_Ground.jpeg
File size
1.35 MiB
Views
445 views
File license
Public domain

(Not all "Vss" pins have been measured yet.)

Vcc.jpeg
Filename
Vcc.jpeg
File size
1.36 MiB
Views
445 views
File license
Public domain

(Not all "Vcc" pins have been measured yet.)

But I did find the datasheet for the TC51V16165CFT-60 components installed:

Filename
partstack-datasheet.pdf
File size
1.21 MiB
Downloads
16 downloads
File license
Fair use/fair dealing exception

I'll try to measure the traces in the next few days, including the connection points you mentioned, Thermalwrong – thank you for that!

Reply 22 of 33, by User5518

User metadata
Rank Newbie
Rank
Newbie

Presumably, I have found the first issue.

The trace highlighted in light green in a screenshot

Thermalwrong wrote on 2024-12-01, 04:27:
460cdt-testpad-traces.jpg
Filename
460cdt-testpad-traces.jpg
File size
505.1 KiB
Views
477 views
File license
CC-BY-4.0

connects to pin 34 of the chip:

ram_pinout.png
Filename
ram_pinout.png
File size
221.62 KiB
Views
411 views
File license
Public domain

(UCAS negated - "Column Address Strobe / Upper Byte Control")

As ChatGPT explained to me, UCAS is relevant for all chips. However, only the first two chips have a 6-ohm trace connection:

UCAS_ok.jpeg
Filename
UCAS_ok.jpeg
File size
1.9 MiB
Views
413 views
File license
Public domain

All other traces have a high-impedance connection (0.3 - 0.5 MOhm):

UCAS_not_ok.jpeg
Filename
UCAS_not_ok.jpeg
File size
1.9 MiB
Views
413 views
File license
Public domain

I currently assume that there is a broken trace between the first two chips and the "lower" chips. I still need to determine the exact location of the fault and verify whether other connections are intact

Reply 23 of 33, by User5518

User metadata
Rank Newbie
Rank
Newbie

After some measurements, I figured this out:

UCAS_traces.jpeg
Filename
UCAS_traces.jpeg
File size
1.98 MiB
Views
400 views
File comment
"not conneted together" = "not directly connected..."
File license
Public domain

Hopefully, this is correct.

All other traces, which were marked by you, Thermalwrong, are working fine / are not faulty.

Reply 24 of 33, by User5518

User metadata
Rank Newbie
Rank
Newbie

Since I still have this error:

IMG_2778.jpg
Filename
IMG_2778.jpg
File size
444.86 KiB
Views
383 views
File comment
Memory-Error
File license
Public domain

I thought it would be a good Idea to check the address-traces, but as far as I could measure them, they are fine.

I also checked these "3T" components:

address-traces.jpg
Filename
address-traces.jpg
File size
1.82 MiB
Views
384 views
File license
Public domain

According to ChatGPT, these are Schottky-diodes, which should protect the address-pins of the RAM-Chips. But they are all fine: In one direction, they have around 300 Ohm and in the other direction, they are showing "Open Loop". But I have no glue, where the address-traces are coming from.
I guess, that this is the memory-controller?

IMG_3017.jpg
Filename
IMG_3017.jpg
File size
63.56 KiB
Views
384 views
File comment
Memory_Controller?
File license
Public domain

But I wasn't able to find any information or pinout about it.

Edit: What I am just realizing: Regardless of whether I start the notebook with the 32MB module or the 64MB module, during POST and also in MemTest, only the modules are detected, not the onboard RAM. I guess, that this is also the reason, why MemTest does not find any errors, since it cannot detected/test the onboard-ram.

Reply 25 of 33, by Thermalwrong

User metadata
Rank Oldbie
Rank
Oldbie
User5518 wrote on 2024-12-08, 13:46:
After some measurements, I figured this out: […]
Show full quote

After some measurements, I figured this out:

UCAS_traces.jpeg
Filename
UCAS_traces.jpeg
File size
1.98 MiB
Views
400 views
File comment
"not conneted together" = "not directly connected..."
File license
Public domain

Hopefully, this is correct.

All other traces, which were marked by you, Thermalwrong, are working fine / are not faulty.

Hmm, that's something I haven't looked at or worked to fully understand yet. I'll have to look into it but I can confirm that my partly working board has the same thing, the UCAS signal for the IC69 IC doesn't connect to UCAS for the one above IC70, instead it connects to the one to the side of it - IC12.
Same for all the ones above as well. I need to look into that and I'll get back to you 😀

I have however finished annotating the memory address lines and the RAS, write enable lines. The UCAS & LCAS are there but I don't understand how they distribute out to the onboard memory yet since my board also seems to have the UCAS line separated between different modules in the same bank.
To clarify the board has two banks of on-board memory which are "IC69 to IC72" and "IC12 to IC15". On the 460CDT they used higher density 64Mbit memory ICs so only IC69 to IC72 are populated for 32MB of system memory.
On the 230CX and the 440CDT they used lower density 16Mbit memory ICs and both banks are populated to make up 16MB of memory.

Here's a handy memory IC pinout diagram for 16Mbit and 64Mbit JEDEC standard EDO Memory ICs:

Filename
64mbit and 16mbit TSOP pinouts.pdf
File size
104.36 KiB
Downloads
14 downloads
File license
CC-BY-4.0

It's A4 sized and quite useful for drawing on if you're checking signals with an oscilloscope.

I also said something incorrect in previous posts regarding SO-DIMM modules for Toshiba laptops, they *are* completely standard EDO SO-DIMMs and I've confirmed that with several EDO SO-DIMMs and both a Tecra 520CDT and Satellite 460CDT. The reason for my misunderstanding is that Toshiba listed their pins 1 > 72 on one side and 73 > 144 on the other. The JEDEC standard from what I can tell, and what you'll see for the pin number markings on EDO SO-DIMM PCBs is that all odd pins are on one side (1 to 143) and all even pins are on the other (2 to 144).
Here's an updated diagram showing where the pins are in relation to the pinout listed in the Toshiba Tecra 500CDT maintenance manual with indicators for the key/gap pins:

Filename
Toshiba-EDO-pinout-reference-sodimm.pdf
File size
567.02 KiB
Downloads
14 downloads
File license
CC-BY-4.0

So you can use EDO SO-DIMMs safely on Toshiba laptops that use 144pin SO-DIMMs even the ones with a footprint for the bigger Toshiba type of SO-DIMM that is held in place with screws.

I found something similar to your experience, this Toshiba Satellite Pro 460CDT motherboard I've been trying to get working for ages has stumped me so much. It was stuck on code 04 for memory data and I found some bad memory data lines of the 64. The memory data lines are directly connected to the chipset and there are no termination resistors between the SO-DIMM and on-board memory. That's what all the lines 4 vias in a row are for, groups of memory data signals.
They are less affected by corrosion than the address / RAS / CAS / WE lines because there's less test pads.
I still haven't got it to go past code 04 with just the on-board memory but now I know that regular EDO SO-DIMMs can be used, trying that it gets stuck on code 05... Progress!

Something I've found is a few instances of those crusty vias which on the top side of the board still connect to where they're going, like the SO-DIMM slot. But it doesn't connect to the bottom side of the via any more which connected to the 22 ohm termination resistor.
The board design does something interesting where there are separate 22-ohm / 33-ohm termination resistors for the on-board and SO-DIMM memory, that broken via meant that the SO-DIMM's memory address line 4 was not working but the on-board memory's MA4 was okay.

Now, here's the annotated picture showing where the memory address lines and WE / RAS / CAS go. But not fully yet since I need to trace out where UCAS & LCAS go fully. Still though if you zoom in on the chipset area you can see which memory address line goes where from the colour.

460CDT memory signal tracing - ANNOTATED.jpg
Filename
460CDT memory signal tracing - ANNOTATED.jpg
File size
1.72 MiB
Views
373 views
File license
CC-BY-4.0

You may notice in my picture that there's no resistors for RAS & Write-Enable for IC12 to IC15 because they're not populated on the 460CDT. I think that removing the resistors for RAS & Write-Enable for the on-board memory might allow just the SO-DIMM memory to work - I'm currently trying that on my board. It hasn't worked yet but I'm trying it 😀
Don't try that if you're not sure you can move them cleanly and put them back easily - the way I've done it is moved them off so only one side is on a pad and not contacting anything else so I can put them back later.

Looking at your first picture where you took a pic of it before cleaning, I overlaid it with the annotated picture and I think these are the spots you should look at:

  • Lower CAS for SO-DIMM - only HALF of your SODIMM is detected, right? Perhaps that's a mismatch between the SPD reporting of the memory module size vs what it can address
  • Write-Enable for IC69 to IC72
  • MA0 for on-board memory - that's possibly an issue since your one won't boot without an SO-DIMM fitted
  • MA3 for on-board memory - same as above
  • MA2 for SO-DIMM - the test pad looks crusty so it's possibly bad, one missing address line could also cut SO-DIMM size in half

The fact that memtest only saw / tested 32MB when the BIOS showed 48MB suggests that 16MB can't be used. I wonder if that's the onboard memory or it can only use half the SO-DIMM??
edit before post: I see your most recent post that was made while I was writing this, you've come to the same conclusion. Perhaps it can't address the on-board memory. Trying a different size SO-DIMM would give a more conclusive answer I think, you can try any EDO SO-DIMM now 😀

Check if the green and red traces are good for both the on-board and SO-DIMM parts. I'll try to find out why the UCAS & LCAS signals aren't common across all the on-board memory.

Reply 26 of 33, by Thermalwrong

User metadata
Rank Oldbie
Rank
Oldbie
User5518 wrote on 2024-12-08, 17:20:
Since I still have this error: […]
Show full quote

Since I still have this error:

address-traces.jpg
Filename
address-traces.jpg
File size
1.82 MiB
Views
384 views
File license
Public domain

I thought it would be a good Idea to check the address-traces, but as far as I could measure them, they are fine.

I also checked these "3T" components:

IMG_2778.jpg
Filename
IMG_2778.jpg
File size
444.86 KiB
Views
383 views
File comment
Memory-Error
File license
Public domain

According to ChatGPT, these are Schottky-diodes, which should protect the address-pins of the RAM-Chips. But they are all fine: In one direction, they have around 300 Ohm and in the other direction, they are showing "Open Loop". But I have no glue, where the address-traces are coming from.
I guess, that this is the memory-controller?

IMG_3017.jpg
Filename
IMG_3017.jpg
File size
63.56 KiB
Views
384 views
File comment
Memory_Controller?
File license
Public domain

But I wasn't able to find any information or pinout about it.

Edit: What I am just realizing: Regardless of whether I start the notebook with the 32MB module or the 64MB module, during POST and also in MemTest, only the modules are detected, not the onboard RAM. I guess, that this is also the reason, why MemTest does not find any errors, since it cannot detected/test the onboard-ram.

Those little 4 leg diodes from what I tell are TVS diodes, for ESD suppression. They're supposed to conduct / short to ground if the voltage goes above the level allowed by the diode. Helps to protect the chipset and ram.
The chipset is that big chip and it's a Toshiba gate array, essentially it's the northbridge / cpu, memory & cache interface. There are no datasheets because the chipset is not something that Toshiba would have marketed to other companies, there might be a generic datasheet for that size of gate array in an unprogrammed state but I haven't looked for it.

Plugging those numbers on the BIOS screen into a hex to binary/decimal. It's saying that just past the 32MB boundary it's writing 00000000 but getting 0d0d0d0d back?
Do you have another EDO SO-DIMM you could try? That's a weird error pattern. The maintenance manual doesn't say much about what those values all mean since according to that document if you get that error it's time for a board replacement 😀 (well, I've seen that error plently of times with troublesome SO-DIMM / memory module bad connections so not quite, perhaps it means replace the memory module. oxidation is not a factor so much for equipment in its warranty period)
But I think that means it tried writing one value and got another back. I found one other reference in newsgroup archives, ironically also for a 440CDT:

Self test Memeory test 36608 KB
Extended memory error
Address 02420878H
Read data 3000021EH
Write data 0000021EH
Test complete

I tried making my own with a known bad SO-DIMM but wasn't quick enough with the camera and the reset button just broke on that laptop, gonna try to make another example though.

Last edited by Thermalwrong on 2024-12-08, 19:11. Edited 1 time in total.

Reply 27 of 33, by User5518

User metadata
Rank Newbie
Rank
Newbie

First of all, I want to thank you for your detailed post. I was just about to give up for the day, but your post motivated me to keep going. 😀

So: I actually have a 4-channel oscilloscope with a 16-channel logic analyzer:

oszi.jpg
Filename
oszi.jpg
File size
910.64 KiB
Views
360 views
File license
Public domain

Everything is still practically new, unpacked and unused. I really need to familiarize myself with it and learn how to use the device properly. It might be quite helpful here...

Next, I’ll try to replicate your measurements on my end and post again if I find something (or even if I don’t). The image is definitely very helpful. Thank you! I’ll also follow your recommendations.

As for desoldering the resistors, I would also put that off for now. I could probably desolder the resistors with my hot air gun, but theoretically (and practically) it should also work with the resistors in place.

Regarding the RAM, I can make the following observation:
I'm pretty sure, that the on-board ram is the issue here:

For instance, with a 32MB module, only 32MB is recognized by the OS, but 48MB is shown in the BIOS:

32MB_Module_plus_16MB_onboard.png
Filename
32MB_Module_plus_16MB_onboard.png
File size
441.72 KiB
Views
360 views
File license
Public domain

Similarly, with a 64MB module, only 64MB is recognized by the OS, but 80MB is shown in the BIOS:

64MB_Module_plus_16MB_onboard.png
Filename
64MB_Module_plus_16MB_onboard.png
File size
504.8 KiB
Views
360 views
File license
Public domain

Reply 28 of 33, by User5518

User metadata
Rank Newbie
Rank
Newbie

I've now checked all the connections and actually found a broken line. 😀

no_connection.jpg
Filename
no_connection.jpg
File size
1.99 MiB
Views
345 views
File license
Public domain

I will now solder a new wire from the resistor to Pin 24 of the "upper" chip and then hope that everything works. It seems very likely, as the connector of the battery that leaked is located exactly on the other side of the resistor/board. So, I'm hoping for the best... I'll report back here to let you know if it worked or if my board went up in smoke. 😉

Reply 29 of 33, by User5518

User metadata
Rank Newbie
Rank
Newbie

It is not pretty, but it connected correctly, hopefully this will work:

IMG_3034.jpeg
Filename
IMG_3034.jpeg
File size
1.36 MiB
Views
337 views
File comment
This was the easiest part.
File license
Public domain
IMG_3039.jpeg
Filename
IMG_3039.jpeg
File size
1.13 MiB
Views
337 views
File comment
I needed a few attemps and it is still not pretty, but it has the right connection.
File license
Public domain
IMG_3041.jpeg
Filename
IMG_3041.jpeg
File size
1.68 MiB
Views
337 views
File comment
The new wire in full length.
File license
Public domain

(And yes, sadly, this was the thinnest wire I had at hand.)

Reply 30 of 33, by User5518

User metadata
Rank Newbie
Rank
Newbie

YES!!!

POST_OK.jpg
Filename
POST_OK.jpg
File size
752.35 KiB
Views
330 views
File license
Public domain
BIOS_OK.jpeg
Filename
BIOS_OK.jpeg
File size
1.13 MiB
Views
330 views
File license
Public domain

It is booting with just the onbard-memory! THANK YOU so much, Thermalwrong! I would never have been able to identify the issue without your help. THANK YOU! THANK YOU! THANK YOU!
Hopefully, I'm not celebrating too early again. MemTest is still running, but so far, things are looking good. 😀

MemTest_running.jpeg
Filename
MemTest_running.jpeg
File size
928.33 KiB
Views
330 views
File license
Public domain

@Thermalwrong If I can do anything to help you with your 460CDT, please let me know.

Reply 31 of 33, by User5518

User metadata
Rank Newbie
Rank
Newbie

So, MemTest has now completed and found no errors. 😀

MemTest_OK.jpeg
Filename
MemTest_OK.jpeg
File size
987.44 KiB
Views
329 views
File license
Public domain

I just installed the 32MB module, and I was able to start the Windows 95 setup without any issues, which wasn't working before:

Win95Setup_OK.jpeg
Filename
Win95Setup_OK.jpeg
File size
1.78 MiB
Views
329 views
File license
Public domain

Now I just need to fix my Toshiba 530CDT and my Escom 486SX laptop. 😉 For now, though, I'm just happy that the 440CDT is working.

Reply 33 of 33, by Thermalwrong

User metadata
Rank Oldbie
Rank
Oldbie
User5518 wrote on 2024-12-08, 21:53:
So, MemTest has now completed and found no errors. :) […]
Show full quote

So, MemTest has now completed and found no errors. 😀

Win95Setup_OK.jpeg
Filename
Win95Setup_OK.jpeg
File size
1.78 MiB
Views
329 views
File license
Public domain

I just installed the 32MB module, and I was able to start the Windows 95 setup without any issues, which wasn't working before:

MemTest_OK.jpeg
Filename
MemTest_OK.jpeg
File size
987.44 KiB
Views
329 views
File license
Public domain

Now I just need to fix my Toshiba 530CDT and my Escom 486SX laptop. 😉 For now, though, I'm just happy that the 440CDT is working.

That's awesome! 😁 That's also another confirmation that code 05 is repairable and it does relate to memory addressing moreso than memory data lines.

Your patch wire does look a bit big but if it's not shorting anything and it works, then it works great. Looks like it's secured well and insulated well so that should be fine as-is for a while.