VOGONS


First post, by Grande 3:16

User metadata
Rank Newbie
Rank
Newbie

Hello all, this is my first time post.

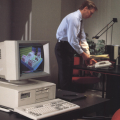
I have slowly been "upgrading" my NEC Powermate 1 APC IV 286, I've replaced the original MFM card with an IDE card and the hard drive from a 20MB MFM drive to a 270MB IDE drive (plenty for '80s/early '90s DOS games, Windows 3.0 etc). I've replaced the BIOS to a newer one that accepts custom drive specs (as "turbo" mode is keypress I now can't get it out of 8mhz but that's another problem to solve) and everything is going well.

However, the IDE controller card (Miniscribe) doesn't have a hard drive pin header for the front activity LED. I'm finding conflicting information on how to connect a header/wires to the card. Can someone please help me on how to connect it. I get by with soldering/electronics but I'm still a bit of a novice.

Thank you in advance.

Reply 1 of 5, by mdog69

User metadata
Rank Member
Rank
Member

JP2 might be a candidate for a header, especially if one pin goes to the resistor near the IDE connector, and if the other end of that resistor goes to pin 39 on the IDE.

Reply 2 of 5, by Grande 3:16

User metadata
Rank Newbie
Rank
Newbie

Thanks for the tip. I did the beep test with a multimeter, the bottom pad on JP2 goes to pin 39 and the top one goes to pin 27.

Reply 3 of 5, by Grande 3:16

User metadata
Rank Newbie
Rank
Newbie

Well, it WAS going to pin 39. And then it wasn't. And then it was going to pin 39, 40, and 38. Now it's not going to 39 again. 😒

Reply 4 of 5, by TheMobRules

User metadata
Rank Oldbie
Rank
Oldbie

Another option is to connect the activity LED directly to your hard drive. Some of them have a 2-pin connector on the front of the PCB for this purpose, others have an LED that you can remove and replace with a pin header connector.

Reply 5 of 5, by DaveDDS

User metadata
Rank Oldbie
Rank
Oldbie

Another option I've sometimes done in the past - connect to the select for the drive - see IDE pinout for details.
(If only one drive - easy to connect via second cable - otherwise you can add a third connector or tack solder wires to
the board)

For a longer cable/larger LED i'd probably build a little driver (as simple as a single transistor) - if you want to condition
on read/write, step etc... you can build a slightly more complex circuit to combine as wanted.

Dave ::: https://dunfield.themindfactory.com ::: "Daves Old Computers"->Personal