VOGONS


First post, by ddoyle525

User metadata
Rank Newbie
Rank
Newbie

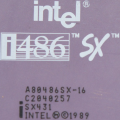
For quite some time I have been wanting to build a 486 PC similar to the original 486DX-33 PC I bought back in 1993. While searching for parts online I noticed that 486 AT-style cases were difficult to find and often expensive and in rough shape. Fortunately, I found a very nice 486 desktop case in the Netherlands so I decided to take a chance and purchase the case. Unfortunately, the case arrived badly damaged. Several of the plastic mounting posts for the front bezel had broken off. Furthermore there was no power switch, no power switch mounts, and the 3.5in hard drive bay was missing. What started as a simple PC build quickly became a significant repair project.
Before I go further I would like to thank Almighty God for His love and answering my prayers and giving me the talent and perseverance to take on these projects to their completion. Also for the Vogons community, and other retro-computing enthusiasts like Phil's Computer Lab, DosDays, LGR and many others for all of the helpful articles, YouTube videos, etc. that made this happen. I am not a crafty person by any stretch and this was my first attempt at using a Dremel tool.

The first order of business was to repair the damaged bezel. I used drywall anchors to replace the broken mounts as shown below. I did this by trimming the anchors to the correct length and then applying JB Weld directly to the bezel where the anchors would go. While the epoxy was still drying I then bolted on the anchors to the metal case and then mounted the bezel to the case so that the anchors landed in the dab of JB Weld I applied earlier. This ensured that the anchors hardened in exactly the correct position.

The second step was to fashion a mount for the power switch. I was able to source a metal plate from another case and using a Dremel I filed away the excess metal around the plastic mounting posts and bolt it into place. I then glued on a plastic extender to fill the gap between the power switch and the power button on the case to give it a good feel.

The third step was to find a replacement 3.5in drive bay. By God’s providence I located a drive bay from an old Dell Dimension that I found in the warehouse of a computer recycling shop. I just had to cut away the excess length with a Dremel and it fit perfectly!

Once the repairs were completed I began the process of ordering parts from eBay to get things working.

"Jesus said to him, “I am the way, the truth, and the life. No one comes to the Father except through Me." - John 14:6

Reply 1 of 7, by ddoyle525

User metadata
Rank Newbie
Rank
Newbie

The biggest stumbling block I encountered was with the video cards. I understand that we are dealing with hardware that is over 30 years old in some cases and I had tried many cards before I found one that was stable and in good condition.
I wanted to build a multi-boot system so I decided to use BootIt BM to make that happen. It is a great product and I highly recommend it.
Here is the final parts list:
• Motherboard: WinTek MV035F, Socket 3 VL-Bus, OPTi 82C802G, 256KB L2 cache (new-old stock)
• CPU: AMD 5x86 133MHz
• Memory: Crucial 64MB 72-pin FPM DRAM
• Video Card: Diamond SpeedStar Pro VLB 1MB (Cirrus Logic CL-GD5428)
• Audio Card: Creative Sound Blaster Pro 2 CT1600
• I/O Card: Winbond PTI-255W VLB Dual-Channel IDE with serial and parallel ports
• Network Card (NIC): Linksys Ether16 LAN Card (new-old stock)
• IDE Storage: 4GB CF Card in HX-118 dual-port CF to 40-pin IDE in 3.5" floppy bay carrier
• Optical Drive: Memorex 52x CD-ROM Drive
• Floppy Drives: Standard 1.44MB 3.5in floppy drive and Teac 5.25in floppy drive
• Speakers: EasyConnections.com 5.25 drive bay speakers
• Power Supply: 200W AT power supply (new-old stock)
• OS: PC-DOS 3.3; MS-DOS 6.22/Windows 3.1; Windows NT 3.1; Windows 95
• Utilities: BootIt BM 2.03 – Multi-Boot Manager
• Accessories: Keytronic 101-key AT keyboard; Microsoft Intellimouse (serial and PS/2)

"Jesus said to him, “I am the way, the truth, and the life. No one comes to the Father except through Me." - John 14:6

Reply 2 of 7, by ddoyle525

User metadata
Rank Newbie
Rank
Newbie

Benchmarks
Wintune 97
Dhrystone 150 MIPS
Whetstone 31 MFLOPS
Video(2D) 3.9 MPixels/s
Memory Read 123 MB/s
Cached Disk 9.9 MB/s
Uncached Disk 1.2 MB/s

CPU-Z 1.04.0.w9x
CPU Speed 121.2
FPU Speed 303.9

DOS Benchmarks
3DBench 1.0c 65.1
Chris's 3D Benchmark 69.4
Chris's 3D Benchmark 640x480 23.2
PC Player Benchmark 17.7
PC Player Benchmark 640x480 6.2
Doom max. details 2134 gametics in 1834 realtics 40.73 FPS
Quake Timedemo 13.0 FPS
Landmark System Speed Test 2.0 = 444.08 CPU 1085.50 FPU 9452.00 chr/ms
Landmark System Speed Test 6.0 = 484.66 CPU 1001.64 FPU 9452.31 chr/ms
TOPBENCH 3.8 295
Speedsys 4.78 CPU 49.48
System Information 8.0 CPU 286.8 Disk 13.8 Performance Benchmark 195.8
SysChk Benchmark 197.4 SysChks

"Jesus said to him, “I am the way, the truth, and the life. No one comes to the Father except through Me." - John 14:6

Reply 3 of 7, by Disruptor

User metadata
Rank Oldbie
Rank
Oldbie

If you operate your L2 cache in WB (write back) mode your upper 32 MB are uncached.

There are these options:
1) Operate your L2 cache in WT (write through) mode
2) Half your memory to 32 MB
3) Upgrade your cache memory to 512 kB (if possible)
4) Enhance your TAG ram (if possible)
5) Live with lower speed (especially with operating systems like NT which assign memory from top to bottom)

You can test it with heise's ctcm utility.

Reply 4 of 7, by ddoyle525

User metadata
Rank Newbie
Rank
Newbie
Disruptor wrote on 2026-01-25, 07:53:
If you operate your L2 cache in WB (write back) mode your upper 32 MB are uncached. […]
Show full quote

If you operate your L2 cache in WB (write back) mode your upper 32 MB are uncached.

There are these options:
1) Operate your L2 cache in WT (write through) mode
2) Half your memory to 32 MB
3) Upgrade your cache memory to 512 kB (if possible)
4) Enhance your TAG ram (if possible)
5) Live with lower speed (especially with operating systems like NT which assign memory from top to bottom)

You can test it with heise's ctcm utility.

Interesting, I did not know about this. Given the choices it seems the easiest would be to lower the RAM to 32MB. I don't know if I have RAM that is stable - I will have to test it.
Thanks!

"Jesus said to him, “I am the way, the truth, and the life. No one comes to the Father except through Me." - John 14:6

Reply 5 of 7, by Disruptor

User metadata
Rank Oldbie
Rank
Oldbie
ddoyle525 wrote on 2026-01-28, 06:48:

Interesting, I did not know about this. Given the choices it seems the easiest would be to lower the RAM to 32MB. I don't know if I have RAM that is stable - I will have to test it.
Thanks!

I think you first should check your L2's operating mode and cacheable area with this tool:

https://ftp.heise.de/pub/ct/ctsi/ctcm17a.zip
On a 486 you should run it with this switch:
ctcm /nop

Reply 6 of 7, by dr.zeissler

User metadata
Rank l33t
Rank
l33t

Interesting. I'll have a look for the WB settings because my machine also has 64MB Ram.
How to set a propper multiboot is shown in my last video. don't know if translation in english works,
otherwise feel free to ask here.

https://youtu.be/uylD7rDSorg?si=KQxEMW3dnqacp9Vx

Retro-Gamer 😀 ...on different machines

Reply 7 of 7, by dr.zeissler

User metadata
Rank l33t
Rank
l33t

we could add winbench96 and MDKBench(dos/win) results as well.

Retro-Gamer 😀 ...on different machines