VOGONS


First post, by dogchainx

User metadata
Rank Member
Rank
Member

EDIT and thread UPDATE: THE FREAK'N WASH WORKED! The thing ACTUALLY BOOTS JUST FINE NOW! 😀 😀 😀

😒

So, this isn't a horrific loss, as I have a backup that works just fine. However....i freak'n love this motherboard...and i never use the word freak'n.

I've been enjoying Wing Commander a lot lately, and decided this last weekend before my life gets very busy with triplets, to play Wing Commander one last time. I turned on my 386 computer and it wouldn't boot. No beeps, no VGA, no nothing except power is turned on. Opening up the case, there was NO burn smell. It just didn't boot up. Here's a quick run-down of what I've done this morning:

1. Have the exact same spare motherboard, and swapped BIOS chips. Spare motherboard works just fine with chips swapped, so the BIOS chip isn't at fault. Also swapped keyboard controller...no boot.
2. Swapped RAM. Still no boot.
3. Reset CPU. Still no boot. Swapped CPUs, still no boot.
4. Removed all cards except VGA card. No boot. Replaced VGA card, no boot.
5. Tested PSU. Works fine. Tried a different PSU. Not boot.
6. Swapped CACHE chips. no boot.
7. No smell of burnt/failed electronics.
8. Double checked EVERY SINGLE jumper/switch compared to working motherboard.

Now, here is a key thing that might indicate a failed tantalum capacitor or component:
Ever since I built this computer I noticed that sometimes that computer wouldn't boot from a cold start. It'd only boot if I hit the reset button. I figured this was something to do with my upgrading the RAM, since 4MB I thought was fine but 20MB caused that issue. Now I'm not so sure. I've replaced the motherboard with it's exact, working twin, and everything works fine with the new motherboard. No boot issues, etc.

If the board is dead, its not a HUGE deal...I have a spare that works great. However, this is my favorite motherboard and finding another one might never happen and would like to see if there's anyway to test the components to see if I can find and repair a failed component. Even if this is a year-long process of replacing simple things (capacitors/resistors/etc) I might work on it.

You can look at this thread for more detailed background of this motherboard and a previous problem I had that was an easy repair:

Can NOT get a mouse detected....

If I only have a simple multimeter, its my understanding that I'd have to remove each component (capacitor,transistor,resistor,etc) to test it, correct? I can't test it while its in the circuit, as others will cause adjusted readings, etc.

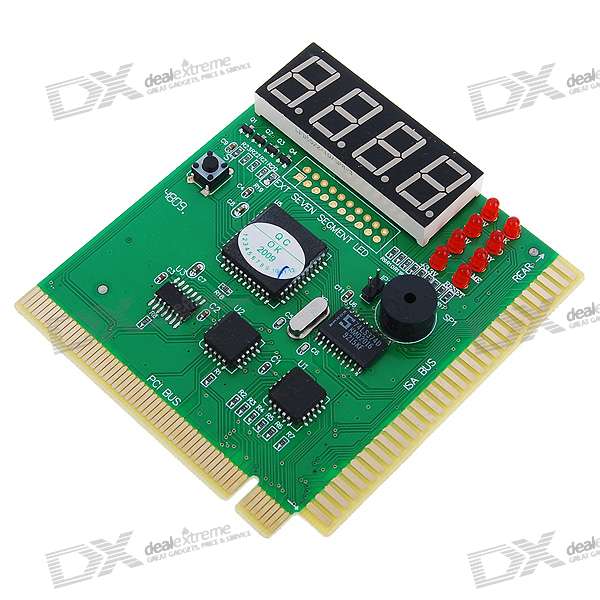
Anyone know how to diagnose a motherboard like this? 🤣

Last edited by dogchainx on 2015-06-25, 12:54. Edited 1 time in total.

386DX-40MHz-8MB-540MB+428MB+Speedstar64@2MB+SoundBlaster Pro+MT-32/MKII
486DX2-66Mhz-16MB-4.3GB+SpeedStar64 VLB DRAM 2MB+AWE32/SB16+SCB-55
MY BLOG RETRO PC BLOG: https://bitbyted.wordpress.com/

Reply 1 of 18, by Jepael

User metadata
Rank Oldbie
Rank
Oldbie

Well, since nothing is burning when power is applied to the motherboard, use the multimeter to verify each power pin is actually reaching the system. Measure voltages at the AT PSU connector on the bottom side or if you are brave enough just measure from ISA slot. Power supplies +5V and +12V should be within 5% of the nominal, while -5V and -12V should be within 10% (IIRC, ATX specs). The closer to nominal voltage, the better. You could also feel any component that feels hot or warm to touch.

I don't know the specifics of that motherboard, but also measure the Power Good signal, because it keeps the motherboard reset until powers have risen. Then I don't know what else to do with a multimeter. Oh yeah measure the RESET signal from ISA slot if the board at least comes out of reset. And of course the backup battery voltage. Did you try to clear CMOS settings already with a jumper?

Reply 2 of 18, by leileilol

User metadata
Rank l33t++
Rank
l33t++

I feel for your loss 🙁

My favorite 386 died in 1996. It had a nice short desktop case and was so white. It was devastating because it's the first computer i've heard digital sound and CD music from, ever. It was also where my first connection to the WorldWideWeb was formed, using Mosaic for browsing.

I still have the software that came with this 386, and it was an absolute joy seeing it all reinstalled in PCem without issue for the first time in nearly 25 years, but it doesn't feel the same when touching a relatively modern PS/2 keyboard and USB mouse to use it 🙁

apsosig.png
long live PCem

Reply 3 of 18, by dogchainx

User metadata
Rank Member
Rank
Member
Jepael wrote:

Well, since nothing is burning when power is applied to the motherboard, use the multimeter to verify each power pin is actually reaching the system. Measure voltages at the AT PSU connector on the bottom side or if you are brave enough just measure from ISA slot. Power supplies +5V and +12V should be within 5% of the nominal, while -5V and -12V should be within 10% (IIRC, ATX specs). The closer to nominal voltage, the better. You could also feel any component that feels hot or warm to touch.

I don't know the specifics of that motherboard, but also measure the Power Good signal, because it keeps the motherboard reset until powers have risen. Then I don't know what else to do with a multimeter. Oh yeah measure the RESET signal from ISA slot if the board at least comes out of reset. And of course the backup battery voltage. Did you try to clear CMOS settings already with a jumper?

I'll try measuring the actual voltage tonight. I did try to measure the resistance of +5v ,+12v, and -12v when the board was off, and all completed the circuit. -5v didn't complete, but I think that's due to the resistance of that circuit and my $15 radioshack multimeter. Also, i don't think a bad -5v would cause the computer not to boot? (isn't it only used in ISA slots?) My other 386 motherboard also didn't show any complete circuit of -5v either, and another 486 board didn't have any readings when measuring the -5v resistance....odd, but like I said, I think my dirt cheap multimeter couldn't read it.

386DX-40MHz-8MB-540MB+428MB+Speedstar64@2MB+SoundBlaster Pro+MT-32/MKII
486DX2-66Mhz-16MB-4.3GB+SpeedStar64 VLB DRAM 2MB+AWE32/SB16+SCB-55
MY BLOG RETRO PC BLOG: https://bitbyted.wordpress.com/

Reply 4 of 18, by matze79

User metadata
Rank l33t
Rank
l33t

Did you try the Finger Test ?
Is some IC running Hot ?

Tried a POST Card ?
http://images.shopmadeinchina.com/p/211/47612 … erboard.bak.jpg

https://www.retrokits.de - blog, retro projects, hdd clicker, diy soundcards etc
https://www.retroianer.de - german retro computer board

Reply 6 of 18, by dogchainx

User metadata
Rank Member
Rank
Member

I do have a post card (that exact one). Didn't show any error codes...LCD remains "- -| - -". It does show the reset works, as the LED's change when I hit the reset.

No IC is running hot or very warm. =|

(BTW, thanks for all the suggestions)

386DX-40MHz-8MB-540MB+428MB+Speedstar64@2MB+SoundBlaster Pro+MT-32/MKII
486DX2-66Mhz-16MB-4.3GB+SpeedStar64 VLB DRAM 2MB+AWE32/SB16+SCB-55
MY BLOG RETRO PC BLOG: https://bitbyted.wordpress.com/

Reply 7 of 18, by matze79

User metadata
Rank l33t
Rank
l33t

I assume you have tested everything in your spare Mainboard.
So it looks like your Mainboard is busted.
So next step would be to hook up a logic analyzer...

Did you measure the Resistance of 5V to GND and 12V to GND ? On the Mainboard ?
Could be that some Capacitor failed.

https://en.wikipedia.org/wiki/Tantalum_capacitor

This could be too one of your Problems, as you wrote above in the other Thread you already faced corrision.

220px-Gebrochene_loetstellen.jpg

https://www.retrokits.de - blog, retro projects, hdd clicker, diy soundcards etc
https://www.retroianer.de - german retro computer board

Reply 8 of 18, by dogchainx

User metadata
Rank Member
Rank
Member
matze79 wrote:
I assume you have tested everything in your spare Mainboard. So it looks like your Mainboard is busted. So next step would be to […]
Show full quote

I assume you have tested everything in your spare Mainboard.
So it looks like your Mainboard is busted.
So next step would be to hook up a logic analyzer...

Did you measure the Resistance of 5V to GND and 12V to GND ? On the Mainboard ?
Could be that some Capacitor failed.

https://en.wikipedia.org/wiki/Tantalum_capacitor

This could be too one of your Problems, as you wrote above in the other Thread you already faced corrision.

220px-Gebrochene_loetstellen.jpg

I basically did this checkup on this page:

http://www.minuszerodegrees.net/5150_5160/MDC … o_beeps_2_2.htm

+5v, +12v, and -5v had ~0.2 on 2K setting of my multimeter.

-5v had no reading whatsoever. But it also didn't have any reading on my other 386 and 486 boards.

I'll look over corroded area very carefully again, but the only thing i saw was -5v line was somewhat corroded, but cleaned and trace works just fine from PSU insert to the end of where the trace goes into the last ISA slot. The other thing that got corroded was the -12v pin...but I removed all corrosion from there as well.

As far as a logic analyzer...yeah, that's quite a bit above my understanding and know-how. 😎

I'll be looking over all of the tantalum capacitors. None show any burn marks or small scorches of any kind, but that doesn't rule out that they are defective.

386DX-40MHz-8MB-540MB+428MB+Speedstar64@2MB+SoundBlaster Pro+MT-32/MKII
486DX2-66Mhz-16MB-4.3GB+SpeedStar64 VLB DRAM 2MB+AWE32/SB16+SCB-55
MY BLOG RETRO PC BLOG: https://bitbyted.wordpress.com/

Reply 9 of 18, by dogchainx

User metadata
Rank Member
Rank
Member

Tested the voltages.

+5 was 4.92
+12 was 11.95
-12 was 11.96
-5 was....-5.99! <---could this be it?

I also noticed the RAM modules were particularly warm! Thoughts?

386DX-40MHz-8MB-540MB+428MB+Speedstar64@2MB+SoundBlaster Pro+MT-32/MKII
486DX2-66Mhz-16MB-4.3GB+SpeedStar64 VLB DRAM 2MB+AWE32/SB16+SCB-55
MY BLOG RETRO PC BLOG: https://bitbyted.wordpress.com/

Reply 10 of 18, by Anonymous Coward

User metadata
Rank l33t
Rank
l33t

User Feipoa also experienced the really warm RAM modules on his Abit FU340 386 motherboard. He was never able to determine the problem though (and he has the equipment to do so). I also have an Abit FU340, but my modules do not get hot. I'm really curious about what's causing it.
-5.99 does seem a little out of spec on the -5V rail. Try a different power supply and see what happens.

I had a 486 motherboard which refused to boot. I tried replacing everything like you did. I was able to get it going again by cleaning the legs of the BIOS chip and the contacts in the BIOS socket.

"Will the highways on the internets become more few?" -Gee Dubya
V'Ger XT|Upgraded AT|Ultimate 386|Super VL/EISA 486|SMP VL/EISA Pentium

Reply 11 of 18, by dogchainx

User metadata
Rank Member
Rank
Member
Anonymous Coward wrote:

User Feipoa also experienced the really warm RAM modules on his Abit FU340 386 motherboard. He was never able to determine the problem though (and he has the equipment to do so). I also have an Abit FU340, but my modules do not get hot. I'm really curious about what's causing it.
-5.99 does seem a little out of spec on the -5V rail. Try a different power supply and see what happens.

I had a 486 motherboard which refused to boot. I tried replacing everything like you did. I was able to get it going again by cleaning the legs of the BIOS chip and the contacts in the BIOS socket.

I'm doing a re-wash with vinegar and soap with distilled water. then rinsing with distilled water/ethanol. I'll let it dry over night with the CPU, BIOS and keyboard controller chips removed and try again tomorrow morning.

I plugged in another PSU, and the -5V rail is reading -5.3. I thought -5V was only for ISA usage though.

Oh, also, the "good power" line (yellow) shows 4.9v...so either both power supplies are ultra-low quality and have it tied into another 5v line, or the reading is well within specs.

Here's crossing my finger that a good wash will solve this. If not..hmm....might resign myself to putting this in the pile of dead boards. 😒

386DX-40MHz-8MB-540MB+428MB+Speedstar64@2MB+SoundBlaster Pro+MT-32/MKII
486DX2-66Mhz-16MB-4.3GB+SpeedStar64 VLB DRAM 2MB+AWE32/SB16+SCB-55
MY BLOG RETRO PC BLOG: https://bitbyted.wordpress.com/

Reply 13 of 18, by dogchainx

User metadata
Rank Member
Rank
Member

OH MY GOSH (yes, here in Utah we say GOSH...🤣)

THE FREAK'N WASH WORKED! The thing ACTUALLY BOOTS JUST FINE NOW! I've booted it a few dozen times now, and always boots up happy even with 20MB of RAM....I don't have to hit RESET anymore on cold boots. 😀 😀 😀

I've washed this once before, but the first wash looks like it didn't take care of all the problems.

Anonymous Coward, you might be right that the BIOS contacts might have had some corrosion, since I pulled the chip and one leg was quite tarnished compared to the rest. It might have been just that one little leg, or a combination of a few other corroded parts I couldn't see.

Thanks everyone for the help! Now I'm a bit more familiar with the process of figuring out a "supposed" dead motherboard!

386DX-40MHz-8MB-540MB+428MB+Speedstar64@2MB+SoundBlaster Pro+MT-32/MKII
486DX2-66Mhz-16MB-4.3GB+SpeedStar64 VLB DRAM 2MB+AWE32/SB16+SCB-55
MY BLOG RETRO PC BLOG: https://bitbyted.wordpress.com/

Reply 14 of 18, by Anonymous Coward

User metadata
Rank l33t
Rank
l33t

Whatever it was that caused the problem, I'm glad it's working again.

I noticed that a lot of my old DIP chips (epsecially BIOSes) have this weird white build-up (corrosion?) going on. It has occasionally caused problems for me when I put them in my EPROM reader.

"Will the highways on the internets become more few?" -Gee Dubya
V'Ger XT|Upgraded AT|Ultimate 386|Super VL/EISA 486|SMP VL/EISA Pentium

Reply 15 of 18, by Jepael

User metadata
Rank Oldbie
Rank
Oldbie
dogchainx wrote:

Oh, also, the "good power" line (yellow) shows 4.9v...so either both power supplies are ultra-low quality and have it tied into another 5v line, or the reading is well within specs.

The power good line is not connected to another +5V line. Is held low by a voltage monitor circuit until supplies are within regulation and when it goes high it is (most likely) just tied to the +5V with a 4k7 ohm resistor. So when it is connected to a load (motherboard or measured with a multimeter) that draws a small current there will be some voltage drop over the resistor so you don't actually measure exactly what is on +5V line but a bit less. Anyway 4.9V is still well within specs (if TTL voltage specs are used, everything over 2.0V at input is regarded as logic high).

Also (most likely) the -5V is just regulated from -12V with a 7905 type regulator and if they have no load (no current drawn) their output voltage might be higher than expected. Sure almost -6 volts sounds a bit high, but most likely the capacitors on -5V line are at least rated for 6.3V, so they should survive it (tantalums may not like it for long though). If you draw at least 5mA current from -5V line, for example put a 1kohm resistor there, or maybe a LED with 470 ohm resistor, the -5V line should be within regulation. (Some power supplies may have this load internally so it does not need external load on -5V. Not many ISA boards use the -5V line).

So the point is, power supplies should always have some load when they are measured, I've seen some AT supplies won't even start without a load.

Reply 16 of 18, by dogchainx

User metadata
Rank Member
Rank
Member
Jepael wrote:
The power good line is not connected to another +5V line. Is held low by a voltage monitor circuit until supplies are within reg […]
Show full quote
dogchainx wrote:

Oh, also, the "good power" line (yellow) shows 4.9v...so either both power supplies are ultra-low quality and have it tied into another 5v line, or the reading is well within specs.

The power good line is not connected to another +5V line. Is held low by a voltage monitor circuit until supplies are within regulation and when it goes high it is (most likely) just tied to the +5V with a 4k7 ohm resistor. So when it is connected to a load (motherboard or measured with a multimeter) that draws a small current there will be some voltage drop over the resistor so you don't actually measure exactly what is on +5V line but a bit less. Anyway 4.9V is still well within specs (if TTL voltage specs are used, everything over 2.0V at input is regarded as logic high).

Also (most likely) the -5V is just regulated from -12V with a 7905 type regulator and if they have no load (no current drawn) their output voltage might be higher than expected. Sure almost -6 volts sounds a bit high, but most likely the capacitors on -5V line are at least rated for 6.3V, so they should survive it (tantalums may not like it for long though). If you draw at least 5mA current from -5V line, for example put a 1kohm resistor there, or maybe a LED with 470 ohm resistor, the -5V line should be within regulation. (Some power supplies may have this load internally so it does not need external load on -5V. Not many ISA boards use the -5V line).

So the point is, power supplies should always have some load when they are measured, I've seen some AT supplies won't even start without a load.

I've read a few articles where some very poor quality PSU's have had the power good line connected to another +5v, just out of a pure laziness and cost cutting measure. Its rare, but the articles have warned about it.

But thank you for the information!

386DX-40MHz-8MB-540MB+428MB+Speedstar64@2MB+SoundBlaster Pro+MT-32/MKII
486DX2-66Mhz-16MB-4.3GB+SpeedStar64 VLB DRAM 2MB+AWE32/SB16+SCB-55
MY BLOG RETRO PC BLOG: https://bitbyted.wordpress.com/

Reply 17 of 18, by matze79

User metadata
Rank l33t
Rank
l33t

https://www.youtube.com/watch?v=CS6BX-gcJqw
😁 enjoy it!

https://www.retrokits.de - blog, retro projects, hdd clicker, diy soundcards etc
https://www.retroianer.de - german retro computer board

Reply 18 of 18, by dogchainx

User metadata
Rank Member
Rank
Member

Just a small update...

The motherboard wouldn't boot again. However, I pulled the BIOS and keyboard chip. The pins look a bit tarnish on both chips now...which is odd, because I remember them not being so tarnished. I shined them up with a metal file, put them back in the socket. Now it boots again, no problems. I'm wondering how to remove the tarnish WITHIN the socket, as that might be an issue in the future. I'll do some research...maybe some very small round file. I tried vinegar (acetic acid), but it won't get rid of it. I thought it would be aluminum oxide? Acidic liquids should help, but not on this.

Anyways, to sum up: It didn't boot...then I filed the pins on the BIOS and keyboard controller chips....now it boots. Ya for corrosion/tarnish removal.

ALSO, COMPLETELY OFF TOPIC....I have three little babies. Two girls, one boy. (I'm a very proud dad!)

386DX-40MHz-8MB-540MB+428MB+Speedstar64@2MB+SoundBlaster Pro+MT-32/MKII
486DX2-66Mhz-16MB-4.3GB+SpeedStar64 VLB DRAM 2MB+AWE32/SB16+SCB-55
MY BLOG RETRO PC BLOG: https://bitbyted.wordpress.com/