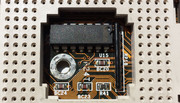
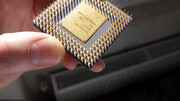
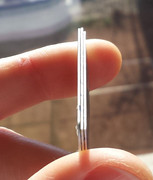
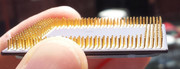
VOGONS


Reply 41 of 844, by Oldskoolmaniac

User metadata
Rank Oldbie
Rank
Oldbie

Very well done.
Good Read
And a damn nice collection I love when people take the time to really clean and repair there collection

Motherboard Reviews The Motherboard Thread
Plastic parts looking nasty and yellow try this Deyellowing Plastic

Reply 42 of 844, by Robert B

User metadata
Rank Oldbie
Rank
Oldbie

@Darkman & Oldskoolmaniac - Thank You for your appreciation 😀

@Darkman - When I was searching high and low, above the ground and underground, forward and backward 😁 for the illusive 5x86 I was very happy when I also found the 4x86 DX2 66MHz and the 4x86 DX4 100MHz. The K7 I found on the local OLX site. I paid around 56 EUR/62 USD for it and I didnt even blink 😁 I haggled a bit on the phone with the owner though, and if I didnt got it right I might have lost the parts 😁 He was something like this: SON YOU KNOW WHAT YOU WANT TO BUY, I THINK YOU"RE NOT A KID ANYMORE....pretty funny...later on he saw that I was a good guy and I got a 10 EUR discount for buying the whole Slot A package 😁

@Oldskoolmaniac - All these posts were written right after I made the builds/repairs/tutorials and the information was fresh. Even after a year I can recall each step I took like it was yesterday 😁 Leaving the parts dirty wouldn't feel right 😁

You'll see later that when I started testing newer parts I begun registering some casualties....but that later 😁 (nevertheless before any testing the parts were super cleaned and I usually didnt bother repainting scratched heatsinks or other parts because I wanted to preserve them as they were, battle scars and all 😁)

Now just a sneak peak - I think I'll post the next two episodes together 😁 they are related after all.....

4600_TI.jpg 5700_4.jpg 6800_5.jpg gf7.jpg

gallery: https://postimg.cc/gallery/2434ih8jc/3f13d257/

Last edited by Robert B on 2018-04-18, 19:18. Edited 1 time in total.

Reply 43 of 844, by Robert B

User metadata
Rank Oldbie
Rank
Oldbie

A not so lucky Asus Geforce 4 4600 Ti

The story of the V8460-600 Asustek Geforce4 Ti 4600 128 MB is like any other dumpster dive/flea market buy 😁 First you see it.WOW! then you start digging in the pile of cards lying in a basket or in a cardboard box 😁 What is THIS! WOW! (again) this look AMAZING! It's HUGE! A quick search on the internet - Asus GF4 4600Ti 128MB HELL YEAH!!! Trying to hide your excitement you ask soflty Hhhhhhooow muuucccchhh is it? (gasp) 😁 2.27 EUR / 2.5 $ Here you go sir! Then you leave happy with the purchase 😁

Yep buying this GF4 was like that. It looked a little beat up, but whole. The fan was spinning smoothly and there were no signs of overheating.

I took it home and did my magic:

Step 1. Full disassembly

Upon close inspection I found that the heatsink was glued on. Before removing the heatsink from the V3 from the earlier posts the first guinea pig was this GF4 4600 Ti. It stood in the freezer in a bag for around 30 min and then with the help of a flat screwdriver and a credit card to protect the PCB it popped easily on the first try. Removing the yellow thermal glue was another story though and it took some work 😁

Step 2. Isopropyl alcohol 99.9%

Full wash with isopropyl alcohol 99.9% pulverized from and old window cleaner container. Some scrubing with an old brush. Then more isopropyl alcohol 99.9% baths 😁 then more brushing..... it came out squeaky clean.

Step 3. Tiny bits

The heatsink was sanded a bit to remove old thermal glue and some blemishes. The fan was cleaned and oiled. The bracket had a little rust which needed to be removed. Other tedious small operations were performed.

Step 4. ASsembly

Smooth sailing. 10 min max 😁

1_FR_1.jpg 1_FR_2.jpg 1_FR_3.jpg DIS_1.jpg DIS_2.jpg DIS_3.jpg DIS_4.jpg DIS_5.jpg DIS_6_1.jpg DIS_6.jpg DIS_7.jpg DIS_8.jpg

gallery: https://postimg.cc/gallery/2ccm5lb6g/6d63a9f5/

4600_TI.jpg BF_1.jpg BF_2.jpg CLEAN.jpg CLEAN_0.jpg CLEAN_1.jpg CLEAN_2.jpg CLEAN_3.jpg CLEAN_4.jpg CLEAN_5.jpg CLEAN_6.jpg DDR.jpg ser.jpg

gallery: https://postimg.cc/gallery/ljb2fx42/c962f314/

By this time I was feeling pretty good with my purchase. I didnt have a PC to test it on. Later when I put together the K7 Classic Athlon system I took it for a spin.

On the first startup I got some bad news. It was dying - artifacts and psyhedelic colours all around.

image.jpg image.jpg image.jpg

gallery: https://postimg.cc/gallery/2dv3zoqxu/6f1dd4f8/

Nothing else to do.I had high hopes that it would work as I always wanted a GF4 4600 Ti. In the hay days of GF4 I only had a Gainward GF4 MX 460 which was kind of meh, but I had bragging rights as my buddies had only GF4 MX 440's 😁

Well you can't "win them all" 😁

This is why I called this short story "A not so lucky Asus Geforce 4 4600 Ti" In the end it got to a good home but it was too late....let's move one shall we? 😀

Last edited by Robert B on 2018-04-18, 19:19. Edited 2 times in total.

Reply 44 of 844, by Robert B

User metadata
Rank Oldbie
Rank
Oldbie

The 5,6,7 AGP trio

The story of this trio was a bit of a surprise.

After posting on the forum from my country, the exact stories that I tell you here, a member sent me a PM in which he said that he wanted to give me 3 AGP cards, of which one was completely new. They were free of charge. The status of these cards was unkown. They were only gathering dust in his drawer.

First I wanted some pictures and after seeing the cards I said I WANT THEM, even if they were newer than my "usual" stuff 😁

After a quick discution on the phone he even wanted to pay for shipping despite my arguing that paying for shipping was the least I could do 😀

One day later I received a BORG like package 😁

Clipboard01.jpg

After I opened the box I was greeted by three gorgeous AGP cards and even some extras: two heatsinks, and IDE cable, a floppy cable, some memory and an old PCI soundcard 😁

The three AGP cards were:

MSI 8948 ver 100 - GeForce FX5700-VTD128 - AGP 128MB
Aopen Aeolus 6800GT-DV256 - AGP 256MB
BFG GeForce 7800GS OC AGP 256MB

The BFG was new and had no signs of usage 😁

The MSI received a new fan connector as it missed one. First I cleaned the golden heatsink until it was shining like diamond in the goats a$$ 😁 Then came turn for the PCB and other bits.

The Aopen was trickier to dismantle but nothing complicated. I had to keep track of all the screws. I also didnt want to damage the thermal pads because the problems with the pads for the K7 cache chips was still fresh 😁 The VRM heatsink was flimsy. You can clearly see sign of overheating. If dust got to obstruct the main heatsink which cooled the GPU then less air would cool the VRM heatsink. Not good.

Upon closer inspection of the back of the Aopen Aeolus 6800GT I saw that a small ceramic capacitor, found near the AGP connector was crooked. What the!? I was amazed that it didnt fall off. After a quick soldering it was back in its place 😀

I used ARCTIC MX-4 to cool the 5700FX and 6800GT.

The BFG beeing a BIG F...... G..N didnt need anything 😁

5700_1.jpg 5700_2.jpg 5700_3.jpg 5700_4.jpg 5700_5.jpg 5700_6.jpg 5700_7.jpg 5700_8.jpg 5700_9.jpg 6800_1.jpg 6800_2.jpg 6800_3.jpg 6800_4.jpg 6800_5.jpg 6800_6.jpg 6800_7_1.jpg 6800_7.jpg 6800_8.jpg 6800_9.jpg 6800_10.jpg 6800_11.jpg bfg7800_1.jpg bfg7800_2.jpg bfg7800_3.jpg bfg7800_4.jpg bfg7800_5.jpg bfg7800_6.jpg bfg7800_7.jpg bfg7800_8.jpg bubu1.jpg bubu2.jpg bubu3.jpg izo1.jpg izo2.jpg izo3.jpg

gallery: https://postimg.cc/gallery/29wghabiw/b18bbcbd/

57001_1.jpg 57001_2.jpg 57001_3.jpg 68001_1.jpg 68001_2.jpg 68001_3.jpg trio_1_1.jpg trio_0.jpg trio_01.jpg trio_1_0.jpg trio_1.jpg trio_02.jpg trio_2_1.jpg trio_2_2.jpg trio_2.jpg trio_3.jpg trio_4.jpg trio_5.jpg trio_6.jpg trio_7.jpg trio_8.jpg trio_9.jpg

gallery: https://postimg.cc/gallery/nvn2f9p4/18fdf90e/

To test these puppies I took out from storage my 4th PC - a Good Ol' Athlon XP + VIA KT333 - I don't have a more potent AGP platform....yet 😁

Hardware and Software used:

1. CPU: AMD Athlon XP 1900+ 1.60GHz - Palomino core - unlocked using Bison conductive paint.
2. MOBO: ECS K7VTA3 V3.0b - VIA KT333
3. RAM: 1.5 GB - DDR1 3X512MB DDR333/DDR400
4. HDD: WD Caviar 800JB 80GB
5. FDD: 1.44MB Alps
6. ODD: LG DVD-RAM 4163B
7. GPU'S:
7.1 MSI 8948 ver 100 - GeForce FX5700-VTD128 - AGP 128MB
7.2 Aopen Aeolus GeForce6800GT-DV256 - AGP 256MB
7.3 BFG GeForce 7800GS OC AGP 256MB
8. PSU: ENERMAX EG365AX-VE(G) 353W
9.Software: Windows XP Home Ed. SP2/Windows XP PRO SP3
10. Misc.

1900xp_1.jpg 1900xp_2.jpg ecs1.jpg ecs2.jpg ecs3.jpg ecs4.jpg ecs5.jpg

gallery: https://postimg.cc/gallery/1326xsyua/bbc6c481/

Testing wasnt quite what I have hoped for.

First I tested the 6800GT and it worked flawlessly. Clear image. Windows install. Drivers install. GPU-z all ok. The problems started when I wanted to play any game or run other 3D programs(for ex. 3Dmark2001). After some trying I managed to start a furmark test (which completed ok) and one 3dmark2001 test. I tried to play UT but the game would not start.

At this point I decided to use the 5700FX. This card showed clear picture with some drivers and some artifacts with others.....when I found a good driver and started UT it showed more artifacts. I consider this card dead...

Next came the turn of the 7800GS. This puppy was something else. BIG, golden, heavy, and smelling heavenly. It even featured LED lighting 😁. On powerup the fan made a noise like a pack of bats right out of hell 😁 I said: I LIKE IT!!! (The fan noise goes down after installing the drivers and ramps up with the temperature). Again clear picture. Drivers install with no problems. I tried to run UT or DOOM 3 - NO DICE!

What the?!?!??! I looked closer at the card and saw that it wasnt fully seated in the AGP slot. The culprit was the white AGP retainer. Now I remembered why I took it out years ago just to put it back before this test, just for the sake of "originality" OUT IT WENT!

I tested again the three cards but the situation didnt change. I couldn't run DOOM 3 on any of the cards...

On the PCB of the 6800GT and 7800GS is a black round buzzer which makes one hell of a racket if you forget to plug the molex connector 😁 I found out the hard way at night around 01.00 hours 😁

1900_0.jpg 1900_1.jpg 1900_2_1.jpg 1900_2.jpg 1900_3.jpg 1900_4.jpg 1900_5.jpg 1900_6.jpg 1900_7.jpg 1900_8.jpg 1900_10.jpg 1900_11.jpg 1900_12.jpg 1900_13.jpg 1900_14.jpg20160607_200041.jpg 1900_15.jpg 1900_16.jpg 1900_17.jpg 1900_18.jpg 1900_19.jpg6800_fur.jpg1900_20.jpg 1900_21.jpg 1900_22.jpg 1900_23.jpg 5700_1.gif 5700_2.gif 68002_1.png 68002_2.png 78002_1.png 78002_2.png attn.jpg buzz.jpg retainer.jpg retainer2.jpg

gallery: https://postimg.cc/gallery/3125lafaa/6342170b/

So this story has an inconclusive ending. I consider the 5700FX dead. About the 6800GT and 7800GS I say that the status is at best uncertain. Until I test them on a proper AGP platform I shall catalogue them as working.

This Athlon XP 1900+ & KT333 runs well with my Palit Geforce 3 Ti 200 - 64MB. I dont know if there is a software or hardware incompatibilty between this platform and the Geforce 5,6 or 7.....

My favourite from this bunch is the Aopen Aeolus GeForce6800GT-DV256 - AGP 256MB. In that time I had a Leadtek 6600GT AGP 128MB which I specially bought for DOOM 3. The 6600GT is also dead...the fan was horrible and ceased a couple of times, despite regular cleaning and the GPU overheated......this is how I got it back from my cousin...

6600gt_1.jpg 6600gt_2.jpg

gallery: https://postimg.cc/gallery/33hf9pnfc/54a3d563/

The casualty rate amongst newer generation components it is much greater than in the case of my older ones. I guess smaller fabrication nodes, higher thermal stress operation plus many other variables make them more susceptible to damage.

Next posts will feature more positive stuff 😁

More later.

Last edited by Robert B on 2018-04-18, 19:19. Edited 2 times in total.

Reply 45 of 844, by retrofanatic

User metadata
Rank Oldbie
Rank
Oldbie
Robert B wrote:

A not so lucky Asus Geforce 4 4600 Ti

Nice try though...it was totally worth trying to save. I have not seen many 4600Ti's out there lately available to buy at a decent price.
Again, good job, I'm liking your posts.

Reply 46 of 844, by Robert B

User metadata
Rank Oldbie
Rank
Oldbie

@retrofanatic - with the GF4 4600 Ti it was a real bummer. At least I have a shell. The soul is between Heaven and Hell 😁

Sneak peak with the next episodes:

* What's left in my stash?
* Little bent PIN
* How I clean and store my stuff

More later.

3dfxmaxi_1.jpg image.jpg image.jpg 366_1.jpg 486_sx_3.jpg Clipboard10.jpg COOL_1.jpg GROUP.jpg

gallery: https://postimg.cc/gallery/2zzinidzs/7bdf908e/

Last edited by Robert B on 2018-04-18, 19:20. Edited 1 time in total.

Reply 47 of 844, by Robert B

User metadata
Rank Oldbie
Rank
Oldbie

I'm not MIA! 😁

I'm just taking my time. I have to make a full "headcount" of my STUFF in preparation of the next episode: What's left in my stash? 😁 It's not THAT much but....I also need to make other photos. You know because of the STANDARDS I have to abide to 😁 The pictures made last year are not near what I want 😁 I need one sunny day and they will be PERFECT!

Cya later dudes 😁 and keep and eye on the thread 😁

Reply 48 of 844, by Robert B

User metadata
Rank Oldbie
Rank
Oldbie

Today the weather wasn't so sunny but I managed to take a few snapshots 😀

Work in progress.... (this may take a few days, but I think you'll say it was worth the wait 😁, higher resolution and better lighting than older pictures I took last year...)

banshee.jpg matrox.jpg opti.jpg s32dx.jpg trident9000.jpg

gallery: https://postimg.cc/gallery/zfmw7920/d25ed3f4/

Last edited by Robert B on 2018-04-18, 19:20. Edited 1 time in total.

Reply 49 of 844, by archsan

User metadata
Rank Oldbie
Rank
Oldbie

I recognize the Banshee straight away, despite there were several Creative models. (I missed my old AGP Creative Banshee and its box too which I used to keep... 🙁)

"Any sufficiently advanced technology is indistinguishable from magic."—Arthur C. Clarke
"No way. Installing the drivers on these things always gives me a headache."—Guybrush Threepwood (on cutting-edge voodoo technology)

Reply 50 of 844, by Robert B

User metadata
Rank Oldbie
Rank
Oldbie

@archsan - I know how it feels to once own something and then lose it ...

The weather was very cloudy these days. I hope on saturday(this week) to take the pictures as I want them, weather permitting... 😁

I'm a man of my word and I'll post the next episodes as soon as possible 😀

Enjoy some pics 😁

k62_350_6.jpg k62_400_2.jpg socket_7_1.jpg

gallery: https://postimg.cc/gallery/mg80kndk/14a286d5/

Last edited by Robert B on 2018-04-18, 19:21. Edited 1 time in total.

Reply 51 of 844, by Robert B

User metadata
Rank Oldbie
Rank
Oldbie

What's left in my stash?

Today the weather was mostly sunny and I had three hours dedicated for taking pictures 😁

Besides the components already posted I present to you the contents of my stash 😁

Enjoy the pictures 😀

CPU'S

image.jpg

AMD

1. AMD 486 DX-2 66MHz - 66NV8T - 1995 week 30
2. AMD 486 DX-4 100MHz - 100NV8T - 1996 week 05
3. AMD 586 133MHz - ADW - 1996 week 42
4. AMD K6-2 300MHz - AFR - 1998 -week 41
5. AMD K6-2 350MHz - AFR - 1998 -week 21
6. AMD K6-2 400MHz - AFQ - 1998 -week 16
7. AMD K6-2 400MHz - AFR - 1998 -week 50

amd_486dx2_1.jpg amd_486dx2_2.jpg amd_486dx4_1.jpg amd_486dx4_2.jpg amd_586_1.jpg amd_586_2.jpg amd_586_3.jpg k6_2_300afr_1.jpg k6_2_300afr_2.jpg k6_2_350afr_1.jpg k6_2_350afr_2.jpg k6_2_400afq_1.jpg k6_2_400afq_2.jpg k6_2_400_afr_1.jpg k6_2_400afr_2.jpg

gallery: https://postimg.cc/gallery/12vn0unk2/73d92ac7/


Cyrix

1. Cyrix 6x86MX PR233 188MHz
2. Cyrix GXm-200GP
3. Cyrix MII-300GP

cyrix_686_1.jpg cyrix_686_2.jpg cyrix_gx_1.jpg cyrix_gx_2.jpg cyrix_MII_1.jpg cyrix_MII_2.jpg

gallery: https://postimg.cc/gallery/3b85dilzs/8d360b74/

Intel

1. Intel 486-SX-25MHz - SX679
2. Pentium 75MHz - SX961
3. Pentium 100MHz - SX963
4. Pentium 133MHz - SY022 - 2 versions
5. Pentium 166MHz - SY037
6. Pentium 166MHz-MMX - SL27K
7. Celeron 300 MHz - SL2X8
8. Celeron A - 366 MHz - SL36C
9. Pentium II - 350MHz - SL2U4
10. Pentium II - 400MHz - SL2U5
11. Pentium III - 450MHz - SL37C
12. Pentium III - 500MHz - SL35E

celeron_PII_1.jpg celeron_PII_2.jpg celeron_PII_3.jpg celeron_PII_4.jpg intel_75_1.jpg intel_75_2.jpg intel_100_1.jpg intel_100_2.jpg intel_133_1.jpg intel_133_2.jpg intel_133_3.jpg intel_133_4.jpg intel_166_1.jpg intel_166_2.jpg intel_166_mmx_1.jpg intel_166_mmx_2.jpg intel_486sx_1.jpg intel_486sx_2.jpg intel_celeron366_A_1.jpg intel_celeron366_A_2.jpg PII_350_1.jpg PII_350_2.jpg PII_350_3.jpg PIII_450_1.jpg PIII_450_2.jpg PIII_450_3.jpg PIII_500_1.jpg PIII_500_2.jpg PIII_500_3.jpg

gallery: https://postimg.cc/gallery/2uy96m2ma/e718e9de/

Slotket Gigabyte-GA-6R7-Rev 1.7

gigabyte_ga_6r7_1.jpg gigabyte_ga_6r7_2.jpg

Coolers

Some of them...

Clipboard07.jpg Clipboard08.jpg Clipboard09.jpg Clipboard13.jpg Clipboard14.jpg COOL_1.jpg COOL_2.jpg COOL_6.jpg

gallery: https://postimg.cc/gallery/18r1w1s5e/7d0d523f/

Graphic adapters

AGP

1.Ati Rage 128 PRO
2.ATI Rage IIC AGP - 3D CHARGER 4 MB
3.ACorp - RIVA TnT 2 Vanta - 8MB
4.Inno3D Geforce 2 Ti - 64MB
5.Palit Daytona Geforce 3 Ti 200 - 64MB
6.S3 Trio3D - 4MB
7.S3 Trio3D/2X - 4MB
8.S3 Trio3D/2X - 8MB
9.S3 Savage 4 - 16MB
10.Sapphire Ati 9600PRO - 128MB
11.SiS 6326 8MB
12.STB Systems 3dfx Voodoo 3-3000 - 16MB

ati_9600pro_1.jpg ati_9600pro_2.jpg ati_rage_128pro_1.jpg ati_rage_128pro_2.jpg ati_rage_IIC_1.jpg ati_rage_IIC_2.jpg gf3_ti200_1.jpg gf3_ti200_2.jpg s3_savage4_1.jpg s3_savage4_2.jpg s3_trio_3d_1.jpg s3_trio_3d_2.jpg s3_trio_3d2x_1.jpg s3_trio_3d2x_2.jpg s3_trio_3d2x_3.jpg s3_trio_3d2x_4.jpg sis_6326_1.jpg sis_6326_2.jpg v3_3000_1.jpg v3_3000_2.jpg vanta_1.jpg vanta_2.jpgInno3d_gf2ti_1.jpg Inno3d_gf2ti_2.jpg

gallery: https://postimg.cc/gallery/kmex7zyw/a49b4335/

ISA

1.Oak Technology OTI077 - 1077082003 REV. G - 512KB
2.Trident TVGA9000C - 7133 Rev. B1 - 512KB
3.Trident TVGA9000i-2 - 7210 Rev. H1

oak_oti77_1.jpg oak_oti77_2.jpg trident_9000_1.jpg trident_9000_2.jpg trident_9000_3.jpg trident_9000_4.jpg

gallery: https://postimg.cc/gallery/1txpyxrrs/b132f7fc/

PCI

1.3dfx Creative 3D Blaster Banshee 16 MB CT 6760
2.Ati Rage LT PRO - 8MB
3.Ark Logic ARK2000PV - 2MB
4.Guillemot Maxi Gamer 3D - 3dfx Voodoo 2 - 12MB
5.Matrox MGA-Millenium II - 4MB
6.SiS 6215 - FVGAP-SS6.1A 2MB
7.SiS 6215 - UTD67B - 2MB
8.S3 Trio64V+ - 2MB
9.S3 Trio64V+ Color Max
10.S3 Trio64V2/DX - 2MB
11.Trident TGUI9440-3
12.Tseng Labs Vision Magic ET6000 4 MB MDRAM
ark_1.jpg ark_2.jpg ati_rage_lt_pro_1.jpg ati_rage_lt_pro_2.jpg banshee_1.jpg banshee_2.jpg banshee_3.jpg banshee_4.jpg matrox_mga_1.jpg matrox_mga_2.jpg matrox_mga_3.jpg matrox_mga_4.jpg s3_trio_64v_1.jpg s3_trio_64v_2.jpg s3_trio_64v_3.jpg s3_trio_64v_4.jpg s3_trio64v2dx_1.jpg s3_trio64v2dx_2.jpg sis_6215_1.jpg sis_6215_2.jpg sis_6215_3.jpg sis_6215_4.jpg trident_9440_1.jpg trident_9440_2.jpg tseng_et6000_1.jpg tseng_et6000_2.jpg v2_1.jpg v2_2.jpg

gallery: https://postimg.cc/gallery/2f39w1kua/d1998d57/

HDD's

ATA HDD'S

1.QUANTUM TRAILBLAZER TRB850A -850MB- 4500RPM
2.QUANTUM BIGFOOT 2.1GB -5.25" - CY2160A - 3600RPM
3.QUANTUM FIREBALL PLUS AS40-40GB - 7200RPM
4.SEAGATE MEDALIST ST33232A 3.2GB- 4500RPM
5.IBM 3.6GB - IBM-DCAA-33610 - 5400RPM
6.FUJITSU 8.4GB - MPD3084AT - 5400RPM
7.WESTERN DIGITAL WDC800JB - 80GB - 7200RPM

FUJITSU 8.4GB - MPD3084AT - 5400RPM
http://www.fujitsu.com/downloads/COMP/fcpa/hd … t_datasheet.pdf
QUANTUM BIGFOOT 2.1GB -5.25" - CY2160A - 3600RPM
http://www.seagate.com/staticfiles/maxtor/en_ … y_datasheet.pdf
QUANTUM FIREBALL PLUS AS40-40GB - 7200RPM
http://www.seagate.com/staticfiles/maxtor/en_ … duct_Manual.pdf
WESTERN DIGITAL WDC800JB - 80GB - 7200RPM
http://www.wdc.com/en/library/sata/2879-001146.pdf
SEAGATE MEDALIST ST33232A - 4500RPM
http://www.seagate.com/support/disc/manuals/ata/4342pmb.pdf

image.jpg FUJITSU_1.jpg FUJITSU_2.jpg FUJITSU_3.jpg ibm_33610_1.jpg ibm_33610_2.jpg IBM_33610_3.jpg QFBL_1.jpg QFBL_2.jpg QFBL_3.jpg QT_1.jpg quantum_BF_1.jpg quantum_BF_2.jpg quantum_BF_3.jpg quantum_BF_4.jpg quantum_BF_5.jpg seagate_33232_1.jpg seagate_33232_2.jpg seagate_33232_3.jpg wd_800jb_1.jpg wd_800jb_2.jpg WD_800_JB_3.jpg wd_22100_1.jpg wd_22100_2.jpg

gallery: https://postimg.cc/gallery/j87w5f42/4a0206cc/

Tests

Fujistu_8_4.png Fujistu_8_4_1.png Fujistu_8_4_4.png Fujistu_8_4_5.png ibm3_6_1.png ibm3_6_2.png ibm3_6_4.png ibm3_6_5.png ibm3_6_6.png QBFOOT_1.png QBFOOT_3.png QBFOOT_4.png QBFOOT_5.png qf40_1.png qf40_2.png qf40_3.png qf40_4.png qf40_7.png QT_850_MB_1.png QT_850_MB_2.png QT_850_MB_3.png QT_850_MB_4.png QT_850_MB_5.png QT_850_MB_6.png Seagate_Medalist_ST33232_A_1.png Seagate_Medalist_ST33232_A_2.png Seagate_Medalist_ST33232_A_3.png Seagate_Medalist_ST33232_A_4.png wd80jb_1.png wd80jb_4.png

gallery: https://postimg.cc/gallery/2exxgdkns/bfa19d55/

ISA Network adpters

1.IBM Turbo 16/4 Token Ring ISA - 72H3500 (72H3496)
2.Viglen Ethernet card P/N:142640-402 REV: 01 - Chipset UL0020

ibm_isa_1.jpg ibm_isa_2.jpg ibm_isa_3.jpg viglen_isa_1.jpg viglen_isa_2.jpg viglen_isa_3.jpg

gallery: https://postimg.cc/gallery/1s42nyu3c/b55eb097/

MOTHERBOARDS

1.Chaintech 486SPM - Socket 3 - Chipset SiS 85C496/85C497
2.Epox EP58 MVP3C-M 100MHz - Socket 7 - Chipset - VIA VT82C598MVP & VT82C586B
3.LuckyStar 5V-1A VER. 2.0 - Socket 7- Chipset - VIA 82C585VPX & 82C586A
4.ZIDA-TOMATO BOARD - 5STXJ-98 REV. 1.02 - Socket 7 - Chipset Intel 430TX - 82439TX System Controller(MTXC) & 82371AB PCI ISA IDE Xcelerator (PIIX4)

chaintech_486spm_1.jpg chaintech_486spm_2.jpg chaintech_486spm_3.jpg chaintech_486spm_4.jpg epox_ep_58mvp3c_1.jpg epox_ep_58mvp3c_2.jpg luckystar_5v_1a_1.jpg luckystar_5v_1a_2.jpg tomato_5stx_j98_1.jpg tomato_5stx_j98_2.jpg

gallery: https://postimg.cc/gallery/2dloy3654/95b13fef/

DAMAGED

1.Super - 486IP-B-2-3 -Socket- Chipset SiS 85C496/85C497 - heavy corrosion, broken plastic SIMM slot, might work.
2.Jetway J446A-V2.0 - Socket 3 - Chiset SiS 85C496/85C497 - missing components
3.TK 82C491 - Chipset UMC - LIF(Low Insertion Force) Socket - UM82C491F - missing components
4.Kaimei Electronic Corp KM-S4-1 Ver: 1.1 - damaged CPU trace - check picture

486_ipb_1.jpg 486_ipb_2.jpg 486_ipb_3.jpg 486_ipb_4.jpg j446_1.jpg j446_2.jpg km_s4_1_1.jpg km_s4_1_2.jpg km_s4_3.jpg tk82c_1.jpg tk82c_2.jpg

gallery: https://postimg.cc/gallery/16j48xww2/e8d202f7/

Memory

SIMM, FPM, EDO, SDRAM, DDR, DDR2.

Memory for days 😁

ram_1.jpg ram_2.jpg ram_3.jpg ram_4.jpg ram_5.jpg

gallery: https://postimg.cc/gallery/k504jgt4/7b560ad6/

SOUNDCARDS

ISA

1.CREATIVE SoundBlaster AWE64 GOLD - CT4390
2.Crystal CS4235-JQ
3.Crystal CX4235-XQ3 ICUAUD-GW805
4.ESS AudioDrive ES688F
5.ESS AudioDrive ES1868F

AWE64_1.jpg AWE64_2.jpg crystal_cs4235_1.jpg crystal_cs4235_2.jpg crystal_cx4235_1.jpg crystal_cx4235_2.jpg ess_688f_1.jpg ess_688f_2.jpg ess_1868f_1.jpg ess_1868f_2.jpg

gallery: https://postimg.cc/gallery/1q09v87a0/12fc2936/

PCI

1.CREATIVE SoundBlaster Live! 5.1 - SB0100
2.Diamond Aureal Vortex 2 Monster Sound MX300 - PCI
3.Yamaha XG YMF724-V PCI

Aureal2_1.jpg Aureal2_2.jpg Aureal2_3.jpg Aureal2_4.jpg Aureal2_5.jpg Aureal2_6.jpg Aureal2_7.jpg creative_sb0100_1.jpg creative_sb0100_2.jpg yamaha_724f_1.jpg yamaha_724f_2.jpg

gallery: https://postimg.cc/gallery/2c0luej7m/8a4f3e93/

Miscellaneous

Diamond modem XP 561
LED displays
Socket 3 cooler and bracket
Some smaller bits and pieces, coolers, cables, etc...

diamond_modem_1.jpg diamond_modem_2.jpg misc_1.jpg misc_2.jpg

gallery: https://postimg.cc/gallery/2cjwg4ama/ac3d7fd7/

The componets posted until now were gathered in a period of one year and half (2015-2016). During this period only the first months were of frantic seaching. Afterwards I wasnt actively looking for parts but didnt pass on the stuff I really wanted.Trips to the local flea market were fewer and I wasnt scouring the forums or the local ads sites. I dont even want to know how much I could've gatherered if I really wanted to to 😁.

See you with the next episodes 😁

Last edited by Robert B on 2018-04-18, 19:22. Edited 2 times in total.

Reply 52 of 844, by Tetrium

User metadata
Rank l33t++
Rank
l33t++

I'm loving your eye for detail, though it is a bit overkill 😁

About your dead graphics cards: I've personally noticed that some graphics cards don't like being used in some motherboards. Whenever I test a graphics card as "possibly defective", I label it (along with in which motherboard I tried it in) and at some later point try it in another setup (different motherboard and different PSU) because sometimes some hardware components simply may not like eachother very much, but both components might be fine anyway when matched with different components.

The higher end graphics cards are more demanding and the ECS boards were a bit more problematic (but that purple color does look neat! 😁), so you might want to try those in another setup one day and see how these work 😀.

The 6800's (especially the faster models) are quite demanding for their age and may misbehave if not used in conjunction with a somewhat overpowered PSU. Seating AGP cards may also be problematic and they may even not work at first, but work perfectly fine after a reseat.

I always check the AGP port for signs of dust too, though I suspect you know perfectly well how to clean hardware components 😁

Whats missing in your collections?
My retro rigs (old topic)
Interesting Vogons threads (links to Vogonswiki)
Report spammers here!

Reply 53 of 844, by Robert B

User metadata
Rank Oldbie
Rank
Oldbie

@tetrium 😁

o-v-e-r-k-i-l-l indeed 😀 but with a twist 😁 To me it comes naturally and it doesnt require more "energy" to accomplish. Glad you still like my "work" 😁

Regarding the case of the AGP Trio I didnt put the story to rest yet. I dont have a more potent AGP platform but as soon as I'll find one that I want, I'll redo the tests.

I was thinking the same thing regarding an obscure incompatiliblity issue with the motherboard that I used or the fact that it is not from the same generation as the GPU's.

NO S-I-R 😁 NO dust in my AGP slot or other kind 😁 but in my case, seating in the AGP slot was an issue but I saw no improvement after making the changes.

Dont worry I'll update the status of the TRIO when I'll revisit the situation 😀

Purple haze is purple haze - I think the GF4 4600 Ti is a gonner...but I'll retest it the first time I have the chance.

Next I'll post the story of the Little Bent Pin and I'll check my inventory for more pictures than I posted when I first wrote the piece.

More later.

20150601_092012.jpg20150601_090548.jpg20150601_120737.jpg

Last edited by Robert B on 2018-04-18, 19:22. Edited 2 times in total.

Reply 54 of 844, by Jade Falcon

User metadata
Rank BANNED
Rank
BANNED
Robert B wrote:

Upon close inspection I found that the heatsink was glued on. Before removing the heatsink from the V3 from the earlier posts the first guinea pig was this GF4 4600 Ti. It stood in the freezer in a bag for around 30 min and then with the help of a flat screwdriver and a credit card to protect the PCB it popped easily on the first try. Removing the yellow thermal glue was another story though and it took some work 😁

Step 2. Isopropyl alcohol 99.9%

Full wash with isopropyl alcohol 99.9% pulverized from and old window cleaner container. Some scrubing with an old brush. Then more isopropyl alcohol 99.9% baths 😁 then more brushing..... it came out squeaky clean.

A few tips from someone that has remove tons of glued on heatsinks on all sorts of stuff. (not just computer parts)
Spay caned air on the heatsink upside down, putting the card in the freezer works but can harm the card. IT can make it brittle and condition can be bad too.
Also try acetone or RC fuel in place of Isopropyl. Keep in mind the RC fuel will remove the glue almost instantly but can remove any marking on the core too. acetone can eat the clear coat on the PCB so be carful it too. When in doubt use a Isopropyl wetnap or Isopropyl and a sponge or likewise item.

Also nice posts and photos.

Reply 55 of 844, by Robert B

User metadata
Rank Oldbie
Rank
Oldbie

@Jade Falcon - Thanks for the advice regarding the removal of glued heatsinks. The GF4 was my first and the V3 the second. I learn as I go. With the method I used it was a calculated risk if I may say so.

As the word goes: Your mileage may vary 😁

Reply 56 of 844, by Jade Falcon

User metadata
Rank BANNED
Rank
BANNED

Yeah you have to be carful when doing this. I find that heading and then freezing the heatsink a few times can help weaken it. Also before taking the card and screw driver to that card try twisting/wiggling the heatsink abit. I wish I new of something I could submerge a card in that would eat the glue but would not harm the card.

Reply 57 of 844, by Robert B

User metadata
Rank Oldbie
Rank
Oldbie

Little bent PIN

The story of the BENT CPU PIN(ssssssssss) or should I say lots of CPU Pins 😁

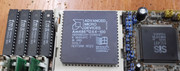
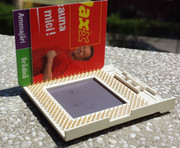
Last year I went to the flea market in search of a good AT PSU. My searches returned a BIG FAT "0". I found a couple of them but they were looking like the kind when powered up, they'll make a small indian smoke signal fire and bye bye precious components. So, no way JOSE! I'll need to buy a new one or at least one from a reliable source.

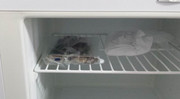
As I was browsing the market I saw a little gipsy boy with a handfull of CPU's all laid out on a piece of cloth 😁 Hmmmm let's see what's there! 😀 It was the first time I saw in the local flea market CPU's in bulk.

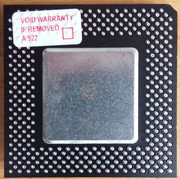
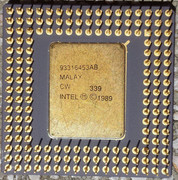
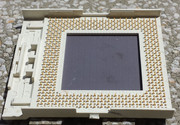
There were many CPU's ceramic, gold cap, etc. but the state they were in was really meeeeeeeeehhhhhhhhhhhhhhhhh: dirty, scratched, scuffed, with bent pins, smelly, chipped, etc. etc. you know the drill 😁

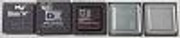
I searched through the pieces and I chosed the following, which to my eye, had a better chance of survival:

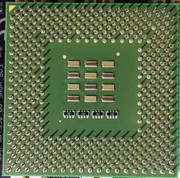
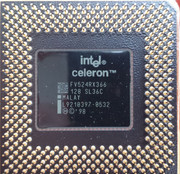
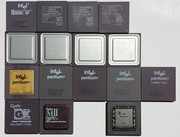
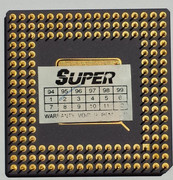
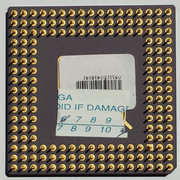
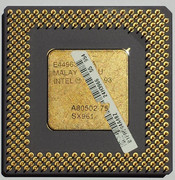
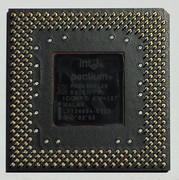
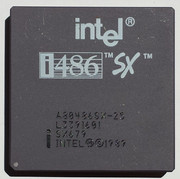
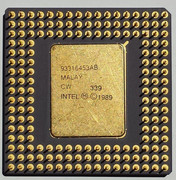
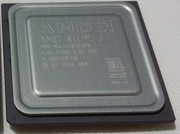
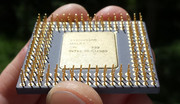
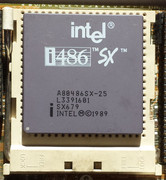
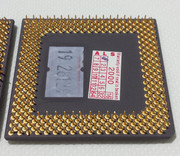
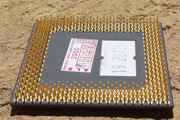
1. Intel SX 80486 4x86 - SX679 - 25 MHz!!! - officially the slowest CPU I own
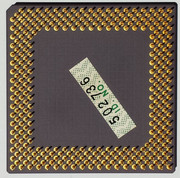
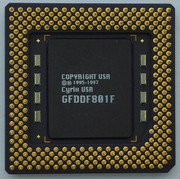
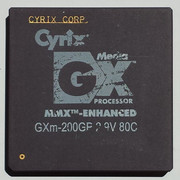
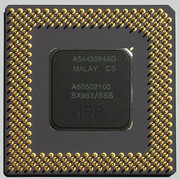
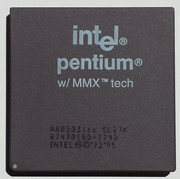
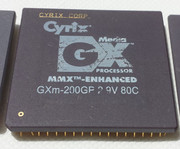
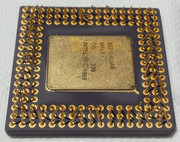
2. Cyrix GXm-200GP - GX Media Processor - MMX Enhanced - 200MHz bus 33MHz max. temp. 80C
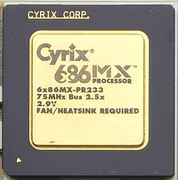
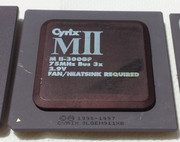
3. Cyrix MII-300GP ~ 225MHz
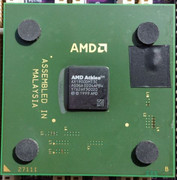
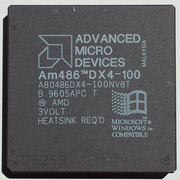
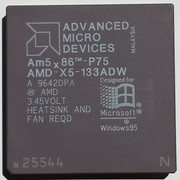
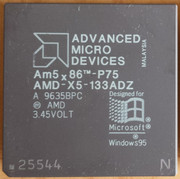
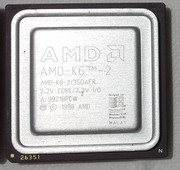
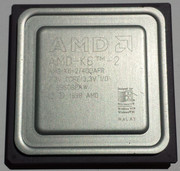
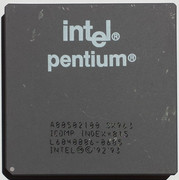
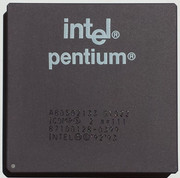
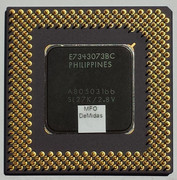
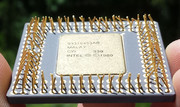
4. AMD K6-2/350AFR - 350MHz
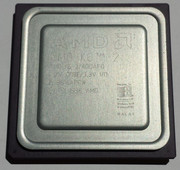
5. AMD K6-2/400AFR - 400MHz

All in all not bad if I say so myself 😁

Until then I didnt have anything to do with bent pins but there's a first time for everything.

The state of the CPU's wasnt IDEAL and ranged from THE WHAT WERE THEY THINKING! to the HELL YEAH!! It can still play CRYSIS! 😁

I browsed the internet for some pointers and in the end armed with common sense, some skill and an old chinese man patience I took the matter by the horns 😁

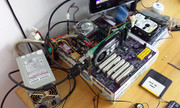
First, all of the CPU's received a good preliminary cleaning and a close damage assessment.

1group_0.jpg 486_sx_1.jpg 486_sx_2.jpg 486_sx_3.jpg Cyrix_GXm_1.jpg Cyrix_GXm_2.jpg Cyrix_M2_1.jpg Cyrix_M2_2.jpg k6_2_350_1.jpg k6_2_350_2.jpg k6_2_400_1.jpg k6_2_400_2.jpg

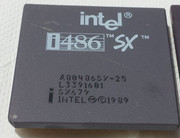
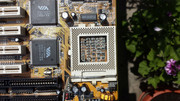
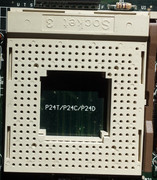
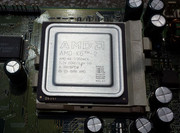
4X86/80486/486 - Bent CPU pins repair Aplicable to any PGA socket 1/2/3/4/5/6/7/8 etc

Tools:

1. 0.5 mm mechanical pen - you can use a smaller mechanical pen than 0.5 mm, I used what I had.
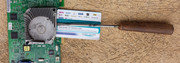
2. a plastic credit card or other type of card
3. regular scotch tape or electrical tape
4. lots of patience 😁 and a steady hand

I didnt use a fine tipped pliers with a smooth interior of the jaws because there was no space available.It was too thick.

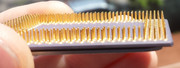
STEP 1 - General straightening of the PINS

The aim of this step is to straighten all the pins in a general way. You dont aim for a final position of the pins. This will come later.

Note. If one of the pins is very bent, dont hesitate to bend the surrounding pins to get a better access to it. Be carefull in this case.

a) when straightening a pin you MUST insert the PIN all the way into the tip of mechanical pen, otherwise you'll end up with a pin in the shape of the letter "S" 😁

b) after you insert the pin all the way into the tip of the mechanical pen, with a gentle motion you straighten the pin.

In my case I used a 0.5 mm mechanical pen which has a larger diameter tip than the pin I was straightening. I had to feel the moment when the pin made contact with the inside wall of the tip of the mechanical pen and then start applying force.

OBS. In some cases you can use a medical needle with a larger diamenter which could fit snuggly on the pins.

tehnique_1.jpg tehnique_2.jpg486_sx_1.jpg 486_sx_2.jpg 486_sx_3.jpg 486_sx_4.jpg

gallery: https://postimg.cc/gallery/1xec9e0w2/7cfe2530/

STEP 2 - The use of a template to straighten the PINS

On the internet the general recomandation is to use a credit card or a metalic ruller to straighten the bent pins.

BUT what do you do when all the pins are bent and twisted? Your eyes can do only so much.

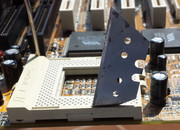
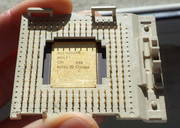
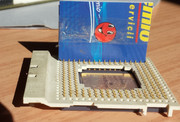
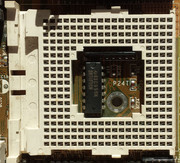
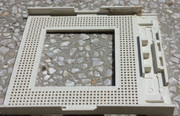
EASY! You dismantle a CPU socket from a donor motherboard OF COURSE 😁

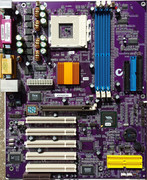
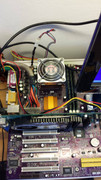
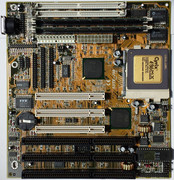
By luck I had a beaten up socket 3 motherboard which already had a broken sliding plastic socket cover and I put it to good use.

NOTE. After the general straightening of the pins in STEP 1, dont rush to press the CPU into the socket cover or into a good CPU socket. Use the mechanical pen to straighten the pins some more and starting from one side, try to GENTLY insert the CPU into all the holes. You may repeat several times the procedure of straightening the pins and trying to insert the CPU into the socket cover/ socket. BE GENTLE or you'll damage something.

NOTE. If you have a good motherboard, be VERY carefull when you try to remove the plastic socket cover because the plastic is OLD and brittle. Common sense and the use of appropriate tools will guard you from problems 😀 See the K6-2 bent PINS straightening guide below

a486_1.jpg a486_2.jpg

gallery: https://postimg.cc/gallery/1nvsn4byw/0d41faec/

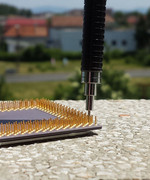
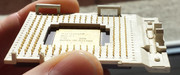
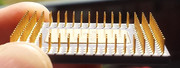
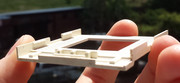
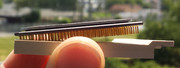
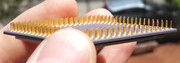
STEP 3 - THE USE OF THE CREDIT CARD (or equivalents)

In the case of the 4x86 socket 3 bent pins problems I estimated by eye that the width between the pins is three times the width of a credit card.

So I cut three pieces from the card and taped them together.

After the CPU was inserted into the plastic socket cover I used this tool to straighten the pins some more. I started slow with a gentle lateral movement and moved it into a rectangular pattern row by row, column by column.

NOTE.Ideally the rounded edges of the card are the leading edge, as they will slide easily between pins.

In the end I saw that this tool I used was slightly wider than the width of the pins, but because the pins are elastic it allowed me to better bend them into shape.

a486_3.jpg a486_4.jpg a486_5.jpg

gallery: https://postimg.cc/gallery/1bin5jes8/48dfef07/

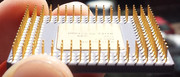
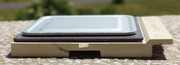
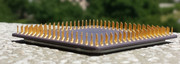
STEP 4 - FINE TUNING

If you have followed the instructions underlined into the steps above you'll see that your CPU will fit into a CPU socket even if you'll have to use a little bit of force.

Start gently from one side and try to fit the CPU into the socket. Sometimes it will drop in like a rock on the first try but usually it wont, so if you dont succede then it is TIME FOR FINE TUNING. DONT USE FORCE!

FINE TUNING means using your eyes and the mechanical pen to align the pins really well.

I recommend this step called FINE TUNING regardlessly because it will ensure you'll have a proper CPU ready to be inserted in any socket.

final_486.jpg final_486_3.jpg final_486_4.jpg final_486_9.jpg socket_3_2.jpg socket_3_1.jpg socket_3.jpg square_pin_2.jpg square_pin.jpg

gallery: https://postimg.cc/gallery/2q912eubm/8190e5e8/

OBS:

a) There are diferences between socket 3 motherboards. In some, your "repaired" CPU will fit and in other it wont. DONT USE GORILLA POWER use FINE TUNING instead 😁 and straighten the pins some more. It will only hurt your eyes 😁 Trust me...

b) Some old CPU's have a collar like bump on some CPU pins. Dont get alarmed that your CPU wont fit all the way into the socket. It is NORMAL. Please dont use a hammer 😁
Some socket 3 motherboards have a number of bigger holes into the CPU socket that will allow the CPU to be inserted all the way in. Some dont have these bigger holes.

c) When I compared a CPU with pins straightened by me with one of my GOOD CPU's, I was amazed to see that my GOOD CPU was in much worse shape than the one I fine tuned 😁

d) In the case of the pins which are bent into the shape of the letter "S" try to straighten them as much as possible. In some circumstances you wont be able to make them very straight but if the CPU will fit into the socket, leave them be, or you might break them. In some cases I used a fine tipped pliers with smooth interior of the jaws to straighten this kind of bent pins but it was a little nerve-racking. Especially if the pins are finer.

e) CPU sockets are pretty permisive and will allow the insertion of CPU's which arent in an IDEAL condition

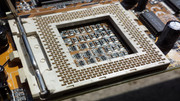
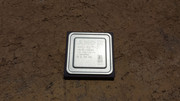
The PINS proved pretty resistant and in the end I obtained the RESULT I was looking for 😀

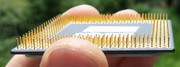
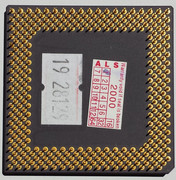
I managed with 168 pins, WILL I succede with 321?!??!!?

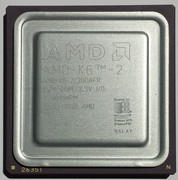
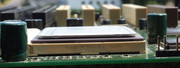
AMD K6-2 - Bent CPU pins repair

In essence you have to apply the same steps like in the case of the 4x86 CPU but with some recommendations 😁

1. The width of the credit card was enough to straighten the pins once I put the CPU into the plastic socket cover.

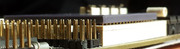
2. The socket 7 plastic cover is more flexible that the socket 3 one, so the danger of breakage is greater.

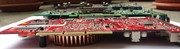
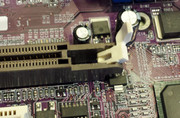
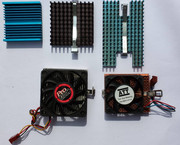
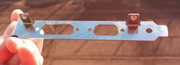
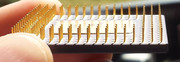
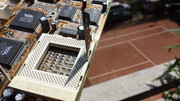
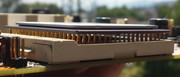
3. GREAT CARE MUST BE TAKEN when removing the socket 7 CPU plastic cover. Use something narrow and strong like the blade in the picture.BE CAREFULL NOT TO CUT THE PLASTIC! After you have gently inserted the blade into one side of the plastic socket cover, apply a gentle force and once you see the cover moving away from the retaining hook STOP and go to the next position. When you finished one side, use a fine screwdriver and again GENTLY try to lift the cover. Now it will separate easily.

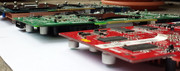
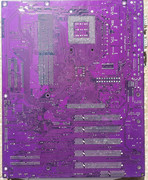
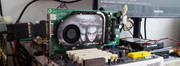
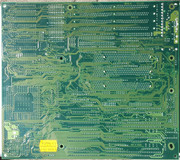
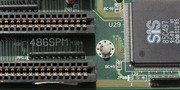
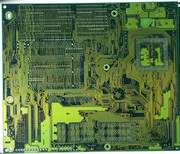
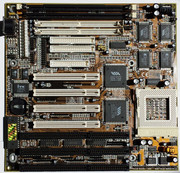
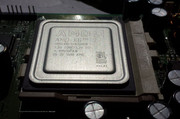
In my case I didnt have the luxury of a broken socket 7 motherboard and I had to canibalize a GOOD one 😁 My LuckyStar 5V-1A VER. 2.0 was really LUCKY! 😁 It received a good socket cleaning too 😁

4. FINE TUNING FINE TUNING AND A LOT OF PATIENCE.

5. In the case of the socket 7 CPU's I could also straighten the pins without the help of the plastic CPU socket cover. I used only the credit card. The DOWNSIDE is that the pins are more than the socket 3 ones and it's not soo easy to see the lines. This puts more stress on the eyes.

In the end all the CPU's survived 😀

20150601_120507.jpgsocket_7_1.jpg socket_7_2.jpg socket_7_3.jpg socket_7_4.jpg socket_7_5.jpg

gallery: https://postimg.cc/gallery/1ejkcr9nc/73f01eba/

k6_2_350_1.jpg k62_350_1.jpg k62_350_2_1.jpg k62_350_2.jpg k62_350_3.jpg k62_350_4.jpg k62_350_5.jpg k62_350_6.jpg k62_350_7.jpg k62_350_8.jpg k62_350_9.jpg k62_350_10.jpg k62_350_12.jpg k62_350_13.jpg k62_350_14.jpg

gallery: https://postimg.cc/gallery/2sozdad20/785c793d/

k6_2_400_1.jpg k6_2_400_2.jpg k62_400_1.jpg k62_400_2.jpg k62_400_3.jpg

gallery: https://postimg.cc/gallery/1vqnya7eq/8b3bf0aa/

20150601_135922.jpg

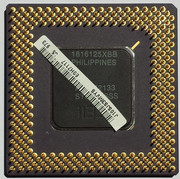
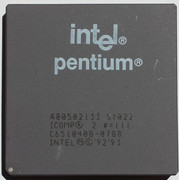
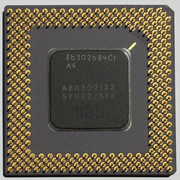
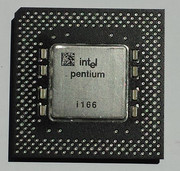
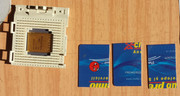
Later I saved more CPU's: a couple K6-2 CPU's, a Cyrix and a Pentium 133 MHz 😁 After this experience I never found older CPU's in the local flea market. So I'll catalogue this period into the section of SPECIAL ENCOUNTERS - Fallout style 😁

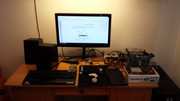
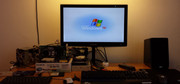
Slowly but surely we are nearing the end of my adventures. There is one episode left and maybe I'll put some pics with my current system which for sure will be a keeper and a LANDMARK of the GOOD OLD DAYS!!!

Enjoy! 😀

Last edited by Robert B on 2018-04-18, 19:23. Edited 1 time in total.

Reply 58 of 844, by Robert B

User metadata
Rank Oldbie
Rank
Oldbie

Because the last post was about restoring components to their former glory or at least to functioning order, when I found in my picture collection these images of the Matrox MGA-Millenium II - 4MB I wanted to upload them.

The first time I first saw the Matrox MGA-Millenium II - 4MB , which I bought during a bulk sale, I new I liked it a lot 😁 It was complete with the add-on card and it looked pretty awesome for the year 1995 😁

I inspected the patient and it showed lots of rust on the video connectors but to add assault to injury I saw that the graphic chip had a few twisted and bent PCB connectors. Good thing I didn't test it this way.

First I used some 1000 grit sandpaper to remove much of the rust and in some areas I had to scrape it off with a fine screwdriver as it was real deep. In the end after a good bath with isopropyl alcohol 99% it came out gorgeous 😀 Later when I dealt with rust on other graphic cards I used an auto liquid rust remover with a small rag or I immersed in the solution the rusted metal parts.

For the PCB connectors of the graphic chip I used a small needle and I managed to pull a little to the exterior two of the connectors and then straighten them as much as possible. Afterwards I spread the connectors until there was no contact between them. They were soft and the chances to damage them further was pretty high 😁 so in the end I decided that I did as much as I could. They survived the ordeal 😁

When you buy older cards be very careful and look closely for missing components(capacitors, small PCB components, etc) or any other visual damage because the cards might have been stacked or tossed in a container by the previous owner/owners or were stored incorrectly. Don't get fooled by the good looks of the card as they can be deceiving 😁

After I washed really well the card with isopropyl alcohol 99% even if it was spotless I wanted to make a test. I used a white rag with some isopropyl alcohol 99% and rubbed really well the PCI connector. To my surprise it was still dirty 😁 If you think your S**T is clean THINK AGAIN! 😁

I tested this card last year on the 5x86 build and it ran flawlessly 😁

matrox_mga_1_1.jpg matrox_mga_1.jpg matrox_mga_2.jpg matrox_mga_3.jpg matrox_mga_4.jpg matrox_mga_5.jpg matrox_mga_6_1.jpg matrox_mga_6.jpg matrox_mga_7.jpg matrox_mga_8.jpg matrox_mga_10.jpg matrox_mga_11.jpg matrox_mga_12_1.jpg matrox_mga_1.jpg matrox_mga_2.jpg matrox_mga_3.jpg matrox_mga_4.jpg zma.jpg

gallery: https://postimg.cc/gallery/36vixmcd4/4f27df7c/

Last edited by Robert B on 2018-04-18, 19:24. Edited 1 time in total.

Reply 59 of 844, by Robert B

User metadata
Rank Oldbie
Rank
Oldbie

This post is not about a very old PC component or peripheral but we're getting there 😁

My trusty Logitech MX518 mouse was suffering from the peeling of the rubberized lateral surfaces and the wear of the top cover.

Because it's still going strong even if it was purchased in 2008 or 2009 I wanted to prolong his life/agony 😁

Full disassmebly.

Dry and wet sanding with 400 and 1000 grit paper.

The removal of the rubberized surface took a lot of elbow grease. The top coat gave up easily but the undercoat took sanding, hot water, isopropyl alcohol and a small dose of paint stripper to remove (dont use much a it can damage the plastic). It was a PITA 😁

Three layers of auto silver flake paint SINTO brand.

Three layers of clear coat KOBER brand.

I didnt use primer even if I had it, for fear that the primer+paint+clear coat would make the parts too thick to put back together.

Buffing of the aluminium Logitech Logo until it was like glass 😁 Originally it was held by a thin double sided tape but I didnt have the correct thickness in stock so I used a two parts transparent glue from BISON.

It came out pretty well for my first try 😁

One of the most tedious jobs was to remove the skates. I managed to damage one but I glued back the adhesive part with the teflon part 😁

Home I use a Logitech G400 and at work I use the MX518 😀 I LOVE THE SHAPE. Too bad I cant find it in stock now...

No I'm not gaming at work, at least not usually 😁

Today I took some pictures for the last episode: How I clean and store my stuff. As soon as I can I'll post the story 😁

I searched through my picture collection and I'll post some stuff after the last episode.

More later.

MX518_1.jpg MX518_2.jpg MX518_3.jpg MX518_4.jpg MX518_5.jpg MX518_6.jpg MX518_7.jpg MX518_8.jpg MX518_9.jpg

gallery: https://postimg.cc/gallery/1tpzogwle/84a35ebc/

Last edited by Robert B on 2018-04-18, 19:24. Edited 1 time in total.