Reply 60 of 852, by oerk
You need to do a TL;DR version 🤣
But seriously, great stuff, and excellent pictures!
You need to do a TL;DR version 🤣
But seriously, great stuff, and excellent pictures!
Wow! I need to do similar with my MX510.
All hail the Great Capacitor Brand Finder
@oerk - In this instance I didnt take pictures because I wasnt sure how it would turn out. Now I'm a little pissed but no worries my G400 its starting to show some wear and maybe I'll paint that sucker too 😁 I tried a streamlined post instead TL;DR and looking back I too would have prefered the TL;DR 😁
@gdjacobs - If you want to paint your mouse too, try first on one that you dont use or you dont need. You'll learn many things before you go guns blazing on the MX510 😁
Sneak peak with the way I store my stuff.
wrote:My trusty Logitech MX518 mouse was suffering from the peeling of the rubberized lateral surfaces and the wear of the top cover.
Ooh.. that NASTY problem I've had (and been having) with some of my stuff with RUBBER (or rubber-like synthetic?) surfaces:
* Logitech MX500 (yes, similar to yours, only it came in black/silver) -- I did clean it once thoroughly (wet), but then it died even though I made sure it was already dry before using 🙁 maybe I got too aggressive somehow.
* a similar gaming mouse that came with the ASUS laptop below (it already died before I attempted to clean it though)
* ASUS G73Jw laptop -- uggh... I still use this mighty thing, but the lid (all covered by rubber!) is sticky and hard to clean, and the palm rest area has now developed bad cracking even -- I'm going to have to peel off the whole rubberized area incl. the touchpad and cover it off with something! I think I will have to try your sanding method with the lid and some buttons! Thanks for sharing!
* an old DSLR I had (the grip), but that was solved with some peeling by nails 😜 and brushing and sprays of Meguiar's Supreme Shine (oh how I love its coconut cookie smell 😊 ) to bring it back to great-looking condition.
Hot humid climate + dust + rubber = sticky gooey degrading rubber
add dry AC'd indoor air and you get cracked degraded rubber after a while 🙁
I have searched around and many people are having similar problem it seems. Guess I'll avoid rubber-covered devices from now on...
By the way, does anyone know of a good alternative to the Logitech MX5xx series mouse today? I've never felt anything as right in my hand as that thing (pun intended). And yes, without rubber.
"Any sufficiently advanced technology is indistinguishable from magic."—Arthur C. Clarke
"No way. Installing the drivers on these things always gives me a headache."—Guybrush Threepwood (on cutting-edge voodoo technology)
@archsan - we are on the same page regarding the rubberized surfaces. I hate their guts 😁 Even my Bitfenix Colossus Venom Edition case is suffering from this damn disease. I resorted to wraping instead of painting to resolve the problem. Even so, I couldnt wrap all the rubberized surfaces. The inside of front of the case would be too much trouble to wrap. I still like my case and in the near future I'll have to address this issue.
I'll post the insides of the case at a later date 😁
How I clean and store my stuff
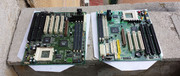
Cleaning and caring for my parts is a very involved process. The moment I aquire something and IT'S MINE I want it to bee in as good as possible shape. This means that if there are issues with the part these will most certainly be addressed before beeing placed in a clean container 😁
All parts will be cleaned thoroughly. Damaged pieces will be rebuilt or replaced. Missing components will be found and mounted.
1. Cleaning my parts.
Until last year when I didnt have such a big collection, cleaning my parts was a very straight forward job. I used a regular,SOFT, animal hairs,painting brush or cotton earbuds with a mild alcohol solution and I just cleaned as well as I could the surface dirt or dust. Mind though that these parts were not the result of dumpster diving or buying from the internet.
After my first bulk buy when I was confronted with at least 20+ pieces in various states of dirtiness 😁 I KNEW I HAD TO DO SOMETHING.
I searched the internet and got a few pointers 😁 To them I added my personal touch (as allways)... 😁
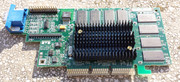
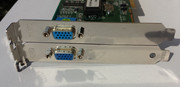
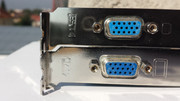
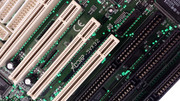
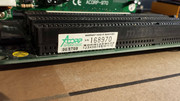
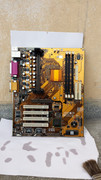
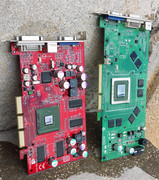
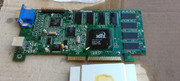
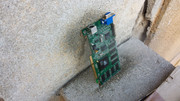
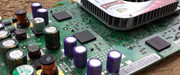
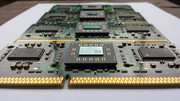
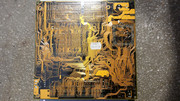
In general cleaning of the parts presented in the posts above went thorough these steps:
a) full or partial disassembly
b) dry cleaning and/or using some kind of liquid
c) final assembly
Sometimes each of these principal steps was comprised from other smaller steps depending of the situation. For example final assembly couldnt be completed before some of the cleaned parts werent rebuilt or restored to their original state.
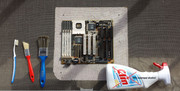
Dry cleaning my parts meant the use of the following tools:
1. Brushes of varying sizes and composition - regular painting brushes made from animal hairs, used toothbrushes - I prefer the Colgate SlimSoft toothbrush. Sometimes I had to trim the brush at an angle to get better access. Sometimes I had to bend the head of a toothbrush for easier usage.
2. Cotton earbuds
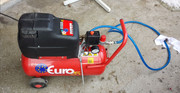
3. If available, a small air compressor - luckily, my father bought years ago a 1.5HP air compressor, which I took out of storage and put it to good use 😁
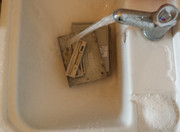
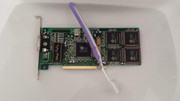
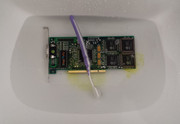
When I had to resort to deep cleaning my components I used:
Isopropyl Alcohol 99% - THE BEST THERE IS. The first time I used this alcohol I was put away by the strong smell. I had to use it in well ventilated areas 😁 and after some time I really started to enjoy the smell 😁 😁 😁 NO I'm not addicted 😁 it's just that I know that after this step my parts will be SPARKLING.
In my point of view, you simply should use isopropyl alcohol because its safer for your parts speaking in terms of home usage.
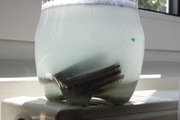
When I first started thinking about washing my components I even EXPERIMENTED with regular water and distiled water, together with some mild dishwasher detergent (Fairy) or strong detergent (Ariel). At first the results were promising BUT after drying you could see small traces of some kind or mineral deposits on the surface of the solder. These mineral deposits could be removed with a cotton earbud. On the local forum where I posted my stuff one guy said that in some given circumstances these mineral deposits can lead to a short and PUFF bye bye sweet PC component. The problem is that these mineral traces can be formed under the surface mounted chips and they cannot be seen.
I DO NOT RECOMEND USING WATER IN ANY FORM TO WASH YOUR ELECTRONIC PC COMPONENTS! - this is a fair warning. You can find on youtube videos with people washing motherboards from old arcade machines and they still work, BUT I just wouldnt feel safe, based on my personal experience, to wash my parts using water, EVEN IF you leave them to dry a long time afterwards.
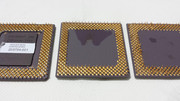
In two instances I used water with Ariel detergent to clean well some of the ceramic CPU I found at the local flea market. They were YUCKY and NASTY. The results were very good.
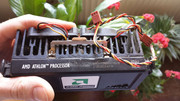
When I found that the heatspreader on the K6-2 CPU's was not glued on the entire circumference I knew that I should STOP using water. In the end the two AMD K6-2 CPU's I washed with water survived. As a precaution I used a syringe with isopropyl alcohol 99% to drip a small amount in the places I could see an opening when I put the CPU against a source of light. This way I could see the alcohol going though one side and coming through the other LIVE AND LEARN!
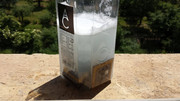
When I cleaned my cables I had one nasty 40 PIN cable which I wanted to dump. It even had a missing connector. I said to my self I have nothing to lose and left it over night in water with detergent. It came out sparkling 😁
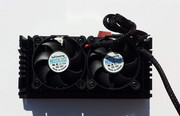
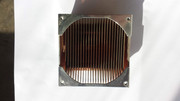
I used water and detergent to wash the dirty and nasty heatsinks.
I even used medical alcohol but i didnt like the results. After drying there were many spots on the surfaces.
So we've established that you should use ISOPROPYL ALCOHOL 99%(for better results).
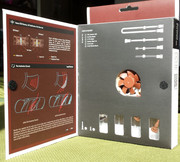
Steps after you have partially or totaly disassembled the parts you want to clean:
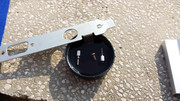
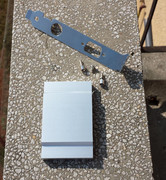
1. Place your component at an angle - sometimes you have to protect the part using a piece of cardboard or a piece of cloth to prevent scratches or other kind of damage. Sometimes I used a mosquito mesh.
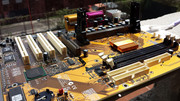
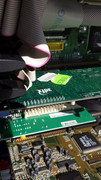
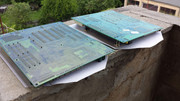
2. Spray the isopropyl alcohol using a window washing liquid container or other similar tool. The finer the mist the better. Also this way you use less isopropyl alcohol. Before spraying the alcohol I experimented using a brush and a cup with isopropyl alcohol. This was a disaster because each time you dipped the brush in the cup you would contaminate the alcohol and in the end you would return the dirt back to its place. So SPRAY THE ALCOHOL.
3. After soaking the component and leave some of the isopropyl alcohol drain use a brush and SOFLTY clean the entire board. BE GENTLE!
4. Another HEAVY SPRAY of isopropyl alcohol with the part placed at an angle.
5. Let it drain. To speed the process first I used an air compressor(be carefull with the distance from which you use it) but afterwards I SIMPLY took the component in my hand an shook it against a wall until I didnt see any drops forming. DONT HIT THE WALL 😁 (I NEVER hit a wall this way) BE CAREFULL!
6. Let it dry completely.
OBS. Sometimes you have to repeat more times the process of brushing and washing with isopropyl alcohol until you get the desired results 😀
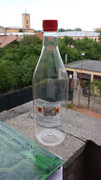
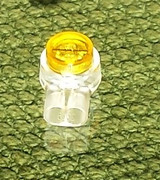
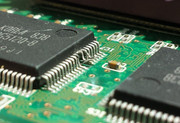
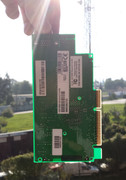
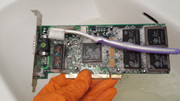
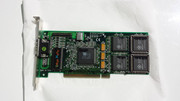
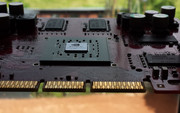
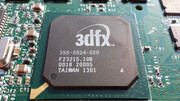
gallery: https://postimg.cc/gallery/2tg07ztvs/f9045df2/
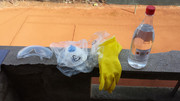
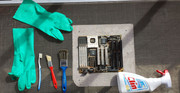
SAFETY GEAR USED
When I first started cleaning my parts I was a little bit paranoid 😁 and used safety glasses, gloves and a breathing mask.
Later, I only used gloves when I had to deal with a lot of isopropyl alcohol.
As I used less and less the air compressor there was no need for a breathing mask.
All the cleaning took part outside in spring or summer.
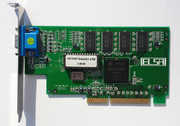
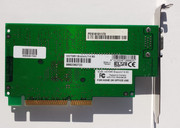
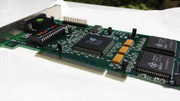
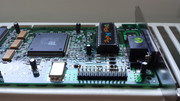
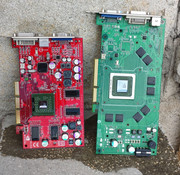
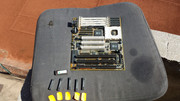
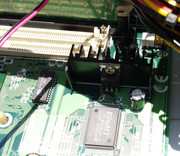
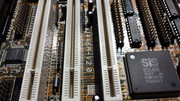
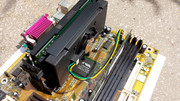
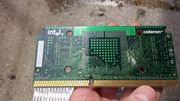
Now you have a very clean PC component.
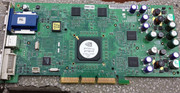
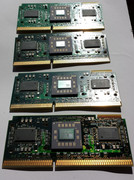
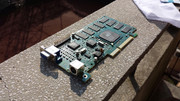
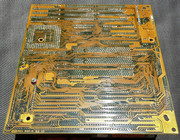
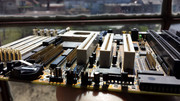
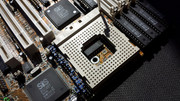
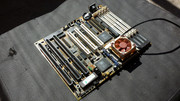
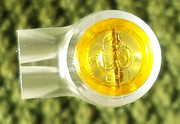
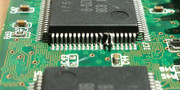
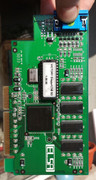
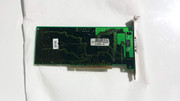
gallery: https://postimg.cc/gallery/31zzqr4lu/732122f8/
If you really want to get even better results use a cotton earbud dipped in isopropyl alcohol and clean even better all the nook and crannies then wash again the part with a heavy spray of isopropyl alcohol.
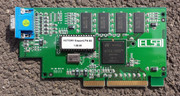
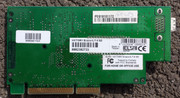
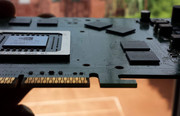
Sometimes the component connector: ISA, PCI, AGP, etc must be thoroughly cleaned even after repeated washes with isopropyl alcohol. Use a soft pieces of cotton cloth.
Warning!
Labels based on paper will be damaged by isopropyl alcohol.
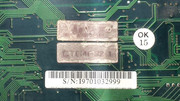
Sometimes ink stamped marking will be removed.
Writing on the labels of some RAM sticks was removed.
NOTE. Labels on newer components werent affected.
OBS.
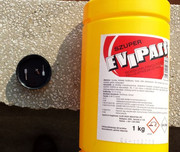
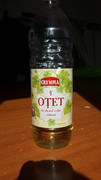
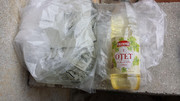
In some instances I used vinegar 9% alcohol made from grapes, to clean some heatsinks and plastic PC case componets. In some instances I immersed the parts in water with a part of vinegar.
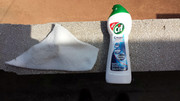
I used CIF cream to clean the surface of some dirty PC cases. BE CAREFULL as the plastic particles CAN remove decals or screenprinted logos!
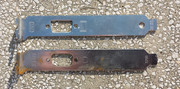
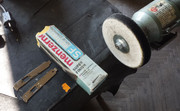
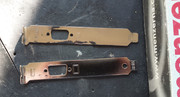
REMOVING RUST: I used fine sandpaper for heavy corrosion or auto rust remover.
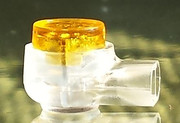
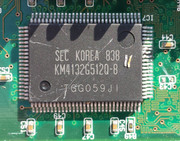
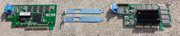
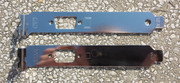
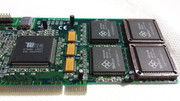
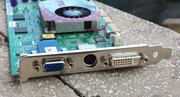
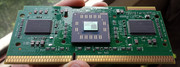
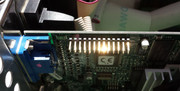
gallery: https://postimg.cc/gallery/1fyo4z9ci/0416e548/
All in all I used under 5L of isopropyl alcohol to wash my parts. Motherboards took greater quantities. After I resorted to the sparying of isopropyl alcohol the consumption went down. I didnt keep track of how many liters I bought but under 5L for sure. Anyway I wasnt beening stingy with the stuff 😁
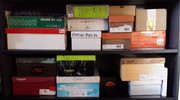
2. Storing my stuff
When I saw that my collection is getting bigger I new I had to do something regarding storage.
I wanted to keep the footprint as small as possible.
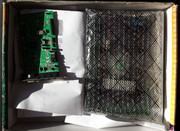
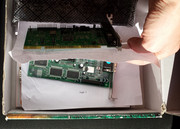
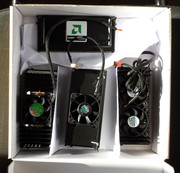
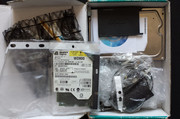
For the storage of PC components I resorted to:
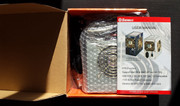
1. Retail boxes - IF AVAILABLE
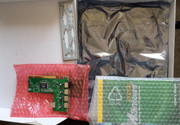
2. Antistatic bags
3. Cardboard boxes
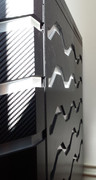
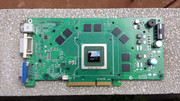
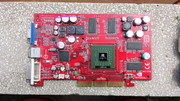
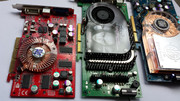
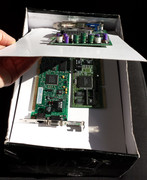
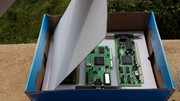
Given the fact that much part of my collection is comprised from graphic adapters and because I didnt have so many antistatic bags I resorted to storage in cardboard boxes, but with a twist. I used a thick cardboard sheet to stack the parts on top of each other while at the same time I wanted to keep them as level as possible. Due to their age some older parts were already warped but with patience I managed to stack them nicely.
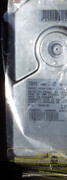
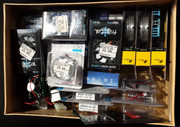
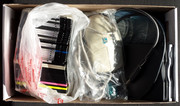
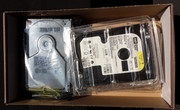
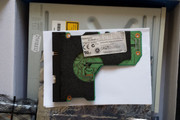
HDD's are kept only in plastic containers or antistatic bags.
RAM stick are sorted in antistatic bags.
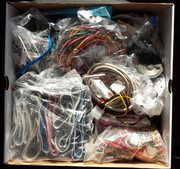
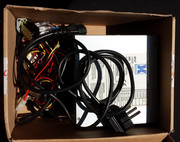
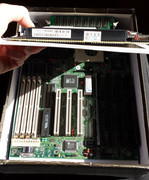
All cables are catalogued and kept in ONE big BOX.
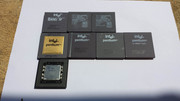
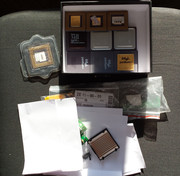
CPU's are kept in a small box carefully stacked - pins between pins or in plastic containers.
The soundcards are few and I keep them in a box with a sheet of A4 paper between them.
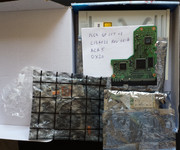
Misc stuff is stored in boxes too. Mice, floppy disks, USB FDD's, ODD, HDD PCB's, etc.
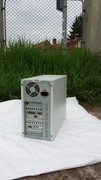
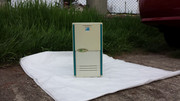
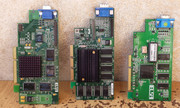
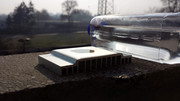
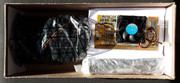
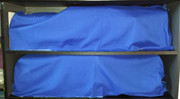
All the parts are in the boxes you see in the pictures and they occupy a small area which is covered by a piece of cloth. Rougly 1m/0.6m.
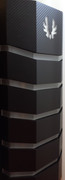
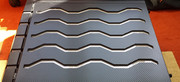
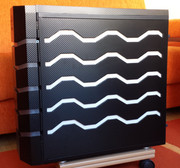
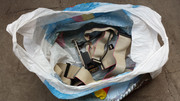
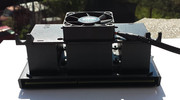
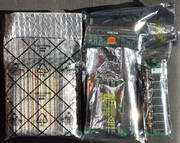
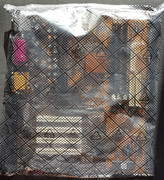
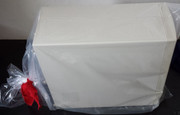
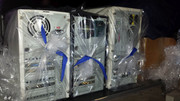
Completed builds are kept in plastic bags with small holes made underneath for ventilation, and are covered by a piece of cloth.
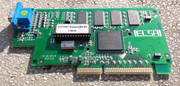
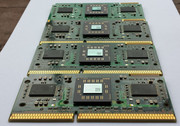
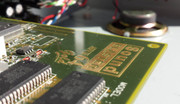
gallery: https://postimg.cc/gallery/1twbtl1xu/c30fb0cc/
This way the parts are destined for LONG TERM STORAGE or as they say kept in SUSPENDED ANIMATION 😁
This was a HELL OF A RIDE and I hope you enjoyed these stories.
I still have some stuff to post, my current PC, built in 2011 😁, a troublesome Enermax PSU, etc......but that's later.
There's a few threads on Vogons about storing stuff. The way you store your stuff is roughly similar to how I store my stuff, except maybe I had to do a bit more 'compression' when it comes to space-saving 🤣
I also use sheets of cardboard to separate PCBs from each other.
I'll store multiple smaller PCBs together if the anti-static bag is big enough, often folding the anti-static bag a single time after each component is inserted into the bag.
I also remove batteries when storing motherboards for any extended amount of time and I remove any heavier CPU HSF, as this can also cause the board to warp, even if it's level.
@tetrium - I also have removed all the heastinks from my motherboards and sometimes even the CPU's. The only motherboards with a battery inside are the three completed builds 5x86, K6-2 and the PIII 550MHz. All are DURACELL CR2032. Anyway they will be checked once a year for leaks, but I've yet to find a leaking CR2032 in my PC's.
wrote:@tetrium - I also have removed all the heastinks from my motherboards and sometimes even the CPU's. The only motherboards with a battery inside are the three completed builds 5x86, K6-2 and the PIII 550MHz. All are DURACELL CR2032. Anyway they will be checked once a year for leaks, but I've yet to find a leaking CR2032 in my PC's.
I've seen it a few times, but to me it appears leaking coin cell batteries is a way more rare thing than those awful barrel batteries.
If a coin cell battery started leaking, the battery goo kinda had the habit to do way less damage, partially because the goo tends to stick to the (usually black) coin cell battery holder first.
I'll often store complete systems without the CR2032 if they have already not been used for an extended amount of time, often first writing down some BIOS settings if applicable. I also often label whatever I have stores, sometimes I'll even include a date code and some snippets of information about any particular oddnesses this had (like "RAM slot #3 seems defective" so I don't end up running into the same problem again and again)
Have you tried submerging the cards in 99% Alcohol, instead of soapy water?
Motherboard Reviews The Motherboard Thread
Plastic parts looking nasty and yellow try this Deyellowing Plastic
wrote:Have you tried submerging the cards in 99% Alcohol, instead of soapy water?
Seems a bit too much of a fire hazard for my tastes 🤣
@Oldskoolmaniac - I didnt try to submerge any of the cards in 99% isopropyl alcohol. After I experimented with submerging in soapy water, in the end I had to wash the card with 99% isopropyl alcohol using the spray method just to be safe. From my experience, submerging the cards in isopropyl alcohol wouldnt be economical. In the end you contaminate the entire liquid with dirt from the previous wash and any of the subsequent parts you wash wouldnt come out as clean if washed separately. IF you have a part that is really dirty with a thick crust of unknown origin you may try submerging in 99% isopropyl alcohol, as a last resort.Regarding the submerging time I cant say anything.Take NOTE that the smell would be strong and the alcohol evaporates relatively quick. You would have to do this in a well ventilated area with a bigger quantity of alcohol or use a hermetic container.
Ill try the spray method then
Motherboard Reviews The Motherboard Thread
Plastic parts looking nasty and yellow try this Deyellowing Plastic
Nice work! Lots of folks around here try to reacquire all their original PC hardware. I never got rid of mine from the 90's, so the acquisition was easy.
What are those raised streak marks on the Am5x86's CPU cooler fan for? I have never seen those before. Is it merely a look cool factor, or does it have some valuable purpose?
Looks like you are in need of mowing the lawn. Never seen grass that tall in a yard setting (referring to 1st page of photos).
Plan your life wisely, you'll be dead before you know it.
@feipoa - glad you like my work 😁 You are in a privileged position to still own your original HARDWARE 😁
The fan in question is a Noctua NF-A4x10 FLX http://noctua.at/en/products/fan/nf-a4x10-flx
Those groves are called Flow Acceleration Channels: http://noctua.at/en/flow-acceleration-channels
BUT given the small size of the fan I think they are just marketing. The fan with a lot of other packed accessories was around 16 USD so it wasnt cheap 😁 - Back in the day my first PC had a crappy 40 mm sleeve bearing fan so for the REBIRTH I went ALL OUT and bought the best 40 mm fan 😁 with SSO2 bearing so it will outlast the system 😁 I LIKE A LOT the fact that the colour scheme blends with the system. It is very silent and smooth running. I didnt want to use a bigger or any other fan 😀 When I saw it I said THIS IS IT! 😁
The grooves are found on the bigger Noctua fans where they serve their purpose well, so I think in the end they added this feature to the smaller one becasue it's a feature of the entire product line.
http://noctua.at/en/technologies
Regarding the lawn, it wasnt exactly a lawn 😁 just a thin strip of FAT JUICY grass at my workplace in the parking lot back in 2015. I have a STIHL FS 56 that would make short work of the grass but since its not my grass why bother 😁 Besides when I took the photos the weather wasnt sunny and I needed a nice background. EVERGREEN was a good theme for this build 😁
Missed me? No?... I didnt think so either 😁
After all the builds and cleanup of various components I remained without something to do. Soooooo today I went to the local flea market. This was one of the few visits made this year. Something was pulling me out of the house. Follow me said a wisper to my brain. Join ussssssssssssss............... 😁
Before leaving the house I set my mind to FIND A RIVA 128ZX and a TNT2.
I spent about one hour there and I found something nice - each piece was about 1.2 EUR - MEGA CHEAP!
1. Elsa Victory ERAZOR/LT 8SD - AGP nVidia RIVA 128ZX 8MB 😁
2. Elsa ERAZOR II-A16 - AGP nVidia TNT 16 MB 😁 some ceramic capacitors missing but nothing that I CAN'T FIX 😁
3. Matrox G4+M4A16DG - AGP Matrox G400 16MB 😁
Next week full disassembly, cleanup and other misc stuff 😁 I'm still debating if I will remove the glued heatsinks. We'll see....
So in the end I found a RIVA 128ZX and a TNT - not bad at all 😁 The G400 was bought because of the Matrox name 😁
Next on my list are a proper TNT2 and a V1.
More later.
gallery : https://postimg.cc/gallery/2mduz39z8/
Today I cleaned the cards I found saturday. In about an hour I examined, cleaned and photographed the three cards.
I made one attempt to unglue the heatsinks using the freezer method followed by a good dose of isopropyl alcohol but NO DICE! There was a ton of thermal glue used so for the time beeing they will stay in place. I'll try other method at a later date.Maybe the canned spray method suggested by the Jade Falcon.
All in all it was smooth sailing. The only problem was the Elsa ERAZOR II-A16 - AGP nVidia TNT 16 MB. Upon close inspection, I saw that there were four missing ceramic capacitors and one memory chip was damaged. The SMD took a masive hit with something sharp. Probably beeing tossed around with other of her sisters. The hit took out a neighbouring ceramic capacitor too. While soldering new ceramic capacitors isnt a big deal I also found that the solder pads on the PCB were broken and the pins cannot be straightened without desoldering the memory chip. At the moment I dont have a hot air SMD rework station and I put the card into my spare parts box. The good news is that half of the solder pad on the pcb isnt detached and I might revive the card at a later date. The bracket was put to good use and completed the Elsa Victory ERAZOR/LT 8SD - AGP nVidia RIVA 128ZX 8MB. In the last picture there are the two pads that broke off.
gallery: https://postimg.cc/gallery/dqnc5rba/788d2b6f/
When i bought the card I didnt see the damaged memory chip, only the missing ceramic capacitors.....let's move along.
Next on my list was a deep cleaning with 99% isopropyl alcohol.
gallery: https://postimg.cc/gallery/1bjxtqt04/39433d50/
The ELSA bracket was rusty and the Matrox one was dull and lost its shine. In the past I used to remove rust by sanding with fine grit sandpaper and a liquid auto rust remover. This time I wanted to try something new and buffed the brackets using a felt wheel and a fine buffing compound. They came out SHINY LIKE NEW! 😁
gallery: https://postimg.cc/gallery/nbb4rqci/bcc10711/
All squaky clean ready to be added into my collection 😀
1. Elsa Victory ERAZOR/LT 8SD - AGP nVidia RIVA 128ZX 8MB 😁
gallery: https://postimg.cc/gallery/2ix2ku7ri/39cdea76/
2. Matrox G4+M4A16DG - AGP Matrox G400 16MB 😁
gallery: https://postimg.cc/gallery/u9r8bey4/19edea20/
Shining...
Your pics are absolutely fantastic!
I really think you could contribute to the Vogons Wiki (send me a private message if you happen to be interested, I can guide you all the way if you wanted to and there's no rush in any way 😀)
Especially if you happen to have some harder to find parts, my camera isn't cooperating as it doesn't want to be found, it's probably hidden in some far corner along with some run-away screws 🤣!
And perhaps a tutorial about cleaning retro computer parts could be useful as well.
wrote:Ooh.. that NASTY problem I've had (and been having) with some of my stuff with RUBBER (or rubber-like synthetic?) surfaces:
* an old DSLR I had (the grip), but that was solved with some peeling by nails 😜 and brushing and sprays of Meguiar's Supreme Shine (oh how I love its coconut cookie smell 😊 ) to bring it back to great-looking condition.
The degrading thing (that transforms into sticky goo) is not the rubber itself, but rather the coating on it, called "softtouch" or something similar, that gives that velvety feeling when its new. I had the same problem with my old Nikon DSLRs, Coolermaster Cosmos PC cases and several remote controls, including WD LiveTV.
The solution to that is removing the goo (i.e. coating) with isopropyl alcohol. I got that suggestion from a Nikon forum, and it works. You will have no "velvety" feeling anymore, but the goo will be gone for good.
GA-6VTXE PIII 1.4+512MB
Geforce4 Ti 4200 64MB
Diamond Monster 3D 12MB SLI
SB AWE64 PNP+32MB
120GB IDE Samsung/80GB IDE Seagate/146GB SCSI Compaq/73GB SCSI IBM
Adaptec AHA29160
3com 3C905B-TX
Gotek+CF Reader
MSDOS 6.22+Win 3.11/95 OSR2.1/98SE/ME/2000