Almost, VLB Heaven...
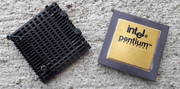
For more than two months I didnt buy anything retro-HW related. While I was in REHAB 😁, I thought I got over the worst part of this addiction. Unfortunately for me, I was wrong 😁 as this week I'm waiting for a package which contains MORE RETRO HW 😁. YEP! I did it again...need I say more?.... It's not a prototype, a monstrous graphic card, an IBM 350 (RAMAC) or something extremely rare but the contents make me remember the times in highschool in 1994...my memory is still fresh. The first time I sat on the chair that I used for the next four years, which had carved on the back the words: IBM PC and between my legs: Don't worry / Be Happy . Go figure 😀
Let's return to the present day and the story I'm about to tell you.
Almost, VLB Heaven.
Why Almost and Heaven in combination with VLB? What made me use these words together? Well, I wish I had a more powerfull mix of components for this endeavour as it would've been even more enjoyable. After this experience, I've aquired the taste for even older parts. While the newer parts, usually have a higher casualty rate, the older parts have yet to disappoint me and they still work "knee deep in the dead", after taking on the Apocalypse from DOOM, being left to the mercy of elements, have escaped the shredder or got away from the vandals who see them only as a GOLD Recovery source.
Up until this moment, when I heard about VLB stuff, I was thinking about something complicated which was also shrouded in a mysterious fog. Why should I bother with something like that? (Little did I know that in the end I was going to like them A LOT!)
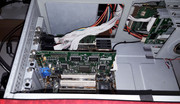
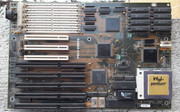
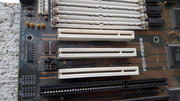
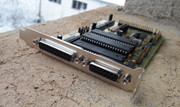
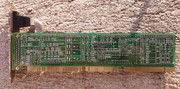
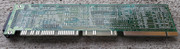
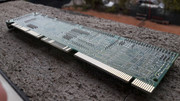
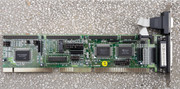
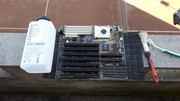
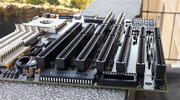
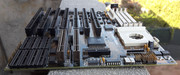
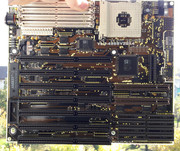
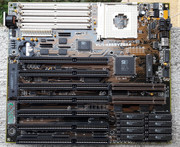
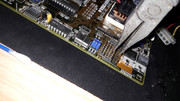
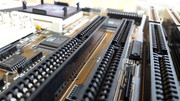
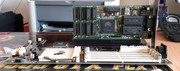
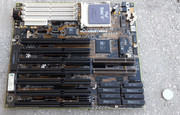
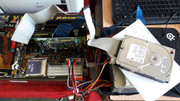
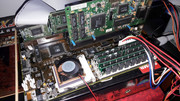
In September 2017 through a stroke of luck, I bought from the flea market, an ASUS VL/I-486SV2GX4 REV. 2.0 motherboard and a mighty - FDD/HDD/SERIAL/PARALLEL/GAME PORT Winbond W83787F, W83758F / Promise PDC20630- EIDE / Super-I/O VLB Controller. I paid a very low price for the entire package. The Asus smilled at me the moment I saw her even if the first time I didnt bought it and I had to get back from my car and recover it from the pile in which it sat. Looking back, I say it was a good decision as I'm pretty sure, it would've haunted me beyond the grave if I wouldn't've done so 😁
This is how I was bitten by the VLB bug. GOD DAMN IT!!! It's crawling under my skin and I CAN'T ESCAPE!!! Something has changed inside me and I can't turn back!
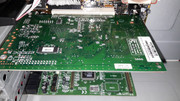
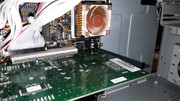
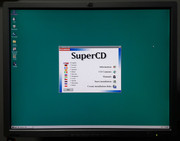
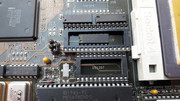
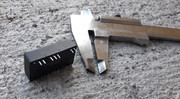
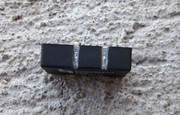
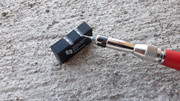
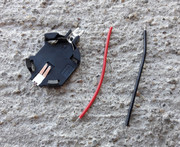
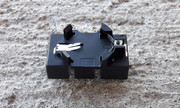
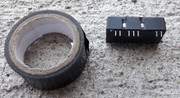
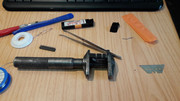
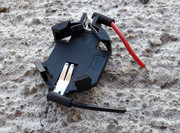
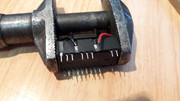
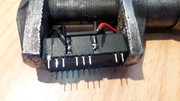
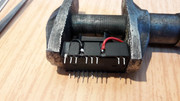
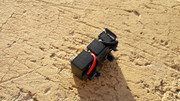
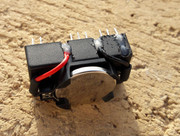
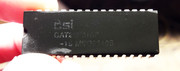
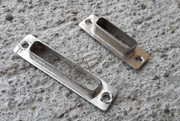
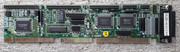
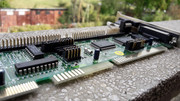
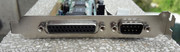
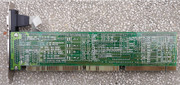
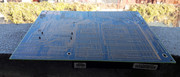
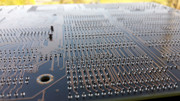
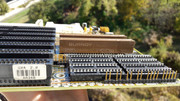
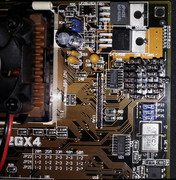
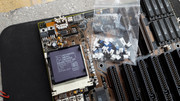
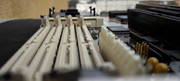
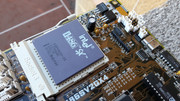
First I cleaned the VLB controller. Without this piece, the ASUS motherboard is just an inert mass. NO HDD, NO mouse, NO CD-ROM, zilch, nada, ZERO. A BIG FAT ZERO! I must say again.
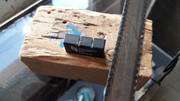
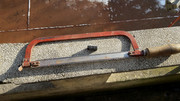
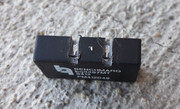
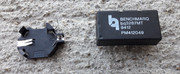
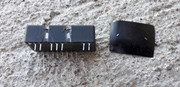
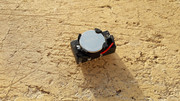
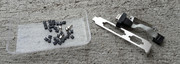
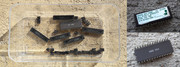
The VLB controller, was in a so-so state. Dusty and dirty with a bent bracket which also lost its shine. The good part was that it was complete.
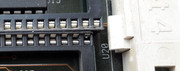
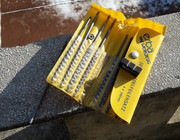
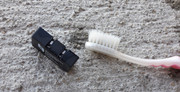
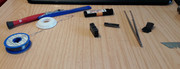
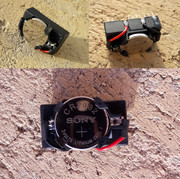
I took off all the jumpers, about 30+ of them and I cleaned them with an old toothbrush and isopropyl alcohol 99%.

Next came the cleaning of the board with plenty of isopropyl alcohol 99%. Before this stage, I took the decision to remove the surface dust using a soft animal hair brush as I was pretty sure it would've made my life a whole lot worse when I was to use the alcohol. IT WAS THE RIGHT MOVE! as everything went smoothly. I paid great attention to detail. It was my first VLB Controller, after all.
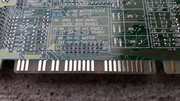
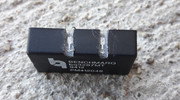
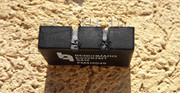
The bracket got back its shine and I put back all the jumpers. It took me a while, but the pictures I made earlier were of big help. I didnt have a manual for the controller and if I would've had missing jumpers, this operation would've been a PITA even with the instructions printed on the back.
Final results. FLAWLESS VICTORY!!!
gallery: https://postimg.cc/gallery/15c7bv6yk/
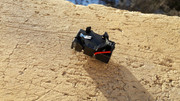
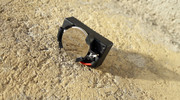
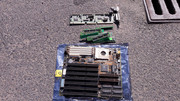
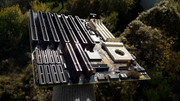
As I said before, I found the ASUS motherboard and the VLB controller at the flea market. I took a picture after I bought them.
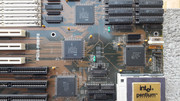
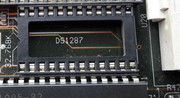
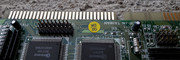
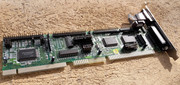
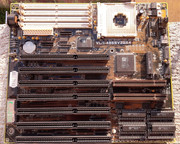
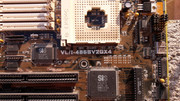
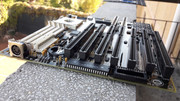
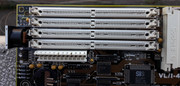
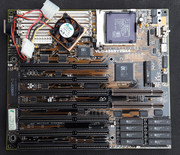
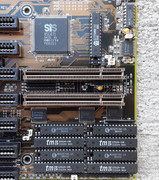
ASUS VL/I-486SV2GX4 REV. 2.0
This motherboar was my ticket in a new stage from the evolution of the PC. As soon as I saw the printed name on the motherboard, I knew I was staring at an ASUS board and my mind was racing towards the dual socket Pentium PRO motherboards. The font is specific to the boards belonging to this era. An ASUS is still an ASUS no matter what.
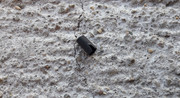
As expected, the motherboard was dirty and had that specific smell which I cant stand to this day even after more than a hundred cleaned components. Come to POPPA to make you GREAT AGAIN! 😁
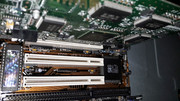
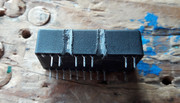
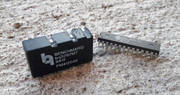
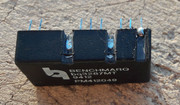
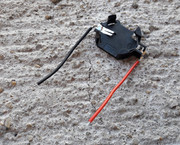
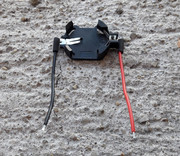
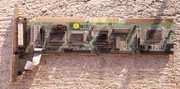
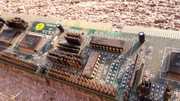
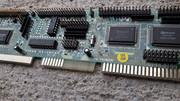
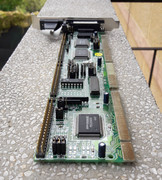
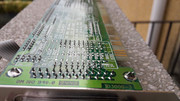
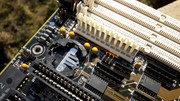
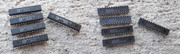
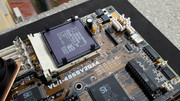
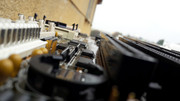
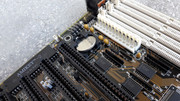
I took off all the CACHE chips, the BIOS chip and the jumpers. The jumpers were brittle and I knew I had to replace them. ISOPROPYL ALCOHOL 99%. Need I say more? I DON'T THINK SO!
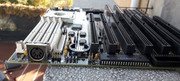
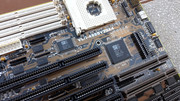

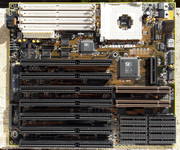
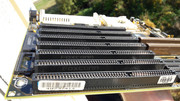
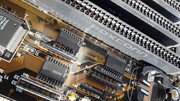
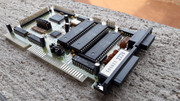
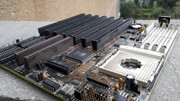
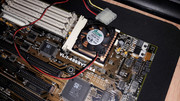
After I cleaned the motherboard I started to stare at it and the thought of populating all the CACHE sockets came into my mind. There were only 128KB and four chips. The motherboard had 8 sockets! Let's DO IT! 256KB!.......Little did I know this would mean more work and less FUN!
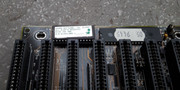
I checked the manual and I found that for 128KB I needed 4x32KB CACHE chips and a 8KB TAG chip. CHECK! I didnt have 64KB chips so I had to use 8x32KB instead of 4x64KB. For the 8x32KB I needed a 32KB TAG chip. At this moment, I didnt know if the TAG chip had to be made by the same manufacturer of the CACHE chips or if it would've had to be of a different construction or of a different brand. I searched vogons.org and the Internet and I found out that these facts dont matter too much as long as the CACHE chips and the TAG have the same specs as stated in the manual. So I searched in my stash of organ donors and parts that will not be restored, and I found on a motherboard 9 identical 32KB CACHE chips. SUPER. Now the ASUS had 256KB CACHE and it looked wicked.
https://www.philscomputerlab.com/asus-vli-486sv2gx4.html
I didnt have a tool for the extraction of the CACHE chips so this operation was nerve racking. I didnt know that I will repeat this process at least three times...😁
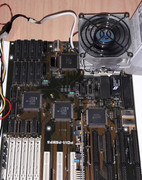
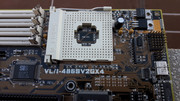
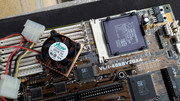
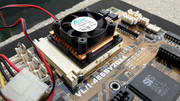
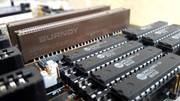
OK. All was clean and shiny, and I wanted to pick a CPU to test the motherboard. I found from the Internet that if I was to use an AMD 5x86 de 133MHz the motherboard would need a specific BIOS version to recognize it and I was pretty sure that it didnt have the correct one. Besides, I couldnt FLASH the BIOS chip because the motherboard and the chip didnt support this. DEAD END! I took from my stash the next BIG thing, an AMD 486 DX4-100MHz 100NV8T CPU.
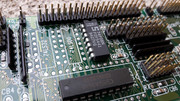
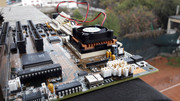
I set up all the required jumpers and I took some pictures with the wonder. I also replace the mix of black jumpers with new white ones. I had to use a pair of pliers with smooth jaws to straighten some pins. Now the motherboard look GREAT! WICKED!!!

The following day, when I tought I had everything ready for the real test, something was bugging me. The Revision 2.0 of the motherboard doesnt have settings for 3V, and my AMD DX4-100 MHz IS 3V! Even if I had jumpers settings for this particular CPU, I decided not to pump 3.45V in a 3V rated part, even if I was told I could do so. The 5x86 133MHz is rated at 3.45V but the motherboard wont recognize it...
My board only has the JP32 jumper and in combination with the JP16 I can get: 3.45V, 3.6V, 4.0V and 5.0 V.
If JP16 is shorted on 1-2, then JP32 sets the voltage. In which case,
JP32 1-2 = 3.45 V
JP32 2-3 = 3.6 V
JP32 OPEN = 4.0 V
If JP16 is OPEN, then the voltage is 5.0 V
Asus VL/I-486SV2GX4 rev. 2.0. - Voltage selection
https://groups.google.com/forum/#!topic/alt.c … sus/svoQg7GSRbQ
http://www.elhvb.com/mobokive/Archive/Asus/48 … 4/sv2g-cpu.html
http://www.dosforum.de/viewtopic.php?f=1&t=8175
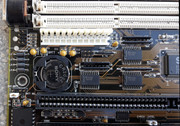
I started to look in my boxes and what do I find? The Intel 486SX de 25MHz which I saved from demise in 2015 and it was featured in the episode: Little bent PIN -
The story of the BENT CPU PIN(ssssssssss) or should I say lots of CPU Pins 😁
Re: Hello, World! :D - Robert B's PC builds - oogle away freely :)
5V? YEAH BABY! This slow 4x86 will help me test this high-end motherboard. GREAT!!! I have to set again all the jumpers...DON'T forget! 25MHz BUS instead of 33MHz!
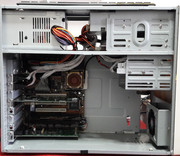
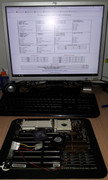
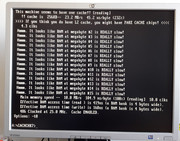
I got everything ready for the test. I powered up the Minebea PSU from the previous episode and I waited to hear the HAPPY BOOT BEEP.
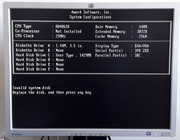
NOTHING! NO BEEP, NO IMAGE on the screen! Just a cricket chirping....😁
What THE....?!?! I used another stick of RAM. STILL NOTHING. I took out all of the RAM sticks .....NOTHING! Well I'll be F.....
I changed the PC SPEAKER as it might be damaged. NOTHING!!! Hmmmm
I tried to connect an FDD and a HDD. I changed a few jumpers on the VLB controller.
STIL NOTHING!
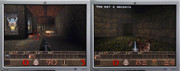
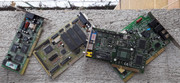
THOSE CACHE CHIPS might be the culprit! There simply is no other explication. I took out all of them and I powered the system. BEEP BEEP!!! I'm alive! I still had no image on the screen... the card Oak Technology OTI077 - 1077082003 REV. G - 512KB was dead...RIP
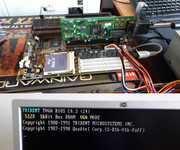
I took out another video card: a Trident TVGA9000C - 7133 Rev. B1 - 512KB and BAM! I got a clear image. All was OK as it should.
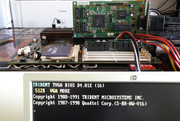
I tried my third ISA card: a Trident TVGA9000i-2 - 7210 Rev. H1 and I received more good news. It was working!
At this moment I decided to put back the original CACHE chips and combine them with other 32 pin 32KB CACHE chips plus another 32KB TAG. This worked and I got the 256KB I so much desired.
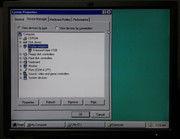
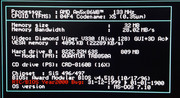
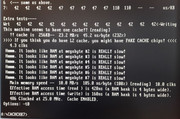
The motherboard is finicky about RAM in regards to capacity, manufacturer, type: SS or DS and the way you fill the slots. The MANUAL was of great help. I managed to get a maximum of 16MB as I only had 4MB and 8MB sticks. The two 16MB sticks I have are in the 5x86 build and they arent going anywhere no matter what.
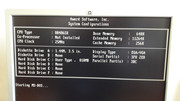
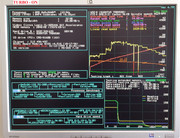
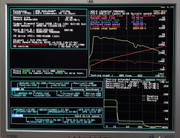
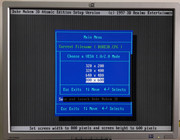
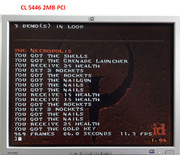
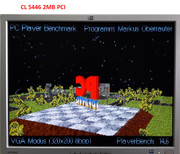
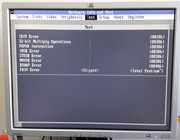
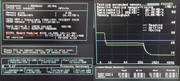
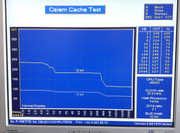
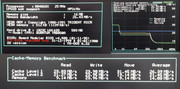
I ran a few tests but I didnt like what I saw. Most likely, THE CPU IS WAY TOO SLOW for this motherboard. The CACHE CHECK program complained about supposedly fake cache chips. It is not the case, as the CPU, the MIX of RAM, the MIX of CACHE chips might be blamed for this behaviour...I didnt set anything in BIOS and only the defaults were loaded...All these "problems" can be easily fixed in the future.


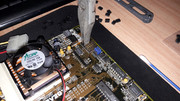
During testing I decided to use a cooler for the 4x86 SX 25MHz as it was quite warm to the touch. It can be used without a heatsink but I wouldnt do this over long periods of time.
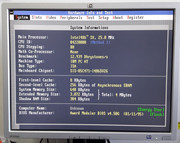
In the end I reverted to the 128KB CACHE and the original chips. A bigger CACHE wont help me if I dont have a RAM capacity to match.
IF IT WORKS DON'T FIX IT!!! 😁
Here we are at the end of the : "Almost, VLB Heaven..." story. I'm pretty sure you understand the title by now. It's not about the difficulties I encountered when I wanted to test the system it is about the fact that a more powerful CPU, more RAM, an ET 4000 VLB video card, etc... would've made all of this more enjoyable.
At the very least I'm glad that the ASUS and the VLB controller are in good working condition.
I might revisit this VLB moment sometime in the future...we'll see.
gallery: https://postimg.cc/gallery/1wjod5nuk/