Reply 300 of 852, by amadeus777999

amadeus777999
Offline
Rank
Oldbie
- Rank
- Oldbie
Great job!
Great job!
😁

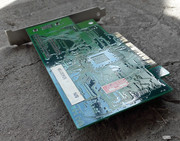
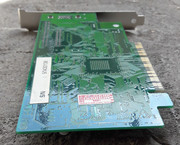
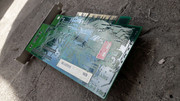
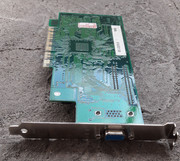
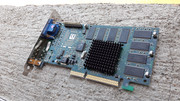
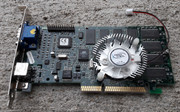
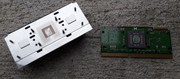
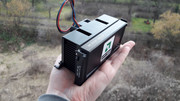
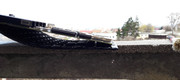
The ATI 9800 PRO 256MB still doesnt work even after I've written another BIOS file and I've soldered back the BIOS chip. The solder job isnt my best but I'm going to take the chip off later for another try. For the time beeing I consider the board dead. I simply have no luck with ATI cards 😁
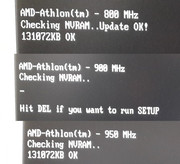
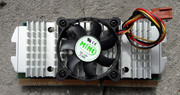
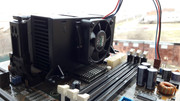
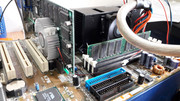
The K7-800 - Slot A - Thunderbird core CPU has been cleaned and put back together -It works like a dream 😁 800MHz, 900MHz si 950MHz 😁
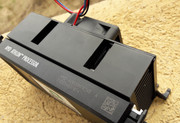
Clean CPU in a dirty slot 😁 the ASUS K7M hasnt been cleaned yet 😁

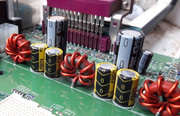
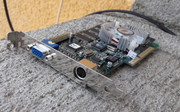
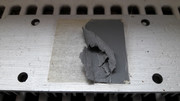
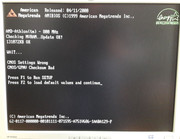
I changed two capacitors on the I850.
Now I know the state of each and every piece I bought recently. Next I'll have to clean the remaining pieces and tell you their story 😀
More later.
I still have more parts to clean: three motherboards, two 3dfx V3 2000/3000 cards and the dead ATI 9800 PRO, remaining.
Preview:
* Celeron A 333MHz
* Gainward Dragon 4000 - 3dfx VooDoo Banshee
* 3dfx V3 2000
More later.
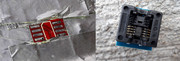
What do you do when you have ZERO experience in DRAG SOLDERING??? 😁
You jump straight to QFP 208 ULTRA FINE PITCH DRAG SOLDERING 😁 You simply just cant be bothered with the intermediate stages 😁
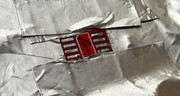
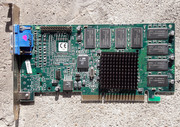
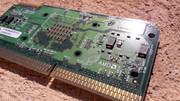
I needed three tries but I managed to resurrect a Tseng ET6000.
Not all was just sunshine and roses:
* the plastic of the PLCC VRAM expansion sockets cracked because of the aged plastic when I removed the chips,
* a VRAM chip was damaged by the extractor,
* I had to remove a nice sticker from the BIOS chip to find out the manufacturer,
* the solder job isnt a professional job but it is strong
* it was a case of many tiny feet of the TSENG ET6000 chip ripped from their pads. Also some of them were bent...etc etc.
I managed to keep all the pads intact. The difficulty was much bigger than in the case of the V4-L. 208 pads! The key word was FLUX!
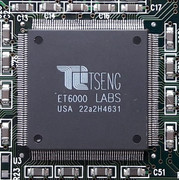

The ET6000 was bought in 2015 for 2 EUR.
The whole experience was very exciting and full of adrenaline.
I used what I learned from the V4-L job and I took it to the next level.
I used a regular 40W soldering iron with a custom tip modified at a grinding wheel. All was done by eye and I didnt use a magnifyng glass. 😁 I wanted to buy a chinese hot air and soldering iron station but I decided I want something top of the line. Such a tool is quite expensive so I resorted to my trusty soldering iron 😁 FTW!!! Nothing ventured, nothing gained.
I still have more ongoing projects....
More later.
You should see my soldering skills. They aren't that great, but I am improving. I have no-clean flux, solder, desoldering wick, a 15W soldering iron (not that great), 60W soldering iron with an LED light, helping hands station to hold logic boards and wiring, and a now broken 45W desoldering iron with pump.
I've made an A/V cable for my C64, which does work + the noise reduction and heatshrink tubing to prevent short circuits within the A/V cable itself (going to jumper the pins on the board itself as well) & PC Speaker header to sound card with a 100 Ohm resistor, 1µf capacitor, some wiring, and heatshrink tubing. I attempted to fix my mom's car keyless entry again, and it doesn't work anymore due to a bad soldering job (going to fix that again).
Discord: https://discord.gg/U5dJw7x
Systems from the Compaq Portable 1 to Ryzen 9 5950X
Twitch: https://twitch.tv/retropcuser
Truth be told: practice makes perfect 😁
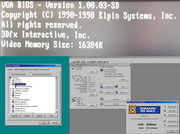
I was amazed by the clarity of the text with the ET6000 compared with that of a CL 5446. The 2D image quality is awesome.

Well done!
How ould one use the hot air station without "frying" the underlying pcb?
My advice is first to practice on a few damaged PCBs and components. I dont have a hot air station and my experience is limited. You can buy special solder paste that can be used to solder components. Sometimes is necessary to have/use a pre-heater to get the existing solder to melt. You need to protect the surrounding IC's that can be removed/moved by the heat or the jet of hot air if it is too strong/too hot, using special tape or other means. You dont have to keep the hot air nozzle in one place for to long. You have to keep it moving and get the solder joints heated up gradually, then use some tools to gently remove the IC. For ex. a fine tweezer. There are plenty of nozzle heads for specific chips you need to remove/solder. You also need to know the maximum temperature one component is able to withstand. Specs sheets are your friend. Practice, practice, practice, join a local electronics group or take a course in soldering.
After I did some "small" repairs and I managed to have some degree of success I can say that it is best to use the correct tool for the job. The youtube videos/tutorials make it look super easy but in fact it might not be the case. Remember, those people have lots of experience and they can "read" the way solder acts.
Looking back at what I did, I suggest that if the repair you need is small it is best to pay a professional and have it done the correct way. Just my 2 cents 😀
https://www.sparkfun.com/tutorials/391
https://www.lifewire.com/using-a-hot-air-rewo … -station-818950
https://www.edaboard.com/showthread.php?t=326147
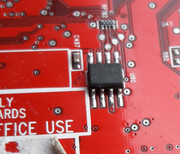
After I got the ET6000 working I also found out that it had another problem. I think that one of the soldered memory chips is bad.
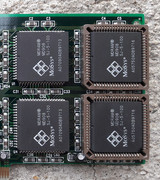
If I remove two of the memory chips from the sockets and leave the two that are soldered I get image corruption in Windows 98 desktop but the DOS image is clean. In DOS DOOM the image is picture perfect.
If I put back the two socketed chips I sometimes get four little dots on the Win 98 load screen and on the lower part of the screen when I play DOOM in Win 98 or DOS. The desktop image in Win 98 is clean. The four little dots stay in one place and have a different colour than that of the surronding area.

I tried the ET6000 on a PIII and on my 5x86.
I also tried to swap the chips from a socket to another and I get the same results. Even if the plastic of the memory sockets has cracked, due to age, the chips make good contact with the pins.
It took massive force to remove the memory chips from the sockets. The cracking appeared after I inserted back the chips.
With all the memory chips, apart of the four little dots, the image is great in DOS and Win 98. I've checked again all the solder joints on the ET6000 chip and they all seem fine. If you find a bad card at the flea market there is bound to be more problems 😁
At this point I've stopped and I'm not going to try anything more. This board was dead to begin with and I dont think that I can make it better. If in the future I find a donor card then I'll try to replace the memory chips. For now I'll leave it as is.
I wonder what will happen with all the plastics in our beloved retro parts 20 years from now. I guess you put a card in a slot and forget about it 😁
More later.
I've seen SMD soldering/desoldering irons at Radio Shack years ago, and the computer store I regularly go to sells them as well. I'm getting 2 desoldering irons (45W with manual pump, and a solder pump with heater) and the SMD solder/desolder iron as well for SMD capacitors, IC chips, and so on.
Discord: https://discord.gg/U5dJw7x
Systems from the Compaq Portable 1 to Ryzen 9 5950X
Twitch: https://twitch.tv/retropcuser
Interesting,
I think I'll use a normal iron + 45deg angled tip and follow some of the tutorials on youtube. I searched for the hollow and angled one("inward-dome") but i can only find it for JBC stations which are pricey.
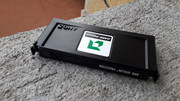
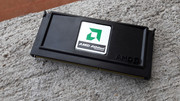
3 d f x
The 3dfx TRIO is ready for its close-up 😁
So many nice stories...with which one should I begin? 😁 ATM I have at least 10 episodes to post. I dont know if I'm going to break them down into smaller ones...
More later.
Passenger 10 - Monsters Off My Back (Nora En Pure Remix)
https://www.youtube.com/watch?v=CHKTD2Zdd_I
Soon the 3dfx TRIO STORY - READ ALL ABOUT IT!!! 😁


gallery: https://postimg.cc/gallery/153h887qm/
More later.
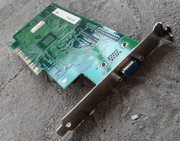
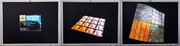
The 3dfx TRIO
Nora En Pure - Morning Dew (Original Mix)
https://www.youtube.com/watch?v=Ca7cfquJcAc
This is a special episode!
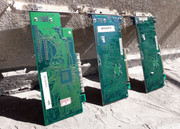
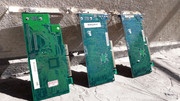
All of the cards I'm about to present were bought from the flea market, at flea market prices of course 😁. The Gainward Dragon 4000 VooDoo Banshee (that's a mouthful) and VooDoo 3 3000 were a little damaged but nothing too scary. The VooDoo 3 2000 has be taken out by me from an old dusty PC case. What a wonderful feeling it was when I removed the retaining screw and I held it in my hands. My heart was racing...
The three protagonists of this special episode are:
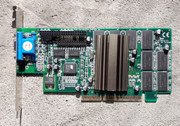
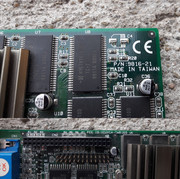
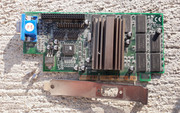
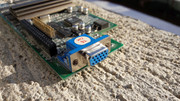
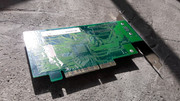
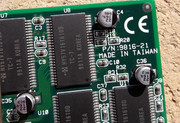
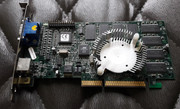
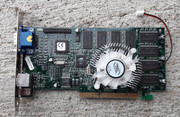
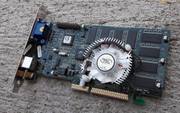
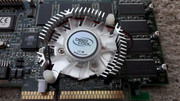
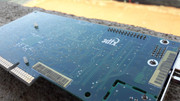
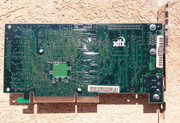
1. 3dfx Gainward Dragon 4000 Voodoo Banshee AGP 16MB ICUVGA-GW816D P/N: 9816-21
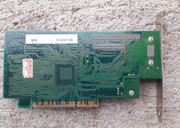
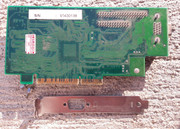
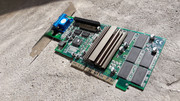
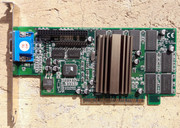
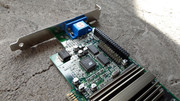
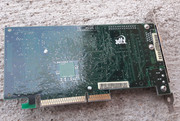
2. 3dfx VooDoo 3 2000 AGP 16MB - 210-0364-003 STB Systems REV. C
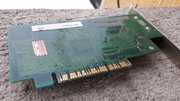
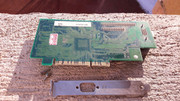
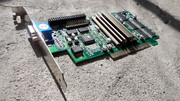
3. 3dfx VooDoo 3 3000 AGP 16MB - 210-0364-003 STB Systems REV. C
3dfx Gainward Dragon 4000 Voodoo Banshee AGP 16MB ICUVGA-GW816D P/N: 9816-21
This card was the result of pure luck.
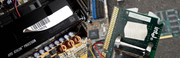
Several weeks ago I was at the flea market. The weather was bad and nothing seemed worthy of my time. When I was about to leave, what did I saw? On a table there were lots of components dumped on top of each other, flea market style. I started sifting through the mess and I found a P4 motherboard (meh), modems (meh), network cards (meh)... eventually a green thingie sticked to my hand. I looked at it and nothing happened 😁 so I put it back (MEH!). I turned away ready to leave but a few moments later I took again the green card in my hands. This time I took the phone from my pocket and I searched the Good Ol' Internet: ICUVGA-GW816D. DAMN! Banshee! How much is it? Less than 2 EUR? Here you go! I left pretty happy with my purchase! Not a moment too soon as a few seconds later a guy came and bought the whole lot 😁
This is how I got my BANSHEE AGP. (I also have two other Banshees PCI cards from Creative.)
The board was missing a 22uf/16V capacitor and I took care to buy a replacement with the same specs and if possible, same markings. After a careful search, I decided to buy 10 pieces of: 22uF/16V, SMD, Panasonic EEE1CA220SR. These are rated at 85C and can be found on many 3dfx cards. They have the marking S after the voltage rating.
This as authentic as it gets...
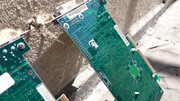
After a good clean the board turned out to be a gem. Sure it remained with a few scars after it was tossed all over the place but I managed to save it just in time.
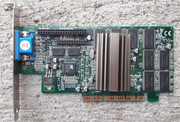

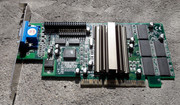
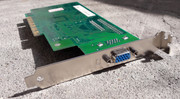
The card is in good working condition.
gallery: https://postimg.cc/gallery/1fuadadri/
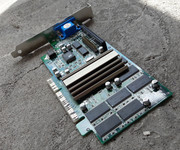
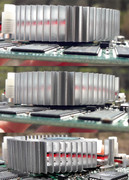
The V3 2000 and V3 3000 are the result of one of my best days at the local flea market. On March 10th, 2018 I bought at bargain prices: an Asus K7M motherboard, an AMD CPU SLOT A 800MHz Thunderbird, the V3 2000, the V3 3000 and a Celeron A 333MHz. WHAT A GLORIOUS DAY!
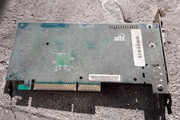
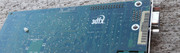
3dfx VooDoo 3 2000 AGP 16MB - 210-0364-003 STB Systems REV. C
Nora En Pure - Zambia (Original Mix)
https://www.youtube.com/watch?v=cDHCbROAVO0
I took out this card from an old dusty case, myself. After a little haggling and a little charm, as the seller was a girl, 😁 I managed to buy this card and not the entire system. FTW!!!!!!! I was told that I have an expensive hobby and she asked me what I did with these old parts. I said to her that some people drink, other take drugs, some buy old HARDWARE, etc... and in fact the sum of the vices is constant. It deepends on how you want to look at it 😁
When I saw the 3dfx logo, my eyes almost popped out of the sockets! What if it was a V5 5500?
The card is mint!
On the back it was covered by a thick layer of dust, like old wine bottles, stored in a dark cellar..
When I rubbed my finger on a small section of the card to see the exact model, I felt like Indiana Jones. A 3dfx is a 3dfx even knee deep in dirt.
The cleaning went without a hitch. The only thing I did, was to dial back the years. The board turned out great.


The testing session revealed that she is at 100%!


gallery: https://postimg.cc/gallery/2c50hc8j2/
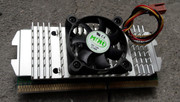
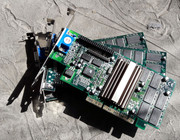
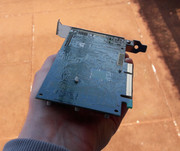
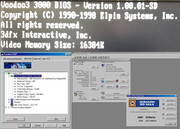
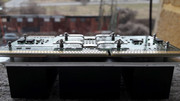
3dfx VooDoo 3 3000 AGP 16MB - 210-0364-003 STB Systems REV. C
Nora En Pure - Lake Arrowhead (Original Mix)
https://www.youtube.com/watch?v=Kav8ZpjXQ54
This card was the starting point of my great day at the flea marlet. I bought it for less than 2 EUR before I found the SLOT A combo and the V3 2000.
Something was telling me that day was special but I was deaf and blind 😁 As soon as I saw the 3dfx logo my heart was pumping. The card was already levitating towards me through the power of my gaze. Come to me! Don't fight me! Look me in the eyes! I'm your saviour! 😁
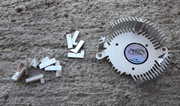
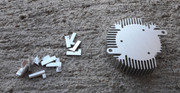
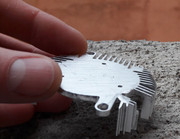
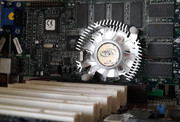
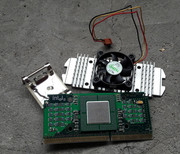
I saw it was incomplete, without a heatsink, missing a few capacitors and the bracket was bent but I already knew it had my name all over it!
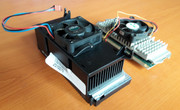
When I started to restore the card one thing was bothering me the most: The heatsink.
My options were limited and I wasnt going to buy something that could turn out not to be what I needed.
I took out my calipers and I measured the distances between the holes. I got a confirmation of something I already knew. The distance between the holes is not typical .
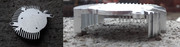
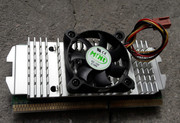
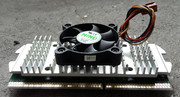
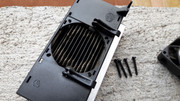
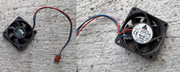
I searched in my stash for a direct replacement but I couldnt find anything. I already knew I was about to try and mount a DeepCool V50 heatsink because I had a spare one after I used the fan on the Hercules GF3 Ti 200 from the Cool Blue episode.
Said and done.
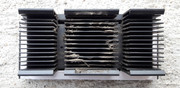
I had nothing to lose so I took the V50 heatsink and modified it. BIG TIME. I wanted to know if I could mount such a cooler on a 3dfx so I didnt pay too much attention at the looks of my modification. I knew I could do it and I wanted to know what it would take do it. So I gave it FULL STEAM and leveled everything in my path.
Even if it seems extreme I had to remove lots of fins otherwise the board didnt fit in the AGP slot. I had a few headaches with three tantalum capacitors plus a quartz clock generator. YAY!
A little skill and a set of fine files later, I managed to test fit the heatsink on the card .
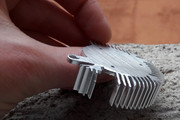
At this moment I didnt know if I had enough material to enlarge the holes in the heatsink so that I could attach with push-pins.
I took a small round file and I started removing aluminium.
A few tries later I obtained the desired results.
Something still bothered me though. Each time I put my hands on a heatsink attached with push-pins I saw that it also had a little side play so I decided to also enlarge to holes sideways . I didnt want the heatsink to be rigid and stay fixed in one position when the card was about to heat up running games.
The looks arent so great as the aluminiun is soft and scratches easily.
The thermal paste spread was SUPER!
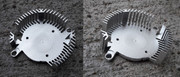
After I sorted out THE COOLING of the card I took care of THE RESTORATION of the card.
Even if I didnt know if the card was working or not I still gave it 110%
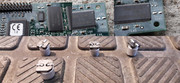
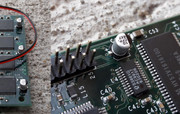
Three 10uf/16V capacitors were missing. I couldnt find a direct replacement at the supplier so I bought ten Panasonic LOW ESR 105C - 10uF/16V SMD capacitors, EEEFP1C100AR.
Smooth sailing.
The results were above my expectations. The card turned out great.
I had my reservations regarding the cooling capacity of the modified cooler but these were soon put to rest. I knew that even without its fins, the modified DeepCool V50 was heavier than the heatsink of the V3 2000, so I was safe. When stressed, the V3 3000 with the V50 was cooler than the V3 2000. My trusty thumb-o-meter said so 😁
Also, the V50 helped reduce temperature of the area surrounding the V3 3000 chip. The passive cooled V3 2000 was much hotter. That was to be expected.
WIN! WIN! WIN!
gallery: https://postimg.cc/gallery/1uc5qcvn2/
Nora En Pure & Sons of Maria - Sleeping in My Bed (Original Mix)
https://www.youtube.com/watch?v=oWYxU1-b0Ik
3 out of 3. A HAPPY END to a special episode. 😀
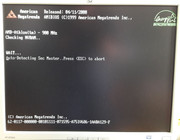
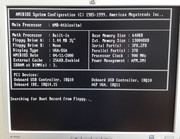
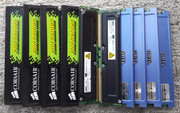
All testing was done on a PIII 800MHz, 384MB RAM, LuckyStar 6VABX2 VER. 2.0 - Slot 1 - Chipset - VIA VT82C693 & VT82C596A, WIN98SE.
I wasnt a 3dfx fan back in the day when it was KING but I'm getting there one 3dfx at a time.
More later.
Sezer Uysal - Boycott (Original Mix)
https://www.youtube.com/watch?v=WpffjAtLens
Next WEEK, TwO Slots - Fill me up!

More later.
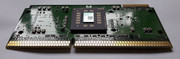
TwO SLOTS
Two slots, Slot 1 and Slot A, Slot A and Slot 1, so similar and yet so different.
While I was cleaning the last two SLOTed CPUs I bought recently, I said to myself that I should make a mini-episode just with them. Said and done. The methods used for opening and cleaning SECC cartridges have been posted a few times before so I'm not going to present them again.
Let's meet the two CPUS:
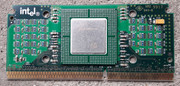
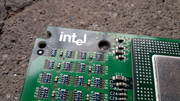
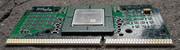
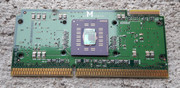
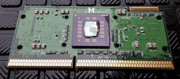
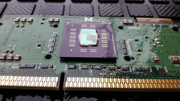
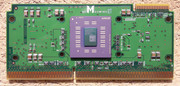
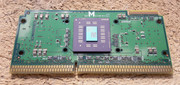
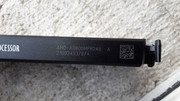
1. Intel Celeron A SLOT 1 - Mendocino 333MHz/66 - SL2WN
2. AMD K7 SLOT A - AMD-A0800MPR24B A - Thunderbird 800MHz
gallery: https://postimg.cc/gallery/1z7z49tm0/
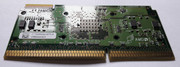
Celeron A 333MHz - SL2WN
This little one, once famed for its overclocking capability, was very easy to clean.
I appreciated the simplicity of the cooling system and the elegance of the retaining system of the heatsink. No more hassle with a Single Edge Contact Cartridge, THANK GOD! 😁
Smooth sailing.
Water and dish soap. Isopropyl alcohol 99%. Metal polish cream. A liberal amount of elbow grease. The results? PRICELESS!


Brand spanking new! 😁
gallery: https://postimg.cc/gallery/qfi4wca0/
https://imgur.com/a/P8KZy
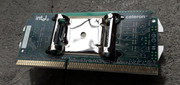
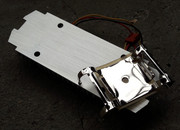
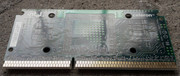
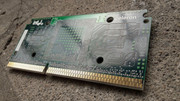
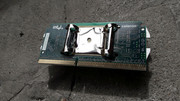
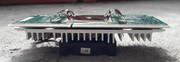
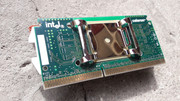
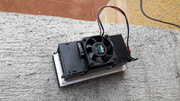
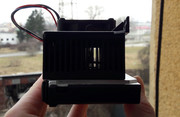
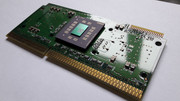
AMD K7 - AMD-A0800MPR24B A 800MHz
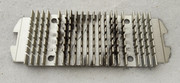
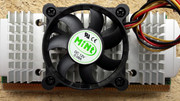
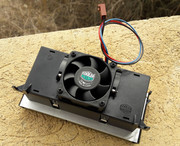
This puppy is my first SLOT A CPU with a Thunderbird core. Before I started to take it apart I said to myself that it is going to be much easier to clean. The on die 256KB cache meant that there were no external cache chips and there was no need for custom thermal pads for the contact with the heat plate of the SECC cartridge. YAY! (at least in theory...)
No matter how many times I have opened a SECC cartridge, I'm still stressed for the duration of the operation. The bending of the plastic, the deformation of the corners of the aluminium heat plate, the desire to avoid doing damage, the danger of cracking the CPU die, the possibility of scratching the PCB, etc etc etc are contributing to the anxiety I feel from the moment I start until I take the glamour shots at the end of the procedure.
The alternative? Powering up a CPU with a thermal grease which is almost 20 years old. What could go wrong, I wonder?
I know that X years from now I will have to repeat this procedure but I try not to think about it 😁
The 800 TB seemed clean but I knew it couldnt be the case. Dust and dirt everywhere...
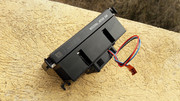
First, I gently opened the clips that attach the heatsink to the heat plate of the cartridge. Then I tried to separate them. After a few failed attempts and a few curse words &)$!)&)*(&$!&)$~~##!!!! I gave up and I took a diferent approach.
I gently removed the plastic cover from the cooler and the silver metal clips. This job took me almost 30 minutes. The plastic is very thin and removing the metal clips while the heastink was glued to the heat plate was a real pain in the arse. After I removed the damned plastic cover and metal clips, I tried again to separate the heatsink from the heat plate. NO DICE.... F...............................K!!!! No matter what I tried, nothing worked.
F--K IT! I opened up the SECC cartridge with the heatsink still attached. This allowed me to use more force to remove the plastic cover of the CPU.
I donated a little skin after all the pulling and pushing and pressing of the parts I was trying to separate. 30 de minutes later I managed to obtain the results I wanted ... and I thought this job was going to be a walk in the park...ahem PIGS FLY with JET PACKS, I TELL YOU!!! 😁
I kept my eyes on the prize and I never gave up. In the end I managed to keep all the parts intact. GG!!!

After 2 minutes on the heater I successfully separated the heatsink and the heat plate. F...ing A+!
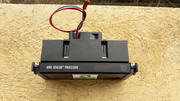
YUCK!
Naked!

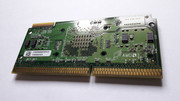
Ready to be assembled.


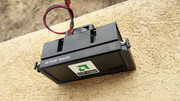
DELICIOUS!
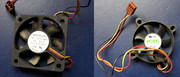
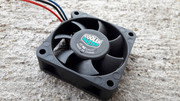
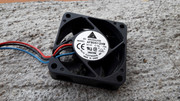
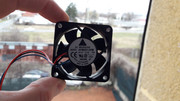
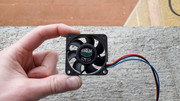
My "biggest" FAN! 😁
Perfect!, another signature job...


gallery: https://postimg.cc/gallery/19l1xjkmg/
https://imgur.com/a/6Q6Vw
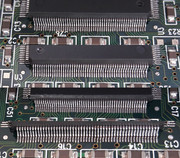
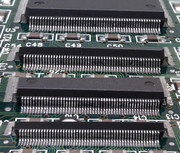
Icing on the cake: RAM....hmmm...serious business 😁
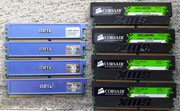
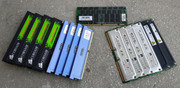
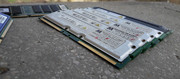
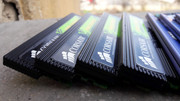
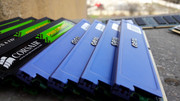
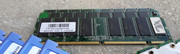
gallery: https://postimg.cc/gallery/2nae3z76w/
https://imgur.com/a/Diyon
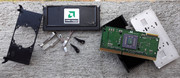
The P66 is undergoing a few more steps until it is ready for the PRIME TIME!
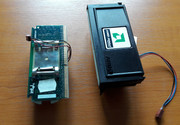
I also bought something special from the flea market. The price was very low. NO BRAINER! (untested)
Western Digital Caviar 140 AT Compatible Intelligent Drive WDAC140 980 cyl * 5 heads * 17 spt * 42.7MB!!! - Produced in 21.01.1992. MDL: WDAC140-32M
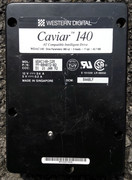
http://redhill.net.au/d/18.php
More later.
Leonard Cohen - Dance Me to the End of Love
https://www.youtube.com/watch?v=NGorjBVag0I
This week, the next episode: ATI special...kind of...my ordeals with ATI cards continue...8500/9500/9800
More later.
It seems that postimage.org is down. I dont know for how long. All the pictures in this thread have become inactive.
I knew this might happen but I hoped it will come at a later date.
I have a backup for all my pics and posts so there are no problems.
Until I decide what I'm going to do or postimage.org is back online, I suspend all the posting on the thread.
Sorry guys.

You can change the picture URL to postimg.cc and that worked for me.
Discord: https://discord.gg/U5dJw7x
Systems from the Compaq Portable 1 to Ryzen 9 5950X
Twitch: https://twitch.tv/retropcuser
Yep almost 4000 pictures 😁 that's going to take a while 😁
I need to take each link and modify postimage.org into postimage.cc
If postimage.org comes back what happens with postimage.cc???
At this point I dont feel too confident to try another free image hosting site 😁

