Black Sabbath - "N.I.B." from The End
THE ORIGINAL PENTIUM
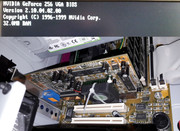
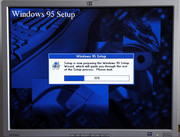
I was in high school when I first heard about the Pentium CPUs with the FDIV bug. This was happening around 1994-1995, I cant remember exactly. Back then, I didnt have a PC. My first PC came much later, in 1996. One thing is certain though, I couldnt even dream about a Pentium powered PC and truth be told, I didnt know what the damn thing was. I had to buy my first PC like you buy potatoes at the market. Only after this purchase I was able to know what I need and how I can spend the hard earned money that my parents gave me.
Until 1994 when I entered the computer science high school from my city, I didnt know what the heck was with these computers. Because the computers were very expensive, until 1996 my contact with the magic PCs took place only at high school and sometimes at few of my friends which had a better financial situation. An internet connection was out of the question. What the hell was that?!?! Internet serious business.
I remember that we were thoroughly amused that those that paid a lot of doe for the first Pentium right at its introduction, bought a “defective CPU”.
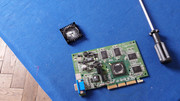
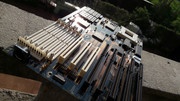
Fast forward to more recent times. In December 2017 I found the following Pentium setup:
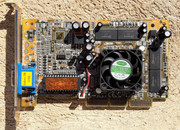
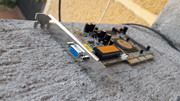
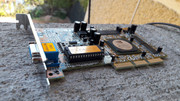
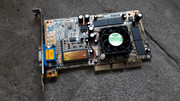
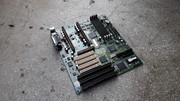
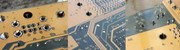
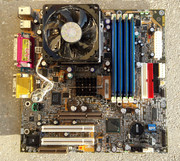
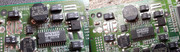
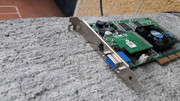
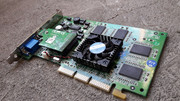
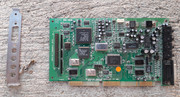
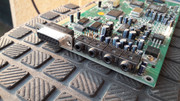
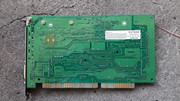
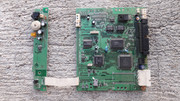
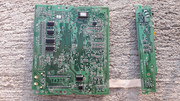
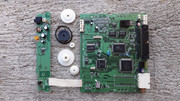
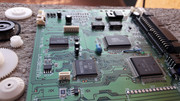
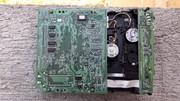
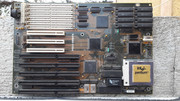
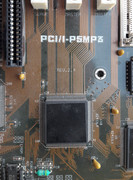
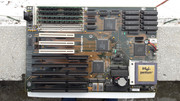
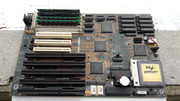
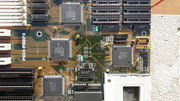
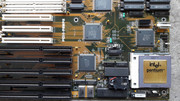
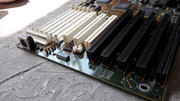
* ASUS PCI/I-P5MP3 Rev. 2.4
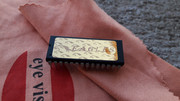
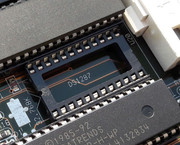
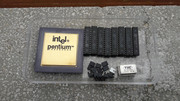
* CPU Intel Pentium 66MHz - SX837 - A8050166 - L4102613 - 94025376AA MALAY
From the seller's add, by the looks of it, I was pretty sure that it was about a P66 with the famed FDIV BUG! The pictures were blurry and I couldnt see well the model number. Even so, I decided to buy the damned thing as it was LOVE AT FIRST SIGHT! (If you want to find out continue to read.)
I had to wait almost two weeks until the package arrived through the local Post Office Courier service. I was very annoyed because the parts should've arrived in two or three days but after I put my hands on the relics, all my anger vanished in thin air.
I saw the add on the local OLX site and it specified that the motherboard was considered defective. The asking price represented the value of the Pentium 66MHz CPU and the motherboard was bonus. I wouldn't've paid so much for just a CPU even if it was the first Pentium CPU, if I wasnt sure that I could recover the motherboard. This sounded way easier in my mind than in reality.
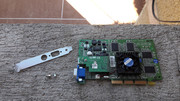
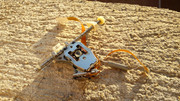
I didnt spend too much time pondering as the add was quite old and I didnt want someone else to steal my thunder, so I put my hands on the phone and I took care of the delivery details. The seller was kind and he also said that he had the original RTC/CMOS battery - Benchmark BQ3287MT, the controller that worked with the kit, plus two old modems and an old graphic card. For all of this I had to pay around 50 EUROS. NO BRAINER! Albeit with the high probability that the motherboard was toast…little did I know how much effort will be required to awaken THE BEAST! OH BOY!
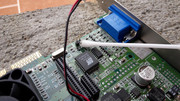
After I found out that I was going to receive the RTC battery, the only thing that still was nagging me was the fact that the BIOS chip looked kind of suspicious as it didnt have the original silver sticker. As I wasnt going to back off, I said F@K IT! My gut feeling was telling me that all was OK but even so I couldnt be too calm. Good luck finding a BIOS chip replacement when the information about this motherboard is so limited.
Eversince I saw the add, I wasnt thinking straight and I left my passion take control.
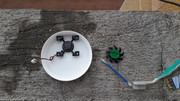
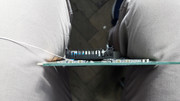
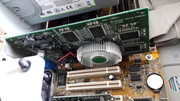
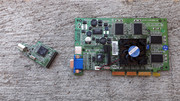
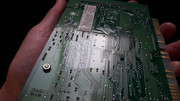
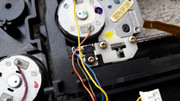
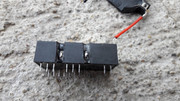
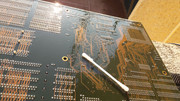
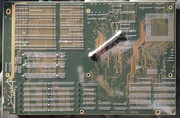
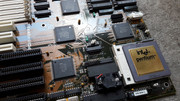
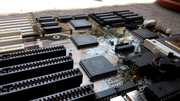
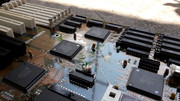
Right after I receveid the parts, I removed the black stickers from the chips of the motherboard. I also had to straighten a pin from one of the chips, because it made contact with a neighbouring pin, an absolute NO NO when I was going to power it up. The whole operation was stressful, as always. In the end I got the desired results. Another bullet dodged.

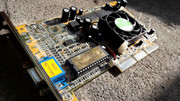
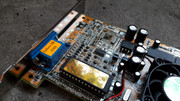
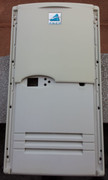
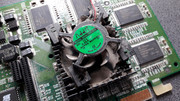
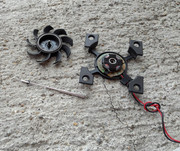
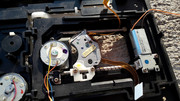
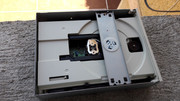
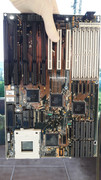
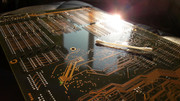
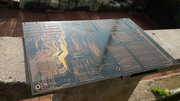
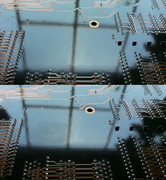
Initial state.


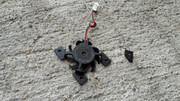
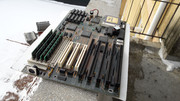
Little did I know that the picture bellow, made in a weather so cold that I couldnt feel my fingers, will be the solution to my problem with this kit, which will prove to be quite stubborn and it will refuse until the last moment, to BOOT from a HDD, as if it didnt want to be brought back to life...REMEMBER! Always take pictures before you do anything with any component. Very often the jumper settings arent well documented and you will search in vain for a manual or additional information on the internet. I KNOW HOW IT IS because I've been there and trust me, IT SUX BIG TIME!

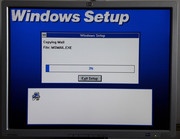
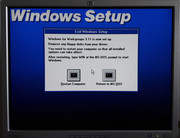
After I received the kit I powered it up but I wasnt greeted by a HAPPY POST BEEP and the screen remained BLACK.
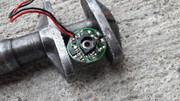
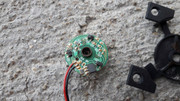
Initially, I thought that the culprit was the RTC battery and I decided to make my first RTC BATTERY MOD. This procedure was presented in the episode:
"Hey Grandpa, do you still lose track of time?!?!? "
Re: Hello, World! :D - Robert B's PC builds - oogle away freely :)
Another POST test, with the modded RTC battery, didnt bring anything new. The kit still didnt POST. The chips from the motherboard were getting warm, sign that it received current, but the screen was still BLACK. I tried other RAM sticks, video cards and PSUs but to no avail.
In the end I got to the conclusion that maybe the data from the BIOS chip was corrupted and there was nothing else I could do until I bought a BIOS programmer.
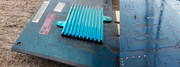
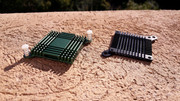
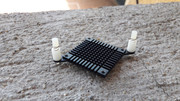
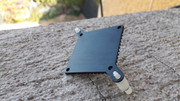
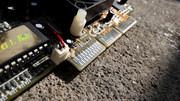
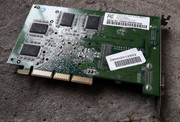
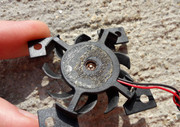
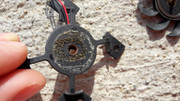
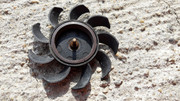
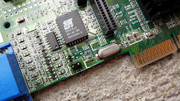
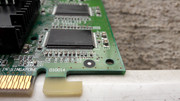
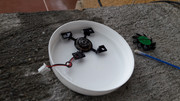
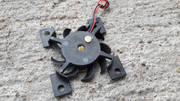
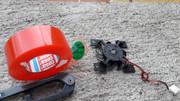
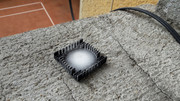
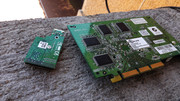
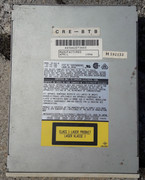
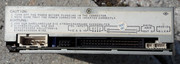
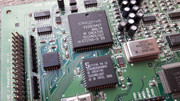
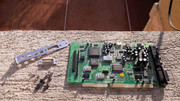
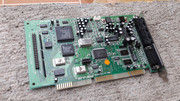
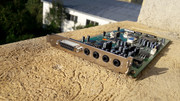
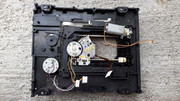
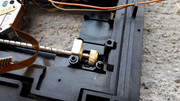
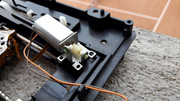
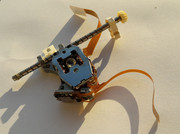
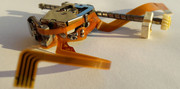
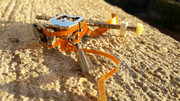
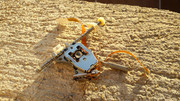
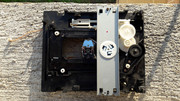
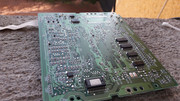
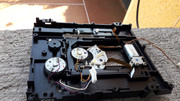
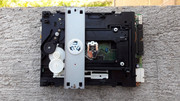
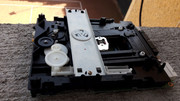
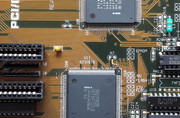
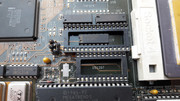
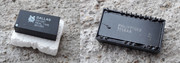
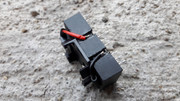
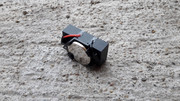
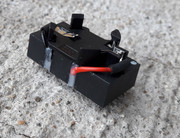
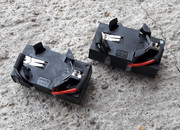
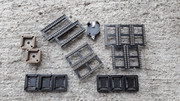
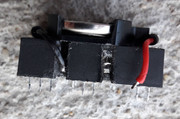
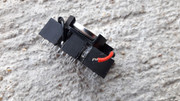
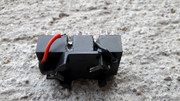
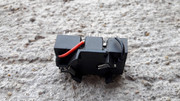
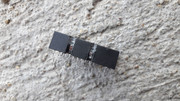
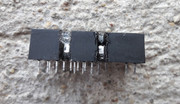
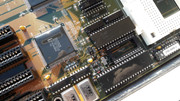
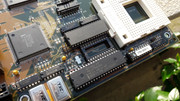
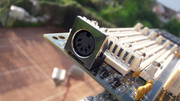
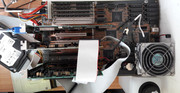
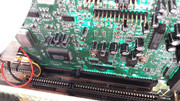
After this, I started to restore the controller, another vital piece of the P66 puzzle, that would render the kit useless if it didnt work. These old motherboards dont have a buil-in FDD/HDD/SERIAL/PARALLEL controller. In the past I ran away from motherboards that need separate controllers or have RTC batteries. Not anymore.
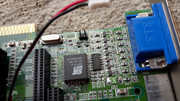
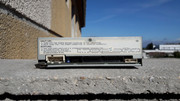
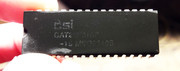
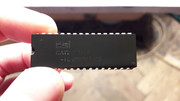
Meet the: JPN CORPORATION CA8302E-1
Re: Hello, World! :D - Robert B's PC builds - oogle away freely :)
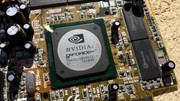
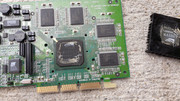
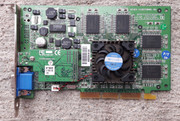
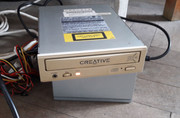
In January 2018 I bought a MiniPRO TL866A BIOS programmer for almost 120EUROS. It took me a while to pull the trigger. I wasnt too happy that I had to pay so much for a BIOS programmer, but I knew that I will need it in the future, so I bought it. With this programmer I was also able to recover the PowerColor EvilKing IV L-card 3dfx Voodoo4 4500 32MB AGP, after many have said that it is beyond rescue...aaahh sweet memories...what an adrenaline rush I had when I saw the screen light up and the image was crispy and flawless...3dfx VooDoo4 4500.....PRICELESS!!!
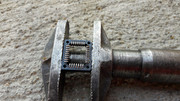
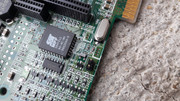
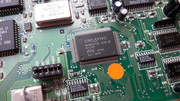
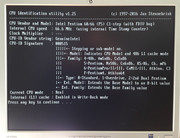
The identification of the specs of the BIOS chip was difficult as the markings were all but gone.
I used a powerful source of light and I wetted the surface of the chip with IPA 99%. This way I found the exact model number : CAT28F010
https://www.onsemi.com/pub/Collateral/CAT28F010-D.PDF
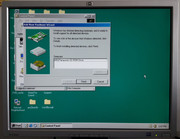
I made a copy of the existing BIOS and I had to choose between three versions that I found on the ASUS site. ASUS, a company that respects itself! I was able to find BIOS files for a motherboard that is over 20 years old right on the manufacturer's site! GG!!! This doesnt happen very often today.
https://www.asus.com/supportonly/PCII-P5MP3/HelpDesk_BIOS/
I tried the first BIOS version, 0205/25.05.1994, even if it was meant for a motherboard with Revision 2.3 and my board was Revision 2.4. I didnt want to use a BETA BIOS or a BIOS for a board with the Revision 3.1 or greater.
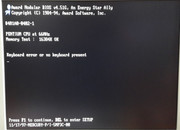
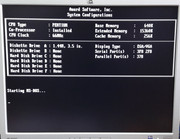
POWER ON!
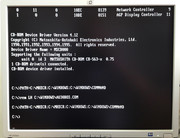
BEEP! I'M ALIVE! F@K YEAH!!! AWSOME!!! OUTSTANDING!!! Man I'm GOOD 😁! POST GOODNESS!!!

The RTC battery MOD for the Benchmark BQ3287MT was executed correctly and it retained the BIOS settings at POWER OFF and after the system was disconnected from the mains. AWESOME NEWS!
The system booted from the FDD and I was able to access the contents of my floppy disks.
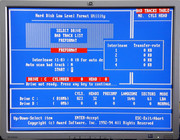
Next, I connected a HDD to the controller and I tried to make the system boot from it. No matter what I tried, I wasnt able to make the system, identify, format or boot from the HDD. Hours were spent trying different things. The HDD was identified in BIOS but that was it. Even in BIOS, from the built in menu, Hard Disk Low Level Format Utility, I wasnt able to format the damned thing! I tried many HDDs to no avail.
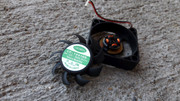
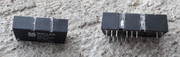
I took a moment and I thought about all the steps I took until I got the system to POST and I got to the conclusion that maybe the RTC battery wasnt what it was supposed to be as the silk screen on the motherboard specified that a Dallas DS1287 is required. I knew that the BQ3287MT is compatible with the DS1287 but I paid 13 EUROS for a DS1287 which also had to be MODDED.
http://www.rigelcorp.com/8051/DS1287.pdf
Another test, this time with the DS1287 and I still couldnt BOOT from the HDD. W@T THE F.........................K!!!!!!!!!!!!!!!!
The situation was worse, as the DS1287 didnt retain the BIOS settings after I disconnected the system from the mains or it was powered off. I thought that maybe I didnt mod the battery correctly and I separated both the "+" and "-" terminals even if this wasnt required. All was for nothing. Two additional modifications later, I came to the conclusion that the DS1287 was either busted or it wasnt what I needed. Hours lost ...shheeeshhhh....


gallery: https://postimg.cc/gallery/2vylqdx0c/
BACK TO BQ3287! https://www.dataman.com/media/datasheet/Bench … arq/BQ3287x.pdf
I removed, checked and tried anything I could think of. CACHE chips, RAM sticks, HDDs, FDDs, PSUs, you name it, I tried it. STILL NOTHING!
After sleepless nights, moments in the day when parts of my brain were locked trying to solve the P66 puzzle, together with the accumulated stress, I said that maybe I need a smaller HDD as the JPN CORPORATION CA8302E-1 controller has a limit of 10 Heads / 1024 Cyl / HDD up to 528MB.
I found at the flea market two small HDDs: a Western Digital Caviar 140 AT Compatible Intelligent Drive WDAC140 980 cyl * 5 heads * 17 spt * 42.7MB!!! - Produced in 21.01.1992. MDL: WDAC140-32M and a CONNER CP30251 - Conner Peripherals 240MB.
These two HDDs brought nothing new. I still wasnt able to BOOT from them. ALL THE EFFORT WAS FOR NOTHING!
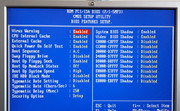
RTC BATTERY.NO! HDD.NO! Maybe I should try other BIOS versions?
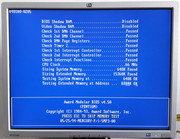
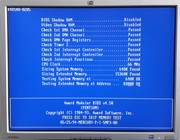
I programmed the BIOS chip with the version 0401/21.07.1994 for motherboards that are REVISION 3.1. Surprisingly the board POSTED and now I had support for HDDs greater than 528MB: "PCI/I-P5MP3 (for Rev. 3.1 or above) BIOS 0401 Support 4 IDE HDD & >528MB size (LBA)" plus more settings in BIOS. Even so, I didnt get any results.
As the BETA BIOS 0402/17.11.1997 was newer than the version 0401/21.07.1994 I tried it too. STILL NOTHING! F@K!F@K!F@K! I couldnt BOOT from THE HDD.
THAT'S WHAT YOU GET FOR PLAYING WITH THE KRAKEN!!! SUFFER !!! SUFFER !!! SUFFER !!! Ohhhh the agony and despair! 😁
BIOS VERSION POST/BOOT screens.

When I was ready to throw in the towel it hit me!
When I cleaned the motherboard I took off all the jumpers and when I put them back I put them as it is specified on the internet and not how they were when the I received it. I couldnt find a PDF with the manual so these schematics were all I had. To make matters worse, the data from the silk screen settings on the motherboard wasnt intuitive and it didnt help me.
https://stason.org/TULARC/pc/motherboards/A/A … -P5MP3-188.html
I think that you already know where I F@KED UP!
I put the jumpers how they were when I got the motherboard and reluctantly I pressed the POWER button...
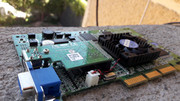
ALL SYSTEMS ARE GO! I was able to boot from any HDD and I even connected a Western Digital Caviar SE - 80GB/7200rpm. The speed of this 80GB HDD was dizzying coming from snail type HDDs that were measured in Megabytes.
Well...that was easy...
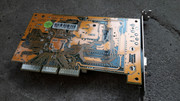
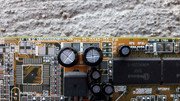
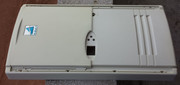
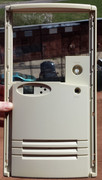
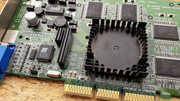
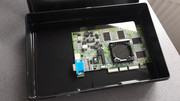
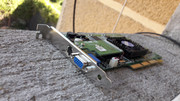
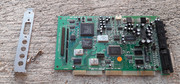
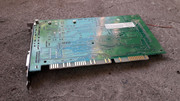
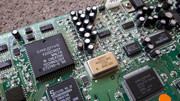
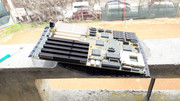
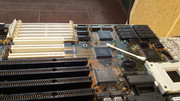
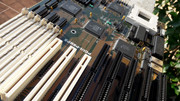
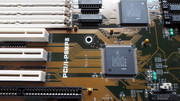
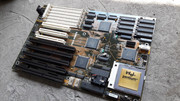
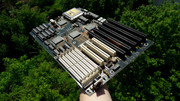
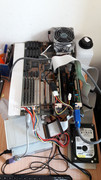
The motherboard went through two cleaning stages. One before testing and the final one before it was placed in its box together with her sisters.

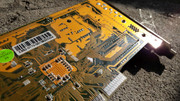
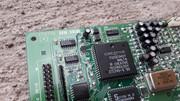
Ready for a good cleaning.


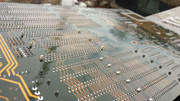
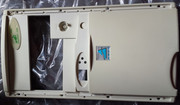
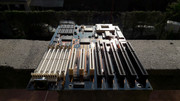
No detail was overlooked.


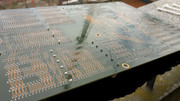
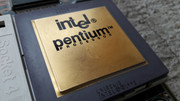
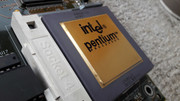
Smile at the camera you BIG LUMP OF GOLD!
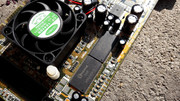
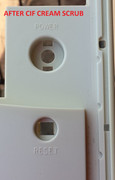
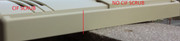
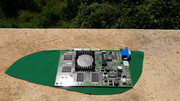
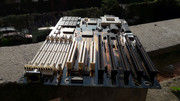
Final cleaning.


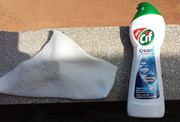
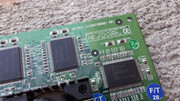
Extreme attention to detail. I preffer cotton sticks when I want to make the PCB shine, because I can apply more "pressure" when I have to remove the adherent dirt which isnt bothered at all by IPA 99% and a soft brush. This is the difference between clean and super clean. All in all, my cleaning procedures give me about 95% of what I want. I'm never satisfied.
Clean! Clean! Clean!
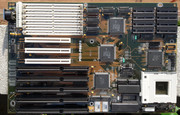


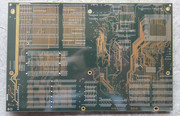
I replaced all the black jumpers with new, white ones, a new white zip tie for the 66MHz quartz oscillator and the motherboard was better than new.


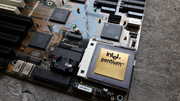
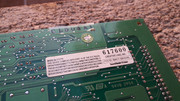
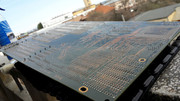
The seal of approval. Gloves are needed while handling the motherboard.
Evergreen.
If I knew how much effort will be required for the restoration and recovery of the P66, I might've not bought it, who knows... In many cases it is better to let passion take over but you should also make a analysis for what is required to achieve your goal.
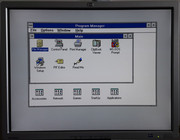
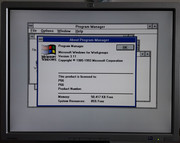
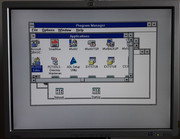
After this, the kit worked flawlessly.
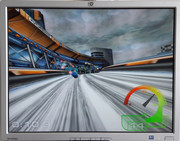
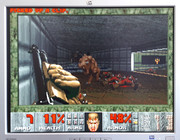
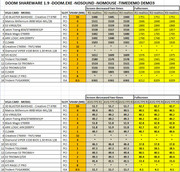
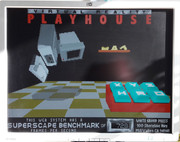
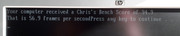
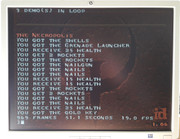
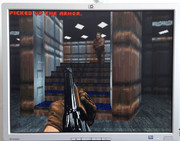
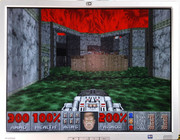
A fellow vogons member, amadeus777999, asked me to run a few DOOM v1.9 Shareware tests. After 100+ runs made to quantify the performance of the 66MHz Pentium, I must say that I am quite impressed. It ran stable and I didnt have any trouble at all. The results were needed for a project of his.
Test setup:
*P66 with FDIV bug
*ASUS PCI/I-P5MP3 Rev. 2.4 with latest beta BIOS / 256KB CACHE
*16MB 4x4MB
*7200rpm 80GB HDD 8MB buffer
*NO SOUNDCARD INSTALLED.
STARTING POINT: https://www.complang.tuwien.ac.at/misc/doombench.html
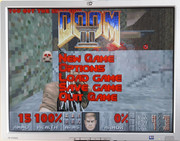
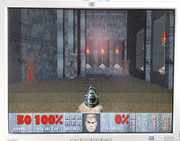
DOOM Shareware V1.9: https://www.doomworld.com/idgames/idstuff/doom/doom19s
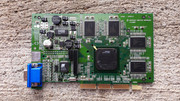
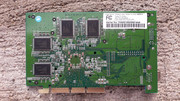
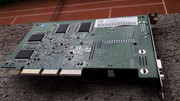
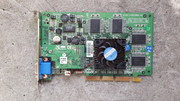
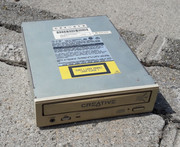
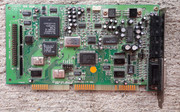
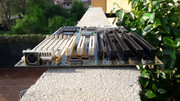
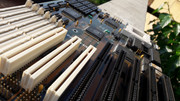
Video cards used during testing:
* 3D BLASTER BANSHEE - Creative CT 6760 - PCI
* Matrox Millenium 4MB MGA-MIL/2B - PCI
* S3 VIRGE/DX - PCI
* Jaton Tseng B54/ET4000W32P - PCI
* Black Magic ET6000 - PCI
* ARK LOGIC ARK2000PV - PCI
* Cirrus Logic CL5446 - PCI
* Creative CT6950 - TNT2 M64 - PCI
* Diamond VIPER V330 BIOS 1.50 RIVA 128 - PCI
* SIS 6215C - PCI
* Trident TGUI9440 - PCI
* Colormax S3 TRIO64V+ - PCI
* S3 TRIO64V2/DX - PCI
* Cirrus Logic CL5430 - PCI
* ATI RAGE LT PRO - PCI
* Trident TVGA9000C -ISA
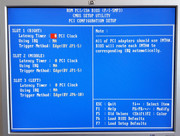
The following cards didnt work on this motherboard: Creative CT6950 - TNT2 M64 *** Diamond VIPER V330 BIOS 1.50 RIVA 128 - PCI *** ATI RAGE LT PRO - PCI. Fore sure it is a case of PCI version incompatibility.
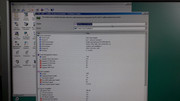
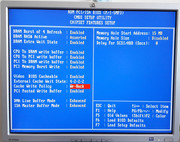
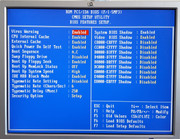
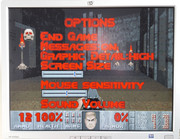
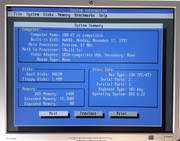
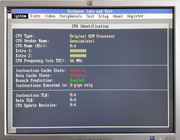
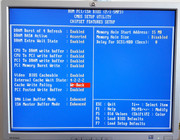
Before I saw how the P66 and the video cards would perform, I had to optimize the BIOS settings.
* MS-DOS 6.22 stock.
* TURBO ON via jumper.
* SMARTDRV.EXE WASNT LOADED.
* In BIOS: WB is a few clicks faster decat WT so I used WB for all tests.(WT-Write Through / WB-Write Back)


gallery: https://postimg.cc/gallery/154fcylyg/
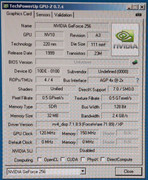
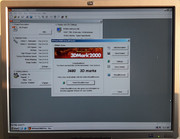
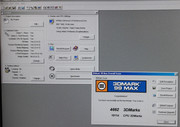
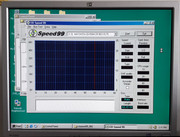
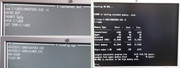
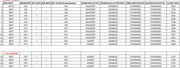
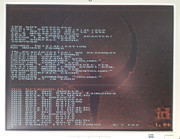
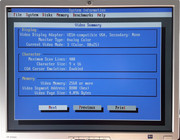
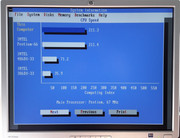
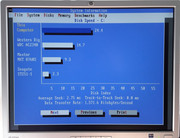
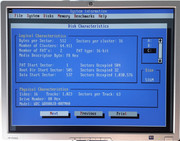
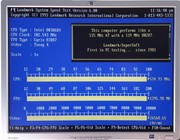
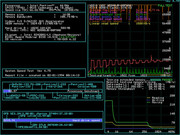
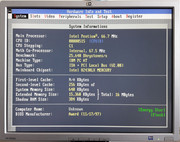
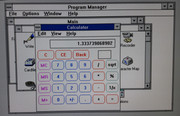
After I set up all I could and I got some nice SpeedSyS 4.78 results, I was ready for the main course.
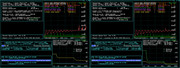
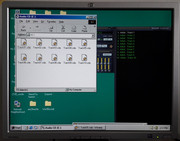
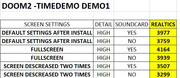
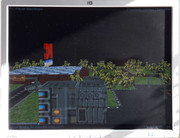
Next came the testing of the video cards. Three runs each, FULL SCREEN and SCREEN DECREASED TWO TIMES.
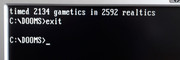
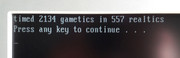
I was already fed with the same timedemo on and on. Also I had to write doom -nosound -nomouse -timedemo demo3 many many times ... ... ...
SOME NICE RESULTS HERE!
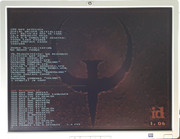
After this I ran other tests.
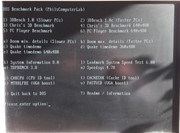
https://www.philscomputerlab.com/dos-benchmark-pack.html
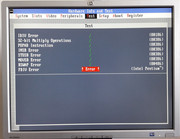
Results


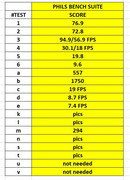
gallery: https://postimg.cc/gallery/1jq9g3yg8/
Some FUN and misc stuff.
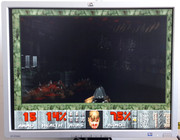
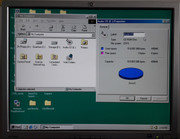
FDIV BUG CPU for sure 😁 WIN! WIN! WIN!
All this adventure spanned across months. All this time wasnt used just for the P66 as I had other ongoing projects. I had the setup on my test table for a few days and then it spent weeks in its box.
More months have passed until I was able to tell you the story.
Looking back, I can say that it was all worth it, even if it took a lot of time, money and effort.
This was THE ORIGINAL PENTIUM story.
It brings me great pleasure to own this kit, as it is the FIRST PENTIUM and the cherry on top it is also "defective" FDIV bug and all. The ASUS motherboard with the Intel chipset completes the picture. Add to this the fact that it is speedy, I wonder what could I possibly want more. Retro HW digging at its best! WIN! WIN! WIN!
Meanwhile, I got my hands on two RAM FPM kits one of 2x16MB=32MB and one of 2x32MB=64MB.
In the future I will be able to build an awesome PC in which pulsates a PENTIUM 66 heart!!!
More later.