Status Quo - In The Army Now
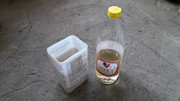
ATI Radeon 9800 PRO or should I say Zalman VF700-Cu (I wonder ...)
Another ATI 9800 PRO 128MB another deception. Truth be told I wasn't without blame. No, this card didn't die because of me it's just that I did mistake after mistake worse than a beginner. Looking back I still ask myself what happened? Even so I still got something in return and valuable data was gathered for the future. I say future because I don't intend to quit this "hobby" even if lately I don't post as often as I would like to.
This is already the third ATI 9800 which has kicked the bucket. Some of you experienced something like this back in the day when this card costed an arm and a leg. Cards that died without a warning so I, who has paid peanuts for this card, shouldn't complain. Even more for the fact that this card came straight from "the dump".
For months I saw this card at the flea market. Tossed on a dirty sheet or a tarp. The fist time I saw it, it was missing only one blue heatsink on the back, the rust was creating havoc and the cooler was ruffled. For me it was an instant DON'T BUY! This however has changed after I found out that my His EXCALIBUR ATI 9800 PRO 128MB AGP IceQ was dead. The next time I saw it I said what the heck and I bough it in even worse shape than before with all the blue heatsinks missing on the back, a busted ceramic capacitor on the back (C86) and a torn SMD inductor 2.2 FALCO 0435. At least this was what I thought initially. Little did I know!
I should have my head checked.
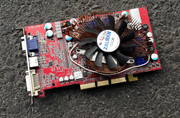


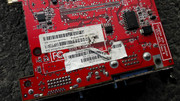
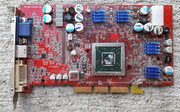
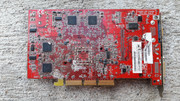
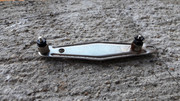
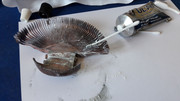
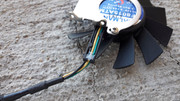
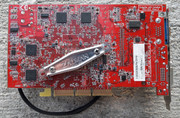
ATI Radeon 9800 PRO 128MB AGP 8x in all its glory. PN 109-A07500-00.
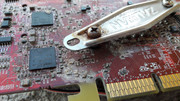
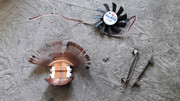
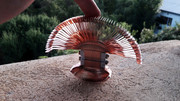
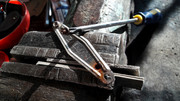
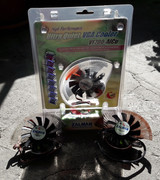
Without a doubt, the central piece of this card is the Zalman VF700-Cu cooler. For sure that it has seen better days and ever since I bought the card I hatched a plan cu give some of its glory back.


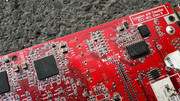
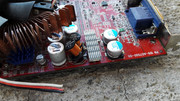
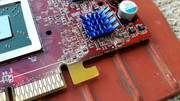
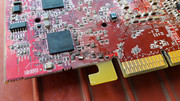
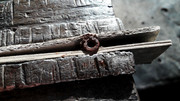
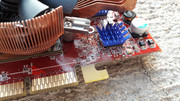
After I removed the Zalman cooler from the board I was greeted by more bad news. Besides the area on the back that was damaged by water or a corrosive substance, I saw that also on the front of the card, many ICs have received the same treatment. To make matters worse, besides the missing ceramic capacitor C86, another capacitor C152 was MIA. GREAT!!!
I took a deep breath and I got to work.
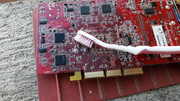
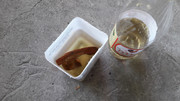
It was the first time when I was confronted with such PCB damage. I weighed my options and I decided to use a rust remover solution that I knew that it had a mild action. I planed to use cotton sticks dipped in solution and remove the corrosion with patience, in stages until I got what I was looking for: the total annihilation of the rusted areas.

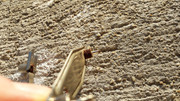
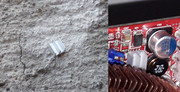
I took a blow bellow the waist from the start. A BUSSED RESISTOR ARRAY 8 with the markings 560 flew off the board. Noooooooooooo! 😁
Initially I thought that the solution was too aggressive but in fact rust was all that kept the resistor in place.
So I took an old toothbrush which had shortened hairs and I scrubbed the PCB with greater force. This is a test to see if other bits will fly from the board. MY WAY or the HIGHWAY!
I told myself there's no biggie. I'll solder the sucker back. So I placed it in a safe place, a plastic cap filled with IPA 99%.
Looking back I should've been more careful where I place the tiny part ...
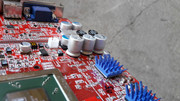
Besides the toothbrush and the cotton sticks dipped in the rust remover solution I also had to use tiny needles to remove some of the crust that was extremely stubborn. Hours have passed until I got decent results. I didn't quit until I got the maximum from what it could be done.

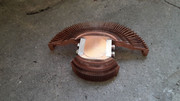
After I sorted out the PCB I turned my attention towards the Zalman cooler.
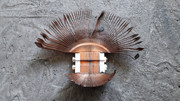
After a quick polish of the base that yielded encouraging results I knew that I could get something special in the end if I decided to do what had to be done.
YUCK!

In the past, to make old copper heatsinks shine, even if temporary, I placed them in vinegar made from grapes for 2-3 hours. This time I decided to keep the heatsink in vinegar for 24 hours. ALL IN!
The next day I was disappointed to find out that the cooler still looked like $hit. The only plus was that the areas that suffered from verdigris were now clean. DAMN!
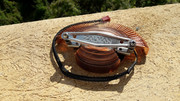
I counted my options and I decided to use polishing paste and a lot of elbow grease.

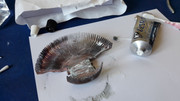
The initial results were encouraging.
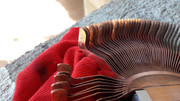
Because I wasn't able to enter too deep with the cotton sticks between the fins I decided to bend them all and see what's what after I finished with the manual polishing.
Hours passed by. What am I doing here? What's my name? Why am I doing this? SHUT UP AN WORK you ORC! ORC! 😁

The partial results, were for me, a moment of satisfaction even if I knew that many more hours will be needed to straighten them back. I knew that they will never be up to factory spec but I wanted them to be bling bling the rest didn't matter. Many of them were already bent from the start so I took this a step further (too far). 😁


The fan was missing its header so I used a cable from a dead fan, I removed one of the four wires, I found a three pin header and I soldered the new cable on the PCB of the fan.
All went well. Spick and span. Smooth revolutions. WIN!
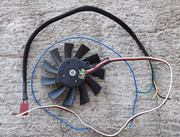

I fixed in place the wires with a bit of transparent POXIPOL.
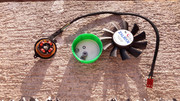
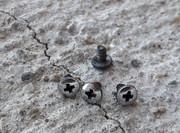
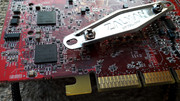
The most difficult task was that of removing the fixing screws from the backplate. "The age old rust" was quite stubborn.

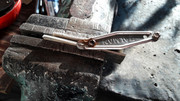
All the parts from the retention system of the cooler took a bath in the rust remover solution.


I polished manually or with a felt wheel all of the screws. One screw had to be replaced.
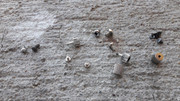
Shiny trinkets!
Screws.
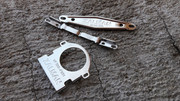
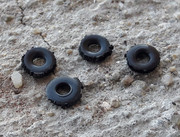
The o-rings have seen better days but they are still up to spec. They will be replaced only if it will be needed.
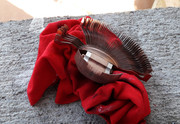
Final results.


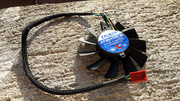
My Zalman VF700 collection. 😁
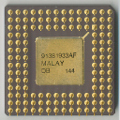
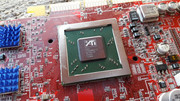
The naked die.
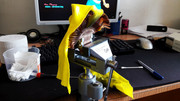
While I was working with this card I found out that my His ATI 9800 card is dead so I didn't have the patience to finish all of the repairs that were planned for this card. I mounted the cooler and I was quick to power it up. No replaced ceramic capacitors, no soldered 560 resistor and no soldered Falco SMD inductor. I was in a hurry. I should've at least soldered the SMD inductor but I forgot completely. I didn't want to solder the missing ceramic capacitors as I lost the 560 resistor. How did this happen? Well, I removed the resistor from the cap filled with IPA 99% with a tweezer and I placed it n a concrete surface. When I returned to recover it I wasn't able to find it. Maybe it stuck to the ends of the tweezer and it flew off into the void. I searched for it many minutes but to no avail. GREAT! A professional beginner!


Unsurprisingly I found out that the card has problems. The only upside was that at least I got the BIOS beep code for VGA not detected: 1 long followed by 3 short beeps. My other ATI 9800 PRO cards haven't been able to even spit out this error.

I forgot to mention that when I used the rust remover solution I also damaged the plastic jacket of some of the electrolytic capacitors. Initially I used cotton sticks but when I turned to the toothbrush tiny drops of solution were propelled on the caps. The damage is only cosmetic and can only be fixed by replacing the caps. "The good news" is that I won't have to do this as the card is already dead.


A few weeks later I soldered the missing ceramic capacitors, I made a tiny heatsink that was also missing from the card and I tried one more time. I didn't find a 560 resistor.

As expected the card returned a black screen and the same beep code. Most probably a dead GPU.

Another fallen ATI. Better luck next time.
This card was a lost cause from the start. Sometimes is better to know when to quit. This comes from someone who still doesn't know when to quit. Do as I say and don't do as I did/do. 😁
In the end I got a cooler that will be put to good use on another occasion. A learning experience and nothing more.
This was one of my worst jobs. Mistakes and bad decisions. Only fools rush in and I guess in this instance I was a fool. 😁
gallery: https://postimg.cc/gallery/nxNBWkL
More later.