VOGONS


First post, by Skyscraper

User metadata
Rank l33t
Rank
l33t

There are many guides on the net for this, I thought I would share how I did it.

This version of the mod is easier done if your RTC is mounted in a socket or if you desolder it but it can be done with the RTC still soldered to the board with some masking.

The nice thing about this verion of the mod is that you do not need to care about what RTC pin goes where and such, the only thing you need to do is if you remove the RTC then make a mark on the bottom of the RTC chip to keep track of pin 1 as the mark on the top will disappear.

Wet grind with a sandpaper until you hit the battery, remove the battery and you will end up with a RTC looking like the one in the picture below. I think all batteries are mounted with + up and - down but take note of polarity when removing the battery just in case. I used cable shoes because the cheap CR2032 battery holder I got diddnt have much to solder on, the cables are unnecessary thick and long.

Click for a large image.

The attachment The_Odin_RTC_and_stuff.JPG is no longer available

The cables soldered.

The attachment Leads_soldered.JPG is no longer available

The battery holder glued to the RTC chip.

The attachment Like_new.JPG is no longer available

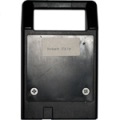
The modified RTC mounted on the board.

The attachment Mounted_on the_board.JPG is no longer available

New PC: i9 12900K @5GHz all cores @1.2v. MSI PRO Z690-A. 32GB DDR4 3600 CL14. 3070Ti.
Old PC: Dual Xeon X5690@4.6GHz, EVGA SR-2, 48GB DDR3R@2000MHz, Intel X25-M. GTX 980ti.
Older PC: K6-3+ 400@600MHz, PC-Chips M577, 256MB SDRAM, AWE64, Voodoo Banshee.

Reply 1 of 3, by seob

User metadata
Rank Member
Rank
Member

Nice looking mod, except the cable shoes, but you already explained why.

Reply 2 of 3, by PhilsComputerLab

User metadata
Rank l33t++
Rank
l33t++

Great guide, thanks!

YouTube, Facebook, Website

Reply 3 of 3, by Skyscraper

User metadata
Rank l33t
Rank
l33t
seob wrote:

Nice looking mod, except the cable shoes, but you already explained why.

philscomputerlab wrote:

Great guide, thanks!

Thanks 😀

This is perhaps good to add.

I noticed that the RTC chip needs to be dried after beeing wet grinded, if its desoldered or socketed just put it in the oven at 70C for half an hour before soldering the leads for the battery holder. If the chip is still mounted on the board its better to leave the board in the sun and wait at least 24 hours even if you have masked the rest of the board well when sanding the chip. If you live in a country where the humidity is 100% and you dont have an AC then I think you could sand the chip down without water without risking it beeing damaged, I used water to avoid ESD damage.

I could not really figure out how the water got into the chip package but it did and the RTC did not function properly until dried.

New PC: i9 12900K @5GHz all cores @1.2v. MSI PRO Z690-A. 32GB DDR4 3600 CL14. 3070Ti.
Old PC: Dual Xeon X5690@4.6GHz, EVGA SR-2, 48GB DDR3R@2000MHz, Intel X25-M. GTX 980ti.
Older PC: K6-3+ 400@600MHz, PC-Chips M577, 256MB SDRAM, AWE64, Voodoo Banshee.