Bombdogs - First Time (Original mix) (No House of the Rising Sun song here)
The card from The Land of the Rising Sun
There are a few cards that stick with you for a very long time. You might think that I'm referring to some mythical cards like the VooDoo 5 6K or something along the line, but that is not always the case. As we are different, or at least we like to think that we are, each of us resonate to certain things that for others mean absolutely nothing or they are just a footnote on their scale of "values".
Sometimes, a card that it is not sold in certain regions of the world due to the fact that it is simply destined for other markets, quickly achieves a status that can make many people hearts race.
For me, among many other things (as you probably know by now), the Canopus line of cards has a very special place in my heart.
Back in their hay day I'm not sure that I heard or read about them. Maybe I saw some ads with their 3dfx cards? My memory is a little hazy but what I can say for sure is that I never heard anyone close to me to own such a card when they were King of the Hill.
Fast forward to somewhere around 2010 I stumbled on some pictures with a few Canopus TNT 2 Ultra cards. I was awed by their presence and I was impressed by their design. They were simply stunning. They have a je ne sais quoi that speaks my language.
For the last 6 years since I started actively acquiring HW I never saw one in the flesh and truth be told I wasn't holding my breath for finding one anytime soon.
I was quite surprised in July 2021, when I received some pictures with a Canopus card from the guy that also found the VooDoo 5 5500 that I repaired in the previous episode.
How LUCKY can you be to score two awesome cards in such a short span of time?
The card was tested and it worked but as soon as I got the pictures I pointed out some problems. Due to the fact that I didn't want to spend money and buy it, I congratulated the guy for a job well done. For the last few years I'm not inclined to spend big money on many parts and I'm just waiting patiently for them to pop up at the flea market. 😁 Sure that they may come with some problems but my body is ready. 😁
That was it for the time being.
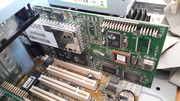
After I repaired the V5 5K I sent the card to the very happy owner and I didn't want something in return for my services. Soon after this, because he asked me, I agreed to receive an Abit KR7A-RAID motherboard as compensation for repairing the V5. The motherboard had issues but I still wanted it as I always like to challenge myself. What? An Abit mobo? Heck yeah! Send it! After I changed some bad caps I found out the real problem of that motherboard as it proved to have a shorted SB. Bummer. In the end I wasn't able to do anything with it. It can be repaired but it is a question of time and money, like everything in life.
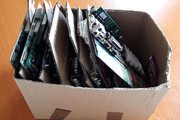
But that wasn't everything. When I got the package, to my surprise, I found a few extras inside. A couple of Celeron Tualatin CPUs, a Diamond Fire 1K Pro AGP card and you guessed it, The Cherry On Top, the Canopus card. I called the guy to ask him if he wanted the card repaired or if it was for me. And so, I got my very own Canopus card. It had a lot of problems but the fact that it was still kind of alive made me want to do everything in my power to restore it. Where people see junk, where people see lost causes, I see opportunity. I can't remember how many times I was asked, what are you doing with those "corpses" and when I present the "finished product" the question quickly turns into: are they for sale? For sale? Not yet! They might be but I can't say for now. Even today I hear people saying that if a component has a few torn caps or other cosmetic damage, they aren't to be bought. That always makes me smile. Remember that these parts will never be manufactured again. Need I say more?
So, in the end, after I thought that the Canopus card was already sold to someone else, I was the lucky winner of yet another "unicorn". Looking back, that card had my name written all over it.
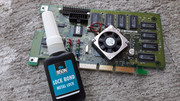
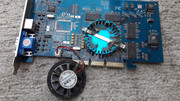
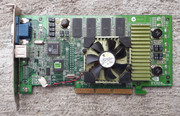
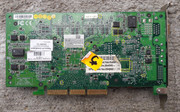
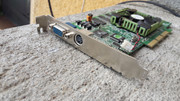
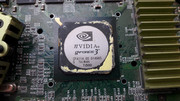
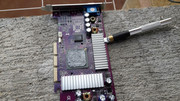
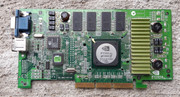
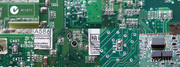
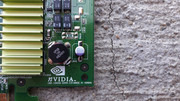
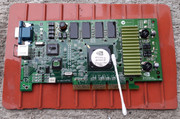
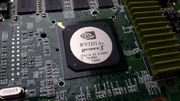
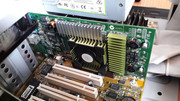
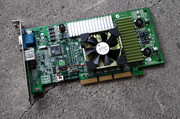
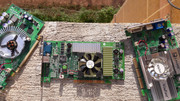
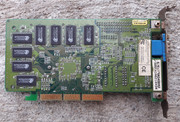
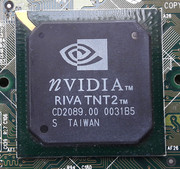
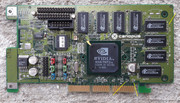
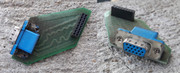
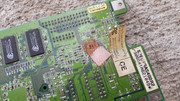
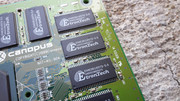
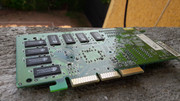
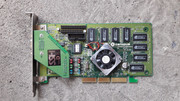
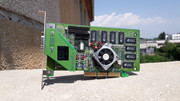
Let's meet the Canopus Spectra 5400R2 N17-AG-904!


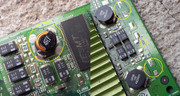
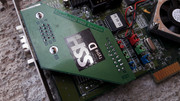
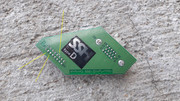
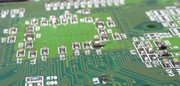
The signature feature of many Canopus cards is the SSH daughterboard. In essence that SSH daughterboard which stands for Signal Super Highway, together with other ICs that are present on the card, ensure a better video output from it or at least that is the gist of it. In practice I saw that indeed the signal output was crispier than that on some other TNT 2 cards I own. This was registered on an LCD. As I do not own any CRTs I can't say if the same difference could be observed on the good old cathode-ray tube monitors.
The tip of the iceberg.
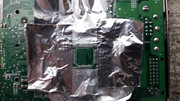
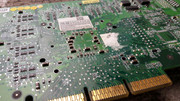
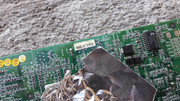
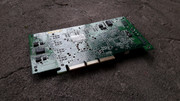
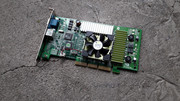
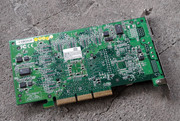
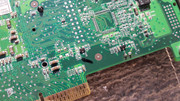
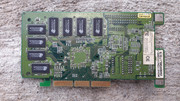
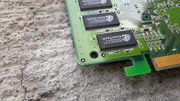
The back of the card was full of scars and missing components. Not a pretty sight.
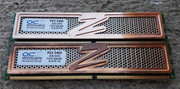
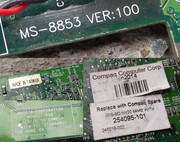
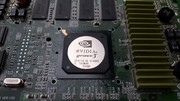
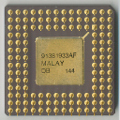
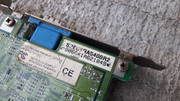
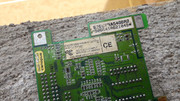
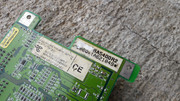
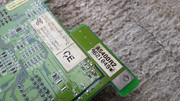
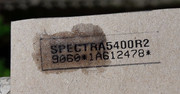
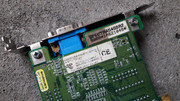
The label that was present on the card had some very interesting information on it. Spectra 5400 Premium Edition or Spectra 5400. What? Spectra 5400 PE? The heck is that? A quick search has revealed that the PE edition is the well known TNT 2 ULTRA variant. What's the stuff with this sticker I wondered? Is it 0 or 1? Why would you put such a sticker on your product? Which one is it?
I already knew that this card was a regular TNT 2 but I still had a 0.0000001% hope that maybe it was the PE edition. I know I was greedy. 😁
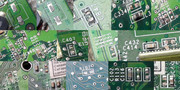
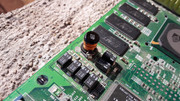
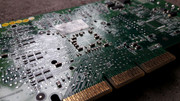
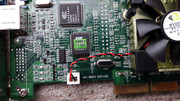
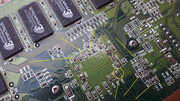
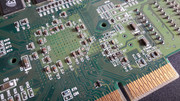
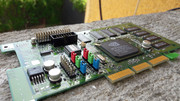
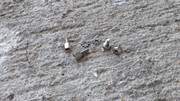
Let's focus on the problems of this card. Many missing ceramic caps, cracked ceramic caps and some deep scratches. Well, it could be worse I said to myself.
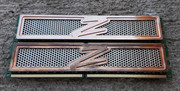
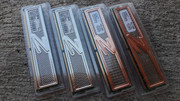
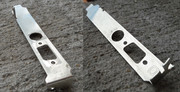
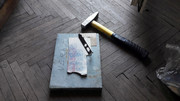
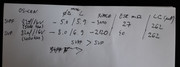
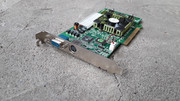
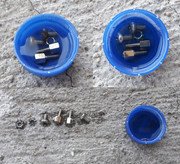
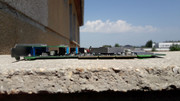
Let's count the number of threads on those screws as I know that I'll need this information later. I really don't want to screw up something.
Left.
Right.
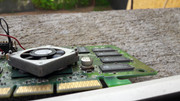
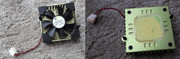
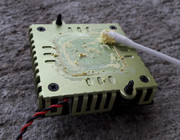
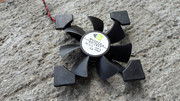
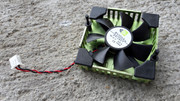
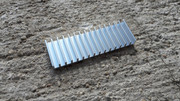
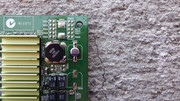
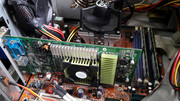
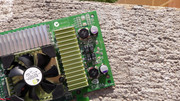
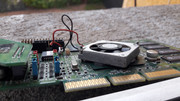
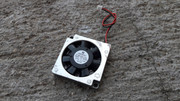
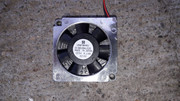
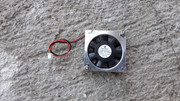
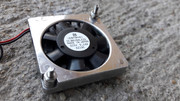
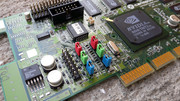
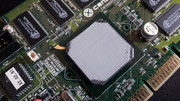
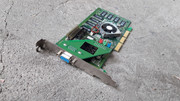
I was intrigued by the miniature cooling fan. It looked to be of high quality and it still spun silently even if it was looking worse for wear. Model Panaflo UDQFNKH01 DC5V 0.14A. Made In Japan. Well, it was to be expected that a high quality miniature fan made in Japan was to be used on a card made by a Japanese company. Elementary.
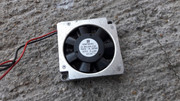
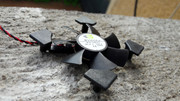
I had some reservations in regard to this diminutive 3cm pygmy but in the end I was won over by it. It was looking a little under the weather, with scratches, dents and some black deposits inside.
Break it up folks! No PE in here! There's nothing to be seen!
I never expected that it would be so tough to remove that tiny cooler from the card. Sure that a nut and bolt combination is way better than some crappy plastic push pins, but using thread locker on them was quite a sneaky move.
I had to be very patient and use a fine needle to remove some of the thread locker that was visible, then I had to use a pair of pliers to keep in place the nut, while I tried to unscrew the bolt from the other side without damaging the card. It was quite a tense situation as I didn't have a wrench that was so small and I knew that if my pliers would slip or if my screwdriver would slip I might have to add some more repairs on the already long list of stuff to do on this card.
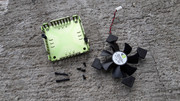
In the end I prevailed and I managed to free the tiny cooler from the card.

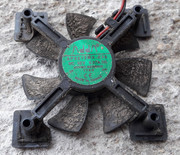
I took a close look at the cooler and at first I wanted to take it apart but I soon dismissed this idea. The cooler has a shroud that it is riveted to the heatsink so, I had to resort to a "key hole" cleaning procedure. A tedious thing, let me tell you.

I could've submerged the entire thing in IPA 99% but as the fan bearing was still running smoothly I wanted to keep that way.
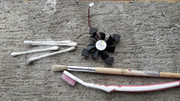
After I used about 15 cotton sticks dipped in IPA I took a close look at the results.
Well, it looks kind of ok, I said to myself, BUT I WANT MORE!
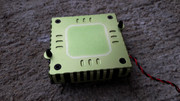
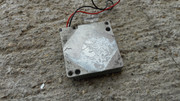
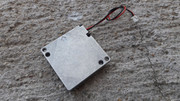
The back of the cooler was in pretty good shape.
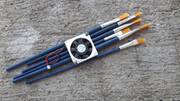
To get into all the tiny spaces of the cooler I bought a set of small brushes and then millimeter by millimeter I cleaned the inside of that tiny thing. I was amazed at how much dirt and grime came out of it. I reckon it took me close to two hours to clean it.
After this, I looked at the results and I played with the idea of using some sandpaper to smooth out the dents that were on the aluminum shroud and then polish it.
In the end I opted to leave it as is, as I deemed this operation to be well into the diminishing results territory. Some of the dents were simply too deep and I had to remove a lot of material.
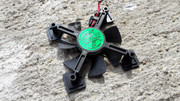
After some more detailing and polishing I got these results.

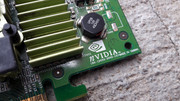
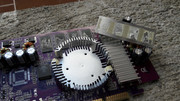
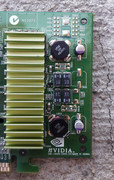
You might wonder why I spent so much time with this operation. Well, look at the card and tell me which signature feature is the most striking? Among, other things, that cooler screams Canopus all the way. This is why I wanted to do everything I could to give this battered thing a new lease of life.
After another inspection of the card I got more good news. Cough, cough. MORE WORK! For ME?! Oh, you shouldn've have! &^%$*#^($#%^!!!! 😁
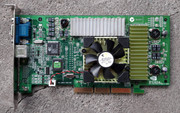
Ready to be made great again.
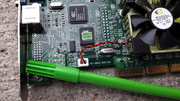
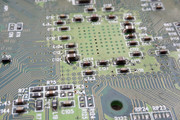
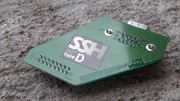
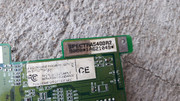
It's ME the SSH thingy. I don't know about you, but all I see is just a PCB and some traces. Well, the Marketing Department needs some material, don't they?
YAY! More bent pins and a few scars. YAY!
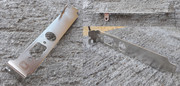
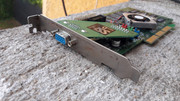
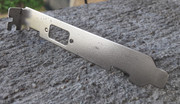
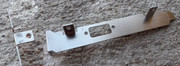
The bracket has seen better days. I'm sure of it.

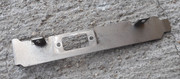
Rust! A very nice flavor! You know! RUST! aka Rusty rust rust ... a very nice fellow ... not.

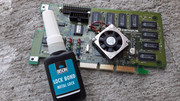
Into the rust remover solution you go! NOOOO!!! Suffer and be reborn!
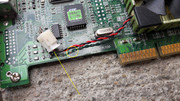
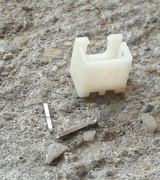
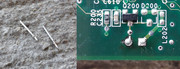
OHHHHH!!! A torn pad! NICE! Look at that cotton sticking to that lifted trace that used to make contact with the missing pad.
Joke aside, I was quite relieved when I saw that I had something to solder onto. That tiny bit of copper made my day. I CAN FIX THIS! Phew!
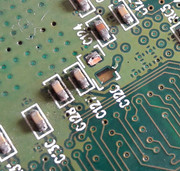
I scraped the copper trace as much as I could, using an X-acto knife, then I soldered a tiny piece of copper wire onto it. The connection was solid. Then I soldered the replacement ceramic cap to the wire. The ceramic caps was first soldered firmly on the other side. While I soldered the ceramic cap, the wire lifted a little but the result was still good and I was pleased with this fix. The rest of the ceramic caps were a breeze to replace. I must say that all of the replacement ceramic caps have been scavenged from donor cards.
The flapping label on the back was secured with 0.2mm double sided tape. That thing was getting on my nerves. The originality of the card must be preserved at all costs.
As something was still nagging me I secured the ceramic cap that had the torn pad with a little two part epoxy. Come high water you are there to stay!
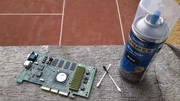
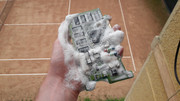
Bubble bath. Due to the fact that the card was already rusty and it was quite dirty I had no reservations in washing it with tap water and dish soap.
Looking good!

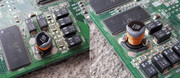
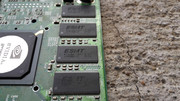
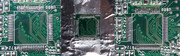
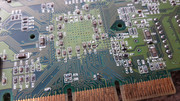
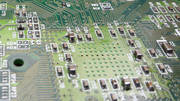
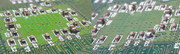
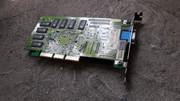
Look closely to the memory chips. I really am amazed that this card has survived.

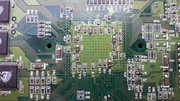
RGB anyone? If you wonder what's the use of these jumpers head over here: "Dual Filter System (DFS: patent pending). To allow the best performance on a variety of monitors, the Fine Filter was developed. In addition, a Super-fine Filter was developed to ensure the best performance on high-end monitors exceeding 21 inches. This setting can be altered via colored jumpers on the board itself. Fine Filter is set by default." http://www.hardware-one.com/reviews/5400pe/5400pe-3.shtml
I already see the final result. 😀 All the hard work will pay dividends in the end.
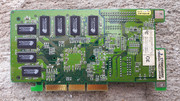
Poor memory chips on the back and a slightly damaged corner. How is this thing still alive?
After the cleaning procedures with water and IPA, one of the paper labels on the back was on its way out. A black marker attempt made things worse. &$#*&$(#^$&!!!!

The SSH daughterboard came out pretty nice but some rust was still giving me the finger.


The bracket was looking awesome after some rust remover solution treatment and manual polishing.

The SSH daughterboard was put through more stages of rust elimination treatment. In the end I had to stop as I simply could not get things to look better than they were apart from maybe changing the connector. 😁
Final results.


You remember the paper label from above don't you? Well, I tried some white corrector on it but that made me lose my marbles. 😁 So I tore up the offending part of the label. Auch!
I was left with a gap that had to be filled. Hmmmm ...
I wanted to print out a new label but the font was hard to identify, so I searched for a clear picture with another label. Then I printed that label on a piece of brown paper that kind of looked old.
After I printed the label I saw that I had to adjust the size of the writing a few times. Trial and error.
Once I got things perfect I rubbed my finger on the paper and you have guessed it. The whole thing came off ...
I could not use the entire label I found on the Internet as each card has its own SN ...
Back to the drawing board.
A new label and some nail varnish. Sure the paper is darker now but the ink is there to stay.
I slapped some 0.2 mm double sided tape.
DONE!
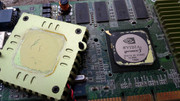
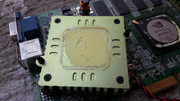
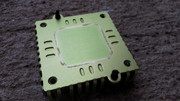
After a lot of work came the best moment. All the parts have been made to look as good as they were ever going to get. Everything was set and ready to go.
I applied some AC MX-4 paste and I removed some of it from the four corners of the graphic chip as the tiny cooler does not cover the entire area.
And now for the coup de grace. THREAD LOCKER!!!
But WHY?
WHY? I had so much fun with it that I had to be sure that I will have more FUN with it at a later date. 😀
Joke aside, that thread locker is vital as due to heat cycles, or just by handling the card, the nuts and bolts might come lose.
If you have paid attention, you remember the two pictures from the beginning of this episode. Left and Right.
I counted the number of threads on each bolt to ensure the same exact torque specs as the original. Then, the thread locker was applied with a fine needle. Also I checked if the cooler wasn't too tight even if I secured it like it was before.

Attention to detail is everything, at least for me.
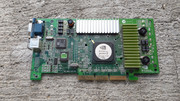
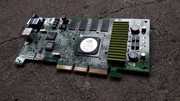
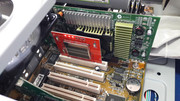
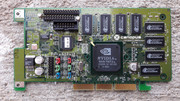
So here we are, close to the end of this endeavor. The results of my work speak for themselves.


Bask in the SUN my beloved! 😀

Almost perfect. Some scars are there to stay but who can see them?

After all the effort I was ready to power it up. The guy that gave me the card said that it was picky and it might not give signal every time. Well, with so many missing caps, I would also not give a signal from time time. 😁
POWER!
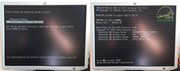
The card XPLODED!!!
Not literally of course.
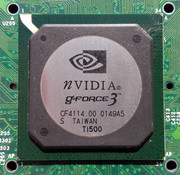
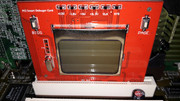
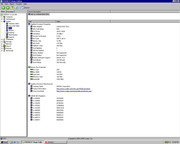
The BIOS string made me smile. This thing has gone Supernova!
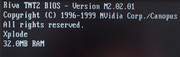
After hours of testing I labeled this card to be @ 100%!
The satisfaction I felt was off the charts. This is a drug that is quite addictive let me tell you.


There you have it. Another success story. 😀 Canopus, the brightest star in the southern constellation of Carina and the second-brightest star in the night sky. Quite a fitting name for this uncommon card I must say. Even if the Canopus Corporation is no more, its legacy still lives on in their electronic artefacts which will endure the test of time for many years to come. You are only forgotten when nobody remembers you.
This card has a very special place in my collection and as I always say, once something goes (will go) out of my collection, then all of them will go as I really am a binary person, 0 or 1, when it comes to certain things that are important to me.
Stay close for more thrilling adventures. 😀 You never know what life has in store for you.
gallery: https://postimg.cc/gallery/6CwYzZF
More later.