Finally got it to work. Installed freedos.
Here is the log for the first card:
R3MEMID version 1.07, (c) Copyright ATI Technologies Inc, 2003
Log file generation enabled to .\R3MEMID.LOG ...
Reference data file (RDF) loading disabled ...
No wait on error enabled (not effected by '-s') ...
TEST RESULT SUMMARY:
====================
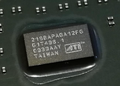
R300 (0x4e44) detected.
128M video memory.
Test suite ran 1 of 1 times.
Checking test status array ...
[1 ] Fill : FAIL
Error ID 0VB001
1024 x 768 - 32 bpp ( 60 Hz): TEST FAILURE
failing bit : MDC0 28 30 31 MDD0 32 33 34 35 36 37 38 39 ...
[2 ] Data line toggle (GUI) : FAIL
Error ID 0VB023
1024 x 768 - 32 bpp ( 60 Hz): TEST FAILURE
failing bit : MDC0 28 30 31 MDD0 32 33 34 35 36 37 38 39 ...
[3 ] RW page (GUI) : FAIL
Error ID 0VB025
1024 x 768 - 32 bpp ( 60 Hz): TEST FAILURE
failing bit : MDC0 28 30 31 MDD0 32 33 34 35 36 37 38 39 ...
[4 ] RW channel (GUI) : FAIL
Error ID 0VB028
1024 x 768 - 32 bpp ( 60 Hz): TEST FAILURE
failing bit : MDC0 28 30 31 MDD0 32 33 34 35 36 37 38 39 ...
[5 ] Data mask : FAIL
Error ID 0VB006
1024 x 768 - 32 bpp ( 60 Hz): TEST FAILURE
failing bit : MDC0 28 30 31 MDD0 32 33 34 35 36 37 38 39 ...
[6 ] Macro + Micro8x2 tiling read : FAIL
Error ID 0VC006
1024 x 768 - 32 bpp ( 60 Hz): TEST FAILURE
failing bit : MDD0 32 33 34 35 36 37 38 39 ...
[7 ] Byte swap macro+micro8x2 read : FAIL
Error ID 0VC018
1024 x 768 - 32 bpp ( 60 Hz): TEST FAILURE
failing bit : MDC0 28 30 31 MDD0 32 33 34 35 36 37 38 39 ...
[8 ] HOST_DATA/<f,b>/M2L : FAIL
Error ID 0TR014
640 x 480 - 8 bpp ( 75 Hz): TEST FAILURE
failing bit : MDD0 32 33 34 35 36 37 38 39 ...
640 x 480 - 15 bpp ( 75 Hz): TEST FAILURE
failing bit : MDD0 32 33 34 35 37 38 39 40 ...
640 x 480 - 16 bpp ( 75 Hz): TEST FAILURE
failing bit : MDD0 32 33 34 35 37 38 39 40 ...
640 x 480 - 32 bpp ( 75 Hz): TEST FAILURE
failing bit : MDD0 32 33 34 35 37 38 39 40 ...
800 x 600 - 8 bpp ( 75 Hz): TEST FAILURE
failing bit : MDD0 32 33 34 35 37 38 39 40 ...
800 x 600 - 15 bpp ( 75 Hz): TEST FAILURE
failing bit : MDD0 32 33 34 35 37 38 39 40 ...
800 x 600 - 16 bpp ( 75 Hz): TEST FAILURE
failing bit : MDD0 32 33 34 35 37 38 39 40 ...
800 x 600 - 32 bpp ( 75 Hz): TEST FAILURE
failing bit : MDD0 32 33 34 35 36 37 38 39 ...
1024 x 768 - 8 bpp ( 75 Hz): TEST FAILURE
failing bit : MDD0 32 33 34 35 37 38 39 40 ...
1024 x 768 - 15 bpp ( 75 Hz): TEST FAILURE
failing bit : MDD0 32 33 34 35 37 38 39 40 ...
1024 x 768 - 16 bpp ( 75 Hz): TEST FAILURE
failing bit : MDD0 32 33 34 35 37 38 39 40 ...
1024 x 768 - 32 bpp ( 75 Hz): TEST FAILURE
failing bit : MDD0 32 33 34 35 36 37 38 39 ...
[9 ] Line slopes/dir/P/solid : FAIL
Error ID 0TR010
640 x 480 - 8 bpp ( 75 Hz): TEST FAILURE
failing bit : MDD0 32 33 34 35 37 38 39 40 ...
640 x 480 - 15 bpp ( 75 Hz): TEST FAILURE
failing bit : MDD0 32 33 34 35 37 38 39 40 ...
640 x 480 - 16 bpp ( 75 Hz): TEST FAILURE
failing bit : MDD0 32 33 34 35 37 38 39 40 ...
640 x 480 - 32 bpp ( 75 Hz): TEST FAILURE
failing bit : MDD0 32 33 34 35 37 38 39 40 ...
800 x 600 - 8 bpp ( 75 Hz): TEST FAILURE
failing bit : MDD0 32 33 34 35 37 38 39 40 ...
800 x 600 - 15 bpp ( 75 Hz): TEST FAILURE
failing bit : MDD0 32 33 34 35 37 38 39 40 ...
800 x 600 - 16 bpp ( 75 Hz): TEST FAILURE
failing bit : MDD0 32 33 34 35 37 38 39 40 ...
800 x 600 - 32 bpp ( 75 Hz): TEST FAILURE
failing bit : MDD0 32 33 34 35 37 38 39 40 ...
1024 x 768 - 8 bpp ( 75 Hz): TEST FAILURE
failing bit : MDD0 32 33 34 35 37 38 39 40 ...
1024 x 768 - 15 bpp ( 75 Hz): TEST FAILURE
failing bit : MDD0 32 33 34 35 37 38 39 40 ...
1024 x 768 - 16 bpp ( 75 Hz): TEST FAILURE
failing bit : MDD0 32 33 34 35 36 37 38 39 ...
1024 x 768 - 32 bpp ( 75 Hz): TEST FAILURE
failing bit : MDD0 32 33 34 35 37 38 39 40 ...
Failure detected.