ChrisK wrote on 2026-02-27, 15:43:Will do asap.
Give me a moment. […]
Show full quote
Shponglefan wrote on 2026-02-26, 17:21:
ChrisK wrote on 2026-02-26, 16:56:
Still had this board around so I thought why not give it a shot with my new self-made(TM) preheating station (which for itself was a long planned project but only got realized within the last weeks):
Can you share more about how you set this up?
I've long considered getting a board heater and also trying to rig something up for BGA chip rework. I'm really curious what your set up is like.
Nexxen wrote on 2026-02-26, 17:29:
Like above, some more info? 😀
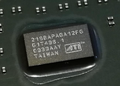
Btw, what diameter are the pads and the solder balls you are going to use?
Will do asap.
Give me a moment.
Sorry for the delayed reply. Had to take some days off over the weekend.
Regarding the preheater, that's a project I was after for quite some time now.
I didn't want to spend that premium share for some professional stuff nor did I opt to buy one of those cheapo ones from aliexpress that come already bent and twisted.
So why not build one on your own? How hard can that be?
In the end there's not so much to tell about: the case is from an old STB, bottom heaters are two 400W ceramic heating plates controlled by one of those REX-C100 PID-controllers from China and its bundled SSR (own story, needless to say: don't trust what's printed on them, however, for this project it doesn't matter).
The PID-controller does a half-way good job. Sometimes it overshoots with temperature but this may be partly due to chosen PID values, where I still have to fine tune, and it also depends on the size of the PCB that gets heated. If the PCB is big then there's not much ventilation under it compared to a smaller PCB giving the system another time constant which influences the regulation. At least I think that this is what changes the overall behavior depending on what you work on. But all in all it's very much usable. Really amazing how effortless you get thermal energy pumped into even a full motherboard heating it to 130°C and more.
For the top heater I used a smaller variant with 200W which only got an on-off switch for now. I had plans to implement a reflow controller with display, network, reflow profiles support (just dreamin', haha). But for now manual control seems to do fine. Temperature is controlled with a separate multimeter.
Most other parts I had laying around or bought for cheap: some aluminium profiles from a 3D printer, metal plates from an optical drive case (sorry LG), some wires, power socket, fuse holders, electrical isolation material, rods from an old lamp holder, 3D printed parts to fit all together, a lot of screws and probably some more stuff like that. The most it takes is creativity to bring it all together and KNOWING WHAT YOU DO since this uses MAINS VOLTAGE. Sufficient electrical isolation is essential as well as knowing what parts get hot and could influence that isolation.
Speaking of that, the top heater still needs some refinement regarding electrical isolation. The current build state was more like "let's first see if it can do at all". It can.
It'd also be wise not to use something round for the beam. With a round shape you'll have to counter any torque acting on it such as with my hot air gun holder (mounted on the leading end in the pic). It works for now but if it bothers me too much I might change that.
Well, that's all to say about it I guess.
RetroPC: K6-III+/400ATZ @6x83@1.7V / CT-5SIM / 2x 64M SDR / 40G HDD / RIVA TNT / V2 SLI / CT4520
ModernPC: Phenom II 910e @ 3GHz / ALiveDual-eSATA2 / 4x 2GB DDR-II / 512G SSD / 750G HDD / RX470